Work Order
When creating a web section using information blocks, a certain work order should be followed. This order may differ depending on the degree of project readiness and a complexity of a specific assignment. Almost in every case you will have to:
- Think through the entire structure of infoblocks carefully.
- Create the necessary infoblock types and set up their parameters.
- Create infoblocks and set up their parameters.
- Create structure inside an infoblock.
- Create infoblock elements.
- Create a physical page (in case a complex component is used) or pages (if simple components are used), locate a component (components) on it, and then set up its parameters.
- Adjust the component operation according to the assignment and website requirements (component template customization, use of the result_modifier.php or component_epilog, customization of the component itself).
Standard Capabilities
Built-in tools of the Information Blocks module are extensive enough. There is no limit either to infoblock types, infoblock number, number of properties of each infoblock, or number of sections or elements.
Infoblock Properties
Elements of each infoblock have a set of system properties that may be extended with user properties. The infoblock properties differ according to their types:
- String - the property value is set as a text line;
- Number - the property value is set as a number;
- List - the property value is selected from the list;
- File - a file is used as the property value;
- Link to section - using this property it is possible to link an element of this infoblock and sections of another information block;
- Link to elements - setting links among information block elements one by one;
- HTML/text - the property value is set as a text with HTML tags;
- Link to elements by XML_ID - the link is stored as a string, and the value is XML_ID of the linked element;
- Bind to Google Maps - setting a link between an infoblock element and a Google Map component;
- Bind to Yandex Maps - setting a link between an infoblock element and a Yandex.Map component;
- Counter - is a substitute to autoincrement for databases. The value will increase by one each time an infoblock element is added. The starting value is set at random. This feature can be used for incoming document registers etc. where the continuous numbering of documents is needed.
- Link to user - a link between an element of this infoblock and system users can be set using this property
- Date/Time - the property value is set as a date/time;
- Video - setting a link between a list element and a media file;
- Link to elements (drop-down list) - setting a link between elements using a list;
- Link to forum topic - using this property, a link can be set between an element of this infoblock and forum subjects;
- Link to file (on server) - using this property a link can be set between an infoblock element and a file on a remote server;
- Link to elements autocomplete text box - setting a link to autocomplete elements;
- Link to product items (SKU) - setting a link to products (SKU).
Each type of properties has its own set of parameters established in relevant forms. Properties may be multiple and of mandatory completion.
Note. It is recommended that only the characteristics that are to be used as filters should be converted into separate properties. The remaining characteristics should be incorporated in product description as text.
Properties of Infoblock Sections
It is possible to set the user properties for infoblock sections. The code of user fields must always contain the prefix UF_. The list of field types is somewhat smaller than that for the infoblock proper:
- Video
- Text
- Integer
- Number
- Date/Time
- True/False
- File
- List
- Link to information block sections
- Bind To Information Block Elements
- Template
- Poll
Similarly to the properties of the infoblock itself, section properties may be multiple and mandatory. In addition, it is possible to establish whether the property will participate in search and sorting, whether the user can edit the property value, and whether the property will be displayed in the general list of properties.
Export-Import
Adding a big number of infoblock elements manually is a very laborious task
Data import/export can be applied using different file formats in order to make the information adding process easier. The following formats are supported:
Export and import in RSS format are arranged using the special components RSS news (export) (bitrix:rss.out) and RSS news (import) (bitrix:rss.show), accordingly.
Data from the infoblock are exported to CSV file using the form Information block export (Control Panel > Content > Information blocks > Export > CSV). Data stored in a separate CSV file, are imported to the information block using the form of Information block import (Control Panel > Content > Information blocks > Import > CSV).
Note: Starting from module version 14.0.5, the section nesting depth for CSV export/import is determined by the settings of the Information Blocks module.
In earlier versions, export to CSV was limited to three nesting levels.
Note: If an infoblock is to be exported as a product catalog, the following path should be used: Control Panel > e-Store > Settings > Data export. In addition, import from a CSV file is possible: as a product catalog. In this case, it is necessary to use the following path: Control Panel > e-Store > Settings > Data import.
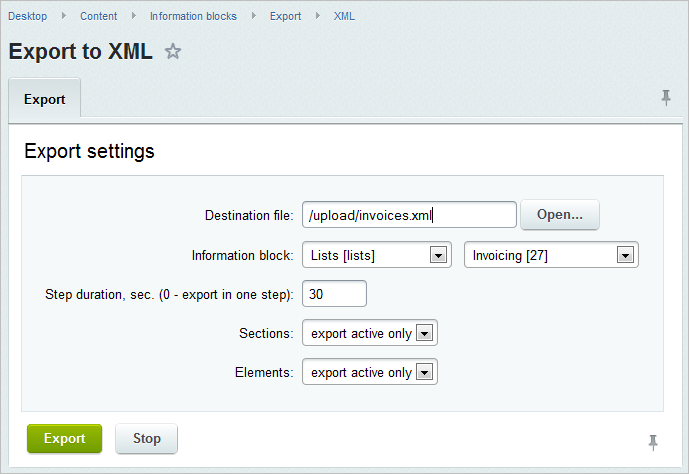
The functional capacity of the infoblock import/export feature permits moving to and from XML not only the contents of the infoblocks but also their properties and images. Export can be made at the page Export to XML (Control Panel > Content > Information blocks > Export > XML). Import can be made at the page XML Import (Control Panel > Content > Information blocks > Import > XML).
Setting Up Fields of the Element Adding Form
The task of creating a large number of elements of an information block can be made easy by using the presettings of the fields of the element adding form. The settings are made in the Administrative section using the tab Fields of the infoblock editing form (Control Panel > Content > Information blocks > Information block types).
Note: The tab Fields permits you to establish preset data for the infoblock element fields.
This form has three columns:
Let us take a closer look at certain fields:
The form type for this field that will open by default shall be set in the fields Description type type (for a preview text and a detailed description): a text field or a visual editor. You have to decide what type of field suits you better.
For a preview text, the – text description type is recommended; and for a detailed description – html. It permits using text with html tags when importing data from a CSV file. In this case, the description will be imported with an already set format.
Fields in the Default value can be used as a prompt for the content manager about the data that should be introduced in the field. For example, a text can be entered in the fields Preview text and Detailed description to help the content manager to complete forms. Let us suppose that the comment for the preview text will be: "Introduce a summary of the piece of news", and for the detailed description: "Introduce full text of the piece of news".
Note: Similarly, the tab Section Fields can be set up.
System Processing of Photographs
As a rule, several pictures are used on websites for an infoblock element: a small preview and a big picture. If multiple elements must be created, normally it takes a lot of time to create small pictures from big ones. However, it is actually not necessary. Just upload one big picture, and indicate in the Fields tab the way you would like it to be processed.
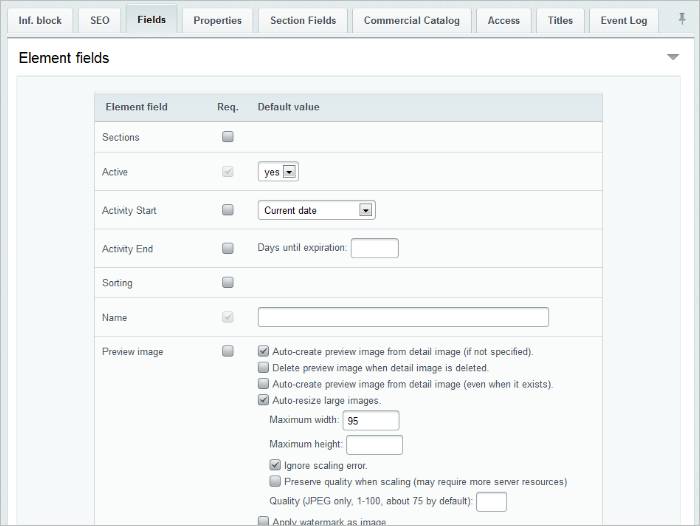
Let us set up the infoblock operation in such a way that when we upload one big picture we obtain one small and one big picture, both of a preset size and with a preset quality.
- Check the box Auto-create preview image from detail image. Now, the preview picture will be created from the big picture.
- Check the box Auto-resize large images. The picture will be scaled down to the size set in the fields below.
- Enter the picture size in pixels in the fields Maximum width and Maximum height. Picture size will be change proportionally. Setting the size in these fields guarantees that a preview picture will not accidentally damage the page layout.
- Check the box Ignore scaling error, to display the picture “as is” in case image processing fails.
Note: The preset image resizing mechanism works with traditional graphic formats: jpg, gif and png. If you upload a picture in a different format, for example bmp, it will not be processed. The system will either display the picture in its original size, or show a message that the picture cannot be processed. It depends on the checkbox Ignore scaling error as to which of these two options will occur.
In order to set up processing quality, you can also use the options of the Fields tab. Please note that free server resources are required to use these fields.
- Check the box Preserve quality when scaling.
- Set an acceptable quality level in percentage in the field Quality.
Enter similar settings in the Detailed image fields in order to set up a picture shown in detailed view.
Setting Up the Element Adding Form Display
The form for editing/adding an infoblock element can be changed and set up according to the requirements of the website content manager. The changed form is displayed and works both for adding/editing an element to the administrative part and for adding/editing an element to the public part.
Note: The form can be set up only from the administrative part of the website.
Follow the steps below in order to set up the form:
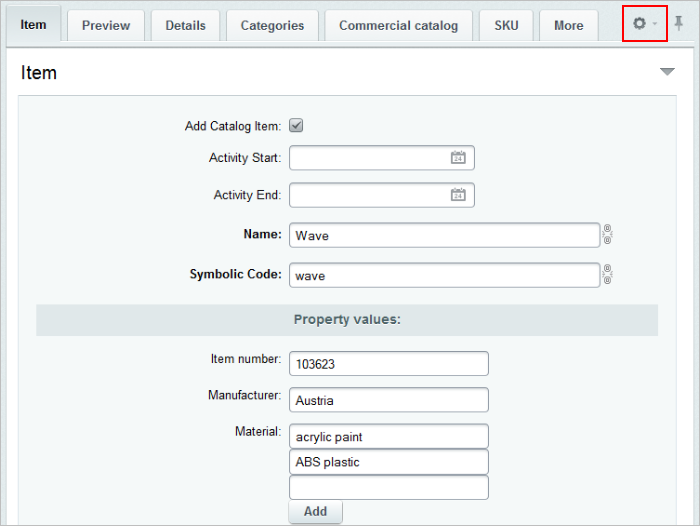
- Go to the page containing the list of the infoblock elements for which a form should be set up.
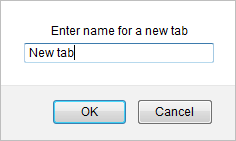
- Open for editing any element of the infoblock and click Settings
 .
.
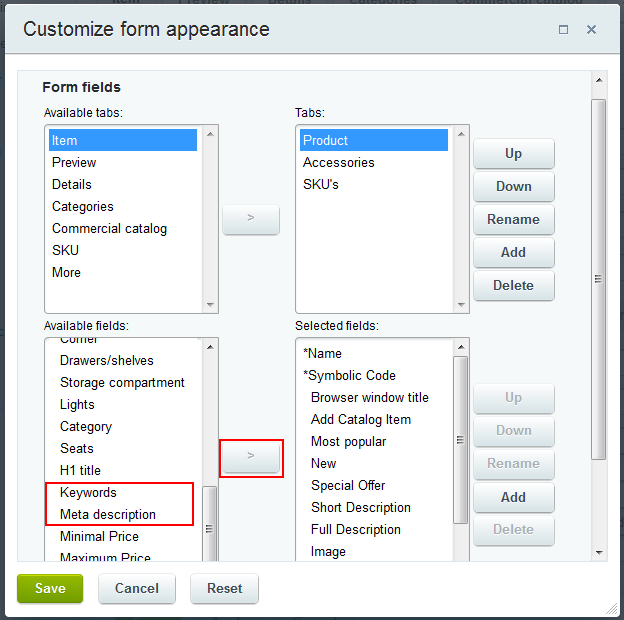
- The window Customize form appearance will open up:
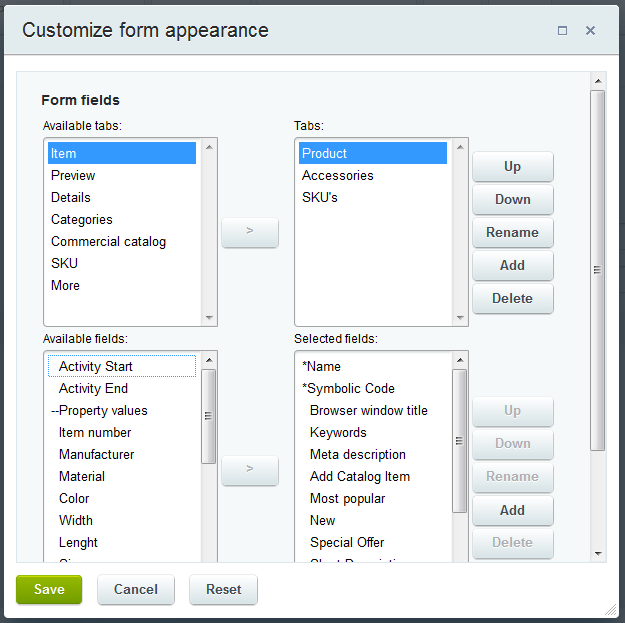
This form permits you to rename and change the sequence order both for fields and tabs of the element editing form. You can also move fields not only within one tab but also from one tab to another, thus forming a visual appearance of the element adding/editing form which is convenient to you.
Set up tabs and fields as necessary:
The option Set these settings for all users by default permits you to establish form settings for all users as default settings.
Save the changes made. Now, you have a changed infoblock element editing form with no unnecessary fields where the remaining fields are grouped up in a necessary order.
Once set up is completed, the form looks like this:
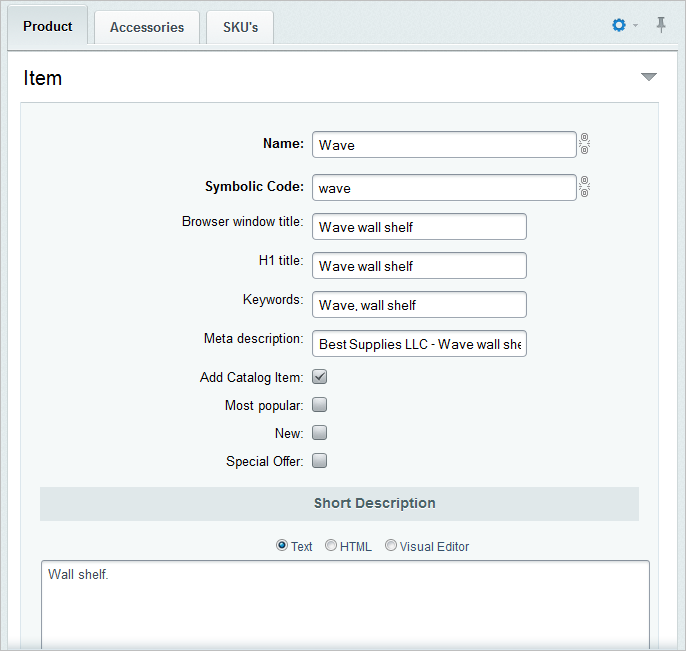
This form will also be used to create/edit elements in the public section.
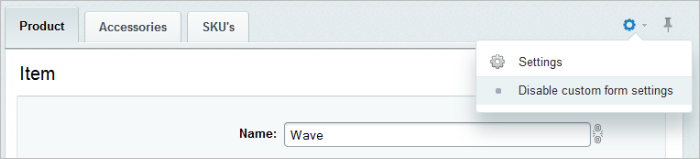
Note: The settings of the external appearance of the element creating/editing form can be reverted in the administrative part of the website using the command
Disable custom form settings from the menu of the
Settings button:
Setting Up Prompts
It is rather unusual to find a highly qualified employee working as a content manager in website support. Moreover, in case of a large number of created properties of an information block, even a highly qualified employee may experience difficulties when it comes to deciding which value should be entered in any other property field. A website administrator can create prompts to make it easier for a content manager to complete forms. The prompts look as follows in the form itself:
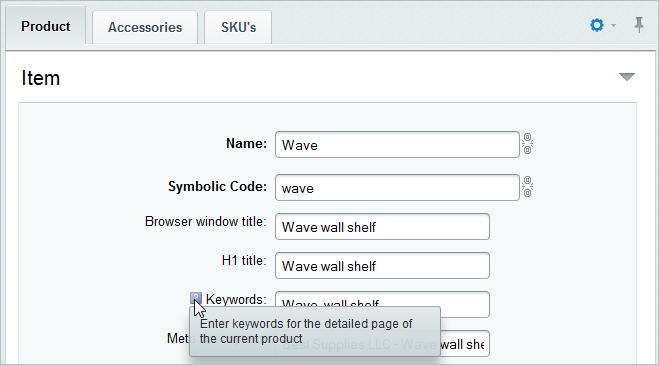
Just use the field Info caption for '?' sign in the properties form of the information block.

Storage Types for Infoblocks
When creating information blocks, infoblock properties should be stored in a separate table, and all of the property values of each element shall be stored in the same string. This technique is called Information Blocks 2.0 and permits you to significantly speed up system operation and also to lift a number of restrictions of the previous version of infoblocks. For example, now there is no need to make the additional request CIBlockElement::GetProperty when selecting property values with the function CIBlockElement::GetList.
Infoblock 2.0 performance options:
- When selecting elements, property values can be obtained at once, because the number of attached tables in the request is not increased with each property and is always equal to 1.
- Sorting by property values is processed similarly to infoblocks 1.0 (except for multiple properties).
- Selection of multiple property values does not lead to a Cartesian product of a query result; property values are transferred as an array.
- For combined filters by non-multiple (single) properties, now there is an option to create a composite database index manually to speed up sampling operations.
- “Straight through” element sampling is not possible for infoblocks 2.0 when an infoblock type and a symbol code of a property is indicated in the filter. Instead, IBLOCK_ID must be specified in the filter.
Full compatibility with API is important. I.e. the technique for using infoblocks, properties, elements, and their values is the same for both versions of infoblocks.
Connection between Infoblocks
Bitrix Framework permits creating interconnections between information blocks using properties of the type Link to elements, Link to section, Link to elements (drop-down list), Link to elementы autocomplete text box and Link to product items (SKU).