Last Modified: 18.03.2021
|
|
|
Views: 15634
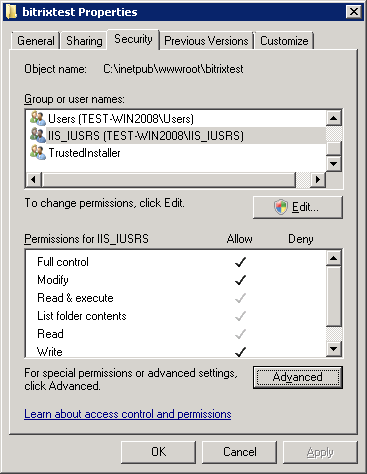
Last Modified: 18.03.2021 Preparation of the Installation PackageDownload the product installation package as a zip-archive. Create a folder for the extraction of the installation package in the folder Open the Properties form of the folder
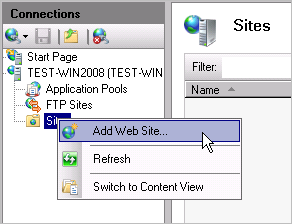
Adding a WebsiteUsing IIS manager on the Connections panel go to Sites and eliminate Default Web Site. Note: you may keep the default website, but in this case you will have to change the port settings for one of the sites during the setup of a new site.
Right click to call the context menu and click Add Web Site
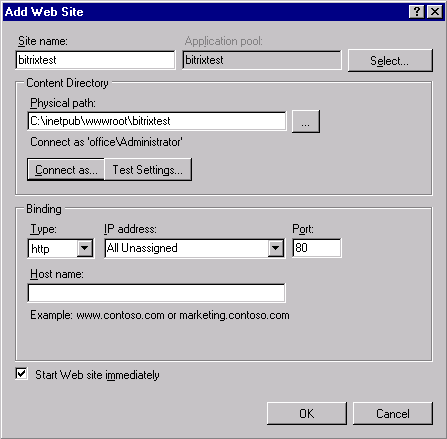
The window for adding a new site will open:
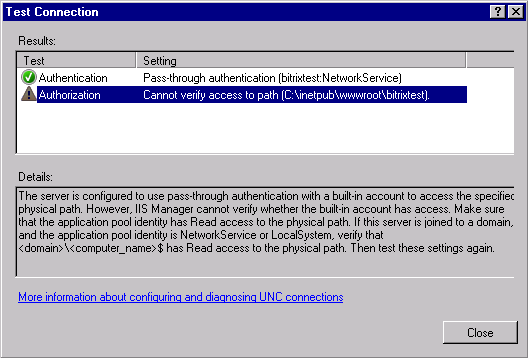
In the Site name box please specify the host name (in our example: bitrixtest), and in the Physical path box, enter the path to the folder containing the installation package. Click Test Setting…. The system will verify the connection parameters and display a message indicating the errors found, if any.
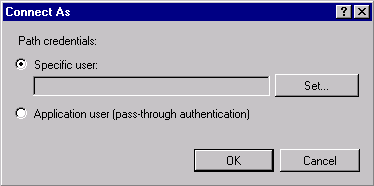
As a rule, authorization errors occur due to the user’s insufficient access rights to perform the operation of verifying folder access rights. Please do the following to correct this error: Close the Test Connection window. Click Connect as…, and the following window will open:
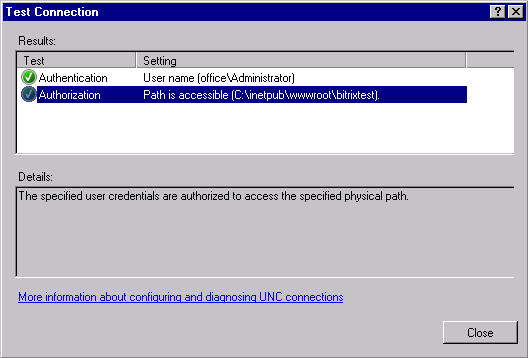
Please check the box Specific User and press Set…. Enter the login and password in the window that opens. Click OK. Verify the connection parameters once again using the Test Setting… button. If the verification is successful, the system will show the following message:
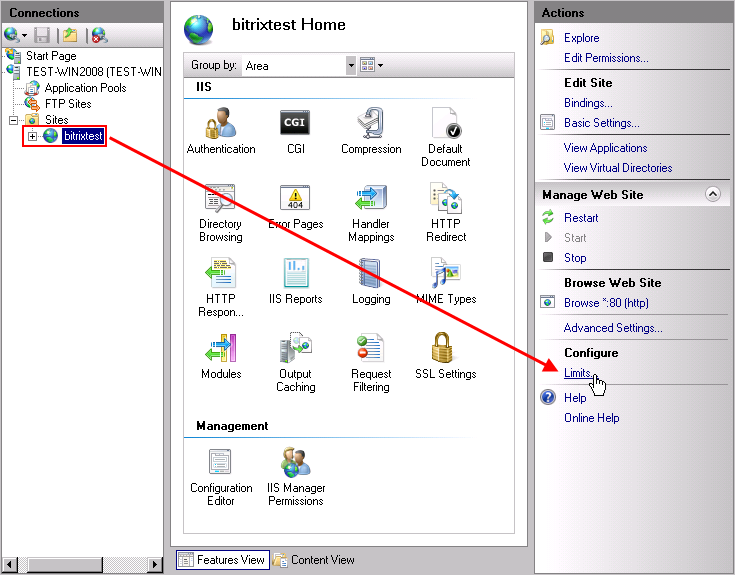
Configuration of LimitsNow, a time-out must be set. For this, do the following: Please activate bitrixtest in IIS Manager on the Connection panel. The Action panel will be refreshed. Choose Limits in the Configure group.
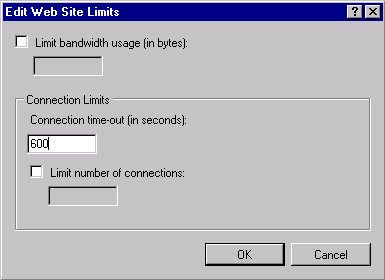
The limit setting form will open.
In the box Connection time-out (in seconds) type 600. This command establishes an intentionally long timeout for the web server while it waits for the script to complete its operation – 600 seconds. Open the file php.ini for editing and specify the following values: max_execution_time = 240 and max_input_time = 240. Note: the indicated values may be user-defined depending on your hosting parameters.
mimetype setup for files without extensionAdditional IIS 7.5 settings for mimetype is required for files without extension, otherwise video player won't be working in the installed product. To avoid this, add '.' extension with type video/x-flv in mime types inside server settings.
Courses developed by Bitrix24
|
