Views: 5907
Last Modified: 24.09.2024
Separate queue server
There is an option to install a separate individual queue server Bitrix Push server 2.0 at the Bitrix Virtual Appliance.
The advantage of this method is when you have your own server environment and server resources are limited, you can launch a separate BitrixVA Virtual Appliance that will only serve as queue server, removing extra load from a main server with the installed Bitrix24 Self-hosted. Additionally, further scaling and servicing will be more convenient.
1. Queue server configuration
-
Download VMbitrix image for the hypervisor you need, or install it via the bitrix-env.sh script on a separate server with CentOS 9.
-
Create and configure server pool: 1. Create Management pool of server, to open all necessary ports in CentOS for correct service operation.
-
Update Bitrix Virtual Appliance to the latest version: 2. Configure localhost settings > 6. Update server.

-
By default, Bitrix Virtual Appliance creates scripts for quick installation of Bitrix24 products in the site directory /home/bitrix/ext_www/{your_site_address}/. This site is not required, it must be deleted.
Go to the menu 6. Configure pool sites > 2. Delete site and select the site directory /home/bitrix/www.

-
Create new site 6. Configure pool sites > 1. Create site and specify the following: address for future queue server, type kernel, encoding UTF-8. The example shows the server address push.b24test.club.

Note: Server address (domain) can be local as well as external – it depends on infrastructure used for server deployment. In any case, server with installed Bitrix24 Self-hosted and queue server must be mutually available via shared connection.
-
New site is created in the directory /home/bitrix/ext_www/{you_site_address}/. Also, scripts for quick Bitrix24 product deployment are created in this directory automatically:
[root@violent-culebra ~]# ls /home/bitrix/ext_www/push.b24test.club/
500.html  bitrix  bitrixsetup.php  images  index.php  restore.php  upload
[root@violent-culebra ~]#
Scripts bitrixsetup.php, restore.php and index.php are not needed and it is unsafe to leave them inside the directory. Delete them from the new site's directory (in the example: push.b24test.club) and convert index.php into empty page:
rm -f /home/bitrix/ext_www/push.b24test.club/bitrixsetup.php && rm -f /home/bitrix/ext_www/push.b24test.club/restore.php && echo '<?php' > /home/bitrix/ext_www/push.b24test.club/index.php
Ensure that site directory still contains safe catalogs and files:
[root@violent-culebra ~]# ls /home/bitrix/ext_www/push.b24test.club/
500.html  bitrix  images  index.php  upload
[root@violent-culebra ~]#
-
Check the Bitrix Virtual Appliance main menu: 9. Configure Push/RTC service for the pool and determine which server is used as the queue server. In this example, it is Nginx-PushStreamModule:

When queue server type is NodeJS-PushServer, you can jump step 9 for opening port for external connections to queue server.
-
Select the menu item 1. Install/Update NodeJS RTC service, enter a host name Hostname and confirm the installation:

Standby until NodeJS-PushServer installation and initialization task is complete:

You can check the currently executed tasks via the menu 10. Background tasks in the pool > 1. View running tasks. If for you need to view log files for executed tasks, they are located in the directory /opt/webdir/temp.
-
For the Bitrix Push server to be able to service external requests, you need to open the port 8895.
Find out, what firewall is used in BitrixVA:
firewall-cmd --zone=public --list-all
If the result is list retrieved list of rules, then firewalld is used, when error – uses iptables:
[root@violent-culebra ~]# firewall-cmd --zone=public --list-all
-bash: firewall-cmd: command not found
[root@violent-culebra ~]#
Commands for opening the port 8895:
- iptables:
iptables -A bx_public -p tcp -m state --state NEW -m tcp --dport 8895 -m comment --comment "BX: push public port" -j ACCEPT && iptables-save >> /etc/sysconfig/iptables
- firewalld:
firewall-cmd --zone=public --add-port=8895/tcp --permanent && firewall-cmd --reload
-
When Bitrix Push server 2.0 is installed and started for the first time, a secret key is generated inside the queue server settings file /etc/push-server/push-server*.json in the section security in the parameter key:
"security": {
	"key": "<your secret key>"
},
Copy this key – it will be useful for subsequent Bitrix24 product configuration.
- All is complete. Configuring Bitrix Push server 2.0 queue server based on Bitrix Virtual Appliance is successfully completed.
3. Bitrix Push server 2.0
-
Go to the Control Panel: Settings > System Settings > Module Settings > Push and Pull.
Before connecting Bitrix Push server 2.0, you need to preliminarily reset queue server settings by clicking on the Restore defaults button:
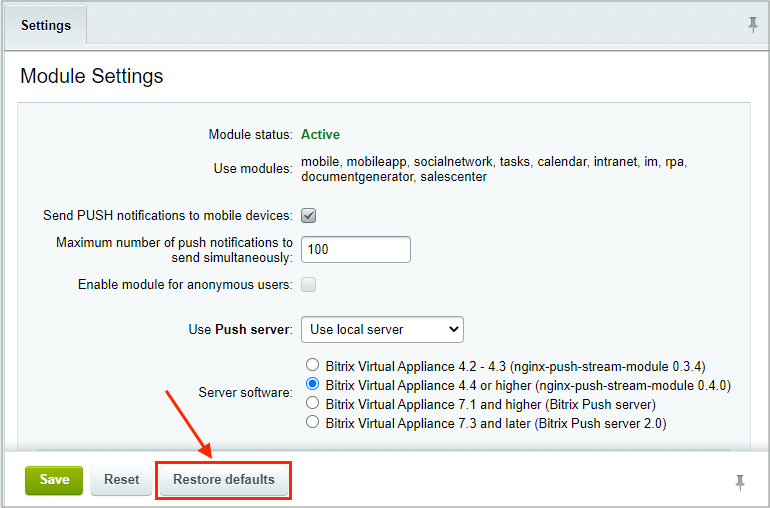
Important! You don't have to additionally click on the Save button!
-
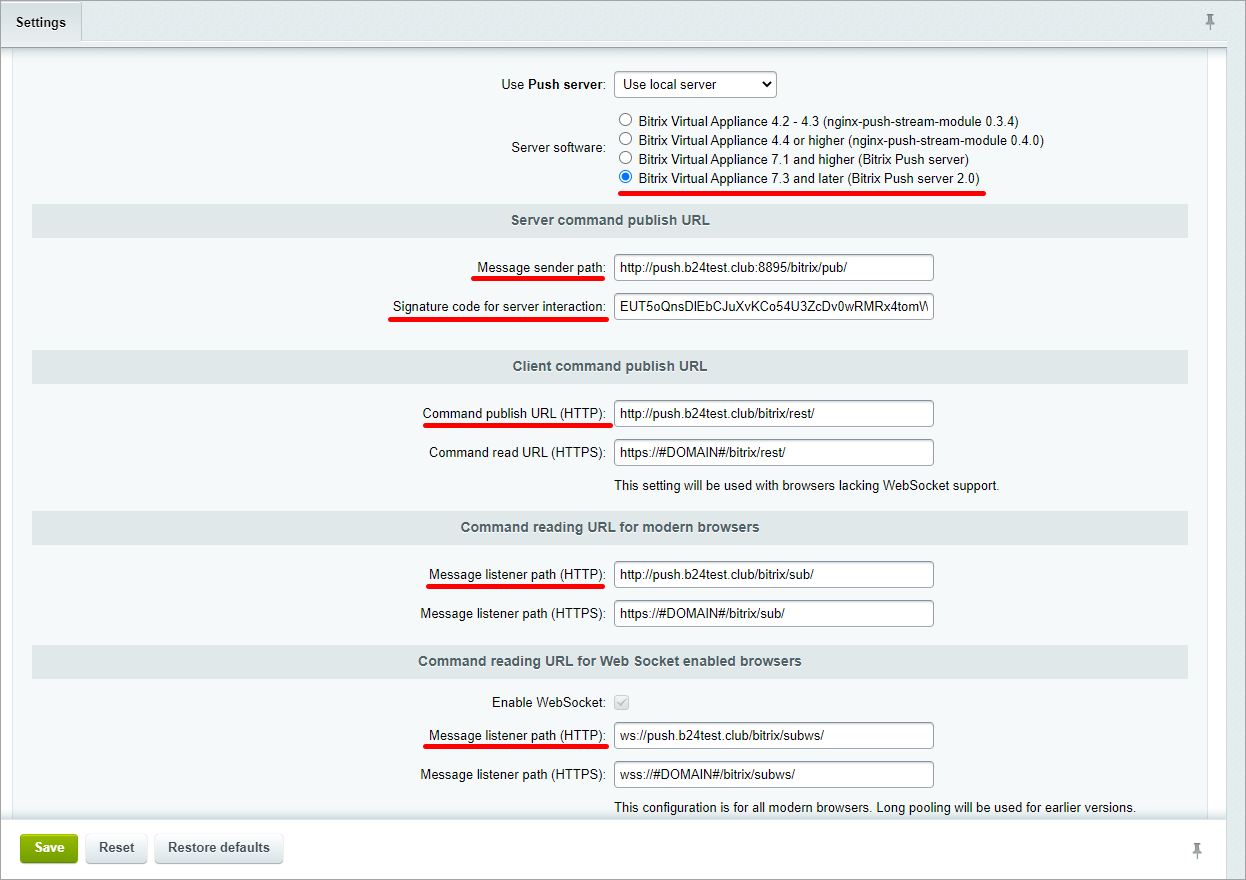
In the option Use "Push server": Use local server select Bitrix Virtual Appliance 7.3 and later (Bitrix Push server 2.0).
Add your Push server address (in the example: push.b24test.club) in the fields HTTPS and WSS command read URL and message listener paths, as well as Signature code for server interaction from Push server settings /etc/push-server/push-server*.json:
-
Save the settings.
3. Implementing secure protocol
-
To ensure interaction between Bitrix24 product and Bitrix Push server 2.0 queue server via secure protocols HTTPS and WSS, both sites located on servers must have SSL certificates.
For VMbitrix, you can connect your own SSL certificate or issue a free certificate from Let's Encrypt via the menu: 8. Manage pool web servers > 3. Configure certificates.
-
After both server will work using HTTPS, add the address of your Push server (in the example: push.b24test.club) in the fields HTTPS and WSS command read URL and message listener path:
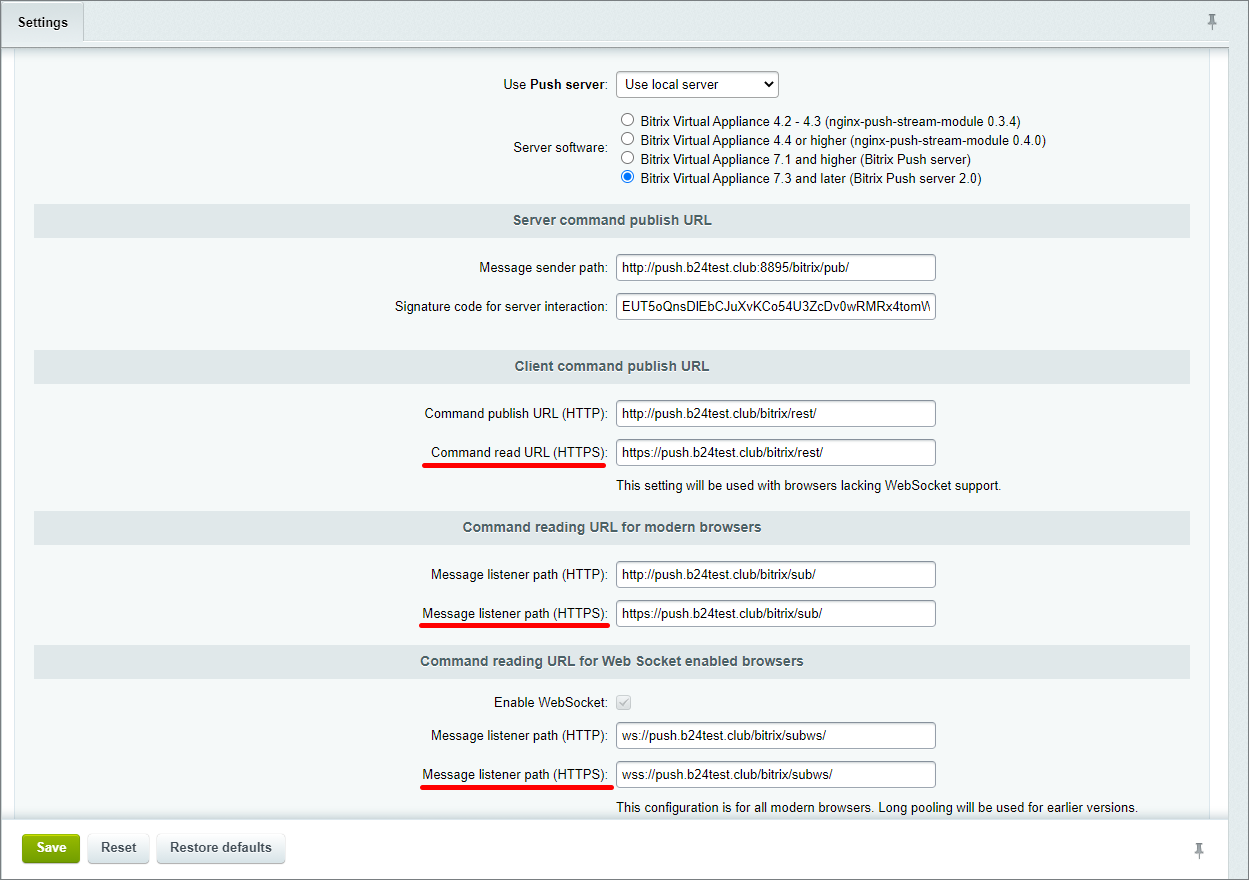
-
Save the settings. The setup is complete.