Let's overview an
example
This example overviews only the principle of creating and using statuses, omitting other settings.
: workflow allows approving document within a cycle, requesting necessary information in case of a required revision, as well as shows comments to the author and revising user.
Starting actions:
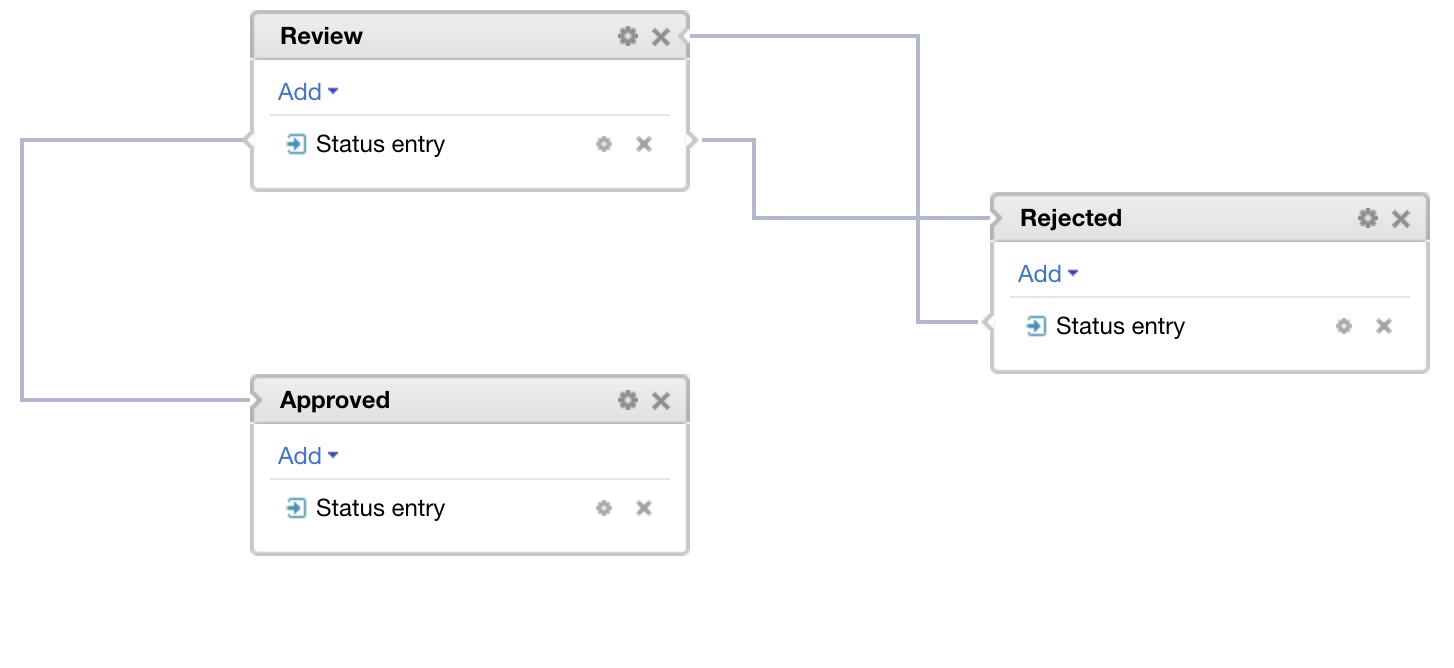
Create 3 statuses: Review, Rejected, Approved.
Add a subprocess to each process
Status entry
.
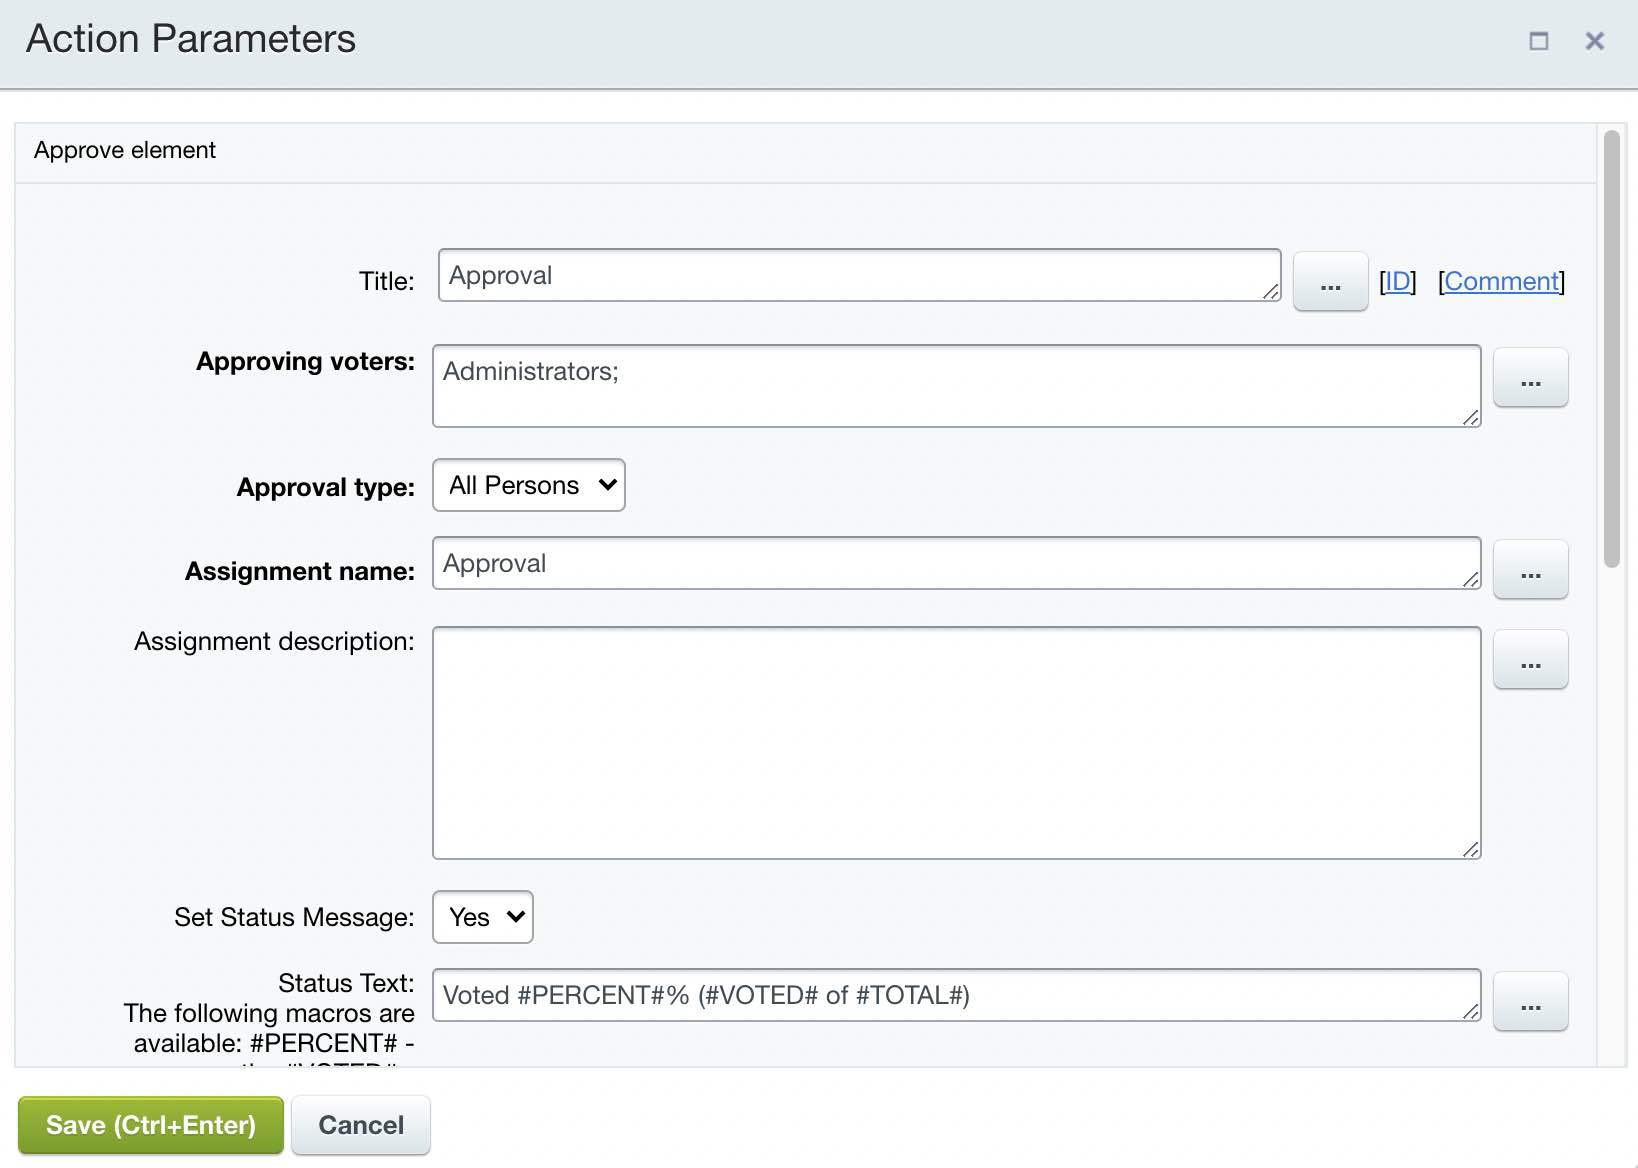
Review status
Go to status and add the action Approved. Complete
all the required fields
in the action parameters. Leave Assignment description field empty for now.
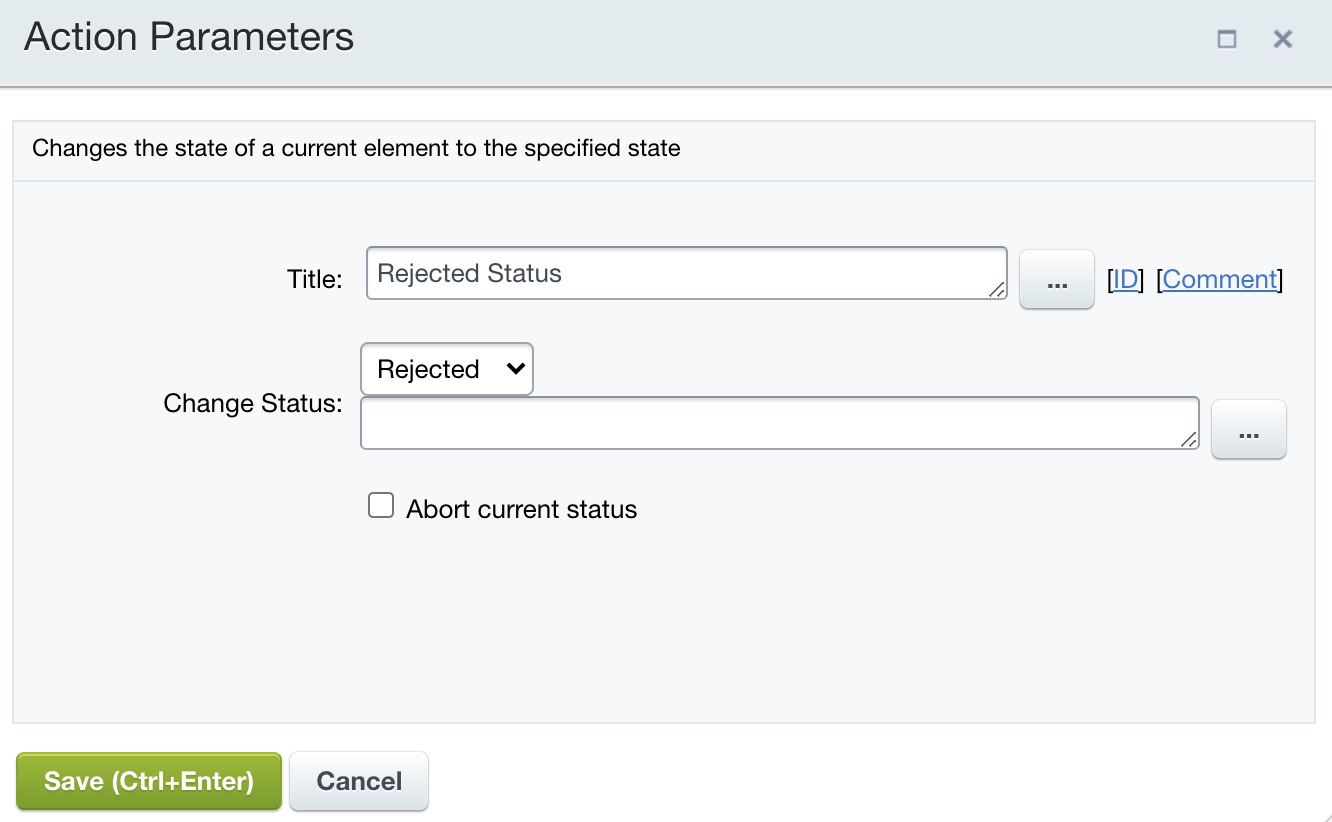
Add actions Set status to each document approval branch, then
configure it
for statuses Approved and Rejected.
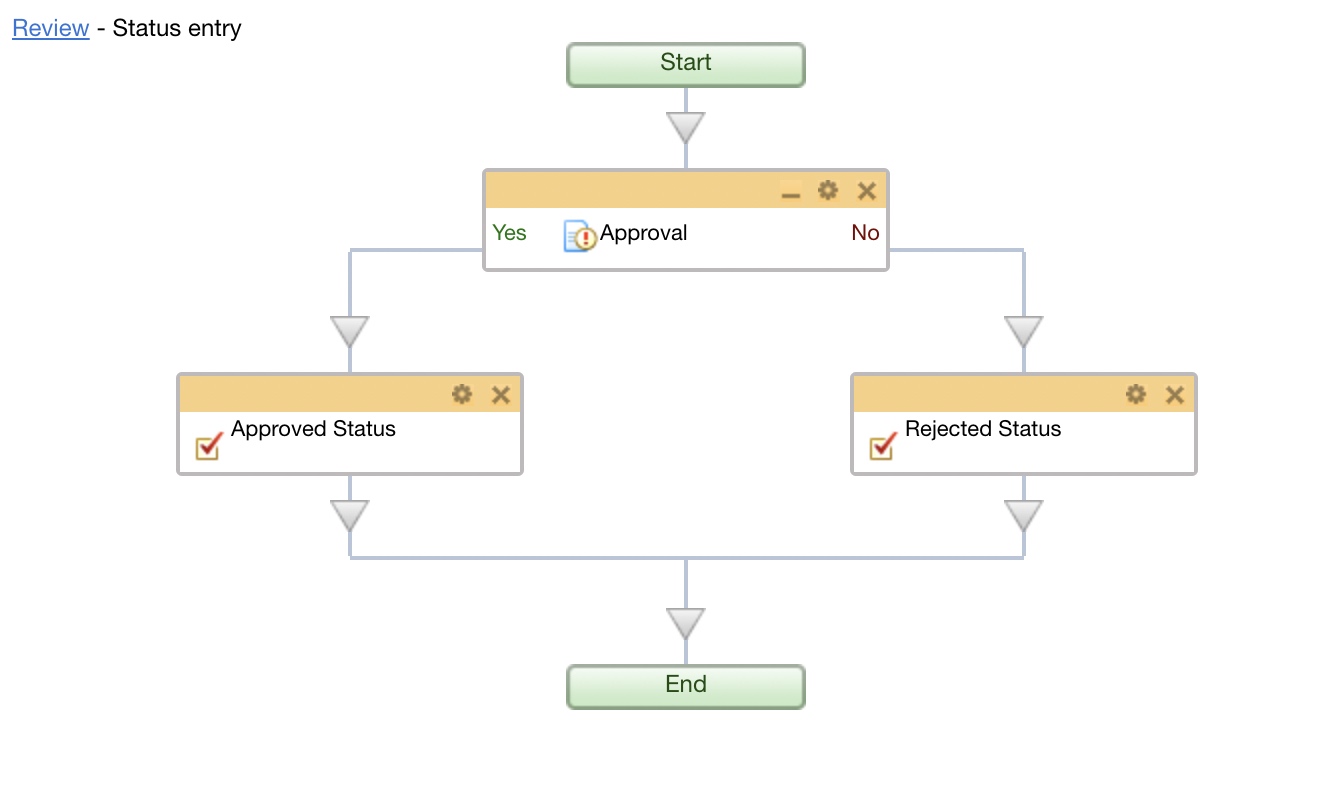
The resulting
workflow
: in case, the verifying employee approves the document, the workflow will switch to status Approved, otherwise - into Rejected status.
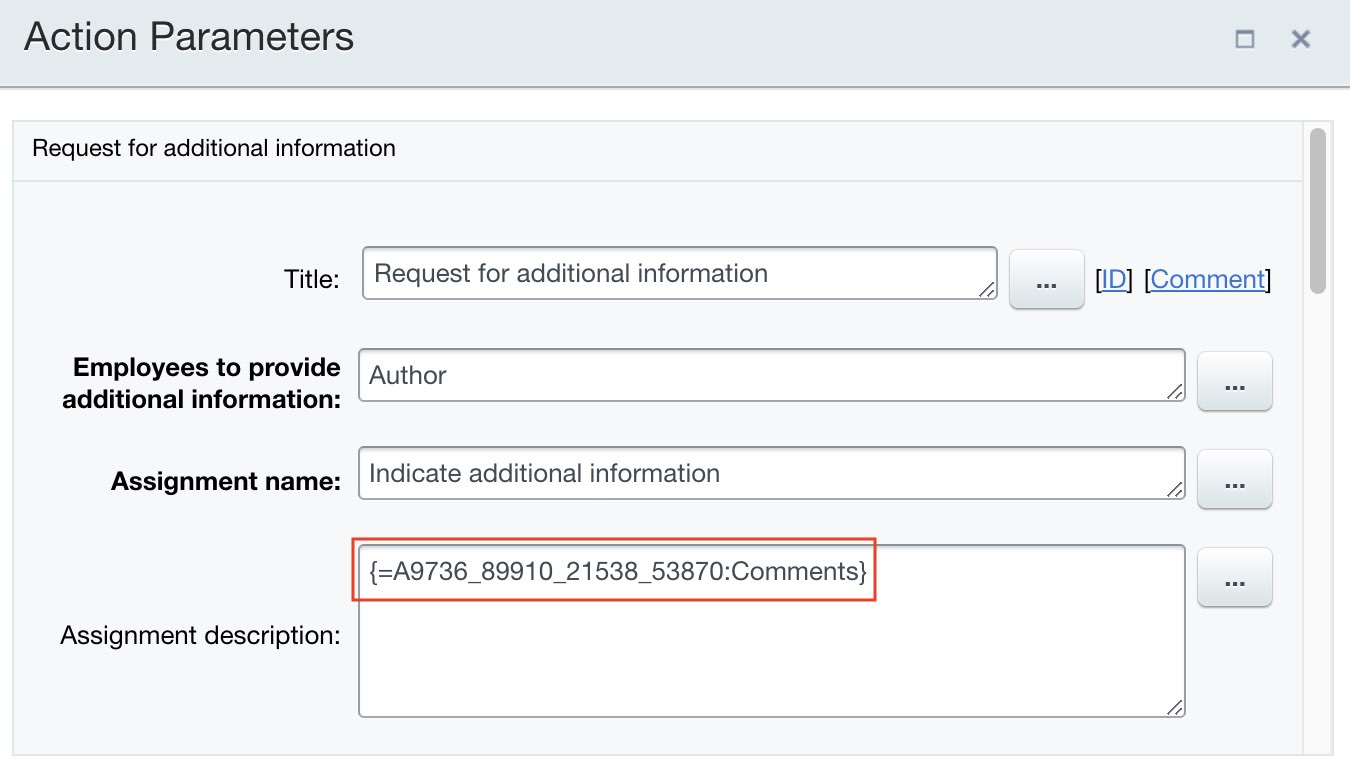
Rejected status
Go to status and add the action Request for additional information. Add
comment
into the Assignment description field, to be left by verifying user after Approve element action is completed (Approve element > Comment, Additional results group).
Return into Review status inside the Approve element action settings. Add comment via Insert Value form into Assignment description, to be left by author after the action Request for additional information is completed.
Add the action Set status and configure it for the Review status.
As the result, we receive necessary improvements/comments from author and send the element/document for re-approval.
Approved status
For example, add an action for author notification about the document/element approval results into this status.
As a result, after all these settings, your workflow will look as follows: