The dedicated User import (Settings > Manage Users > User import) admin section allows importing complete user lists.
Important!CSV file
It's recommended to create CSV files using MS Excel software. It's advised to check the file encoding by opening it using MS Excel when you have created the file using other software.
in the site encoding. Encoding can be viewed in the site creation/editing form (Settings > System settings > Sites > Sites).
Important! If the system uses the UTF-8 encoding, a CSV file must be created in this encoding as well.
Preparing a CSV File
A valid CSV file must exist before you import users from it. The file must have the following format:
header
data
data
data
Each line in the file represents a table row. A header can include any records in a single line. The header describes the data that follows it. The values in each line (the header and the data) are separated by a delimiter.
The data in fields must match the format prescribed by the header. Independently of data existing for corresponding field, the field must be specified.
For example, if the file header has the following format:
and there is no data for some fields, say 2, 4 and 5, the data row must still be like the following:
Smith;;John;;;
Fields without data are simple marked by delimiter.
Important! Minimum condition for user import from a CSV file is the specified NAME and LAST_NAME for the user.
Table with field headers and data types
The table contains all the data types and a mandatory field attribute.
Value
Type
Required
Comments
ACTIVE
boolean
No. Default is True.
Active.
LOGIN
string
No. Auto generated by default.
Specifies a user login, min. 3 characters.
PASSWORD
string
No. Auto generated by default.
Specifies a user password, min. 6 characters.
NAME
string
Yes
User’s first name.
LAST_NAME
string
Yes
User’s last name.
SECOND_NAME
string
No
User’s second name.
EMAIL
string
No. Default value is the administrator’s e-mail.
The E-mail address.
DATE_REGISTER
date
No. Default is the current date.
The date a user was registered.
LID
string
No
The ID of a default site for notifications.
ADMIN_NOTES
string
No
Administrator’s notes.
EXTERNAL_AUTH_ID
string
No
The external authorization source ID.
XML_ID
string
No
The user ID for external connection (e.g. ID in an external database).
Personal data
Type
Required
Comments
PERSONAL_GENDER
string
No
Gender: M – male; F – female.
PERSONAL_BIRTHDAY
date
No
Date of birth.
PERSONAL_CITY
string
No
Address: city.
PERSONAL_STATE
string
No
Address: region, state etc.
PERSONAL_ZIP
string
No
Address: ZIP code.
PERSONAL_WWW
string
No
Personal web site URL.
PERSONAL_PROFESSION
string
No
Profession.
PERSONAL_NOTES
string
No
Arbitrary notes.
PERSONAL_ICQ
string
No
ICQ account number.
PERSONAL_PHONE
string
No
Home phone.
PERSONAL_PHOTO
string
No
The path to a photo relative to a folder specified in the import parameters.
PERSONAL_FAX
string
No
Fax number.
PERSONAL_MOBILE
string
No
Mobile phone number.
PERSONAL_PAGER
string
No
Pager.
PERSONAL_STREET
string
No
Address: street.
PERSONAL_MAILBOX
string
No
Address: P/O box.
Work data
Type
Required
Comments
WORK_COMPANY
string
No
Company name.
WORK_DEPARTMENT
string
No
Department.
WORK_POSITION
string
No
Position.
WORK_WWW
string
No
Company web site URL.
WORK_PHONE
string
No
Work phone.
WORK_FAX
string
No
Work fax number.
WORK_PAGER
string
No
Pager.
WORK_STREET
string
No
Company address: street.
WORK_MAILBOX
string
No
Company address: P/O box.
WORK_CITY
string
No
Company address: city.
WORK_STATE
string
No
Company address: region, state etc.
WORK_ZIP
string
No
Company address: ZIP code.
WORK_PROFILE
string
No
Company profile.
WORK_LOGO
string
No
The path to a company logo image relative to a folder specified in the import parameters.
WORK_NOTES
string
No
Arbitrary notes.
UF_*
string
No
User field.
IBLOCK_SECTION_NAME_*
string
No
Information block binding.
Please be advised the following aspects before formatting CSV file:
Delimiter can be as follows: comma (,), semicolon (;), space or tabulation. Spaces between values are prohibited. When space character is used as a delimiter, ensure that there are no double spaces between values.
When comma is a part of a value (for example: object properties are comma-separated), enclose the value in double quotation marks "orange,red,green".
When double quotation marks are part of the value, enclose the value into the pair of double quotation marks. For example, "John" in CSV file must have the following format: ""John"".
Empty strings in CSV file are prohibited.
Headers, string values and login are case-insensitive.
Passwords are case-sensitive.
Logical values have the following format: Y — true; N — false.
Data, located in the string after the last identified value in the header string is ignored. For example, if file header string indicates 10 characters and the data string contains 12 characters, the last 2 will be removed.
Data elements which values are not specified are processed as empty strings.
Time format must be set in the site language format. For example: MM/DD/YYYY HH:MI:SS (for English).
To make sure you will not encounter any errors during import, check that the file data meet the specification described at the beginning of this chapter. You can check this by opening a CSV file in MS Excel:
Check the headers.
Ensure the length of all passwords is at least 6 symbols.
Ensure the length of all logins is at least 3 symbols.
You can start import after checking CSV file.
User export from the system
You can use a user export file from an active site as a template. Execute the following actions:
Go to the User list page (Settings > Manage users > User list).
Click Excel button to download data from the list.
Next, adapt the file to the CSV file requirements. Specifically:
delete summary list at the end of table;
replace value names in the header for correct Latin names according to Data type table, listed in the subsection Preparing a CSV File;
check field content for correct data input according to the Data type table (gender values must be indicated as M and F).
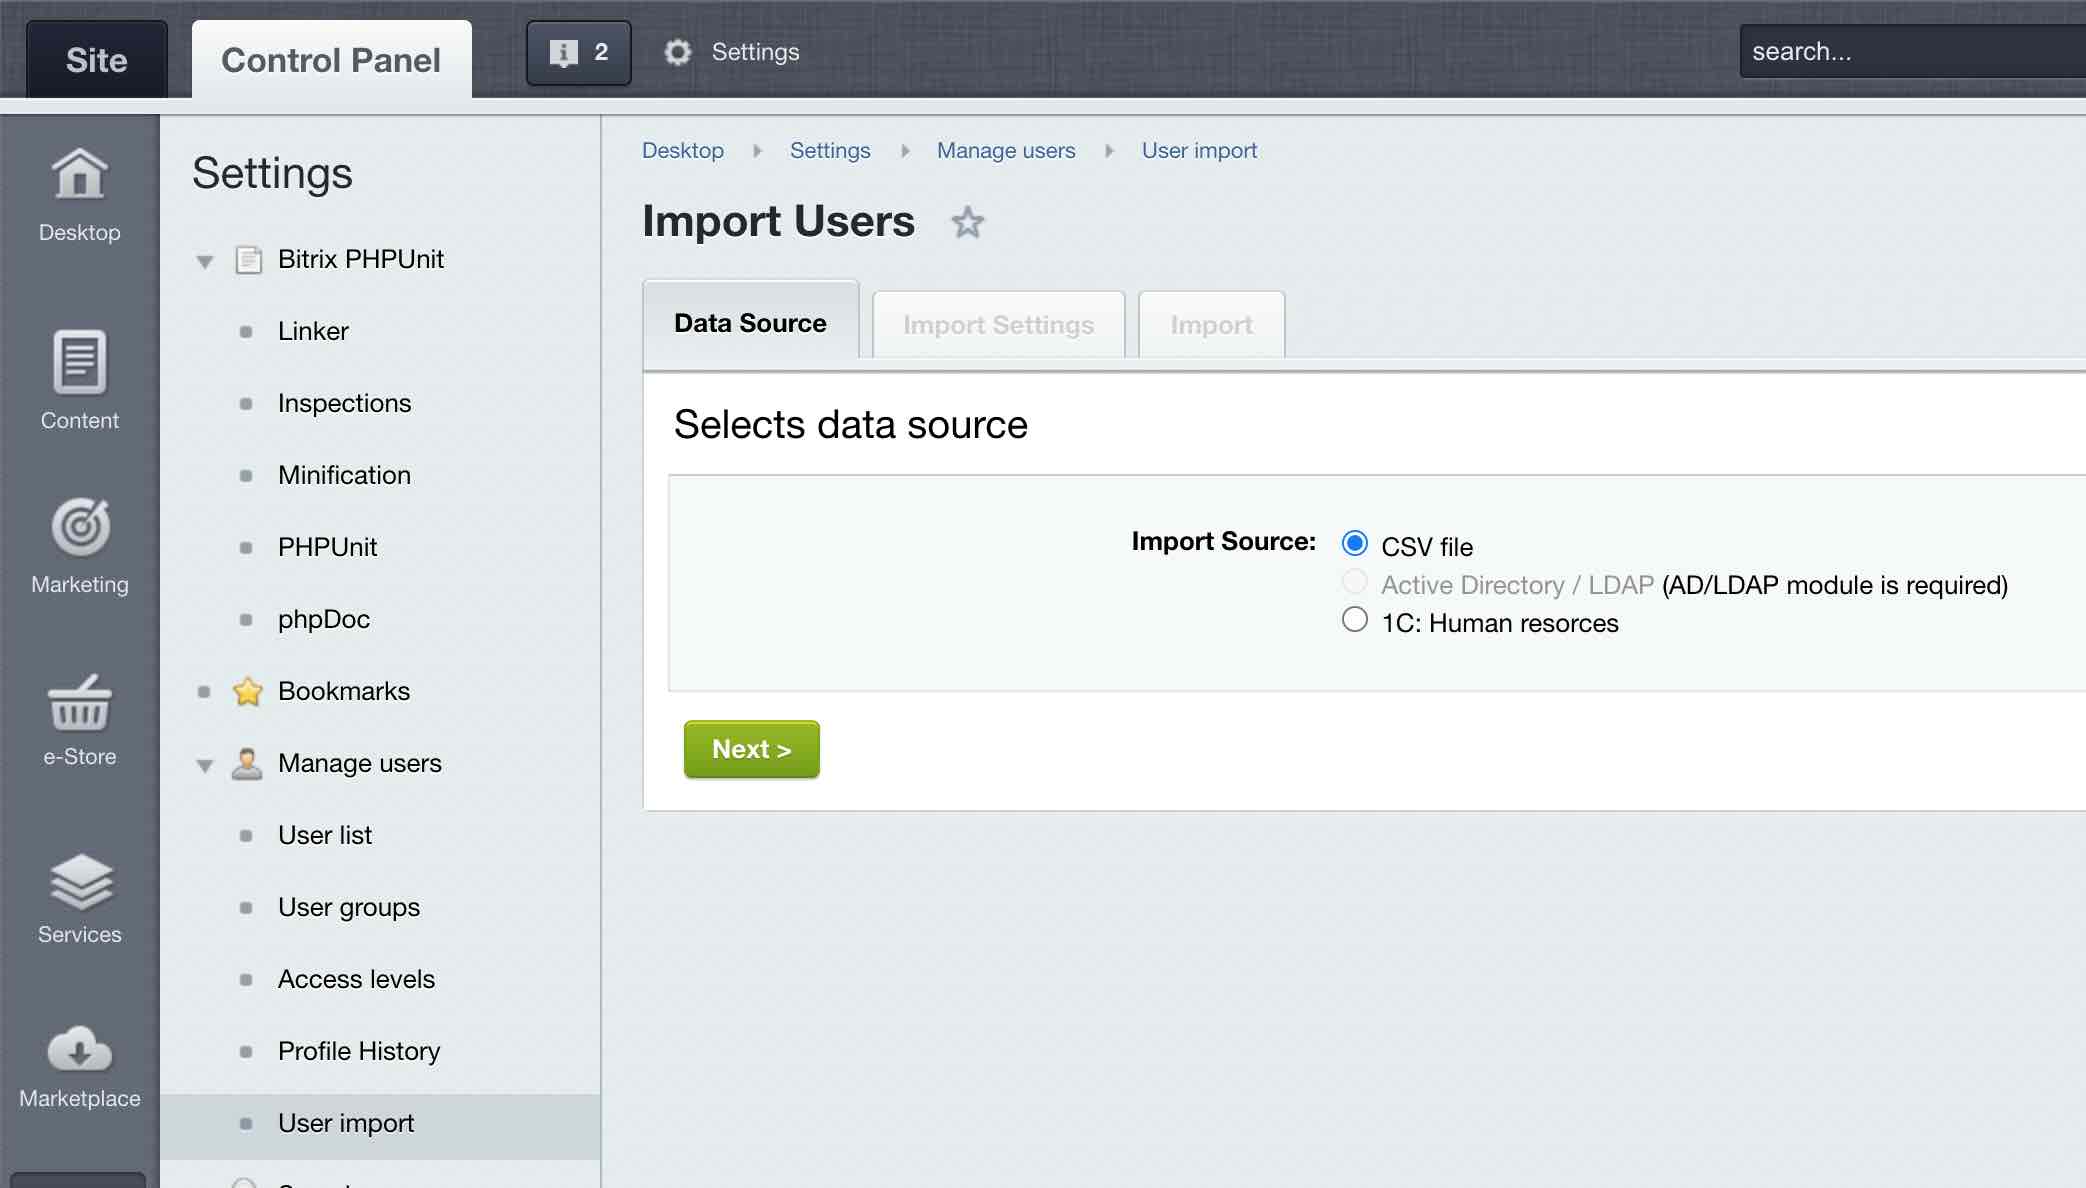
Import procedure
In the Import users form, select CSV file as a data source and click Next.
Fill in the fields in the next tab (Import Settings):
Data File – specify the pathname of the CSV file.
Field Separator – specify the separator character used in the file.
Add Users to Groups – select the group (or groups using Ctrl key) to which to add the user profiles.
Path to Images Relative to Site Root – the path to an image file folder relative to which the values of PERSONAL_PHOTO and WORK_LOGO are expected in the file. If the fields is empty, indicate full path relative to site root in the values PERSONAL_PHOTO and WORK_LOGO.
Bind Users to Information Block Sections – select an information block to which users having the IBLOCK_SECTION_NAME_* property will be added. Only a single information block can be indicated. In case the same user must be bound to various iblocks, the binding subsequently must be performed manually.
Allow LDAP authorization – specify the LDAP authorization server name. You can create a server now by clicking Create if required.
Notify User If E-Mail Is Available - notify users about registration at the site via selected template. Works, if user e-mail was indicated inside CSV file.
Ignore Duplicate Logins - indicate this option to avoid adding users with logins already in the system during the import.
Click Next. The next step automatically imports users. Upon completion, a message indicating the number of imported users will be shown.
Viewing Imported Data
To view the imported data, open Settings > Manage users > User list showing all the users registered in the system.
If the import procedure failed for some reason, delete all the records that have succeeded to import, correct the CSV file and perform the above actions again.