Views: 18949
Last Modified: 04.10.2024
Remember that you first have to configure the parameters of the standard and high levels prior to configuring the highest protection:

Note: if at least one parameter of the highest protection level takes an invalid value, the protection level whose parameters are completely configured takes effect with respect to parameters of other protection levels.
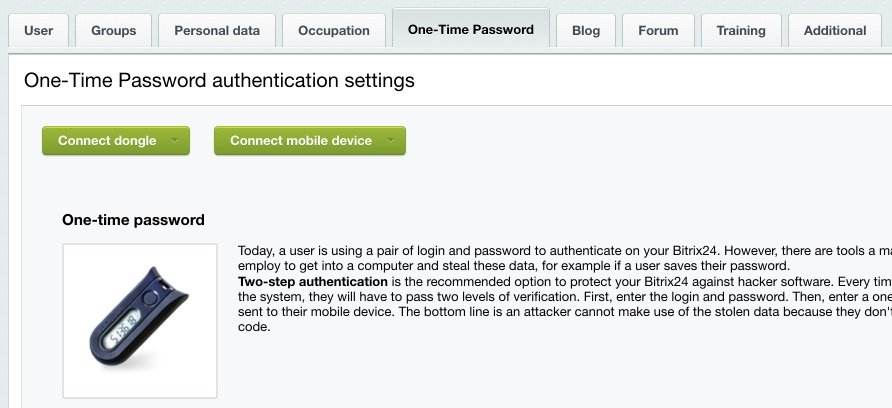
One-Time Passwords
The concept of one-time passwords empowers the standard authorization scheme and significantly reinforces the web project security. The one-time password system requires a physical hardware token (device) or special OTP software. These passwords are especially recommended for use by the site administrators since they significantly improve security of the “Administrators” user group.
Note. You have to enable the one-time password system for the site to be protected at the highest protection level.
You can enable (or disable) one-time passwords on the Settings > Proactive Protection > Two-step authentication form by clicking Enable one-time passwords (or Disable one-time passwords).

For the one-time password scheme, a corresponding tab is shown in the user profile form. The one-time password mechanism is configured for each user individually.
Integrity Control
The File integrity control form (Settings > Proactive Protection > Integrity Control) serves to check the integrity of the system kernel, system area and public files.
Check the system integrity on a regular basis (at least weekly) for the site to be protected at the highest level. Perform the integrity control check before updating the system and collect the new file data afterwards.
Note. Some module updates may require the control script to be signed anew.
Running the Integrity Check
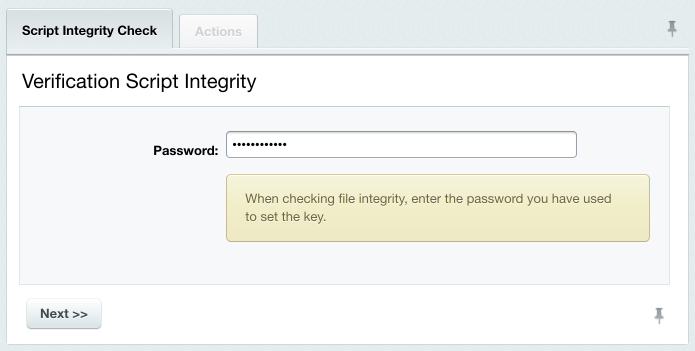
- Enter and remember your password. A strong password should have at least 10 characters containing letters and digits.
- Confirm the password in the corresponding field.
- Specify and remember a keyword. It must differ from the password.
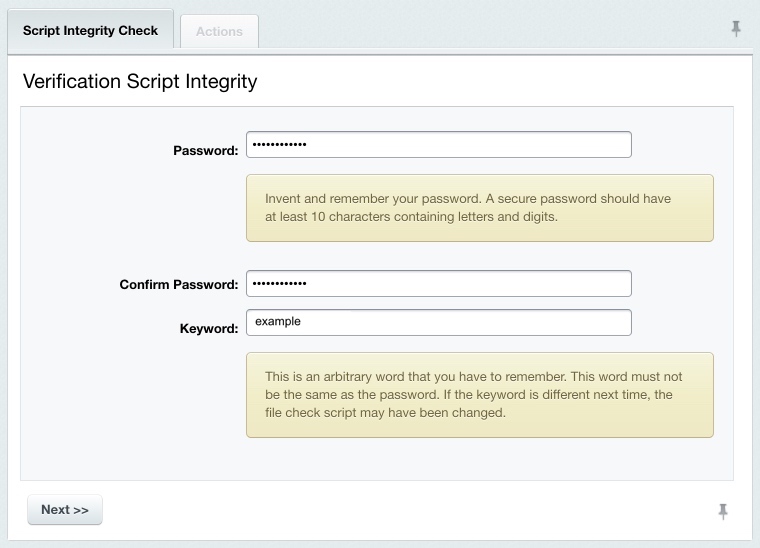
- Click Next.
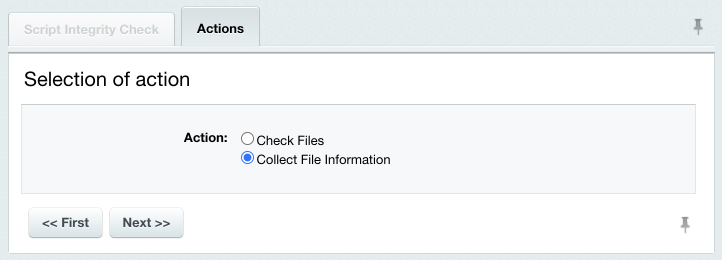
Now you can collect the file information in order to check the system integrity.
Gathering the File Information
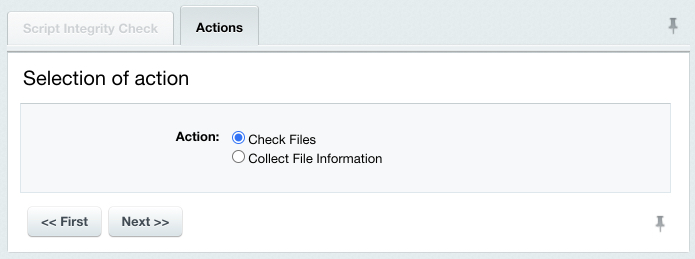
- Click the Actions tab and check the Collect File Information option:
- Click Next. The following form will open:

- Set the data collection parameters:
- Data Collection Area – select the system folders you want to process.
- File Extensions – specify extensions of files whose information is to be collected. Separate multiple extensions with comma, without space.
- Encryption Password – type here and remember the password which will be used to encrypt and decrypt the verification file.
- Step Duration – specify the duration of a single data collection step, in seconds.
- Click Next to start data collection. Upon completion, download the data file to your local computer for better security.
The verification data file is now ready, you can check the system integrity.
Checking the System Integrity
Every (except the first) time you start the system integrity check, the verification script is checked for unintentional or malicious changes.
- Enter the password that you have used to sign the verification script and click Next.
Ensure the verification script prints the keyword you have specified for signing.

Note: if the keyword differs from the one you have previously entered, the integrity control script is compromised which means it has been modified and cannot be trusted. In this case, you have to supersede the control script (for example, rollback to version 8.0.0).
- Click the Actions tab and activate the Check Files option.
- Click Next to open the verification data file selection form:
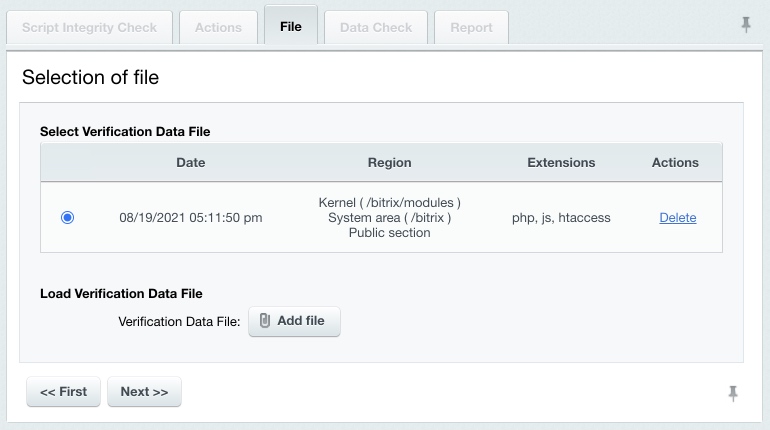
- Select one of the existing log files or upload the log file from your machine using Add file. The following form will open.
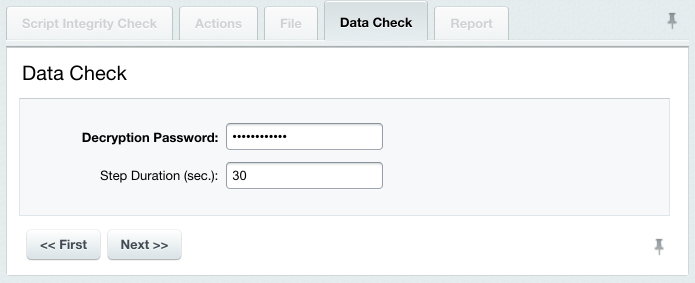
- In the appropriate filed, type in the decryption password you specified when creating the verification data file.
- Specify the duration of a single check step (less times give more server stress).
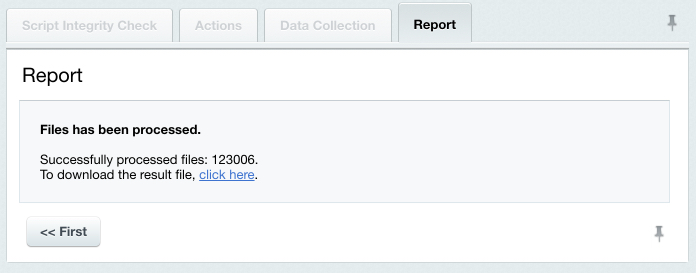
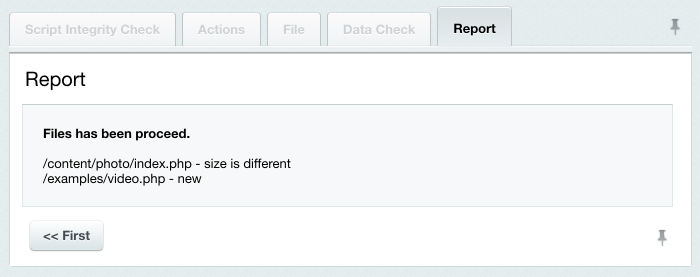
- Click Next to start checking the system integrity. On completion, the following report will be displayed:
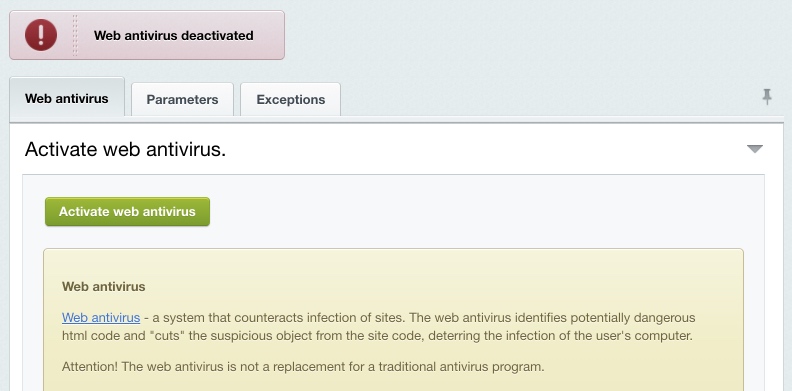
Web Antivirus
Web antivirus is a special software to help prevent malicious actions that may be performed on a website. Such software detects known or potentially dangerous portions of HTML code and cuts these codes away thus blocking viruses.
Note: web antivirus should not be regarded as a replacement for the conventional antivirus software.
To enable or disable the web antivirus function, just click the button on the Web Antivirus form (Settings > Proactive Protection > Web Antivirus).
Note: to detect viruses potentially injected before until the buffering occurs, add either of the following code:
auto_prepend_file = /www/bitrix/modules/security/tools/start.php
or to .htaccess:
php_value auto_prepend_file "/www/bitrix/modules/security/tools/start.php"
To select an action the system will undertake when a virus activity is detected, click the Parameters tab:
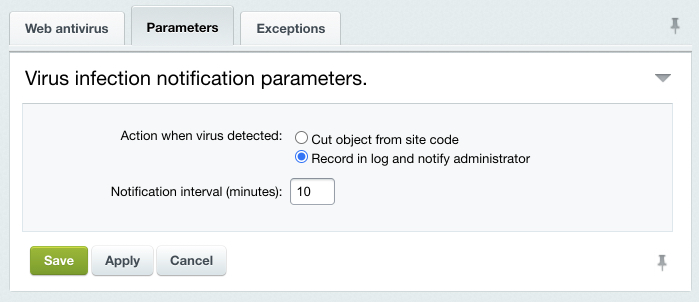
- Cut object from site code - deletes dangerous code;
- Record in log and notify administrator - this option specifies to only log the virus activity; no dangerous code will be removed. The website administrator will be notified of the virus event via the e-mail once in the time interval denoted in the Notification Interval field.
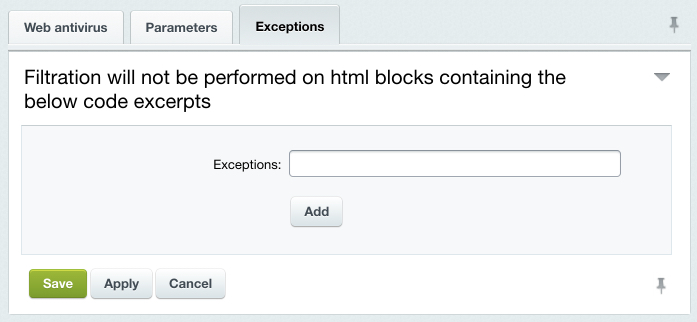
If, for some reason, you do not web antivirus to be applied to specific portions of the web page HTML code, specify such code on the Exceptions tab.