Views: 8852
Last Modified: 29.05.2024
Installation
The example archive includes SDK CRest and a PHP file containing the example code. You have to upload the files extracted from the archive to your web server prior to installing the application on your Bitrix24. The application is capable of receiving the current user's authorization to make REST API calls from outside the Bitrix24 context to get the user's first and last names.
Important! This example uses SDK CRest. You have to open the
checkserver.php you have uploaded to the server in your browser to make sure your server configuration is correct.
Learn more.
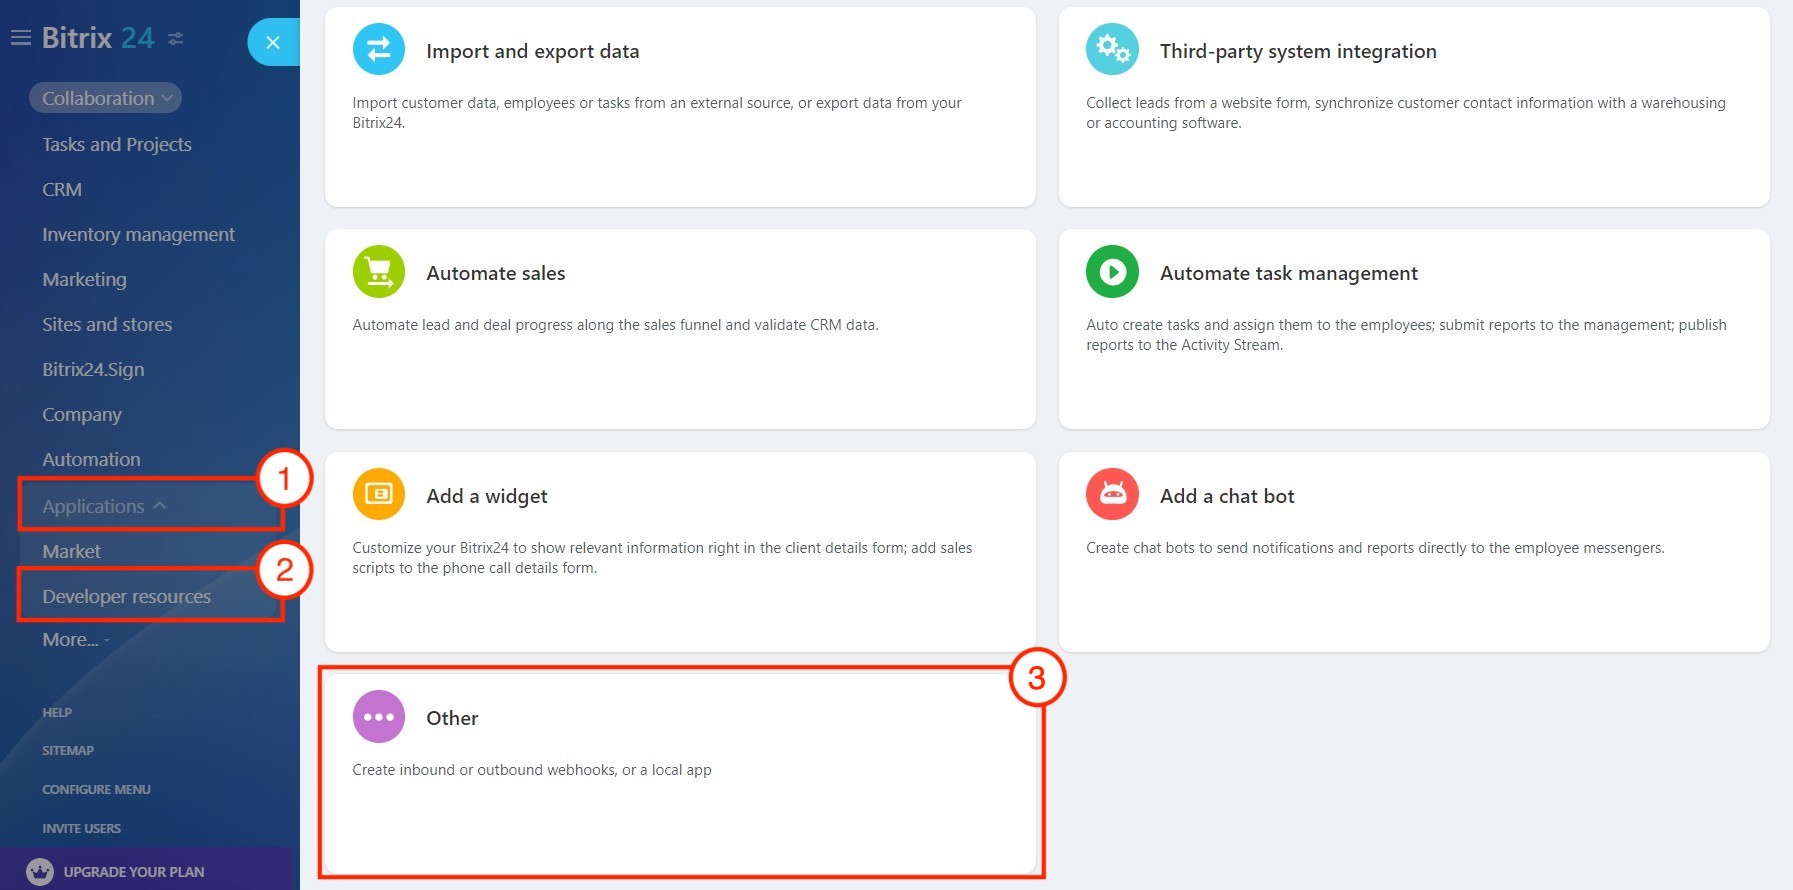
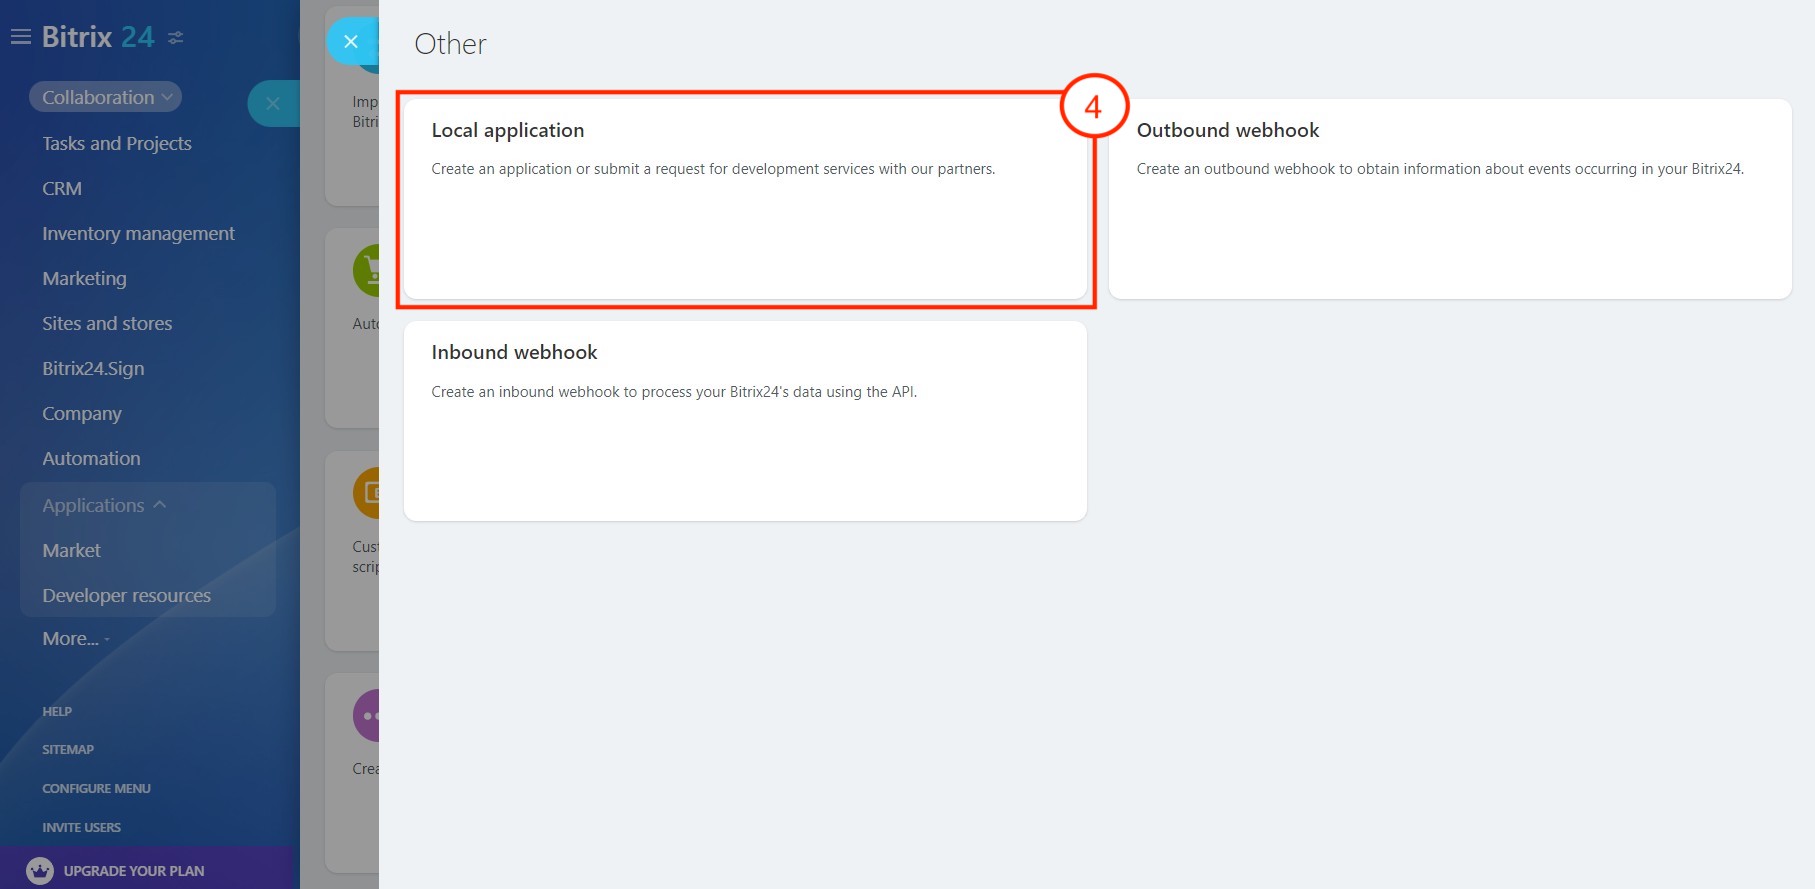
To install the local application, go to: Applications 1 - Developer resources 2 - Other 3 - Local application 4:
In the Add Application form, fill out the required fields and select the required permissions. For this example, you have to select the user management permission. Enter Your handler path - your application URL has to be available on the remote server via HTTPS before you will add it to your Bitrix24 .
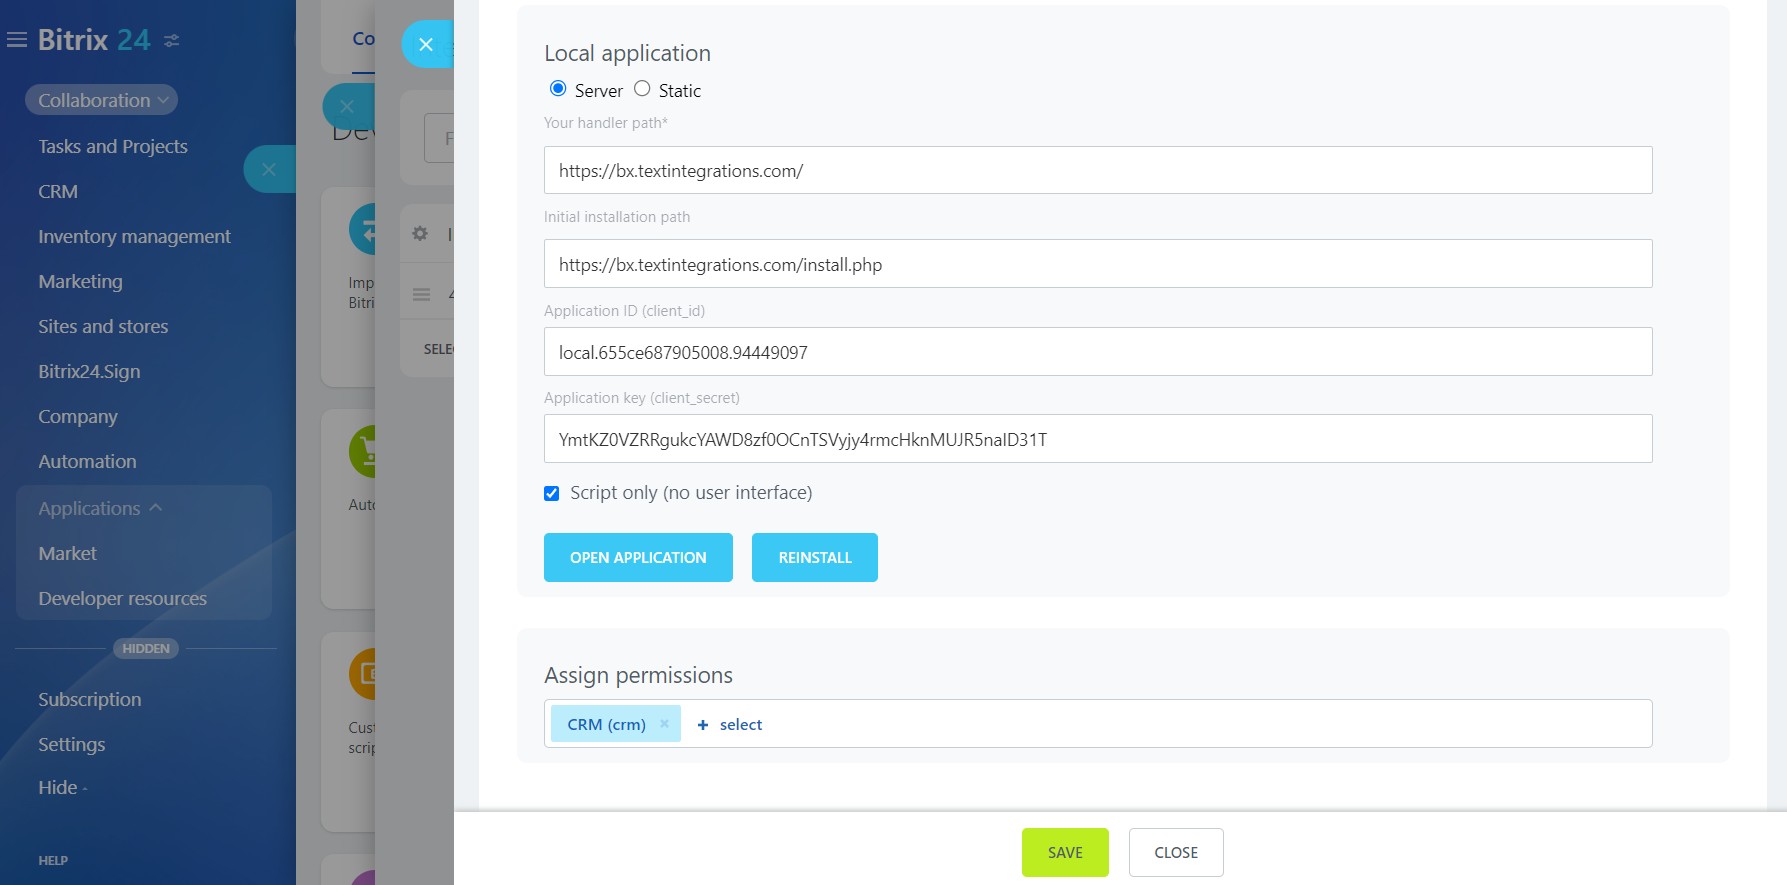
Make sure you check the Script only option to inform the system that your application will not add any pages or dialog boxes to the Bitrix24 user interface. This option also hides input field(s) you normally use to enter the menu item name. GUI-less applications typically use a different URL to provide user interface, or don't provide it at all.
Note the field Initial installation path. You have to enter the URL of the install.php you have extracted from the archive and uploaded to the server. This URL will be called only once when saving the local application form. The system uses this URL to send the ONAPPINSTALL, event the script uses to save authentication tokens of the current user. Whenever you want to update these tokens manually, open the Applications page and select the Re-install option.
After clicking Save, you will remain in the Add Application form. It is now showing the OAuth 2.0 authentication keys you will need to add to the application code.
Because a GUI-less application functions outside the Bitrix24 context, it has to implement the OAuth 2.0 protocol in full. Open the settings.php file provided in the example and find the constants C_REST_CLIENT_ID1 (the application code) and C_REST_CLIENT_SECRET2 (the secret key). Set them to the values you now see in the Add Application form. Upload the changed files to the server.
Upload the modified files to the server.
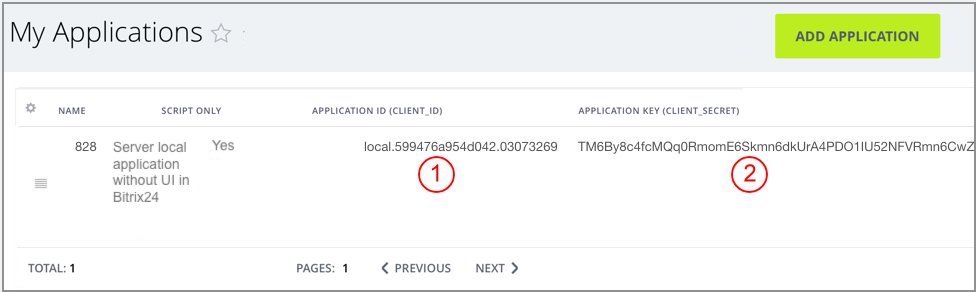
Now, open the My Applications page in Bitrix24 to see the new application added to the local applications list:
Using the GUI-less application
Important! This example uses SDK CRest. You have to open the
checkserver.php you have uploaded to the server in your browser to make sure your server configuration is correct.
Learn more.
Open the index.php in your browser supplying a correct URL of your server:
The application will show the first and last names of a user who was logged in when installing the application. The data is obtained via the REST API using authorization data saved when installing the application. The authentication tokens will be refreshed automatically should they become invalid.