Introduction
The following methods of Bitrix Site Manager installation exist:
- For evaluation of Bitrix Site Manager at a local machine, install Bitrix Environment which deploys all the required software like web server, database etc. (see Installing the trial version using Windows installer).
- If you have all the required helper software installed (Apache, PHP, database, for trial version - Zend Optimizer), refer to Installing Bitrix Site Manager for installation guidelines.
- To install the required helper software required by Bitrix Site Manager (Apache, PHP, database, for trial version - Zend Optimizer), you can download and install Bitrix Environment (see Installing Bitrix Web Environment). In this case, you will have to install Bitrix Site Manager from a downloadable archive file (see Installing Bitrix Site Manager).
- To install the system at a remote server, use a special script: BitrixInstall, see Installation using BitrixInstall. Alternatively, you can still install from a downloadable archive file (see Installing Bitrix Site Manager).
Should you have any questions installing the system, you can always ask them at the technical support service.
System requirements
Server software requirements
PHP enabled web server
Apache (recommended) – the Bitrix software was developed for Apache 2.0 and higher.
PHP
Bitrix Site Manager and Bitrix24 require PHP version 5.3.x or higher. It is recommended that you use the latest stable release of PHP to prevent PHP failures and to provide the maximum security at the server side.
The following PHP extensions are required:
Note. UTF-8 is available for Oracle and MySQL. To ensure the correct support of UTF encryption, check if the mbstring module is installed in PHP. In this context, the php.ini file in the PHP settings must include:
 mbstring.func_overload=2
 mbstring.internal_encoding=UTF-8
Database server support
MySQL
MySQL version 5.0 and higher is recommended.
To support MySQL, the system requires the MySQL support for PHP to be installed.
Web server configuration
For proper functioning, Bitrix Site Manager requires the following parameters to be set.
PHP settings
The following PHP parameters are essential.
- memory_limit = 64M;
Maximum amount of PHP memory required by the system core.
Note: this parameter can be changed:
- by editing the file php.ini directly;
- from within a script by calling ini_set("memory_limit", "64M");
This call is added to /bitrix/php_interface/dbconn.php at the installation time using the user-supplied value;
- in the file .htaccess using the directive: php_value memory_limit 64M
- in the file httpd.conf using the directive: php_admin_value memory_limit 64M
Note: parameters can be altered from within the .htaccess file if the following conditions are met:
- Apache (or compatible) web server is used;
- .htaccess files are processed by a web server, which means that the web server configuration file (httpd.conf) contains the directive AllowOverride set to All or any value other than None;
- PHP is installed as an Apache module (if PHP runs as CGI all the required parameters must be set when compiling PHP)
- file_uploads = On;
The parameter defines whether files can be uploaded to a server or not.
Additionally, the following variables are also to be set:
- upload_tmp_dir = <folder name>
- upload_max_filesize = <required file size limit>
Important! It is essential that the specified directory exists, and a current user (under which the web server runs) is granted the write permissions for this folder.
- Proper PHP session handling is the indispensable condition. You are recommended to check that the folder where the session files are saved exists.
Note: if the parameter session.save_path is missing from php.ini, the default value of /tmp is used.
If the server URL's happen to contain the
PHPSESSID=... parameter, you hide it as follows:
- Add the line session.use_trans_sid = 0 to php.ini;
- In .htaccess, add the following directive: php_flag session.use_trans_sid off
The demo site has this line included in .htaccess, you can uncomment it if required.
Supported standards. Client software requirements
|
Bitrix Site Manager and Bitrix24 use and support the following technologies. |
HTML/XHTML
The system places no restrictions on templates developed with HTML/XHTML.
JavaScript
The system unconditionally supports the use of JavaScript in the site templates, menus and pages.
AJAX
This technology is widely used in the Control Panel and Components 2.0 to speed up the system response and decrease server-to-client data traffic. The system places no restrictions on using AJAX in the public section.
CSS
The design of each site template can be controlled via separate CSS files. Analogously, separate style sheets can be used with public components as well as module templates (e.g. forum, helpdesk, polls). The Control Panel features the use of visual themes: users can create their own custom visual themes through the cascading style sheets.
Flash
The system has limited support for the Macromedia (now Adobe) Flash technology. Flash plug-ins can be used in the following ways:
- as a part of the site template design;
- as advertising banners;
- as user input controls deliberately designed to interact with the system.
RSS
The system supports RSS versions 0.92 and 2.0. In the core, RSS is used to exchange information between the Information Blocks and Blogs modules.
CSV
The system uses the CSV standard to exchange information between the Information Blocks module and other systems.
Browser support
Bitrix Site Manager and Bitrix24 were developed to support the most popular browsers (Internet Explorer 11.0 and higher). The Control Panel is optimized for the maximum performance with them. The public section appearance is browser-independent.
Known problems
- The visual editor behaviour may somewhat disagree in different browsers (Internet Explorer and FireFox).
- Some API functions and class methods may produce HTML code that do not fully conform with the XHTML standard, and potentially may not pass the W3C validation.
Installing the trial version using Windows installer
The fully functional trial version is available for free and can be evaluated during 30 days. The trial version of Bitrix Site Manager enables users to learn the system architecture and features by the example of a fully functional, ready-to-go web site. The evaluation period allows you to integrate the system with the site design and prepare the site for launching.
Setup operations
If you install the MySQL version using Bitrix Environment, you will not have to install any additional software manually. A simple and easy-to-use installer will automatically install the following applications to your PC:
- MySQL 5.0.51;
- Apache 2.2.15;
- PHP 5.3.2;
- Catdoc - MS Office file indexing;
- xpdf- Adobe PDF file indexing;
- msmtp E-Mail Manager.
Bitrix Environment copies the application files to an isolated folder. Bitrix Environment helper applications will not conflict with any existing installations of MySQL, Apache or PHP.
Your system should meet the following minimum requirements to install and run Bitrix Environment:
- Windows 98/ME/NT/2000/XP/2003/Vista/2008 Server;
- 100 Mb of free disk space;
- Internet connection if you install using the downloaded Bitrix Environment package.
You can always download the latest version at http://www.bitrixsoft.com/download/.

Choose here the required installation version.
- Download an .exe file of the required edition. The package file is in the format xxx_encode_phpN.exe, where xxx is the edition abbreviation and, N is the PHP version, for example: smb_encode_php5.exe.
- Run the downloaded file.
Bitrix Site Manager Installation Wizard
Installation wizard will help you install the system taking as less time and efforts as possible. Use the Next and Back buttons to navigate through the wizard steps. The Back button allows you to return to a previous step if you need to change the installation preferences. If you want to abort the installation, click Cancel.
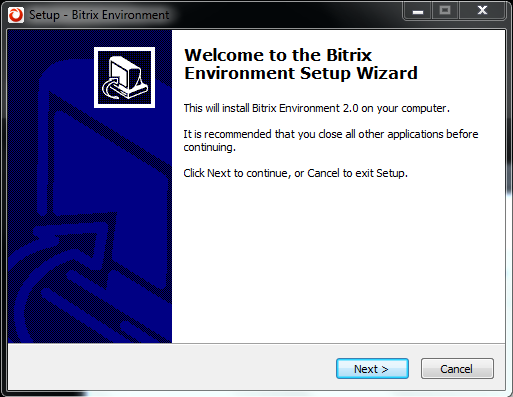
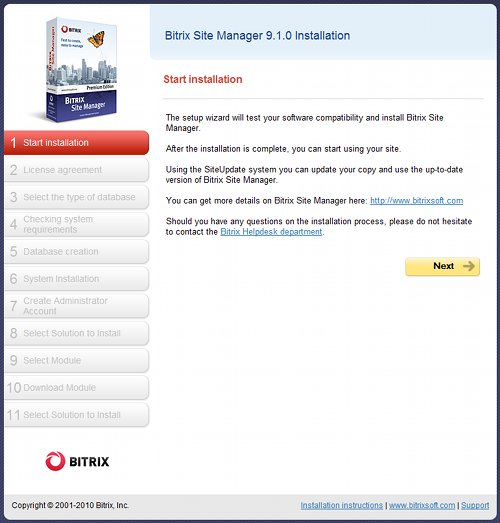
Step 1. The Initial Installation Screen

The first wizard window informs you that the installation is starting and displays the basic information about the product.
- Click Next. This will open the next step containing the Bitrix Site Manager License Agreement.
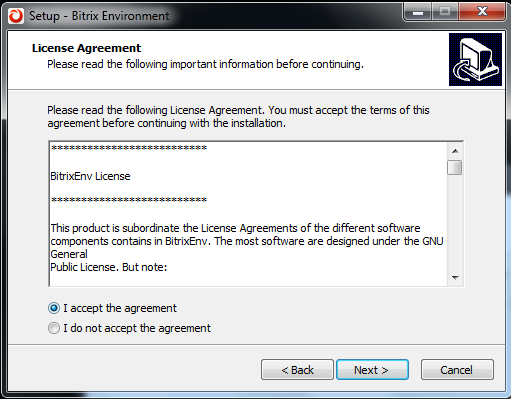
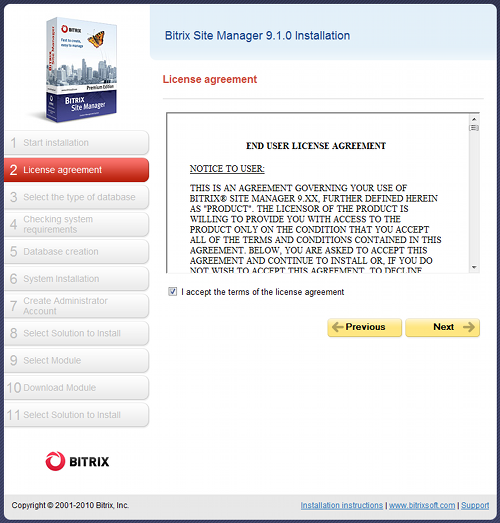
Step 2. The License Agreement

Read the Agreement carefully. If you accept the license terms, check the I accept the agreement box. You must accept the License Agreement to continue installation. Click Next to open the next window of the Wizard.
Step 3. Bitrix Environment and Encoding
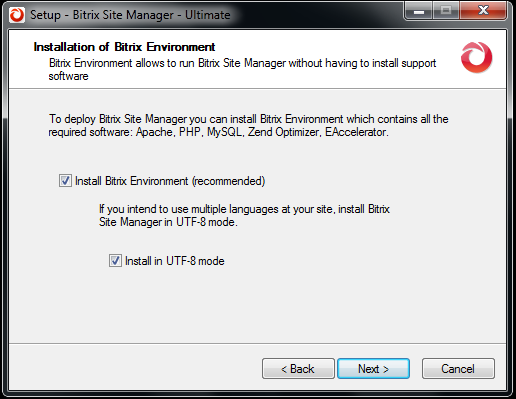
If you do not have Bitrix Environment installed on your machine, do the following.
- Enable the Install Bitrix Environment option.
This will download and run bitrix_env.exe, the Bitrix Environment package (see Installing Bitrix Web Environment) which will install all the required third-party software: MySQL 5.0.51, Apache 2.2.15, PHP 5.3.2, Catdoc - MS Office file indexing, xpdf- Adobe PDF file indexing, msmtp E-Mail Manager.
Important! If you refuse to install Bitrix Environment, the wizard will proceed to the destination folder selection step. In this case, you will have to install all the required software manually. However, if, having installed Bitrix Site Manager you find that you cannot install these applications without assistance, simply run the Wizard again.
- If you plan to use multiple languages on your site, enable UTF-8 encoding.
- Click Next.
If you have previously installed Bitrix Environment package, uncheck the Install Bitrix Environment option. Confirm that you do not want to download and install it:
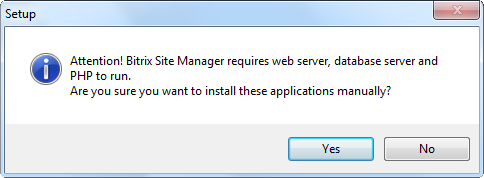
This will open the destination folder selection window.
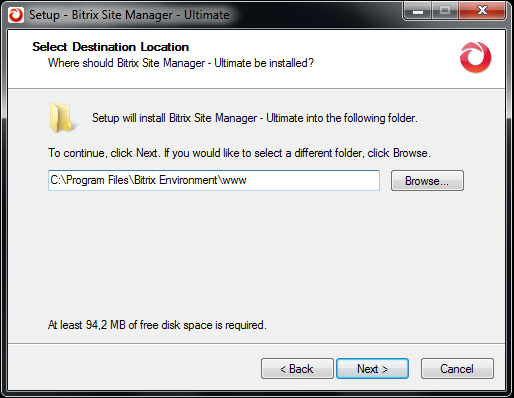
- Specify the folder in which the Bitrix Site Manager files will be unpacked and click Next.
The installation confirmation window will appear.
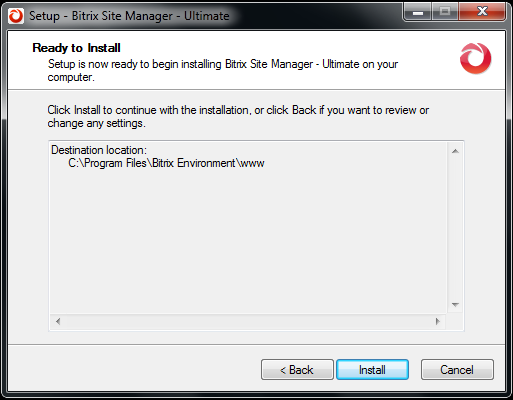
Review all settings. At this step, you still can change them if required by clicking Back.
- Click Install. The installation progress window will show (step 5).
Step 4. Ready to Install
This window displays a summary of the installation preferences you have specified in the previous steps. Click Back if you need to change settings.
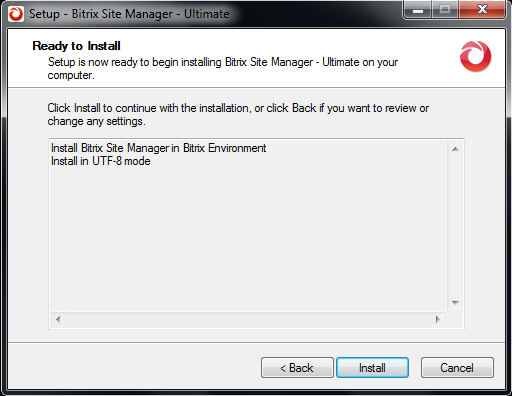
- If you accept the proposed settings, click Install to start installation.
If you have chosen to download and install Bitrix Environment, the web environment installation wizard will start (see Installing Bitrix Web Environment). When it completes, the step 5 will follow.
Step 5. Copying Files
The installation of Bitrix Site Manager is now starting.
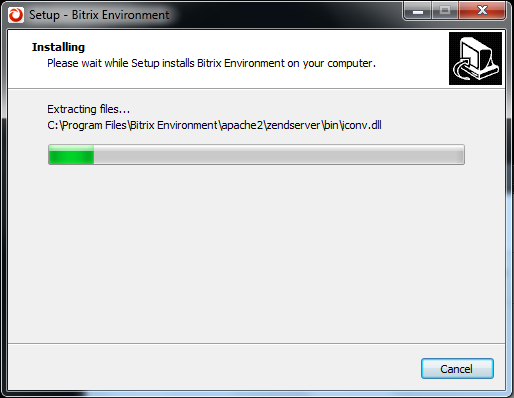
When the installation completes, the last window will open notifying that all the files have been copied successfully.
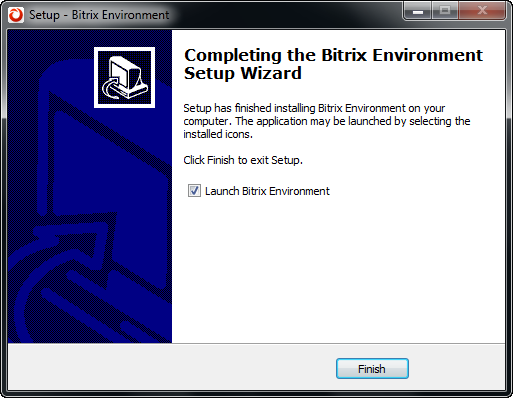
Step 6. Final Step
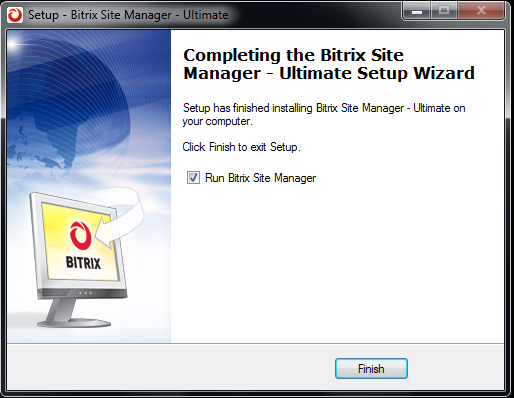
This window informs that Bitrix Site Manager files have been successfully copied to your machine.
- To run Bitrix Site Manager right after closing the installation wizard, enable the Run Bitrix Site Manager option.
- Click Finish to quit the wizard.
Running Bitrix Site Manager
First Run
If you have left the Run Bitrix Site Manager option checked on the last screen of the installation wizard, the system will be started automatically right after the wizard is closed.
When the system is starting, it opens a browser window in which you will continue the installation and configuration of Bitrix Site Manager. The browser side installation includes two steps. The first step is fully automated and equivalent to the step 6 of the Bitrix Site Manager installation wizard (see Step 6. System installation). After the installation is complete, the system will move to the final step in which the system administrator account is created (see Step 7. Creating an administrator's account) and then runs the Installing Solutions.
Subsequent Runs
You can run Bitrix Site Manager:
- by activating the shortcut
 on the Desktop (if you have chosen to create it);
- using the Start menu (Start -> Programs -> Bitrix Web Environment -> Bitrix Web Environment);
- by running BitrixEnv.exe located in the system installation folder (e.g. C:\Program Files\Bitrix Environment\)
Using the Taskbar Icon
After the system has been launched, the Bitrix Web Environment icon becomes visible in the system tray.
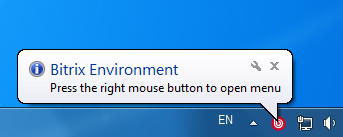
When visible, this icon indicates that all the applications required by the system are up and running. You can now start working with Bitrix Site Manager.
- Right-click on the icon to bring up the context menu.
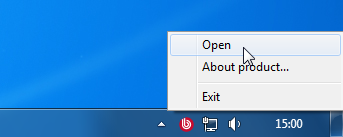
The menu includes the following commands:
- Open: opens the public section (i.e. the index page visible to visitors) of the site in your browser;
- About: navigates to the Bitrix company site;
- Exit: closes all the applications required by Bitrix Site Manager (web server, database etc.).
Installing Bitrix Web Environment
The Bitrix Web Environment package is extremely useful for testing the trial versions of Bitrix Site Manager. The Bitrix Web Environment installation wizard deploys the following applications required by the system:
- MySQL 5.1.51
- Apache 2.2.15
- PHP 5.3.2
- Catdoc - MS Office file indexing
- xpdf- Adobe PDF file indexing
- msmtp E-Mail Manager
Note! Here, Bitrix Web Environment implies the above listed software but not Bitrix Site Manager.
Preliminary operations
Do the following to download Bitrix Web Environment:
Note! If you have chosen to use Bitrix Web Environment, you will have to download a stand-alone Bitrix Site Manager package. You can download it at this page as a
.zip or
.tar.gz file. Unpack the downloaded archive to the Bitrix Web Environment root (/
www/ folder) and follow the Bitrix Site Manager installation instructions (see
Installing Bitrix Site Manager).
The Bitrix Web Environment Installation Wizard
Important: Use Bitrix Web Environment for testing purposes only. We don't recommend using it in release configurations.
The installation of Bitrix Web Environment is very simple. It will not take more than 5 minutes.
Use the Next and Back buttons to navigate through the wizard steps. The Back button allows you to return to a previous step if you need to change the installation preferences. If you want to abort the installation, click Cancel.
Step 1. The Initial Installation Screen
The first wizard window informs you that the installation is starting and displays the basic information about the product.
- Click Next. This will open the next step containing the License Agreement.
Step 2. The License Agreement
Read the Agreement carefully. If you accept the license terms, check the I accept the agreement box. You must accept the License Agreement to continue installation.
- Click Next to open the next window of the Wizard.
Step 3. Choosing Installation Folder
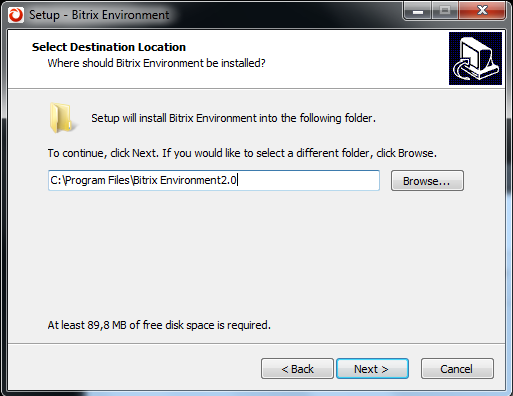
- Specify the folder to which the Bitrix Web Environment will be installed. The default destination directory is
C:\Program Files\Bitrix Environment. To choose a different folder, click Browse and select the folder in the tree, or type the path in the edit box.
- Click Next to open the next screen.
Step 4. Shortcuts
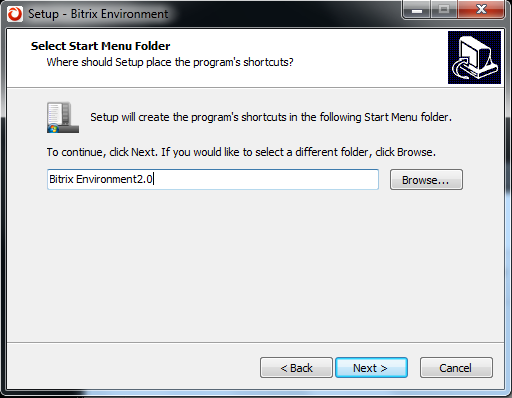
This window shows the name of a folder containing the application shortcuts that will be created in the Start menu. By default, the wizard suggests the folder Bitrix Site Manager. You can specify a different folder name.
- Click Next to go to the next step.
Step 5. More actions
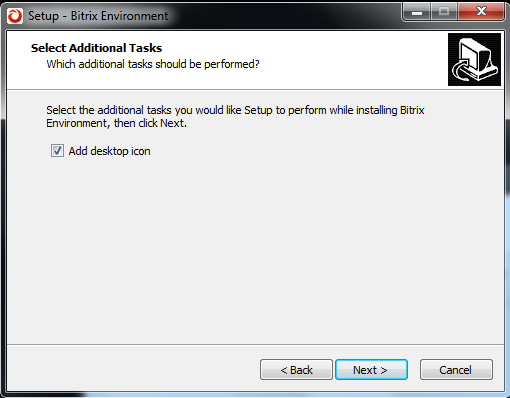
Enable the Add desktop icon option to place a shortcut to Bitrix Web Environment on your desktop.
- Click Next to go to the next step.
Step 6. Web Server Parameters
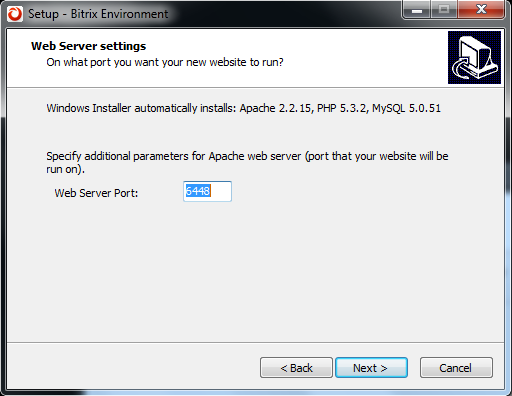
Here you can change the port at which you will connect to the Apache web server.
By default, the web server is configured to respond at port 6448. You can set any other port number (e.g. 6443) unless this port is not in use by other applications (e.g. IIS).
Step 7. Ready to install
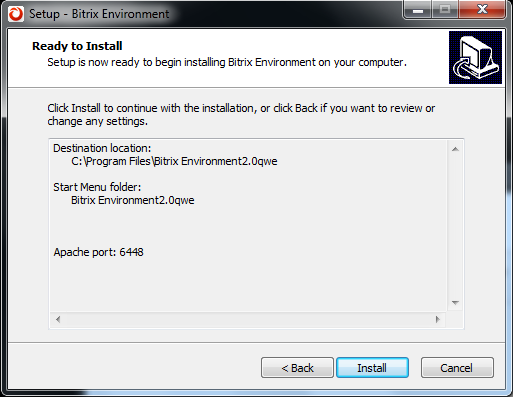
This window displays a summary of the installation preferences you have specified in the previous steps. If you need to change the installation preferences, click Back.
- If you accept the proposed settings, click Install to start installation.

Wait until the wizard copies files to your machine.
Step 8. Final Step
This window informs that the Bitrix Web Environment files have been successfully copied to your machine. To run Bitrix Web Environment right after closing the installation wizard, enable the Launch Bitrix Environment option. Click Finish to quit the wizard.
Configuring Bitrix Web Environment
To change the settings for Bitrix Web Environment:
Edit the parameters as required. For additional references provided below is a brief description of the dialog box options.
Another way to edit these settings is by opening the
bitrixenv.ini file from the Bitrix Web Environment installation folder (e.g.,
C:/Program Files/Bitrix Environment/).
[Parameters]
ApachePortSSL=443 ; SSL port
StartApacheSSL=0 ; secure SSL mode
MySQLPort=31006 ; MySQL server port
StartMySQL=1 ; 1 - start MySQL server, 0 – don’t start
StartXMPP=1 ; 1 to start XMPP server, 0 – don’t start
StartSMTP=1 ; 1 to start SMTP server, 0 – don’t start
StartAgents=1 ; 1 to start Apache agents, 0 – don’t start
StartMSMTP=0 ; 1 to start built-in SMTP server , 0 – don’t start
ServiceName=BitrixEnv ; name for the Windows service
MSMTPAuth=0 ; use SMTP authentication (when StartSMTP is 1), 0 – don’t start
MSMTPServer=localhost ; built-in SMTP server address (used when StartSMTP is 1)
MSMTPAuthPassword=123456 ; password for built-in SMTP server; used when StartSMTP and MSMTPServer are 1
MSMTPAuthLogin=admin ; login for built-in SMTP server; used when StartSMTP and MSMTPServer are 1
ApachePort=6448 ; default port for use by Apache
MSMTPFrom=support@server.local ; default sender address
Important: Use Bitrix Web Environment for testing purposes only. We don't recommend using it in release configurations.
Installing Bitrix Site Manager
All versions of Bitrix Site Manager are shipped as .zip and .tar.gz archive files for PHP 5.
- Download Bitrix Site Manager installation package to your server or computer.
- Extract files from the archive to the root folder of your site.
Now, ensure your system corresponds minimum requirements.
- If required, install Apache web server and configure it to support PHP. Bitrix Site Manager requires Apache version 1.3 or better and PHP 5.0.0 or better.
- If required, install database engine (MySQL version 4.1.11 or higher, Oracle 10g or higher or MSSQL 9.0 (2005) or higher).
- If you install the Oracle version, ensure that the client part of Oracle Database 10g Client or higher is installed. Create a new user.
- If you reinstall the system, remember to remove all tables.
- Ensure that you have at least 10 MB of free disk space for the update system.
Attention! Bitrix Site Manager can only install and operate correctly if your system conforms these minimum requirements.
To start installation, open http://<your_site>/index.php in your browser. Replace here <your_site> with the real address of your site.
Step 1. The start
To start installation:
- Download Bitrix Site Manager installation package to your server or computer.
- Extract files from the archive to the root folder of your site.
- Open http://<your_site>/index.php in your browser (replace here <your_site> with the real address of your site).
- Follow the installation wizard instructions.
The first wizard window informs you that the installation is starting and displays the basic information about the product.
Click Next to continue installation.
Step 2. The license agreement
Read the Agreement carefully. If you accept the license terms, check the I accept the License Agreement terms box. You must accept the License Agreement to continue installation.
Click Next to open the next window of the wizard.
Step 3. Choosing the database type
Here you will have to enter your license key and select database for which the system will be configured.
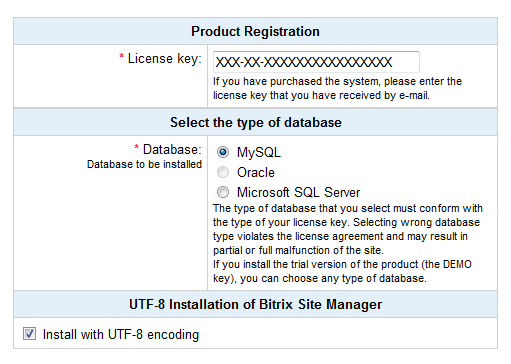
- License Key field: if you have already purchased a license, enter the license key here. If you install the product for evaluation purposes, leave the default field value (DEMO).
- Choose database field: select here the database you want to support. If you install the trial version, you can choose any database
Attention!
Note! MSSQL and Oracle databases are only available in Premium and Ultimate editions.
You must select the exact database type for which your license has been issued. Selecting any database type other than the one stipulated by the license violates the license agreement and can cause partial or full malfunction of your site.
The MSSQL database type will be available if only ODBC is supported by your system. Oracle databases require the OCI8 library (the file php_oci8.dll) to be installed. If your system does not meet these conditions, the MSSQL and/or Oracle database types will not be available.
Oracle and MySQL databases can be installed in UTF-8 encoding. If you choose to install UTF-8 version, mark the UTF-8 Installation option.
However, selecting UTF encoding requires the mbstring PHP module to be installed. You can verify the presence of this module by examining the contents of php.ini or .htaccess files:
mbstring.func_overload=2
mbstring.internal_encoding=UTF-8
php_value mbstring.func_overload 2
php_value mbstring.internal_encoding UTF-8
Click Next to continue.
Step 4. Preliminary verification
The installation wizard checks your system for minimum requirements and displays advices on how to tune your system for optimum performance.
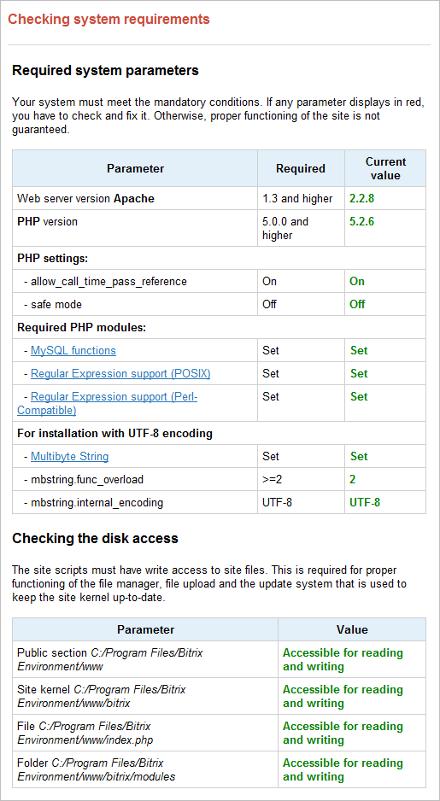
If your system does not match minimum requirements, the problem description in red will display on the top of the screen. The detailed description of the incompatibility can be found in the page body. You cannot continue installation until you fix the problem.

If your system does not match the recommended settings, you can still proceed with the installation. The installer will show the potentially incorrect settings. However, it is strongly recommended that you bring these settings into line with the recommended values. You can verify the system preferences in the Site Check form in Control Panel.
Click Next to continue.
Step 5. The database creation
Here the license file and the database connection configuration file are created; the database is populated with data.
The fields in the Database parameters group vary depending on the chosen database type. Other fields are common to all databases.
MySQL database parameters
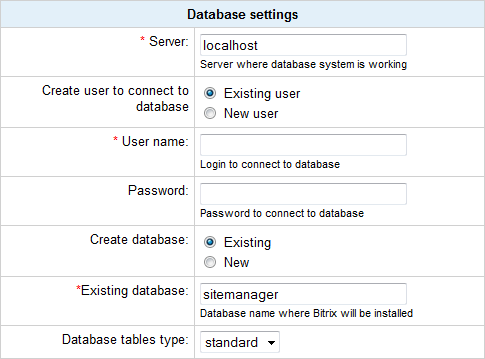
If you install Bitrix Site Manager on a local machine and have the required applications (Apache, PHP, MySQL, Zend Optimizer for the trial versions), or Bitrix Web Environment installed:
- Server: the address of a server that hosts the database engine (MySQL in this case). This value is usually "localhost" for local servers, and the port number in the format localhost:[port]. You can find the port number in the MySQL configuration files.
Important! When installing Bitrix Site Manager on Bitrix Web Environment, type localhost:31006 in this field.
- Database user: select to create a new user;
- User name: type here any desired database user name (login) that will be used to access the database.
- Password: the database user password.
- Database: select to create a new database.
- Database name: the name of the database to which the product will be installed.
- Type of database tables: standard tables are generally good for most use cases.
- Select Create new database. A new group of fields will appear: Administrator login and password.
- Type root in the Login field.
- The Password field must be empty.
If you install Bitrix Site Manager on a remote server, consult the hosting service provider for the database parameters. Specifically, you should obtain values for the following fields:
- Server address;
- Database user: consult whether you need to create a new database user;
- (database) User name;
- (database) Password;
- Database: consult whether you need to create a new database;
- Database name;
- Type of database tables.
Standard tabled are optimum for most cases. However, web shops are observed to perform better with InnoDB tables.
Attention! If you need to create a new database user or a new database, the database user name and password fields are required. If no database exists yet, you must create a new one (by selecting the appropriate option). However, new databases are usually created by the hosting service techsupport. You will only have to obtain the user name, password and connection parameters.
Oracle database parameters
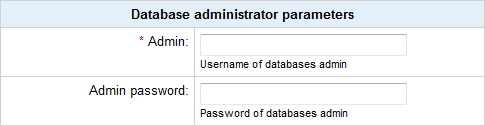
Note! If you choose to create a new database or database user, you will have to provide the database administrator's login and password. The database administrator's user name and password are used only at the installation and database creation time. This information is not stored in the system.
MSSQL database parameters
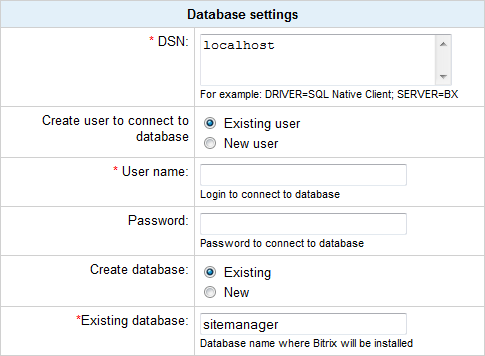
- DSN: a database connection string. The string should contain, at least, the connection driver parameters and the server name. Optionally, you can include the user name, password or other parameters.
Note! Sometimes you would need to specify a user DSN name here (a connection must be created in advance).
For local servers (if the product is installed on the same server as the database), this parameters usually has a value of localhost.
- Database user: if checked, a new database user will be created. Otherwise, an existing user will be used.
- User: a user name (login) used to access the database.
- Password: a user password to access the database.
- Create database: check this option if you want to create a new database.
- Database name: type the name of the database to which the system will be installed.
Note! If you choose to create a new database or database user, you will have to provide the database administrator's login and password. The database administrator's user name and password are used only at the installation and database creation time. This information is not stored in the system.
Additional parameters
These parameters define permissions to assign to all files and folder of the site. They are common to all database types.
- Access permission for site files: Permissions that will be applied to all newly created files. Access permissions should allow the web server to write to files.
- Access permission for site folders: Permissions that will be applied to the newly created folders. Access permissions should allow the web server to write to folders.
Note: you can alter the database connection parameters manually by editing the file /bitrix/php_interface/dbconn.php which is created upon installation.
Click Next to continue.
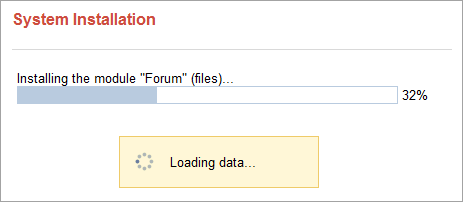
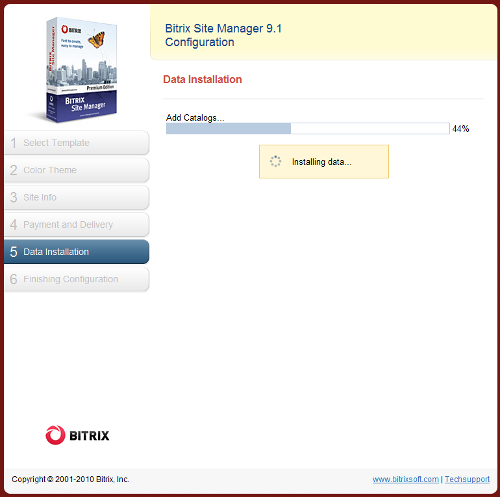
Step 6. System installation
At this stage, the wizard creates the database and copies the system files. You can watch the process proceeding in the progress bar. Upon completion, the wizard will switch to the next step automatically.
Step 7. Creating an administrator's account
Here you will configure the web site and create a web site administrator's account. The administrator's account provides full access to web site management and configuration. After the installation is complete, you can create more users with less permissions.
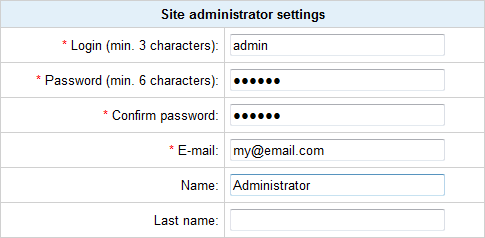
Note: fields marked with asterisk (*) are required.
- Login: the site administrator login to access the Control Panel pages. Must contain at least 3 symbols;
- Password: the site administrator password. Must contain at least 6 symbols;
- Confirm password: type the password again to validate it.
- E-Mail: the address of the site administrator's e-mail account;
- First name, Last name: the real name of the site administrator.
Step 8. Installing Solutions
Here you will have to select a web solution to be installed.
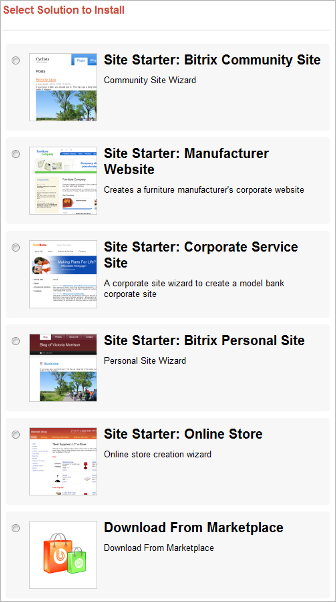
Select the solution you find most appropriate for your website.
- Community Site Wizard is a neat solution for you to create a social community website, such as, for example, coffee lovers club, book readers club and so on.
- Corporate Service Site Wizard is a solution oriented to non-manufacturing companies. The wizard creates a sample website to provide banking services.
- Manufacturer’s Corporate Website Wizard, on the contrary, is a solution oriented to industrial companies. The wizard creates a exemplary website to represent a furniture manufacturer.
- Personal Site Wizard creates a website devoted to solely represent a person in the Internet.
- Download From Marketplace is a special option to download and run the website solution from Bitrix Marketplace.
- Online Store Wizard is a perfect choice for companies willing to sell their products online.
Online Store Wizard and Manufacturer’s Corporate Website Wizard share common steps therefore this guide discusses only upon the Online Store Wizard.
Community Site Wizard and Corporate Service Site Wizard are not discussed here as well because they are similar to Personal Site Wizard.
Note: Steps 9-11 are necessary only for the Download From Marketplace solution.
Personal Site Wizard
Step 1. The design template
Select here the design template for use with the website. The templates vary not only in the look, some may have different settings.
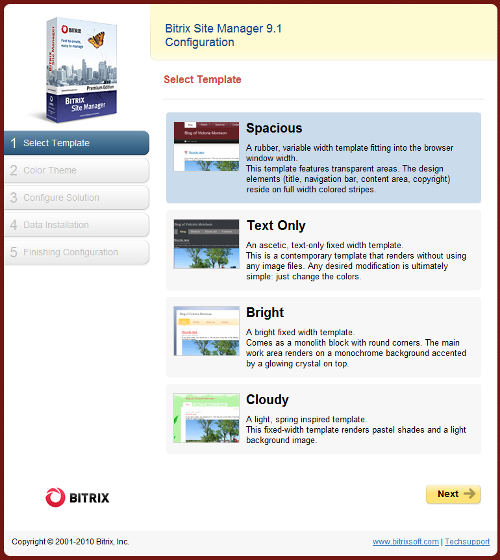
- Select the design template and click Next.
Step 2. The color theme
Each design template allows different colors of your choice. Different templates provide different color sets.
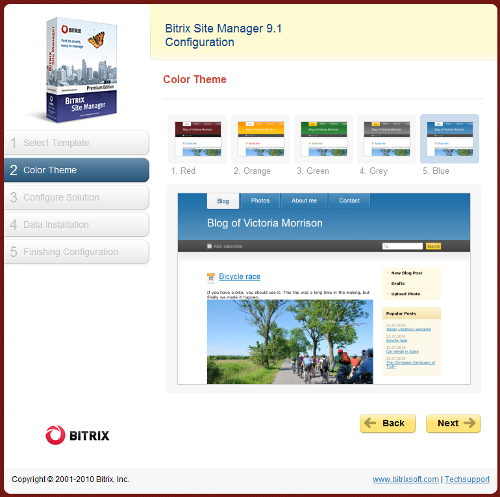
- Select the color theme you find most appropriate for your website and click Next.
Step 3. Providing basic information
This is the step when you specify the website name and the owner name.
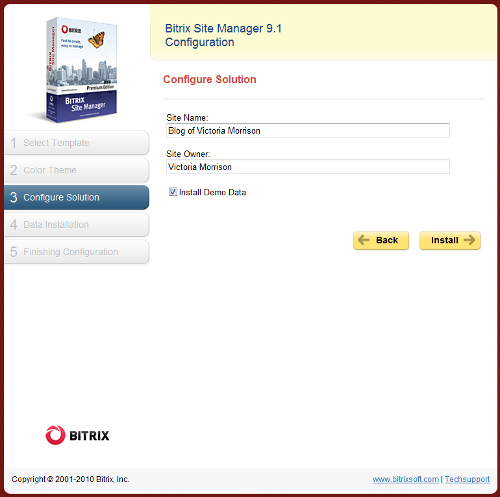
- Fill in the Site Name and Site Owner fields.
- If you install the system for evaluation purpose, you may want to install demo data to get a quick glance at the website right after the installation.
- Click Install to proceed.
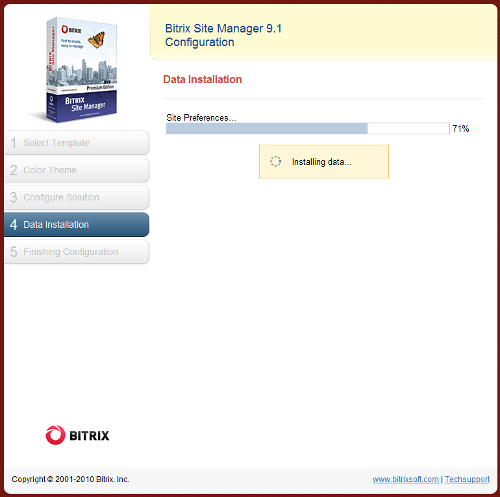
Step 4. Installation and copying
This step is fully automated not requiring your assistance. After the installation is complete, the wizard will move to the next step.
Step 5. The final step
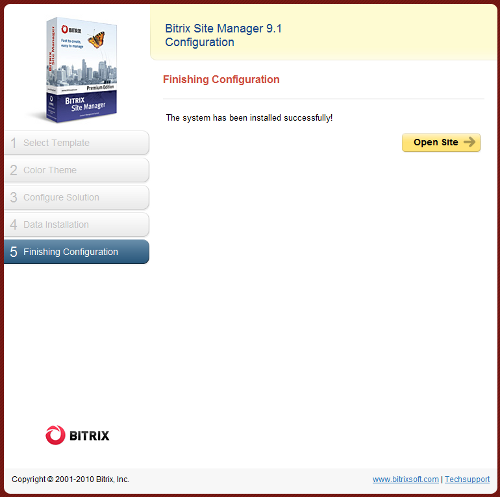
- Click Open Site to view the main page of your site.
Online Store Wizard
Step 1. The design template
This is the first step. Select here the design template for use with the website.
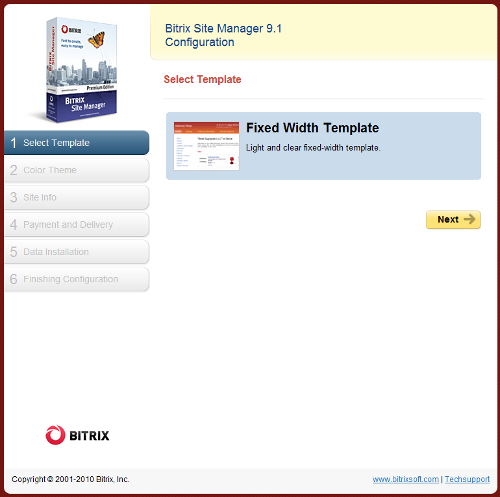
- Select the required template and click Next.
Step 2. The color theme selection
Now select the color for the previously specified template. The preview pane below the color palette shows how your site will look with the current color applied.
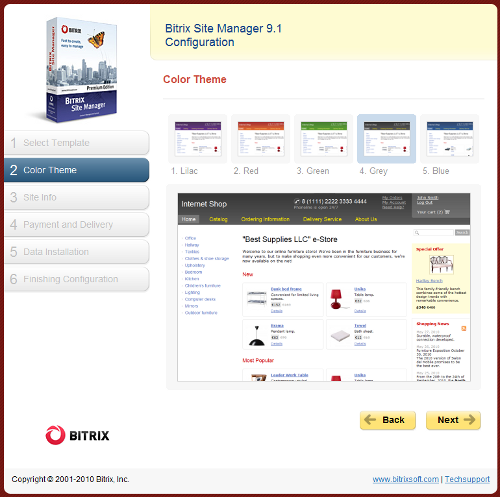
- Select the color you like most and click Next.
Step 3. Company information
Provide basic information about your web store. Note that this data will be visible as-is to your site visitors.
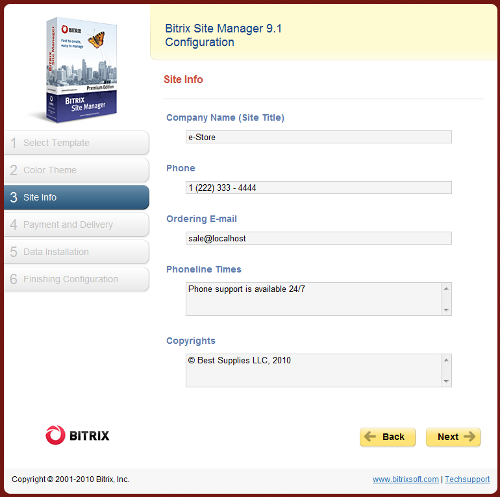
- Fill in the form fields and click Next.
Step 4. Configuring the online store options
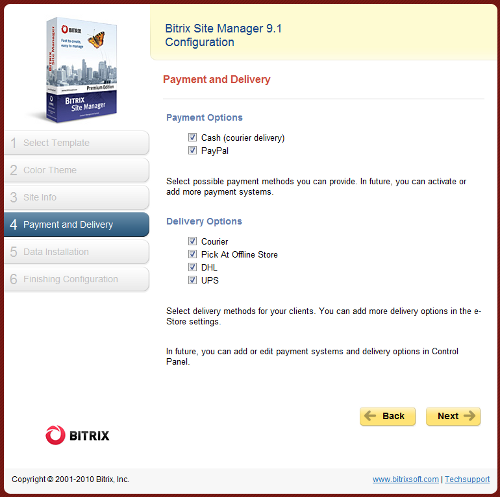
- Fill in the form fields and click Next.
Step 5. Installing and copying
At this step, the system is installing the solution. After the installation is complete, the wizard will move to the next step.
Step 6. The final step
This screen informs you that the solution installation has been completed successfully.
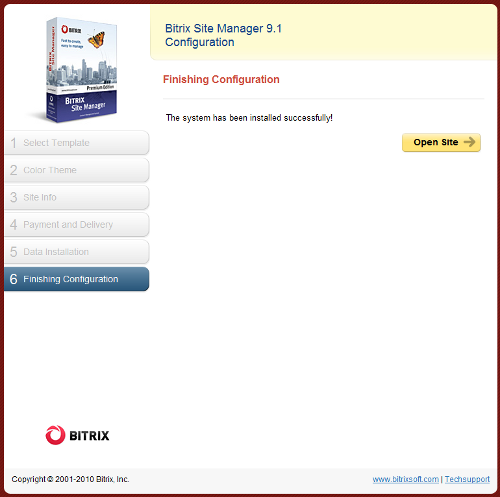
- Click Open Site to quit the wizard and open the main page of your website.
Manufacturer’s Corporate Website Wizard
Step 1. The design template
This is the first step. Select here the design template for use with the website.
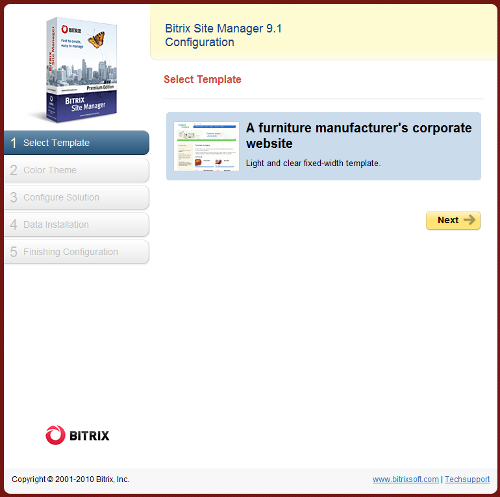
- Select the required template and click Next.
Step 2. The color theme selection
Now select the color for the previously specified template. The preview pane below the color palette shows how your site will look with the current color applied.
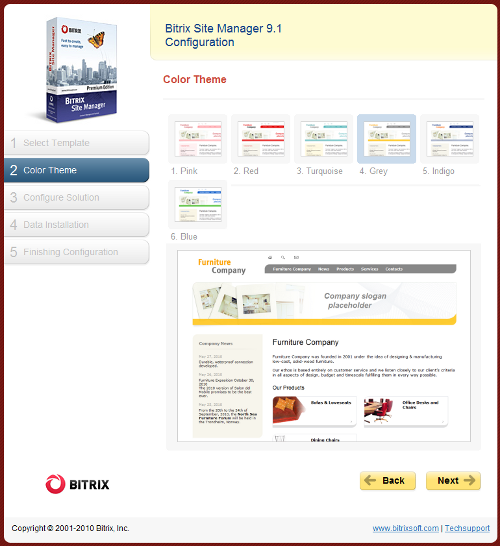
- Select the color you like most and click Next.
Step 3. Company information
Feed the wizard with the company identity information here.
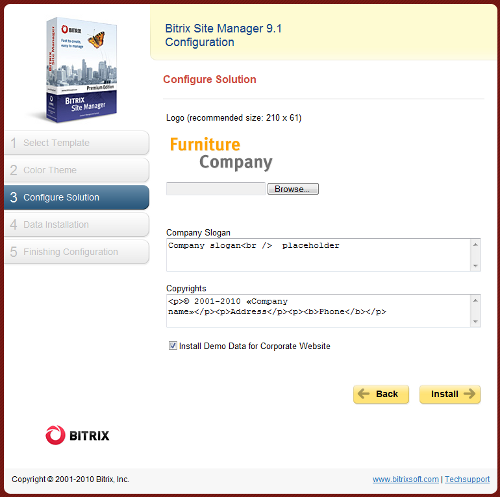
- Fill in the form fields. Do not forget to upload the logo.
- If you install the website for a specific company or project, uncheck Install Demo Data for Corporate Website.
- Click Next.
Step 4. Installing and copying
At this step, the system is installing the solution. After the installation is complete, the wizard will move to the next step.
Step 5. The final step
This screen informs you that the solution installation has been completed successfully.
- Click Open Site to quit the wizard and open the main page of your website.
Multiple installations of Bitrix Site Manager
Side-by-side Installation of Bitrix Site Manager
If you need to install and run multiple instances of Bitrix Site Manager (e.g. different editions), or any other sites using Apache web server, you can easily accomplish this using a single installation of Bitrix Web Environment.
Do the following to configure Bitrix Web Environment for multi-system usage.
Here, 81 is the port number. The port must be specified twice: with the listen and VirtualHost directives. You can specify any vacant port number on the range 1 – 65535 to create a virtual host.
After you have finished the configuration, you will have to restart Bitrix Web Environment.
You can create as many sites as needed. The only thing to do is create a site folder and add a record to httpd.conf specifying a new port number for every new site.
In the example above, a new site can be accessed at http://localhost:81. Other sites are also available at http://localhost:port_number.
Additionally the following section in httpd.conf file should be changed:
<Directory>
 Options FollowSymLinks
 AllowOverride None
</Directory>
Replace AllowOverride None with AllowOverride All.
Installation using BitrixSetup
Bitrix Site Manager can be easily installed at a remote server by uploading the installation files via the FTP or using the BitrixSetup script. In the first case, download the commercial or trial version and unpack it at a local machine. Then, use any FTP client to upload the extracted files to the root folder of your web server. Otherwise, upload the archive to the server and extract files remotely.
However, we strongly recommend that you use the special BitrixSetup script to avoid upload errors and eliminate a frequently occurring problem of different FTP and Apache user access permissions.
BitrixSetup uploads the trial or commercial version of Bitrix Site Manager to your site directly from www.bitrixsoft.com without the intermediate downloading step. Furthermore, the script can extract files from the installation package if you cannot access your site via SSH or third-party software.
- Download the script at http://www.bitrixsoft.com/download/cms/download_cms.php#tab-bxsetup-link.
- Click the Download button.
- Establish an FTP connection to your server.
- Upload the downloaded file to the root directory of your web server.
- In your browser, type http://<your_site>/bitrixsetup.php (replace <your_site> with the real site name) and press Enter. The browser will display a BitrixSetup welcome page.
Warning! Please ensure that your web server has enough permissions to create and write files.
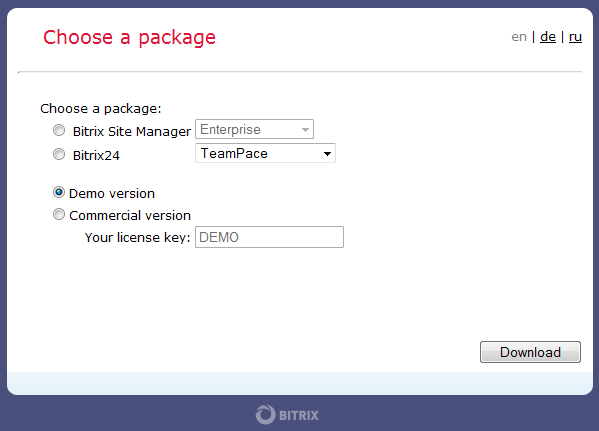
- Select the appropriate version in the License key field.
- Demo version can be installed without a license key, or with a trial key.
- Commercial version requires that you enter the license key previously obtained from Bitrix.
- In the Package edition field, select the product edition whose trial version you wish to install.
- Click Download. This will open the Downloading installation package page.
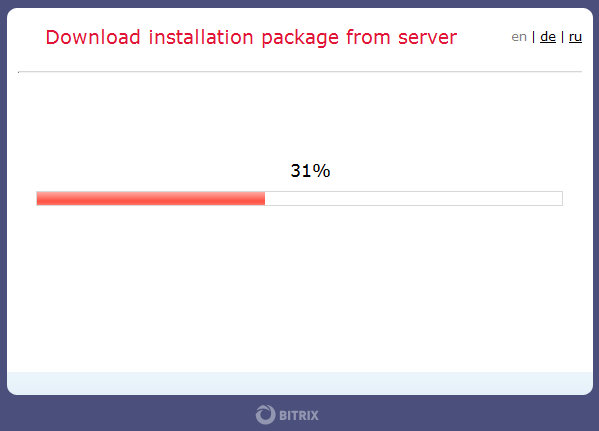
BitrixSetup will connect to the Bitrix server directly. The script will copy the installation files to the root directory of your site and unpack them if you have chosen to do so.
The Back button allows you to return to the previous section where you can alter the installation settings (e.g. product edition).
The status bar displays diagnostic messages about the current operation (e.g. downloading or extracting files). The progress bar reflects the operation flow.
After the process of loading and extraction is complete, the browser will display the installation wizard form.
Important! After installation, you must delete bitrixsetup.php from the root directory of your site. Unauthorized access to this script may damage your site.
Registration procedure
Before you start using the commercial version, you have to activate your license key. If you install the trial version, you can omit registration yet it is recommended that you proceed to enable system updates during the trial period.
Registering a commercial version
Attention: According to the license agreement, one key allows only two installations of the system: a public installation and a local (developer) installation, the latter being unavailable from the Internet. Should an error message appear about exceeding the acceptable number of product installation please contact
Helpdesk.
Registration entitles you to obtain latest system updates and receive support from the Bitrix technical support service.
Moreover, having your commercial copy registered you can access the Bitrix private forum where users and Bitrix developers communicate and discuss important issues, resolve user's problems.
To register your copy:
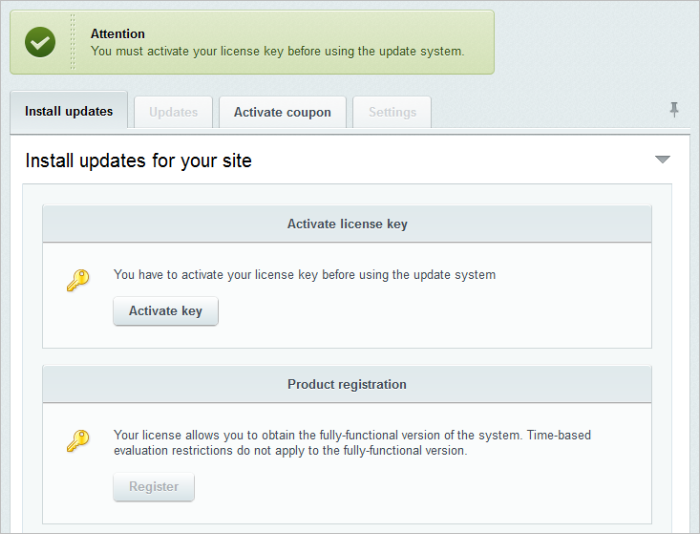
- Open Control Panel.
- Click Marketplace > Platform Update to open the system update form.
Since your copy is not registered yet, you will see the following error message:
You will see the following form:
Note: fields marked with asterisk (*) are required.
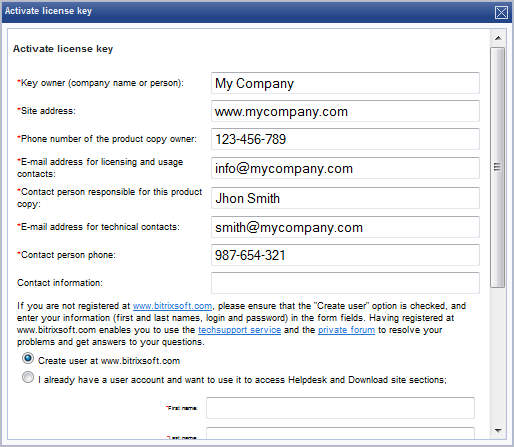
- Fill in the following fields:
- Key owner (company name or person): please indicate the name of the company which is the key owner. If a private person owns the key, please provide the name of that person here.
- Site address: please indicate the addresses of the sites that will be managed using the system with this license key.
- Phone number of the product copy owner: please indicate the contact telephone number, with the area code, of the product owner.
- E-mail address for licensing and usage contacts: please provide an email address that may be used by the employees of Bitrix, Inc. to contact you, if necessary.
- Contact person responsible for this product copy: please indicate the full name of a responsible contact person.
- E-mail address for technical contacts: please indicate the telephone number of a contact person.
- Contact person phone: here, you may provide additional contact information: email addresses, mail address, contact telephone numbers, etc.
- Contact information: here, you may provide additional contact information: email addresses, mail address, contact telephone numbers, etc.
- Create user at www.bitrix24.com: if you are not a registered user at Bitrix, Inc., please check this box. After the activation of your license key you will be registered on the company website with the registration data indicated in the boxes below. Using the indicated registration data you may contact Bitrix Help Desk and also obtain access to a forum on the company website intended for registered users only.
- I already have a user account...: please check this option if you are registered at www.bitrix24.com and indicate your login.
- Click Activate license key. The license will be activated.
- Then, you have to obtain a full version of the system without limitation on the operating time. Click Register. The product will be registered using the data provided during activation:
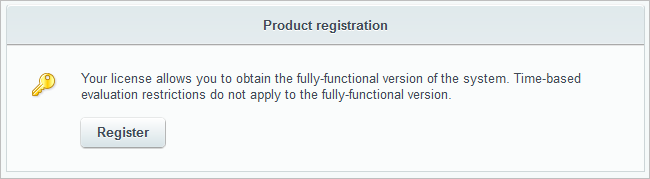
Note: If for some reason, the license key has already been activated, you will be offered to register the product in the update system.
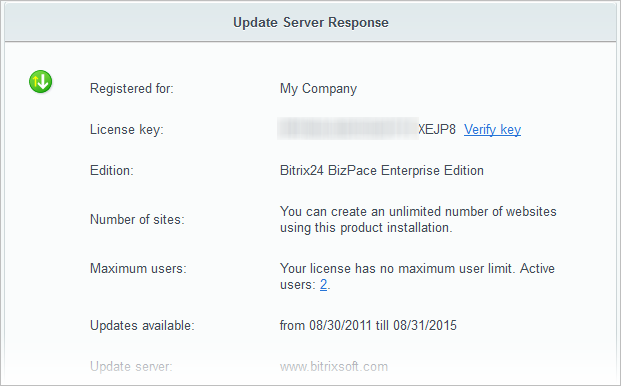
When finished, the license information will be available:
Registering a trial version (DEMO)
If you install the trial version, you will see the License key is not found message when opening the Marketplace > Platform Update page.
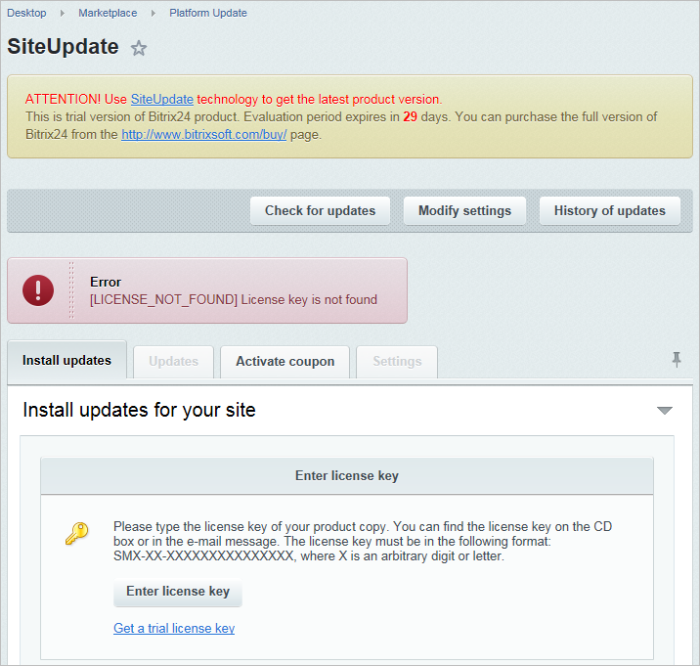
Essentially, a local trial version does not require that you obtain a license key. It only enables the system to receive updates. Obtaining a trial key requires that you register at the Bitrix web site.
Click Get a trial license key. This will open the trial registration page at the Bitrix web site.
Note: fields marked with asterisk (*) are required.
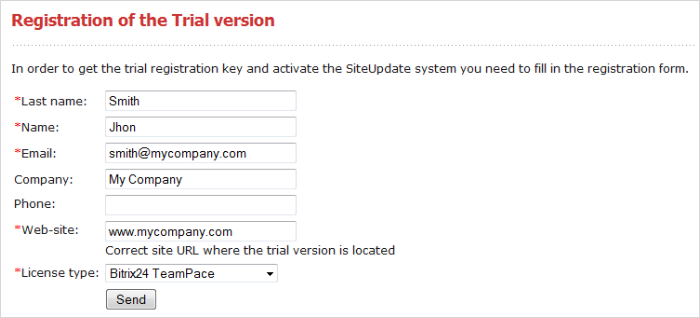
Fill in the form fields:
- Last name, Name: specify your last and first names;
- E-mail: specify your e-mail address. The trial key will be sent to this address;
- Company: the company name;
- Phone: the phone number;
- Web-site: specify the exact address of a site that runs the trial version of the system;
- License type: select the version of the product you have just installed.
Complete the form and click Send. The system will inform you that your request is now put in the submission queue.
A message containing the license key and the period of validity will be sent to the address you have previously specified in the trial registration form. You can copy and paste this key in the Control Panel form where you clicked the Get a trial license key link, or in the Kernel module settings page.
- Open Control Panel.
- Open the Kernel module settings page: Settings > System settings > Module settings.
- Open the Update System tab.
- Paste the key in the License Key field.
Now you can obtain updates during the 30-day trial period.
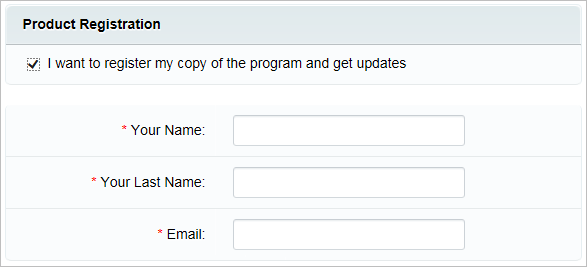
Note: If during the installation of the trial version of the product on the step
Product registration you check the option
I want to register my copy of the product and get updates and provide data for the registration of the trial version, then there will be no link to
Get a trial license key after the installation of the product. Thus, the trial version will be activated for 30 days.
Registering a trial version using a commercial key
|
Bitrix24 commercial version |
Having tried the demo version of the product you can register it and upgrade it to the commercial version.
To do so, you have to:
- Buy the license.
- Introduce your license key:
On the tab Install updates (Marketplace > Platform Update), by clicking Enter license key.
or
- On the tab Update system of the setup page Kernel module (Settings > System settings > Module settings > Kernel module) in the License key box.
- After that, the key activation process shall be launched according to the instructions given in the lesson Registering a commercial version. Upon the completion of commercial registration, the demo version limitation on the operating time will be lifted, and you will obtain the full product.
Update system
The system updates, like the technical support, are available within a year after the moment of registration of the purchased license. If you want to access these services after that period, you will have to renew your license.
Attention! For each installation of Bitrix Site Manager, a special token is stored in the Bitrix clients database. When a project is moved to another location (server), the token is replaced once the system requests the Bitrix server for updates for the first time from the new location. Since then, you cannot update the system from the old location.
Your computer must be connected to the Internet to receive updates.
Overview
The update system serves to interact between and transfer data from the update server to a client (installed product copy). The main types of interaction are:
- updating the product modules to the newest versions, which allows to obtain new functionality and fix possible bugs;
- downloading new modules that may be available according to the license terms;
- downloading language files (files with language-dependent messages translated into other languages);
- downloading the help system in different languages;
- product registration using the license key;
- downloading the Bitrix Self-hosted or Bitrix24 source code files;
- obtaining more sites by entering a coupon code.
The following terms are used with the update system.
System core - the /bitrix/modules/ folder (all paths are specified relative to the root folder unless otherwise is explicitly stated). The notion of system core often implies the database structure.
Service area - all subfolders of the /bitrix/ folder except /bitrix/modules/ (i.e. the system core) and /bitrix/updates/. The notion of service area often implies the contents of the auxiliary database tables (for example, b_event_type).
Update system folder - the /bitrix/updates/ directory. This folder is for exclusive use by the update system and cannot be used otherwise.
Public section - all folders related to a given product copy save the system core, service area and the update system folder. The notion of service area often includes the database contents except for the data of the auxiliary tables.
Product registration - results in removing the trial version restrictions from a given product installation (e.g. time restriction).
License key - a special key (a chain of symbols) which is the statement of the right to use the given product copy.
Site coupon - a special key allowing to create one more site using the given product copy.
Update server - a server that is used to send bits of update data to the update system. The update server address can be explicitly specified on the module settings page (must be www.bitrix24.com).
|
Important notes on the update system |
The update system does not alter the public section in any way. The service area may be changed in case of absolute necessity; but even so, existing files and records remain since they might have been changed by a user. The system core can be modified extremely, but the backward compatibility is guaranteed.
Important! If you have changed even one file of the system
core or the database structure manually, the automatic update may cause unpredictable results.
The update system does not collect or send any confidential data regarding the installed product
copy. The update system and the update server exchange only the technical data which is required by
the update system to function correctly (e.g. current module versions or last update dates).
The modification that the update system performs on the system core is technically complex and intricate.
If it fails or completes with errors, the dependent sites may become inoperative. Before update, you
are recommended to ensure that a back-up copies of the database, scripts of the system core and the
service area are created. It is desirable to perform update when the server load is minimum. If you
encounter update problems, you need to contact the Bitrix technical support service immediately.
|
The update system main page |
You can open the update system page by selecting Marketplace in the top left menu, and then choosing Platform Update.
If you see a message showing that your license key is invalid (or the license is not found), the
following reasons are possible:
- if you already have a license key, enter it in the appropriate field on the update system main
page (or on the Kernel module settings page: click Settings on the top toolbar and
select Kernel in the drop-down list);
- if you do not have a license key, you can send a request for a trial key. To do so, click the
corresponding link on the update system main page. Enter the obtained key in the appropriate
field on the update system main page, or on the Kernel module settings page.
If the update system main page displays a message reading that a license key is not activated,
you have to fill in all the fields of the activation form. After you complete and send the form, the
license key will become activated.
The update system main page may tell that a new version of the update system is available, you
must install it first. You will not be able to proceed with other updates until you install a new
version of the update system.
If you have already provided a valid license key, and the update system is up-to-date, the update
system main page will offer the following actions which are available according to your license
terms.
- Recommended updates - this action is available if the update server can offer
new versions of modules stipulated by terms of your license.
- Optional updates - available if the update server can offer new
versions of files containing language-dependent messages.
- Register your copy - displayed if your copy is not registered but the current license
permits registration. You must register your product copy immediately after you have received
the license key, since it will be difficult to restore the site up-state after the trial period
expiration. The product registration is a single step operation - all you have to do is click
the link.
- Download source code - available if the source codes of your product copy are enciphered
but the current license permits obtaining full open source codes. Before you attempt to download
them, you must ensure that all modules are updated to the latest version (i.e. no module updates
should be available). Source code download is a one-click operation. Please note that download
may take some time if your connection is slow, or the update server load is high.
- Add extra sites - this action is always available. If you have a coupon for extra
sites, you can apply it any time.
- History of updates - displays the installation journal containing information about
20 recently installed updates including status and error messages.
Update via proxy server
You can configure the update system to communicate via proxy server on the Kernel module settings page (the Update system tab), Settings > System settings > Module settings, select Kernel in the drop-down list:
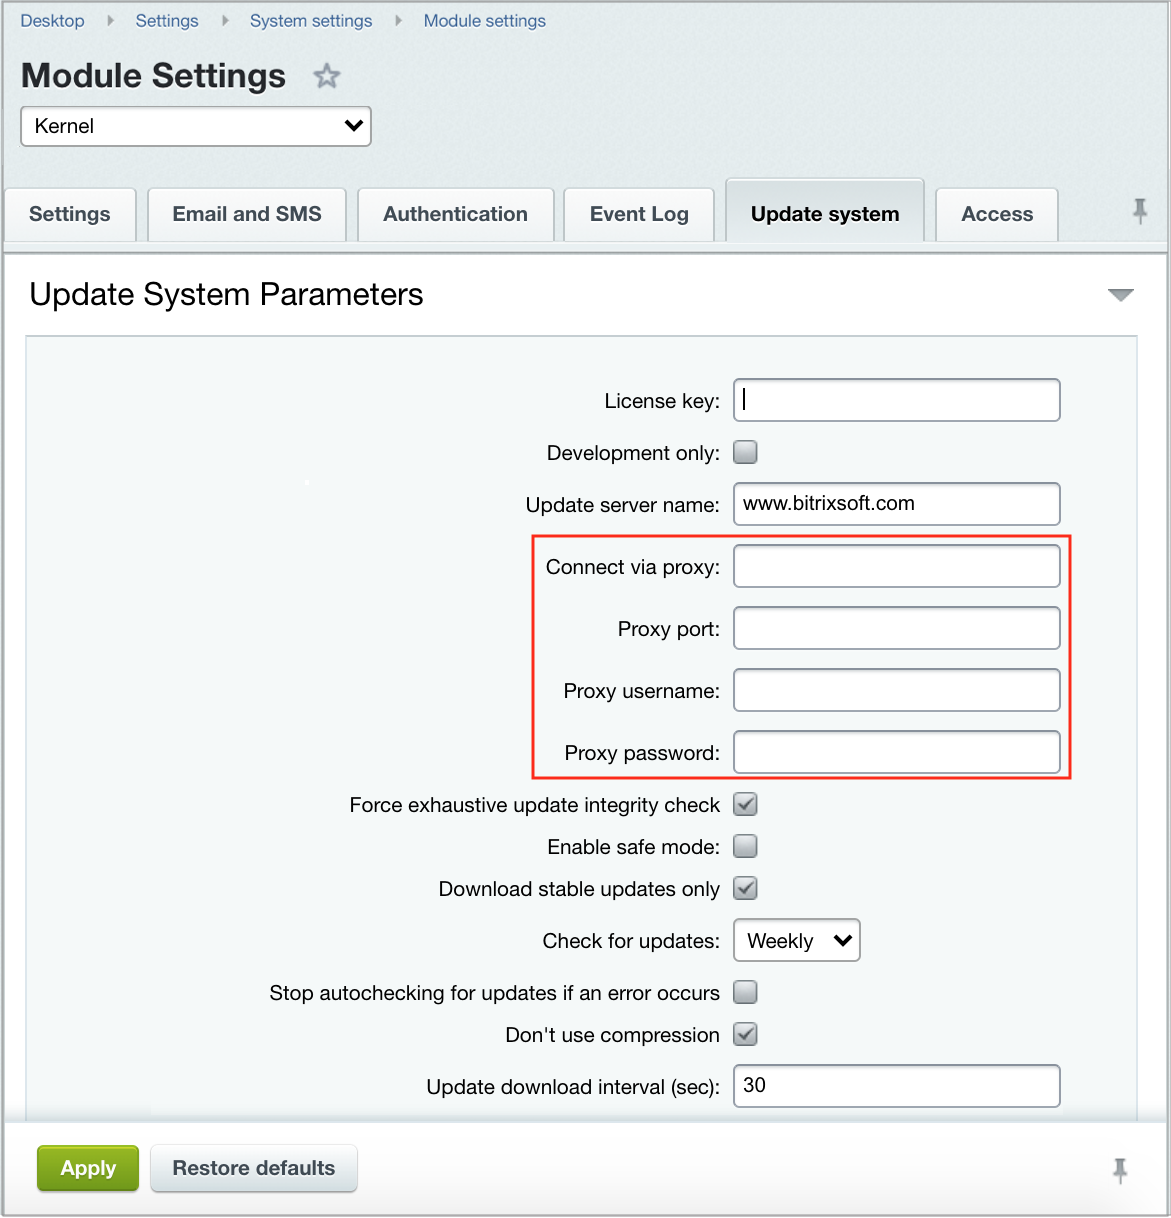
Note the following options.
- Force exhaustive update integrity check. Enabling this option makes copying the update
files more safe. This function may slow down the update process but allows to get full
information about each new file copied to your system.
- Download only stable updates. Some new modules and/or updates are available at
beta testing stage. Changing this option is equivalent to clicking the Allow beta
versions / Allow only stable versions button at the Marketplace > Platform Update > Settings.
- Check for updates. You can completely disable autochecking if required. However,
it is not recommended.
- Stop autochecking for updates if an error occurs. If checked, this option tells the update system
to stop any current operation whenever it encounters any error.
After you fill all the required fields and save settings, the update will be performed via the specified proxy server.
Update system via proxy operates based on the following principles:
- All data exchange with server is performed using HTTP protocol.
- Responses are compressed via gzip (when supported by your PHP).
- Licence key is passed in an encrypted format (specifically, passes the hash key).
- Sends licence associated data: number of sites, number of users, set of modules and module versions.
- Sends PHP versions and database information as well as site encoding data.
- Update system does not collect ant user data.
Additional security measures
When required, network administrator can establish additional security measures:
- Connect proxy server to the network only during update download time.
- Configure proxy for connecting to site with updates using SSL.
- Enables full traffic logging on server.
- Block access from proxy to all URLs, except for www.bitrix24.com.
Downloading Updates
The update system performs a technically sophisticated modification of the product kernel. If this modification is made improperly, the sites working on that kernel may become inoperative. Should you experience any problems with updates, you have to contact our Help Desk team immediately.
Important: Before proceeding with updates, please make sure you have a backup of both the database and the product kernel and service area scripts. The update procedure should be carried out at a time that the server load is minimal.
Please follow the steps below to download system module updates:
- Using the Notifications menu located on the administrative panel above, go to the page Site Update (Marketplace > Platform Update):

- Click Install recommended updates to install all the system module updates.
If you choose not to install all the updates at once, please check only the updates you wish to install on the tab Updates and click Install updates.
If necessary, the update process may be stopped by clicking the Stop button. In this case, the system will not interrupt the update immediately and fully but will complete the downloading of the module that was being updated when the Stop button was clicked. Should any failure occur during installation, the system will notify you about it, and the process will just have to be repeated. If you update modules one by one rather than all at once, then after you have installed each “portion” of the modules you will have to click Check for updates and then install the chosen modules.
Important: If any related module updates are available, either all related modules must be chosen for an update or none of them. The elimination of one related module from the list of updates will result in the automatic elimination of all others.
Attention: Please read the module update descriptions carefully. They contain important information about update installation; they also may contain warnings about possible problems in operation.
Downloading Interface language Files
|
You have an option to install additional user interface languages. |
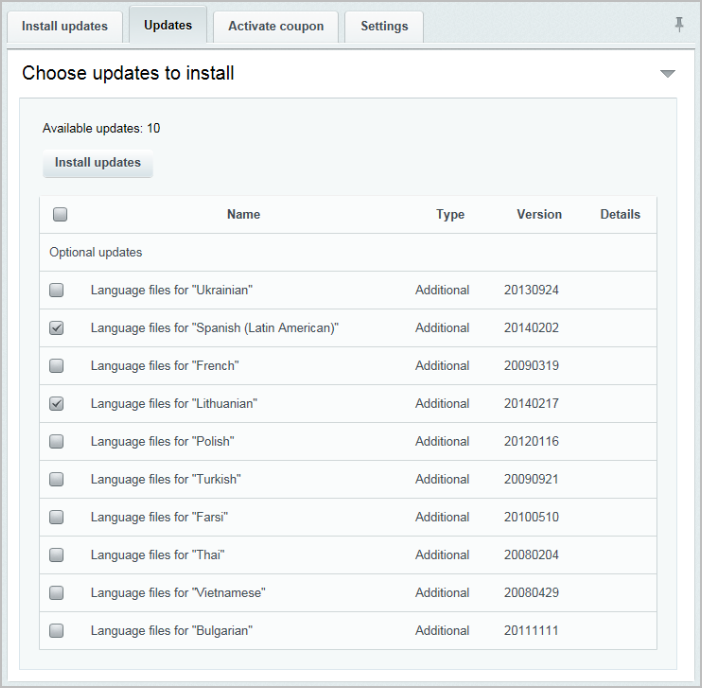
- Click the Updates tab;
- Select the required languages in the optional updates group;
- Click Install Updates.
Adding more sites
The Bitrix Site Manager features creation of unlimited number of sites with the use of a
single copy (license) of the product, keeping a single installation of the system kernel and
database on the server. Maximum number of sites is limited only by the license terms. If you want to
create more sites over the current limit, you have to purchase the appropriate license.
Buying licenses for extra sites implies that you are given a respective number of coupons (one
coupon for one license). Extra licenses and coupons match the product edition. For example, to
create one more site with the Professional MySQL edition, you have to purchase a license
(coupon) for an extra site for the Professional MySQL edition.
After you have obtained a coupon, enter it and click the Activate coupon button.
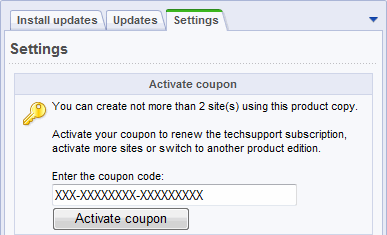
If the coupon is valid (i.e. it matches the current product edition and was not activated
before), the maximum number of sites for this product copy will be increased by 1.
Configuring IIS for use with the system
IIS 7.0, a new web publication service, comes as a part of Microsoft Windows Server 2008. The key difference of this version, as far as work with Bitrix Framework is concerned, is the use of FastCGI, a request queue, and also the abandonment of nginx. Installation and setup of Bitrix, Inc. products on servers with Windows OS has become much simpler.
There are no significant differences in the installation of the Bitrix Framework onto IIS comparing with the installation on Apache. Only a general sequence of actions changes:
Attention: Currently, the Document library (webdav) module works improperly on web servers controlled by IIS 7.x. The architecture of such web servers in its basic variant does not permit organizing the work of PHP scripts according to the WebDav protocol – the server picks up all the requests and they fail to go through to the Bitrix24 system.
PHP Installation and Setup
|
In order to install PHP, first of all the PHP 5 installation package shall be downloaded from http://windows.php.net/download/ (Microsoft recommends a Non-thread-safe (NTS) installation package to be used). |
Launch the installation package and follow the instructions of the Setup Wizard.
First Step (Installation Start)
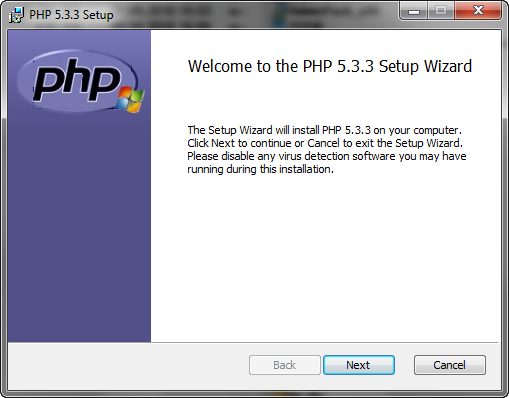
The first window of the Wizard informs about the commencement of the installation and provides information about the product.
Click Next.
Second Step of the Wizard (License Agreement)
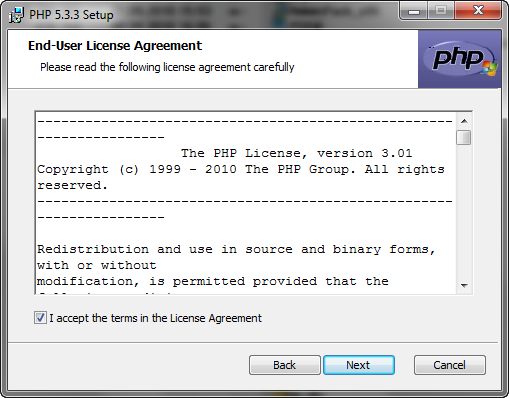
Read the license agreement carefully. If you agree with its terms and conditions, check the box I accept the terms in the License Agreement.
To proceed with the installation please click Next.
Third Step of the Wizard (Directory Selection)
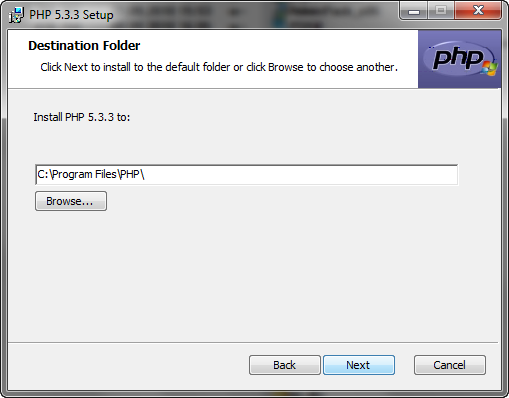
Please choose the directory to install the software and click Next.
Fourth Step of Installation (Web Server Selection)
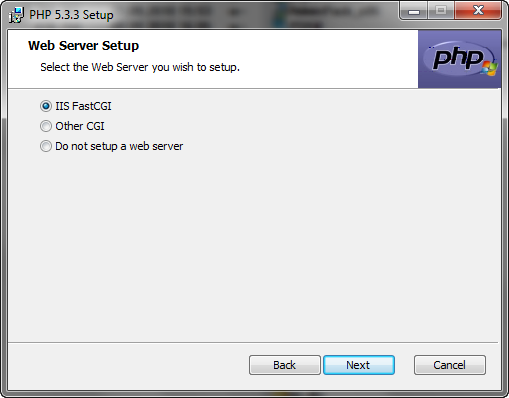
Please select IIS FastCGI as the installation web server and click Next to proceed with the installation.
Fifth Step of the Wizard (Component Selection)
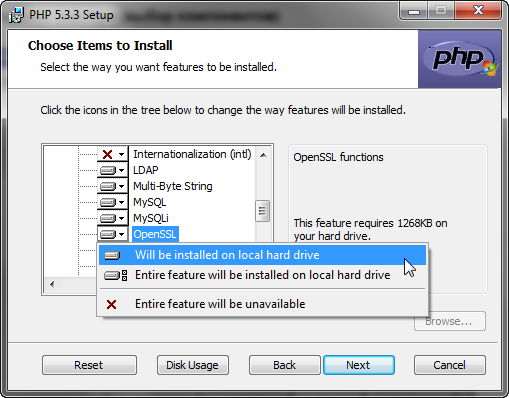
Include the necessary Extensions (PHP add-ins) to be installed:
- GD2;
- LDAP (in case you will use LDAP authorization);
- Multi-Byte String (this extension is required if product is to be used in the UTF-8 encoding);
- MySQL;
- OpenSSL;
- zip.
Note: said extensions may be manually added later as extension=name_of_extension_file.dll in the file php.ini in the folder where PHP was installed. For example: extension=php_win32scheduler.dll.
To continue the installation, please click Next.
Sixth Step of the Wizard (Installation)
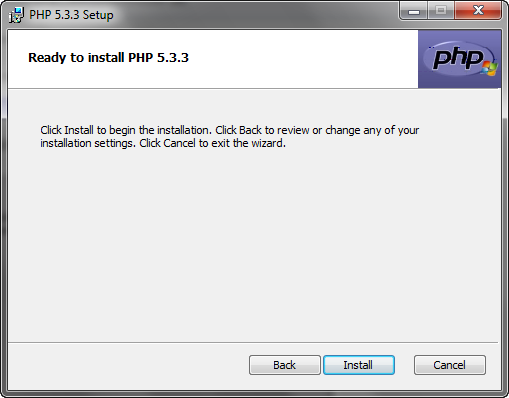
Click Install to start the installation process:
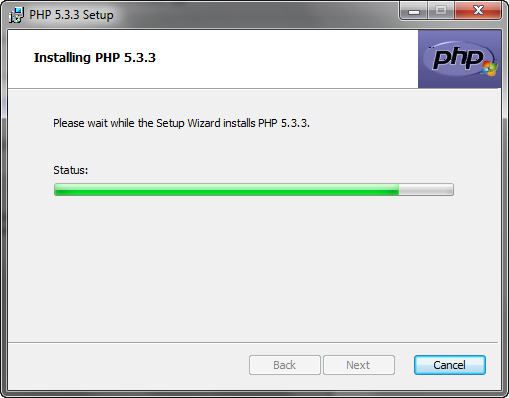
Please wait while the Setup Wizard copies and installs files.
Seventh Step of the Wizard (Completion of Installation)
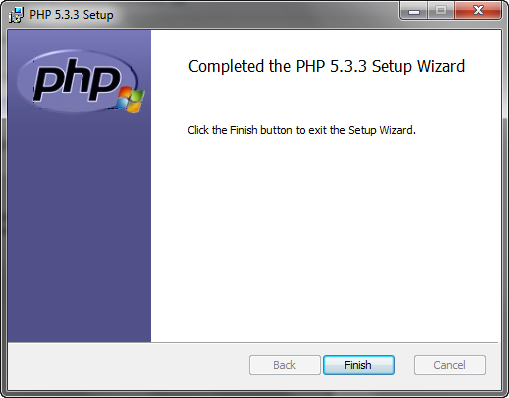
PHP has been installed successfully. Please click Finish to exit the Wizard.
PHP Setup
PHP must be setup immediately after its installation:
- Go to a folder where PHP was installed using any file manager.
- Open php.ini for editing.
- Please set the following parameters:
fastcgi.impersonate = 1
cgi.fix_pathinfo = 1
cgi.force_redirect = 0
short_open_tag = On
extension_dir = "C:\<path_to_folder>\PHP\ext"
upload_tmp_dir="C:\inetpub\temp"
session.save_path="C:\inetpub\temp"
allow_call_time_pass_reference = On
display_errors = On
Note: In Bitrix24 Self-hosted <? is used instead of <?php.
Note: inetpub means a location where sites will be placed. This folder exists by default.
Please do the following to check the PHP setup:
- Go to Start > Run;
- Open command prompt window using the command
cmd;
- Once in the command prompt window, go to a folder with PHP using the following command:
cd C:\<path_to_folder>\PHP\;
- Give the command info to php:
php –info.
If everything was done properly, the same configuration file will be offered (php.ini).
FastCGI Module Setup
In order to improve performance, php files must be processed with the FastCGI module. Please do the following:
Note: if you set 1 as the parameter of fastcgi.logging in the php.ini file, errors will be output to the log and not to the monitor. It increases the security of PHP.
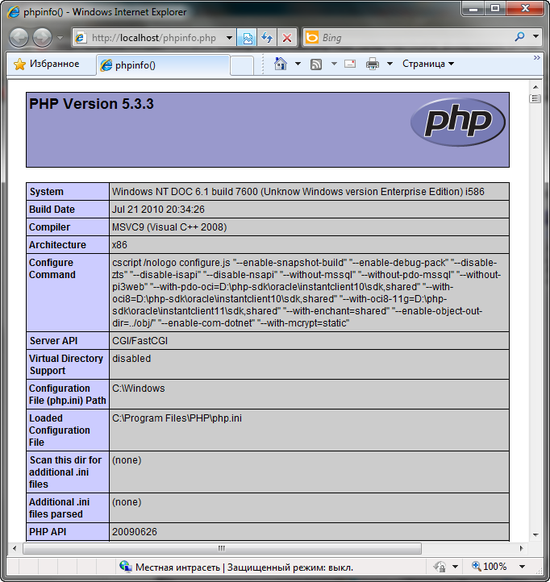
Checking PHP
PHP parameters may be checked as follows:
- In the folder
C:/inetpub/wwwroot create a file phpinfo.php containing the line:
<? phpinfo(); ?>
- Type the following in the browser address bar: http://<your_portal>/phpinfo.php.
- If setup is done correctly, opens a standard page containing information about PHP:
Preparatory Operations
Preparation of the Installation Package
Download the product installation package as a zip-archive.
Create a folder for the extraction of the installation package in the folder C:\Inetpub\wwwroot\ (or in another folder you determine as a root folder of the web server). For example: C:\Inetpub\wwwroot\bitrixtest and extract the contents of the archive to this folder.
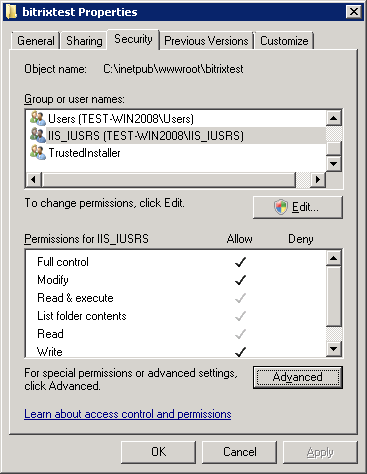
Open the Properties form of the folder C:\Inetpub\wwwroot\bitrixtest and add the Modify rights for the group on behalf of which PHP process is launched (in our case, it is IUSRS) in the tab Security.
Adding a Website
Using IIS manager on the Connections panel go to Sites and eliminate Default Web Site.
Note: you may keep the default website, but in this case you will have to change the port settings for one of the sites during the setup of a new site.
Right click to call the context menu and click Add Web Site
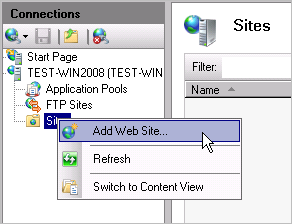
The window for adding a new site will open:
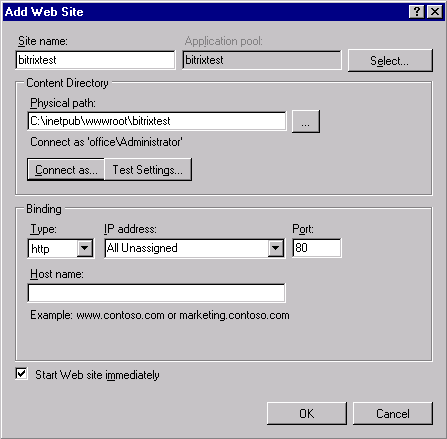
In the Site name box please specify the host name (in our example: bitrixtest), and in the Physical path box, enter the path to the folder containing the installation package.
Click Test Setting…. The system will verify the connection parameters and display a message indicating the errors found, if any.
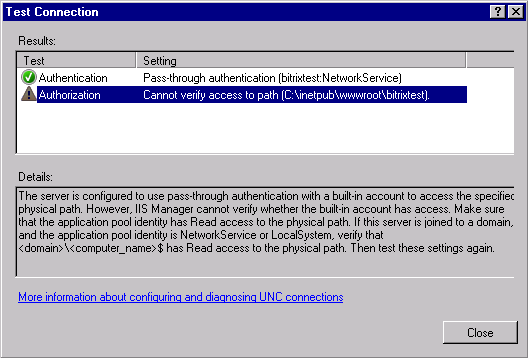
As a rule, authorization errors occur due to the user’s insufficient access rights to perform the operation of verifying folder access rights. Please do the following to correct this error:
Close the Test Connection window. Click Connect as…, and the following window will open:
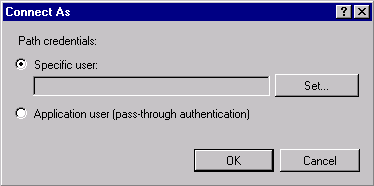
Please check the box Specific User and press Set…. Enter the login and password in the window that opens. Click OK.
Verify the connection parameters once again using the Test Setting… button. If the verification is successful, the system will show the following message:

Configuration of Limits
Now, a time-out must be set. For this, do the following:
Please activate bitrixtest in IIS Manager on the Connection panel. The Action panel will be refreshed. Choose Limits in the Configure group.

The limit setting form will open.
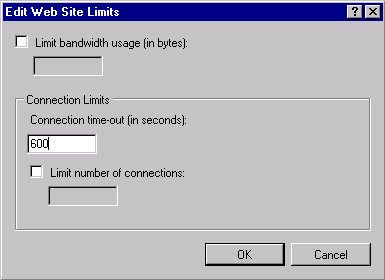
In the box Connection time-out (in seconds) type 600. This command establishes an intentionally long timeout for the web server while it waits for the script to complete its operation – 600 seconds.
Open the file php.ini for editing and specify the following values: max_execution_time = 240 and max_input_time = 240.
Note: the indicated values may be user-defined depending on your hosting parameters.
mimetype setup for files without extension
Additional IIS 7.5 settings for mimetype is required for files without extension, otherwise video player won't be working in the installed product. To avoid this, add '.' extension with type video/x-flv in mime types inside server settings.
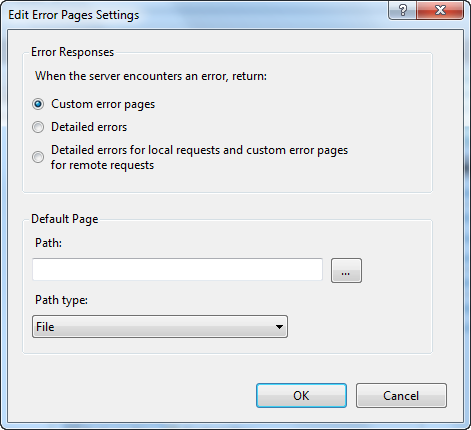
Configuring The Error 404 and SEF URL’s
SEF URL’s are implemented by handling a 404 error.
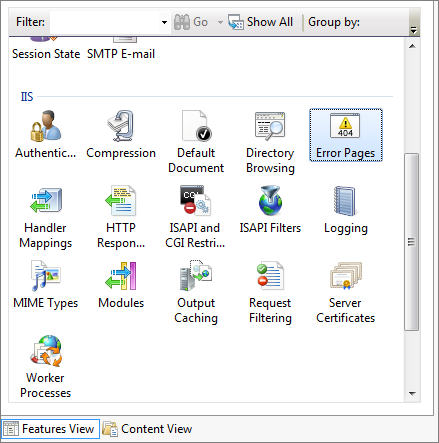
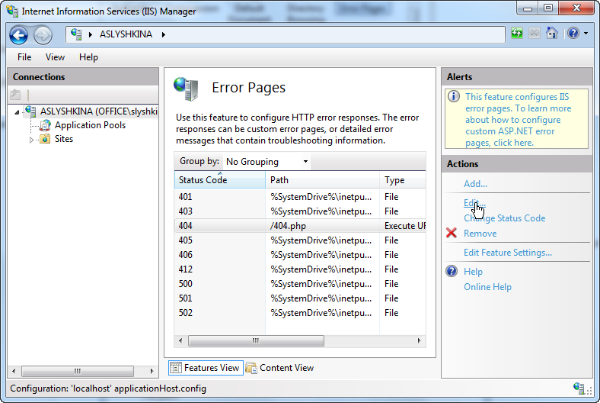
- Select bitrix in Connections of IIS Manager. Activate Error Pages in IIS group.
- Right-click the row containing the error 404 to bring up the error properties form.
- Click Edit
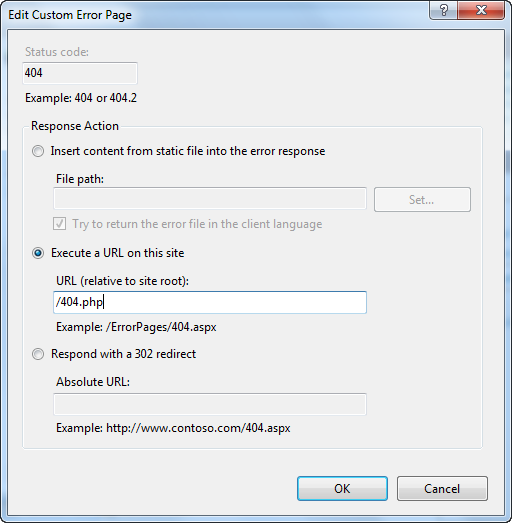
- Select Execute a URL on this site. Type the error 404 script path in URL: /404.php. This file is created at the product installation time. Click OK.
- Click the Edit Feature Settings…
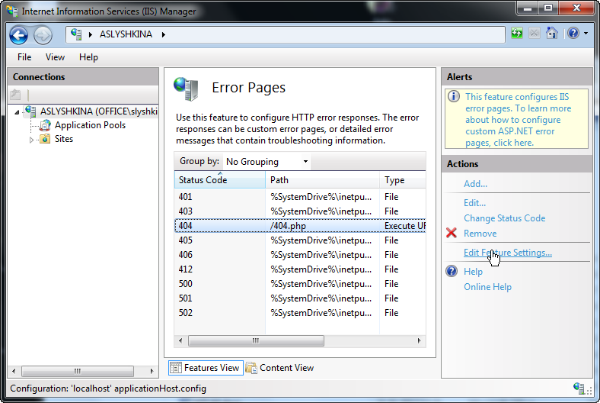
- Check the Custom error pages option. Click OK.
Backup and restoration tools
Using the back-up and restoration built-in tools
A special backup feature may be used to move the site to a remote server (or from a remote server to a local computer).
Please note: The backup feature may only be used for an MySQL database.
Before moving the site from a local computer to a remote hosting or from one remote hosting to another using the incorporated backup function and special script restore.php, it is necessary to do the following:
- Verify that:
- The remote hosting meets the minimal technical specifications of the product;
- The user under which Apache (PHP) operates has the rights of at least (0644 – for files and 0744 for folders) for all files in the site root.
- If an active license is available, it is strongly recommended that the existing product copy be updated to the latest version.
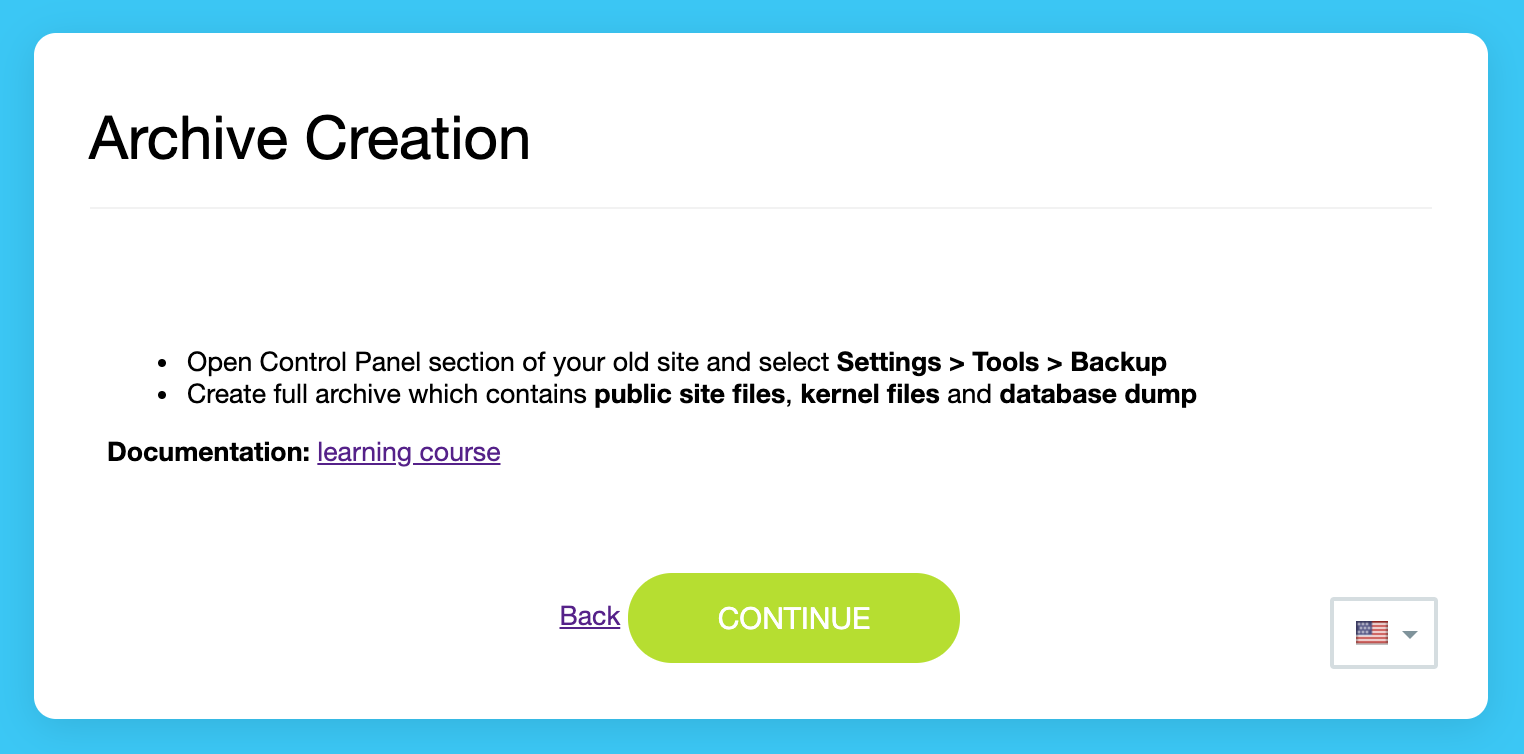
The next step is the creation of a site archive. The archive may be created on the Backup page (Settings > Tools > Backup > Create Backup).
After that, you may proceed with the actual site moving. Please follow the steps indicated below:
- Download the file containing the archive to the site root directory on a remote server or on a local computer depending on where you moving the site to and from. If the source site is available on the Internet, it is recommended for the archive to be downloaded from a remote server. In this case, all parts of the archive are downloaded automatically. In case of moving from a local computer to a hosting all parts have to be brought together using restore.php.
Important: if the archive file contains complete site copy (both the kernel and a public part), there is no need to install Bitrix system on the server.
- Download the restore.php script available through the link provided in the reference at the bottom of the page with backup list. Upload the script to the site root on the server.
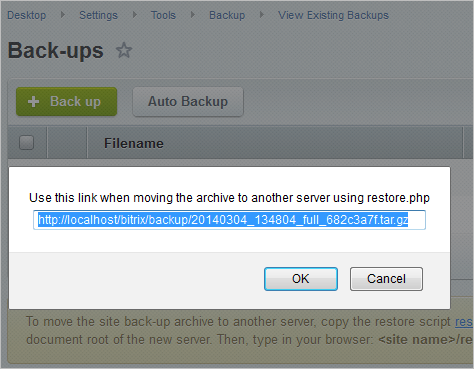
Note: This link contains a script that corresponds to your installation package version. The latest version of the script is available at
bitrix24.com.
- Please type in the address bar: http://your_site/restore.php. Press Continue.
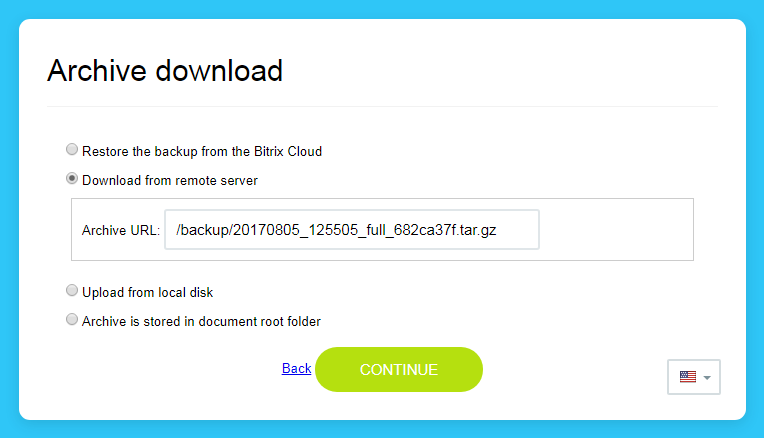
- Please choose the required option of the archive file location in the dialog window that opens and click Continue.
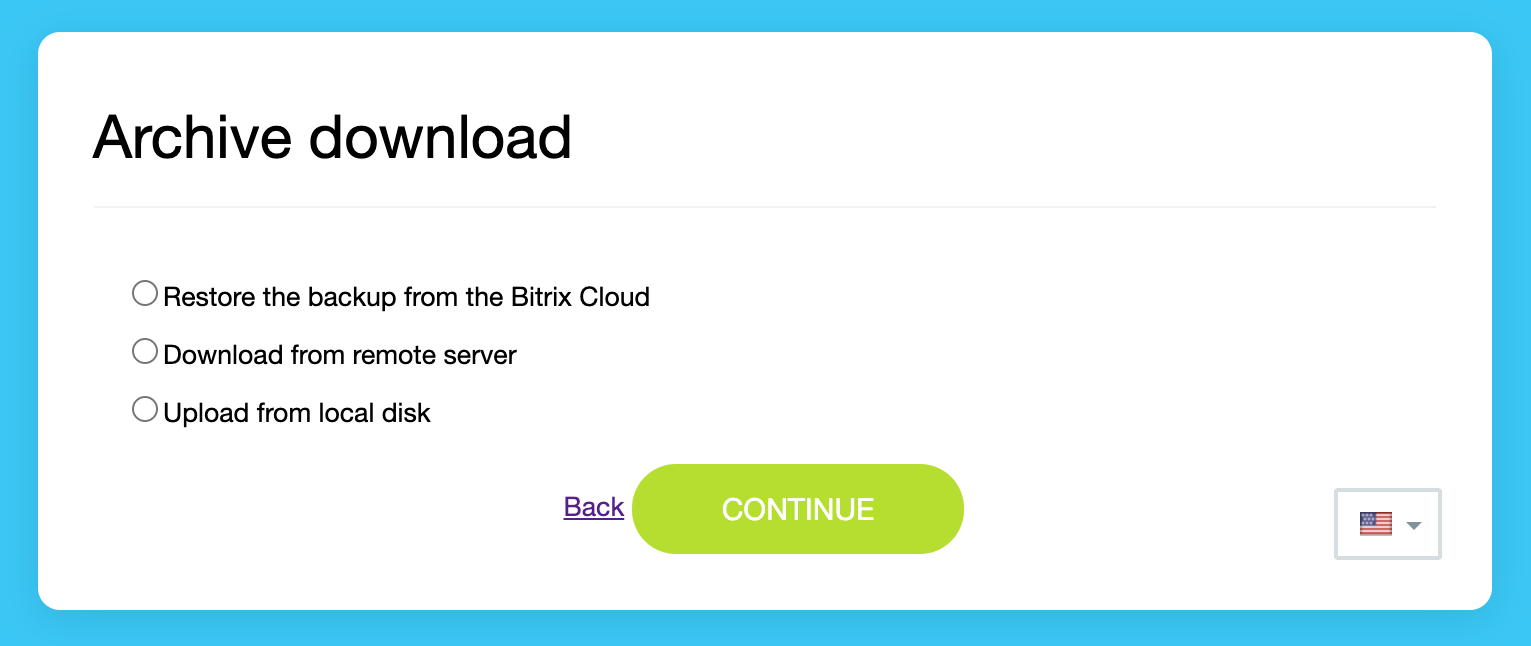
Note: The options Archive is stored in document root folder and Archive is already extracted will appear when the archive has been copied or extracted to the site root, accordingly.
Note: If the site archive was located in the client’s cloud, please choose the option
Download from remote server and indicate the path to the archive:
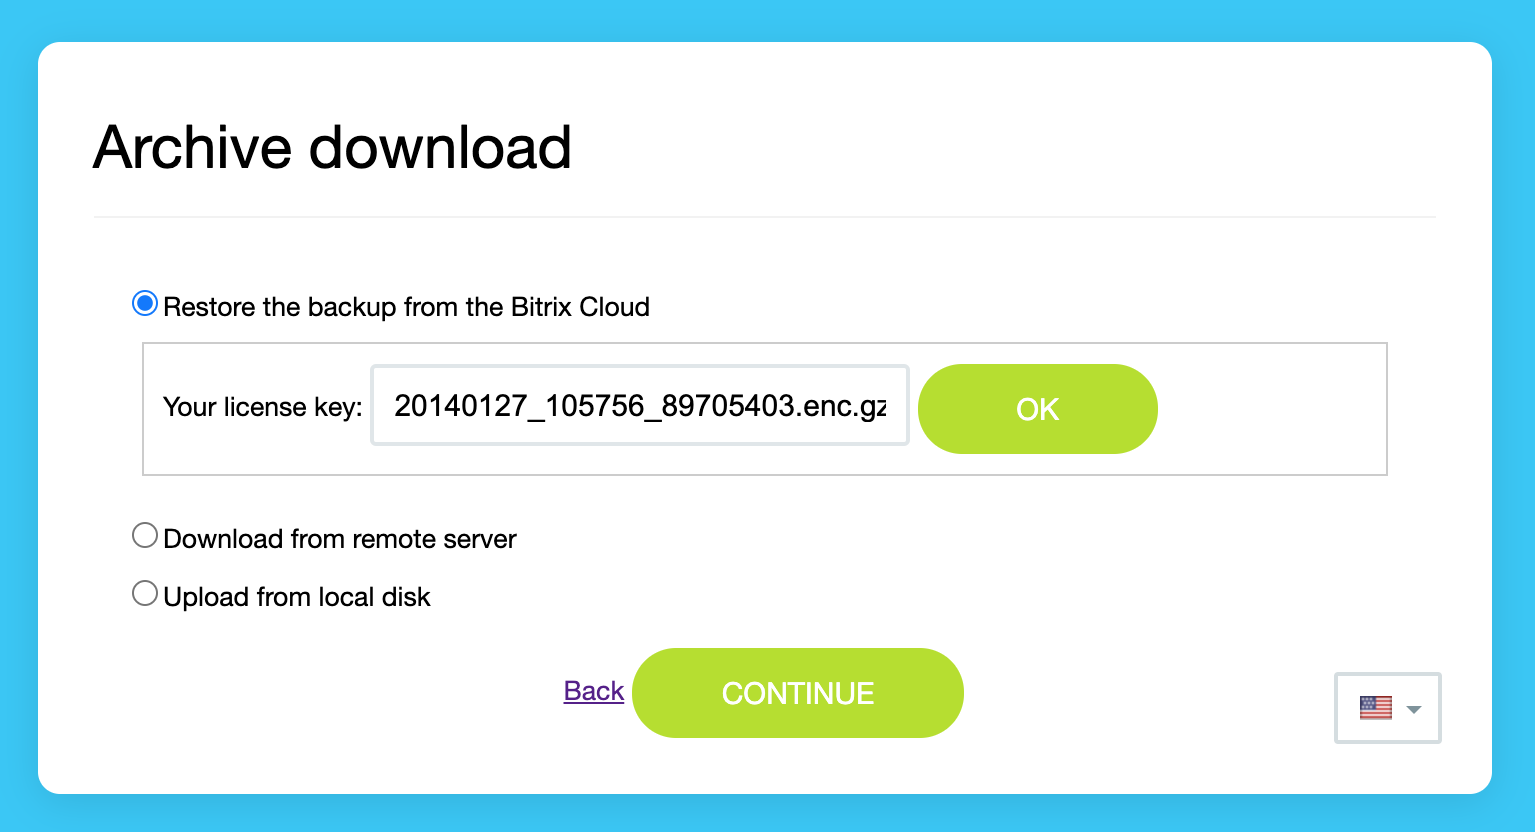
If the site archive was located in
Bitrix Cloud, please select the option
Restore the backup from Bitrix Cloud and enter your active license key:
- After the archive is downloaded, you will be requested to enter a password (if the archive was protected at the backup stage) in order to extract the files.
- After the files are extracted, the database connection settings must be established if a database dump was created during the preparation of the backup copy.
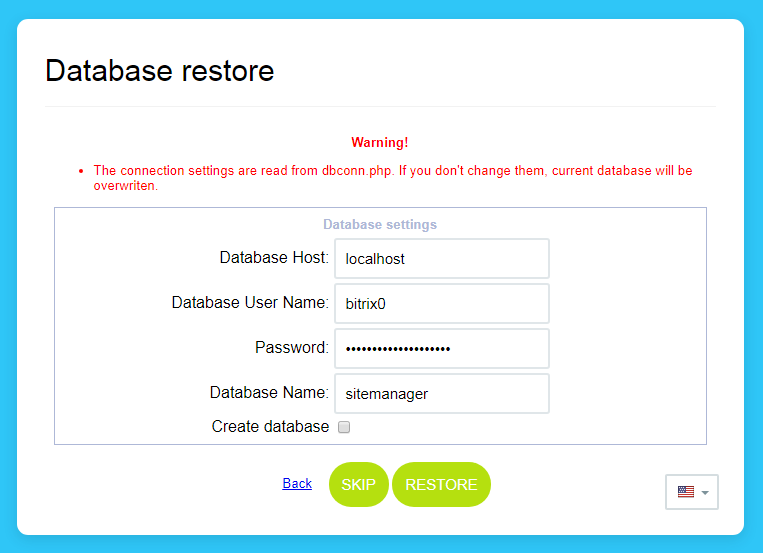
Please indicate the required settings, click Restore and wait for the script to complete its operation.
- Once extraction is successfully completed, click Delete archive and temporary scripts in the opened dialog box:
The following files will be deleted to prevent damage to the site or information leak:
- /restore.php
- /backup file (file with an extension of .tar.gz or .enc)
- /bitrix/backup/database dump (file with the extension .sql).
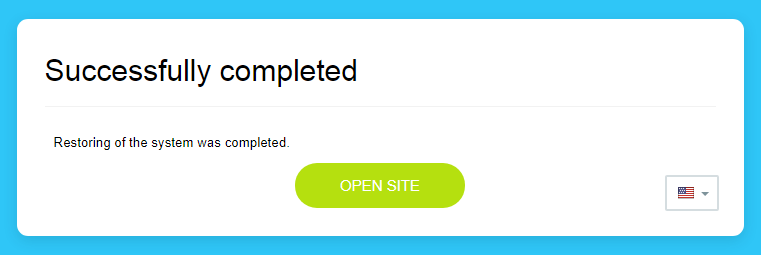
After that, you will be automatically redirected to a public section of the recovered site.
Special considerations:
- If IIS is used as a web server, please be advised that the web.config file is also archived. You have to delete the extracted web.config file. Your server will create a new customized file.
- After migration, numerical control may become inoperable. In this case, .htaccess.restore has to be renamed .htaccess.
Possible Errors during Migration
|
Site Migration Using Improper Means |
The migration of site to hosting should be performed using backup/restore tools built in Bitrix Framework.
Although a site on Bitrix24 Self-hosted is a set of files and a database, copying of files directly to a remote server in most cases will not be a proper solution. Due to a big number of small files, such copying may take several hours. In addition, the use of standard features enables the avoidance of possible future problems with access rights to the site files.
Among the most common problems are the following:
- Web server cannot write to a folder that it needs to or delete temporary files. Possible consequences:
- Product update is impossible;
- Site cannot be edited using a web interface;
- Caching component works improperly;
- And other problems.
Note: For example, the system may even create temporary files, but hosting rights do not allow you to delete them. As a result, after a day of work, the account gets blocked because the disc quota is exceeded.
In this case, the simplest solution will be establishing the rights to all files and folders 777 (for Unix platform) or provide PHP with the write right for these files in any other way.
- There is no possibility to edit the files created using a web interface through ftp/ssh files. In this case, it will be hard for many web developers to debug the site.
One of the simple but not always effective solutions is to determine settings in the file dbconn.php permitting everyone to edit the files created through Bitrix Framework.
define("BX_FILE_PERMISSIONS", 0666);
define("BX_DIR_PERMISSIONS", 0777);
However, you will have to periodically change the rights manually for the files created through ftp/ssh; or, if hosting supports it, to establish the umask setting.
The following problems may occur during the migration of the site to hosting due to the PHP settings:
- Problems with file owner inconsistency: on a number of hosting PHP works on behalf of one user, but ftp/ssh access is granted to another. In this case, the files created by one method may be unavailable for modification or even cause a runtime error due to a breach of the security settings.
- Problems with security settings: there are different options to connect PHP, and some of these options establish severe restrictions on the file owner and file rights. In this case, code 500 errors may occur, and the only way for you to solve the problem is to refer to web server error log.
Example: If PHP is connected as CGI, hosting often requires that the file owner and file rights were consistent. If your account is not the file owner or if the file rights permit writing to all users, PHP will generate an error. In this case, the correct rights to files and folders and also the correct settings in dbconn.php should be established.
- Limits to the script execution time or other allocated resources. In this case, the site may act strange –sometimes it may open, and sometimes not and then show white screen.
Example: Various scripts of data import and export are the most sensitive to memory size and execution time. If you experience errors, check hosting resource availability. If the resources are insufficient, change the hoster.
- Problems with using utf-8 in hosting. Make sure that it is supported (mbstring library and a possibility to set the parameter pgp: mbstring.func_overload=2 must be available).
- Other problems that are specific for your hoster. To eliminate them, we recommend that the site operation be tested beforehand in the hosting of your choice and that the contact details of the provider’s support team be available.
Sometimes hosting does not permit sending email without authorization. In this case, you will have to redefine email sending function in accordance with the product documentation in order to send emails from the site.
|
Extracted Site Is Unavailable |
After extracting a backup copy, the only thing shown on the site is the authorization form. Possible reasons and solutions:
- Incorrect value of the box Path to the web server root folder of this site in the site settings (Settings > System settings > Websites > Websites).
Solution: change the value in the box Path to the web server root folder of this site in the site settings to a relevant path in a new hosting by clicking insert current. Leave the box empty if all the sites work on the same web server.
- If migration was carried out by a simple copying of files (FTP/SSH), the file .access.php may have been left uncopied. This file contains user groups’ access rights to the site. If this file is absent, all users have the right Forbidden.
Solution 1: Put the file .access.php with the contents to the site root:
<? $PERM["/"]["*"]="R"; ?>
or
Solution 2: Establish the right Read for the All users (with non-authorized users) group using product’s file manager in the properties of the site root folder in the Access tab.
When looking through WinRar, the archive created by the standard backup system, it becomes evident that the archive contains far fewer files than there are files on the site.
Reason: the point is that the tar format has several dialects. The system zips archive in the format GNU tar the way tar does it in Linux by default. WinRar understands tar, but does not support this dialect in full.
Backup archive must be extracted by the system restore.php downloaded from the backup copy page. If in this case some files are also missed, the problem should be solved through the helpdesk service.
ERROR 1062 (23000)
When extracting a backup copy, the following error occurs: ERROR 1062 (23000) at line 1247: Duplicate entry '2-?' for key 2.
Reason: the error occurs if the encoding of the archive is different from the encoding used on the new database server.
This error may be bypassed or eliminated by way of one of the following ways:
Errors in .htaссess
Some errors (for example, error 404 when going to a page with detailed news information) during site migration occur because the file .htaссess is getting renamed by adding “_” (low line). In order to solve this problem, just check the file name and correct it if the error is detected.
If IIS is Used as a Web Server
In this case, the file web.config is also archived causing problems with extraction. After extraction, restore.php will not work.
Solution: eliminate the extracted file web.config. The server will create a new customized file.
Uninstalling Bitrix Site Manager
You can uninstall the Bitrix Site Manager by selecting one of the commands:
- Menu Start -> Settings -> Control panel -> Add Remove Programs
or
- Menu Start -> Programs -> Bitrix Web Environment -> Uninstall.
Removing Bitrix Site Manager from a remote server deletes the database files as well as all files and folders from the root folder of your web server.
Check that …/www folder was removed from the Bitrix Environment folder as well.
Server configuration errors
Requisite access rights at server
|
Access permissions configuration |
You (or your hosting service) can configure access permissions on the remote server as desired, but the result must be the only one: scripts should be able to access files for both reading and writing, which means that a primary "user" under which the Apache server runs, must be
able to access files with these modes.
At the same time, if a shared hosting is the case, other users must not be able to read or write your files via their scripts. Your "user" should be able to rewrite files via the FTP as well as modify uploaded files from within scripts.
The problem is that each hosting provider has their own security policy and preferences.
Some hosting providers launch the server process under user nobody:group by default. The files that a hosting client stores on a server, should be accessible by the Apache. It means that they has the attribute read for all set, or a user (file owner) and server must belong to the same group. In the latter case, files must be accessible by the group members for reading (FTP servers assign this kind of permission).
This approach hits hard the security because if all users belong to the same group, they can read each other's files. Say, a user opened a page in the browser which runs a CGI script. As the script in fact is executed by the Apache server which runs under nobody, the script will run with permissions assigned to this user.
The Bitrix24 remains fully functional with any access permission that you have specified at the installation time.
To allow the Bitrix24 work correctly with your CHMOD, you have to set the following constants in /bitrix/php_interface/dbconn.php:
define("BX_FILE_PERMISSIONS", 0644);
define("BX_DIR_PERMISSIONS", 0755);
These are the standard settings of rights used on the majority of hosting types. Should any problems occur, please contact the support service of your hosting.
You can set the access permission level manually by using CHMOD in console.
The following command sets the access permission level for both files and folders:
chmod -R 644 *
You can use the following command to set rights for folders only:
find . -type d -exec chmod 0755 {} ';'
If you need to establish different rights on folders and files, please execute the following script:
<?php
define("BX_FILE_PERMISSIONS", 0644);
define("BX_DIR_PERMISSIONS", 0755);

function chmod_R($path) {

   $handle = opendir($path);
   while ( false !== ($file = readdir($handle)) ) {
     if ( ($file !== ".") && ($file !== "..") ) {
       if ( is_file($path."/".$file) ) {
         chmod($path . "/" . $file, BX_FILE_PERMISSIONS);
       }
       else {
         chmod($path . "/" . $file, BX_DIR_PERMISSIONS);
         chmod_R($path . "/" . $file);
       }
     }
   }
   closedir($handle);
}

$path=dirname(__FILE__);
umask(0);
chmod_R($path);
echo $path;
?>
Some FTP clients allows to recursively set rights for files and folders. For example: FlashFXP version 3.xx.
Please pay attention to check the appropriate boxes:
Separately set File and Folder attributes;
Apply changes to all subfolders and files
Each instance has its own level:
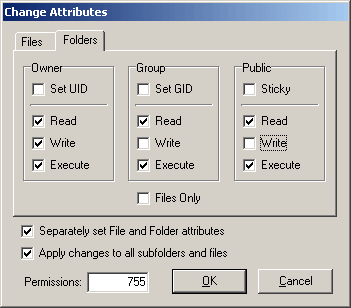 |
|
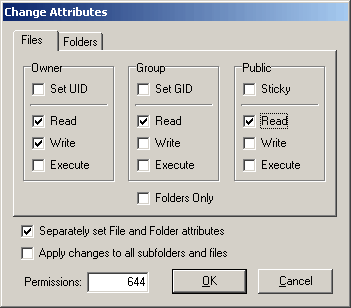 |
| Folder permissions |
|
File permissions |
Important: The
Site Explorer allows to view the system-level attributes of files and folders.
When viewing the file structure in the Site Explorer, the level of access rights to files and folders for each user group may be seen in the Access permissions column using the Extended button.
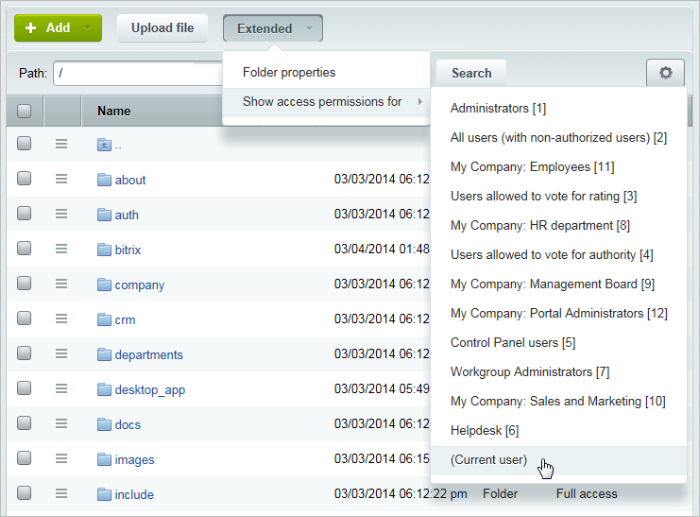
Using .htaccess
.htaccess htaccess (hypertext access) is a file of an additional configuration of the Apache web server. It permits you to set a large number of additional parameters and permissions for web server operation in a separate catalog without changing the main configuration file httpd.conf.
The file .htaccess is similar to httpd.conf, the only difference is that it applies only to the catalog where it is located and to its child directories. The file .htaccess may be located in any catalog unless these directives are redefined by directives of underlying .htaccess files. Proper settings of the main configuration file httpd.conf are necessary for the .htaccess files to become usable (the value of the directive AllowOverride must be set as All). The paths to files and catalogu must be indicated from the server root.
You do not need to restart server after you have modified the .htaccess file. This file is checked each time the server is queried, that’s why changes take into effect right away. As this is the system file, it cannot be accessed by users from their browser.
Note: During installation, the processing of .htaccess files is verified in the preliminary check step.
In the demonstration site, the file .htaccess contains the following directives by default:
Options -Indexes
ErrorDocument 404 /404.php

<IfModule mod_php5.c>
  php_flag allow_call_time_pass_reference 1
  php_flag session.use_trans_sid off

  #php_value display_errors 1

  #php_value mbstring.func_overload 2
  #php_value mbstring.internal_encoding UTF-8
</IfModule>

<IfModule mod_rewrite.c>
  Options +FollowSymLinks
  RewriteEngine On

RewriteCond %{REQUEST_FILENAME} -f [OR]
RewriteCond %{REQUEST_FILENAME} -l [OR]
RewriteCond %{REQUEST_FILENAME} -d
RewriteCond %{REQUEST_FILENAME} [\xC2-\xDF][\x80-\xBF] [OR]
RewriteCond %{REQUEST_FILENAME} \xE0[\xA0-\xBF][\x80-\xBF] [OR]
RewriteCond %{REQUEST_FILENAME} [\xE1-\xEC\xEE\xEF][\x80-\xBF]{2} [OR]
RewriteCond %{REQUEST_FILENAME} \xED[\x80-\x9F][\x80-\xBF] [OR]
RewriteCond %{REQUEST_FILENAME} \xF0[\x90-\xBF][\x80-\xBF]{2} [OR]
RewriteCond %{REQUEST_FILENAME} [\xF1-\xF3][\x80-\xBF]{3} [OR]
RewriteCond %{REQUEST_FILENAME} \xF4[\x80-\x8F][\x80-\xBF]{2}
RewriteCond %{REQUEST_FILENAME} !/bitrix/virtual_file_system.php$
RewriteRule ^(.*)$ /bitrix/virtual_file_system.php [L]
  RewriteCond %{REQUEST_FILENAME} !-f
  RewriteCond %{REQUEST_FILENAME} !-l
  RewriteCond %{REQUEST_FILENAME} !-d
  RewriteCond %{REQUEST_FILENAME} !/bitrix/urlrewrite.php$
  RewriteRule ^(.*)$ /bitrix/urlrewrite.php [L]
  RewriteRule .* - [E=REMOTE_USER:%{HTTP:Authorization}]
</IfModule>

<IfModule mod_dir.c>
  DirectoryIndex index.php index.html
</IfModule>

<IfModule mod_expires.c>
  ExpiresActive on
  ExpiresByType image/jpeg "access plus 3 day"
  ExpiresByType image/gif "access plus 3 day"
  ExpiresByType image/png "access plus 3 day"
  ExpiresByType text/css "access plus 3 day"
  ExpiresByType application/javascript "access plus 3 day"
</IfModule>
Note
To activate the commented PHP directives, you have to remove the comment operator (#) at the beginning of each line. If your Apache server does not allow PHP flags, these directives will incur an internal server error (500). If this is the case, comment these directives back.
Other uncommented PHP directives are enclosed in the verification condition statements ensuring the required Apace modules are present in the system. These directives will never cause the server errors.
- The PHP directive php_flag session.use_trans_sid off disables the session ID in the site URL's.
- If the PHP flag php_value display_errors is set to 1, the error messages are enabled and displayed. The directive php_value error_reporting defines which level of PHP interpreter errors is displayed.
- The directives
php_value mbstring.func_overload 2 and php_value mbstring.internal_encoding UTF-8 control the settings of the mbstring library.
- The directive block
IfModule mod_rewrite.c - is a setting of rights for mod_rewrite.
- The directive
AddType application/x-httpd-php .ico determines the processing of the extension ico as php files.
- The directive ExpiresActive on enables image caching which boosts their download speed on the repeated queries.
ExpiresByType image/jpeg "access plus 3 day" and ExpiresByType image/gif "access plus 3 day" define the cached image format and the caching period. By default, .jpeg and .gif files are cached for 3 days.
Note: The file .htaccess must be saved in the UNIX format (Save as UNIX text option in the FAR manager editor).
Authorization in the CGI Mode
Sometimes authorization during data exchange with 1C will not work. The problem is often caused by php operating in the CGI mode. This mode experiences problems with HTTP data transmission to php. It can be verified by viewing phpinfo() in the section Server API: CGI.
The problem may be bypassed, but .htaccess processing and mod_rewrite must be activated on the server. To activate them, please proceed as follows:
- Add the following lines in the file .htaccess of the site root:
    RewriteEngine on
    RewriteRule .* - [E=REMOTE_USER:%{HTTP:Authorization},L]
- Comment out the following lines in the file bitrix/admin/.htaccess that deactivate mod_rewrite:
    #<ifmodule mod_rewrite.c="">
    # RewriteEngine Off
    #</ifmodule>
- Add the following lines in the file bitrix/php_interface/dbconn.php:
    $remote_user = $_SERVER["REMOTE_USER"]
    ? $_SERVER["REMOTE_USER"] : $_SERVER["REDIRECT_REMOTE_USER"];
    $strTmp = base64_decode(substr($remote_user,6));
    if ($strTmp)
        list($_SERVER['PHP_AUTH_USER'], $_SERVER['PHP_AUTH_PW']) = explode(':', $strTmp);
To check the operability of HTTP authorization, please use the script.
Attention: sometimes this bypass option fails to solve the problem. If after all the recommendations are implemented HTTP authorization fails, please contact your hosting provider about this problem.
Database failures
Database connection errors
When a database connection error occurs, the following error message is displayed:

The visual aspect of the message is defined by the contents of the file /bitrix/php_interface/dbconn_error.php:
<br>
<table cellpadding="1" cellspacing="0" width="35%" bgcolor="#9C9A9C">
    <tr>
        <td>
        <table cellpadding="5" cellspacing="0" width="100%">
        <tr>
            <td bgcolor="#FFFFFF" align="center">
            <FONT face="Verdana, Arial, Helvetica, sans-serif" size="-1">
            <font color="#FF0000"><b><?echo "Error connecting to database."?></b></font><br>
            Please try again.</font></td>
        </tr>
        </table>
        </td>
	</tr>
</table>
<br><br><br>
To resolve the problem, do the following:
- check the database connection parameters (in /bitrix/php_interface/dbconn.php);
- check whether the database is accessible.
Database query errors
When a database query error occurs, the following error message is displayed:
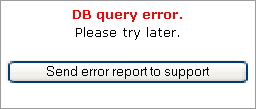
The visual aspect of the message is defined by the contents of the file /bitrix/php_interface/dbquery_error.php.
Situations may happen when a site denies to reply and returns an empty page to visitors. In this case, open the file bitrix/php_interface/dbconn.php containing the database connection parameters, and set the parameter: $DBDebug = true;
<?
define("DBPersistent", true);
$DBType = "mysql";
$DBHost = "localhost:31006";
$DBLogin = "root";
$DBPassword = "";
$DBName = "bsm_demo";
$DBDebug = true;
$DBDebugToFile = false;

set_time_limit(60);

define("BX_FILE_PERMISSIONS", 0644);
define("BX_DIR_PERMISSIONS", 0755);
@ini_set("memory_limit", "64M");
?>
This will cause the error message to be printed. The message usually contains names of damaged tables.
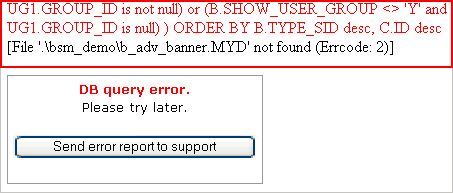
Run perror.exe (can be found in mysql/bin) with the error code to get the error description:

Note:
The error
28 displays the following description:

This means that the disk on which the database is installed is out of free space.
If the database damage is the case, you are recommended to use the built-in database check and repair tool. This will allow you to restore the site functionality in the shortest possible time.
Note!
- The standard database check and repair tool only works with the MyISAM tables of MySQL.
- The check script starts from the administrative section of the site Settings > Tools > System Administration > Database Check:
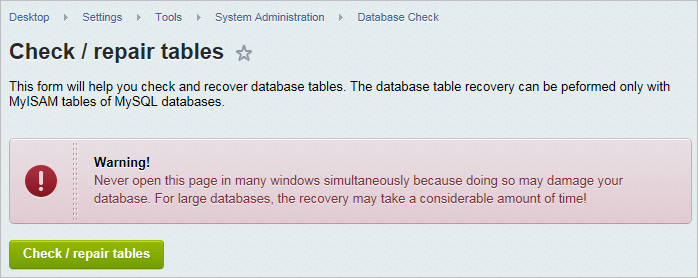
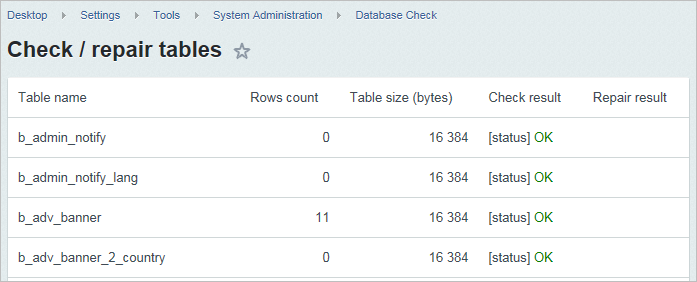
If the statistics tables are damaged and you cannot open the Control Panel, you can disable gathering statistics by supplying the parameter ?no_keep_statistic_LICENSE-KEY=Y on the URL (substitute LICENSE-KEY with your license key).
-
There is a possibility to use the check script and recover the database without the need to go to the administrative section.
To do so, supply the database access login and password on the URL. For example: http://www.mysite.com/bitrix/admin/repair_db.php?login=DB_Login&password=DB_Password. By default, the database access parameters are stored in /bitrix/php_interface/dbconn.php.
Problem:
The following error appears on the screen:
| MySQL Query Error: ….. [Out of memory restart server and try again (needed 65528 bytes)] |
|
Solution:
Memory size must be increased in MySQL settings.
The following MySQL parameters should be used and entered in the MySQL configuration file my.cnf:
key_buffer = 128K
max_allowed_packet = 16M
table_cache = 4
sort_buffer_size = 128K
read_buffer_size = 128K
read_rnd_buffer_size = 128K
net_buffer_length = 128K
thread_stack = 128K
MySQL will have to be reloaded after you change the parameters.
Possible server failures
500 - Internal Server Error
Since there are a lot of reasons which may cause server errors, their diagnostics is very complex and tedious.
If a server error occurs, the first thing to do is view the error.log file. This file may contain a line with the error description.
-
Typical situation when a server error may occur is exceeding the allowed server permissions.
For example: the system creates and saves a page with the 0777 permissions, while the maximum permission allowed by the server is 0644. The server will return the 500 error upon attempt to access the page.
- A timeout limit for the execution of php scripts may also be a possible cause;
- Alternatively, the system may have no write or read rights, etc.
- Another prevailing reason is invalid server configuration or using forbidden directives (for example, in .htaccess). In this case, remove or comment the failure line in the file.
- Note! If PHP runs as CGI, the 500 error may be cause by a PHP fatal error. In this case, you are recommended to check the program code and diagnose the error.
- Internal server errors may come about when a CGI script runs on the Apache server and the execution time exceeds the maximum allowed period specified in the server configuration.
Thus, everything depends on the server configuration.
It is important to know that the said restrictions are not determined through PHP settings in php.ini.
Normally, such an error and its cause are recorded in server logs. You have to refer to the hoster requiring that the reason of the error be indicated and the error be eliminated (for example, by increasing the resources). If the hoster could not find a solution, please contact Bitrix helpdesk providing an accurate description of the error and the reasons indicated by the hoster. Helpdesk will not be able to assist you without knowing the reason of the error.
Bitrix Virtual Appliance v4.3 (Archived)
This chapter is for users and developers of web systems who are installing Bitrix software (Bitrix Site Manager or Bitrix24) for evaluation or migrating to Bitrix Virtual Appliance.
Introduction
The Bitrix Virtual Appliance is designed using VMWare Studio 1.0 in VMWare Virtual Appliance format. The virtual machine is compatible with the following VMWare software:
- VMWare Server 1.0 and higher;
- VMWare ESX 3.0 and higher;
- VMWare ESXi 3.5 and higher;
- VMWare Workstation 6.0 and higher;
- VMWare Player 2.0 and higher;
- VMWare Fusion 1.1 and higher.
The machine hosts a Linux based virtual server optimized for common web server hosting service.
The virtual server includes:
- OS: CentOS 6.3 with autoupdate feature;
- two-tier configuration: NGINX + (Apache2+APC);
- MySQL 5 with InnoDB support;
- HTTPS support;
- additional software and packages: geoip, catdoc, poppler, mc, man, strace;
- properly configured firewall (iptables) and secure configuration;
- DHCP based or manual IP address;
- configurable mail client (msmtp);
- MRU action toolbar for remote control;
- remote control via HTTP and HTTPS;
- exhaustive settings to control system robustness, performance and security.
The default password for the root superuser and for the bitrix user is bitrix.
The virtual machine comes preconfigured for the best performance of Bitrix software.
Attention: Be sure to change the passwords when running the system for the first time!
Minimum Requirements For VMWare Player / Bitrix Virtual Appliance
A computer to run Bitrix Virtual Appliance under VMWare Player shall meet the following minimum requirements:
- Windows XP / Vista / 7 / Server 2003 / Server 2008 32/64-bit; Linux 32/64-bit;
- VMWare Player;
- Minimum free disk space: 2 GB;
- Minimum RAM: 160 MB;
- Recommended RAM: 256 MB or more.
Running the Bitrix Virtual Appliance
- Download and install VMWare Player.
It is completely free and supports Windows and Linux.
Note: the VMWare Player installation procedure falls beyond this manual; please refer to
VMWare documentation for detailed information.
- Download the VA virtual machine package here.
- Extract files from the downloaded archive to any folder, for example:
С:\VMBitrix\BitrixVM\.
- Run VMWare Player. Click Open Virtual Machine and select BitrixVM.vmx that has previously been extracted to
С:\VMBitrix\BitrixVM\. The new virtual machine will be added the list.
- Select Bitrix Virtual Appliance and click Play Virtual Machine:
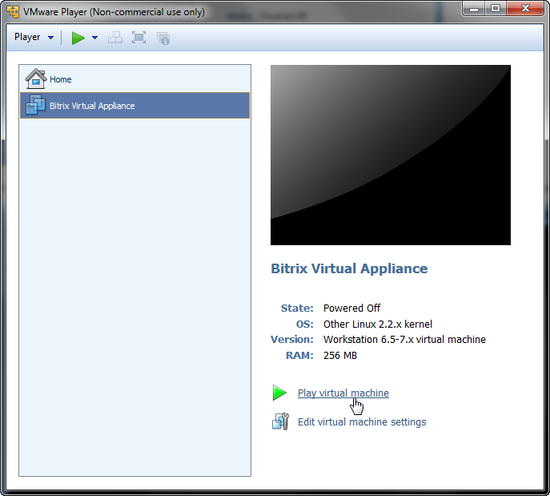
- VMWare Player will start the virtual machine and load the operating system installed on it. Once the operating system is loaded, you will see the following window:
- When starting the virtual machine for the first time, you will be prompted to change the passwords for the root superuser and the bitrix user:
- In localhost login and Password prompts, type the current login and password (root and bitrix, respectively). Hit Enter.
- When prompter for (current) UNIX password, type the current password (bitrix) and press Enter.
- Type the new password in Enter new UNIX password; press Enter.
- Retype the new password in Retype new UNIX password; press Enter again.
Note: you can also change the password using the
Change root password command.
- Now your virtual server is running and ready for use:
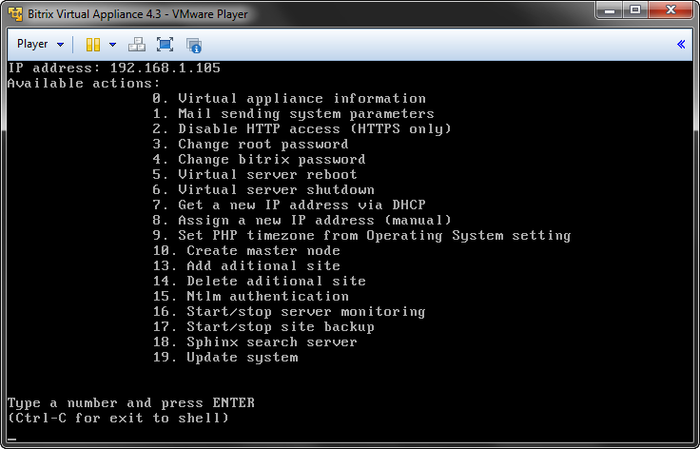
The Available actions list enumerates possible administrative options.
- 0. Virtual appliance information – shows information on the current settings and parameters for the current environment;
- 1. Mail sending system parameters – configures the parameters of the built-in mail server;
- 2. Disable/Enable HTTP access (HTTPS only) – enables or disables access to the website using HTTP protocol;
- 3. Change root password – changes the superuser password;
- 4. Change bitrix password – changes the password for the "bitrix" user;
- 5. Virtual server reboot – restarts the virtual server;
- 6. Virtual server shutdown – stops the virtual server;
- 7. Get a new IP address via DHCP – obtains a new IP address for the server from a DHCP server;
- 8. Assign a new IP address (manual) – enables an administrator to set the server IP address manually;
- 9. Set PHP timezone from Operating System setting – sets the virtual appliance's time zone according to the operating system preferences;
- 10. Create master node – creates a master node in a web cluster;
- 11. Add slave node – adds a slave node to an existing web (available only on a master machine);
- 12. Make slave node a master node – converts a slave node into a master node (available only on a slave machine);
- 13. Add additional site – adds another website in multisite mode;
- 14. Delete additional site – deletes an existing website when in multisite mode;
- 15. NTLM authentication – enables or disables NTLM authentication;
- 16. Start/Stop server monitoring – enables or disables server status and health monitoring;
- 17. Start/Stop site backup – enables or disables website data auto backup;
- 18. Sphinx search server - setting for the Sphinx search server;
- 19. Update System - updates the virtual appliance to the latest version.
To execute any command, type the command number and press Enter. For example, to disable the virtual server type 6 (Virtual server shutdown) and press Enter.
To direct control back to operating system, press Ctrl+Alt.
To return from shell to the virtual machine menu, execute:
cd ./menu.sh
Note: if you encounter problems with the network adapter, try changing the adapter mode (
Bridged,
NAT,
Host-only):

Then, restart the server by selecting the command
5 and pressing
Enter.
Now that the server is running, type the address suggested by the appliance (it varies from system to system; the screenshot above shows the address http://192.168.1.105) in the web browser. You will see the following welcome screen:
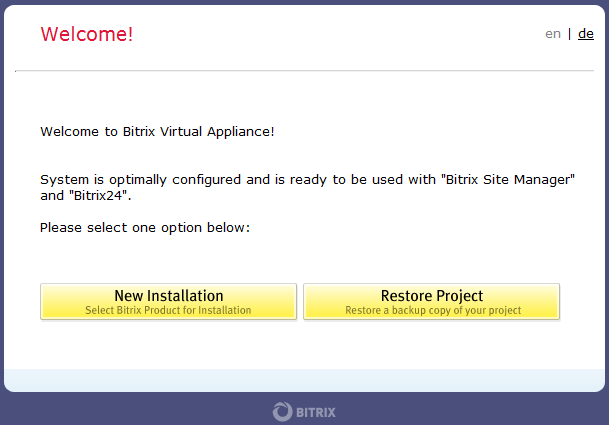
Choose one of the options to continue:
- New Installation - runs the installation wizard which will download, unpack and install a new website;
- Restore Project - runs a restoration wizard to create a backup copy of your website or restore it from an existing backup.
Configuring the SMTP Mail Server
You can configure the mail server in the Bitrix virtual appliance menu.
- Select Mail sending system parameters by typing 1 and pressing Enter:
- The Bitrix appliance will show the SMTP configuration prompt:
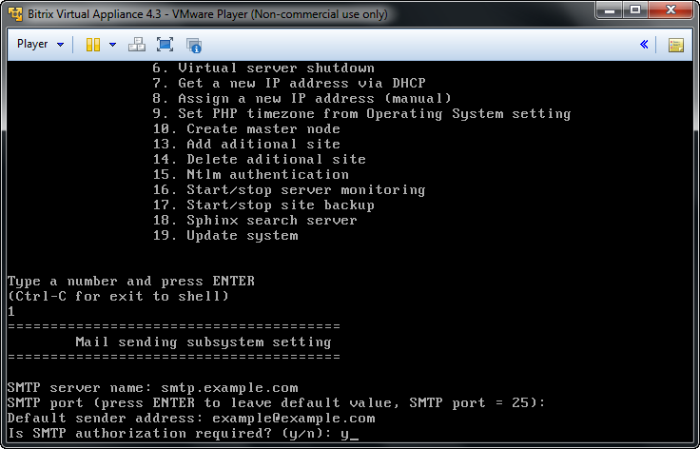
Specify here the following parameters:
- SMTP server name - the address of the SMTP server used for outgoing messages.
- SMTP port - the mail server port: 25 for insecure connection and 465 for secure SSL connection.
- Default sender address - specifies the address that will be substituted in the e-mail message.
- SMTP authorization required – type y if you require more security (for example, to avoid unauthorized spamming).
Having acquired the options, the configuration screen will show them for review:
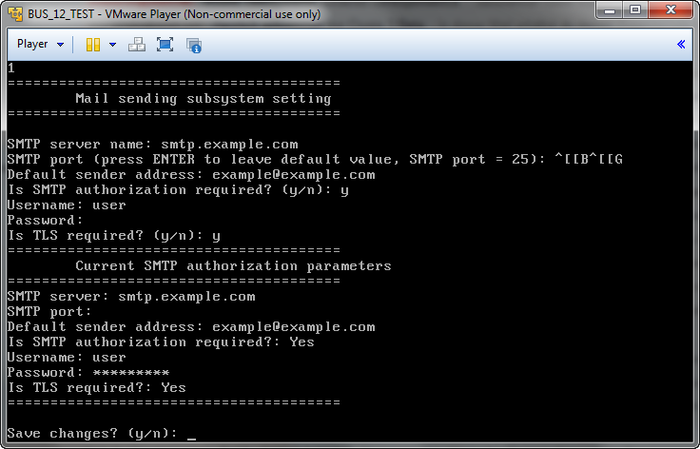
- Select Yes to save changes.
Creation of a Master-Slave Cluster
Bitrix Virtual Appliance also has a support for quick deploy of a master-slave cluster configuration Bitrix Site Manager or Bitrix24 Self-Hosted with an installed module of Web Cluster.
It will permit to distribute one site among several servers thus solving several tasks:
- Ensure the high availability of the site;
- Site scaling in case of an increasing load;
- Balance of load, traffic, and data among several servers.
Preparation of a Virtual Machine for Connection to the Cluster
The following steps must be followed to prepare a virtual machine for connection to the cluster:
- Change the standard password of the root user;
- Change the standard password of the bitrix user
- If virtual machine is to be added to cluster as a slave node, the database with the same name as the database on the master node must be deleted (by default it is sitemanager0).
Creation of a Master Node
After preparation of the first step towards setting up a cluster is the creation of a master node. Master base MySQL will be located on this node, and also this node will set up the cluster and all its nodes.
To this effect:
After confirmation, the process of creation of the cluster master node starts. It will setup all the necessary services and add all the necessary entries in the Web cluster module.
After setting up the master node you will be offered to create a slave node. You may agree or decline and create slave node later.
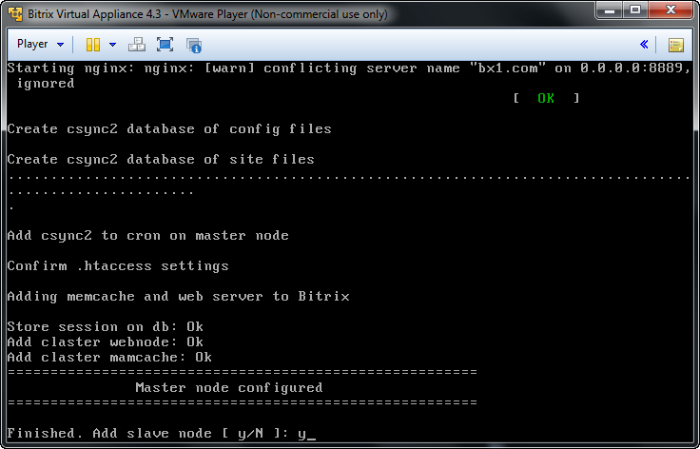
Creation of a Slave Node
To ensure the proper operation of the cluster, at least one slave node must be added to the cluster after the creation of the master node. It can be done either immediately after the creation of the master node or using the administrative menu:
After confirmation, a process will start to setup the cluster, move the site files and database onto the new node, and add node services to the Web cluster module.
Having added the slave node, we obtain a fully functional cluster. If the project load increases, an additional slave node may be added to the cluster in a similar way. Thus, the consistency of project work is ensured notwithstanding any load increase:
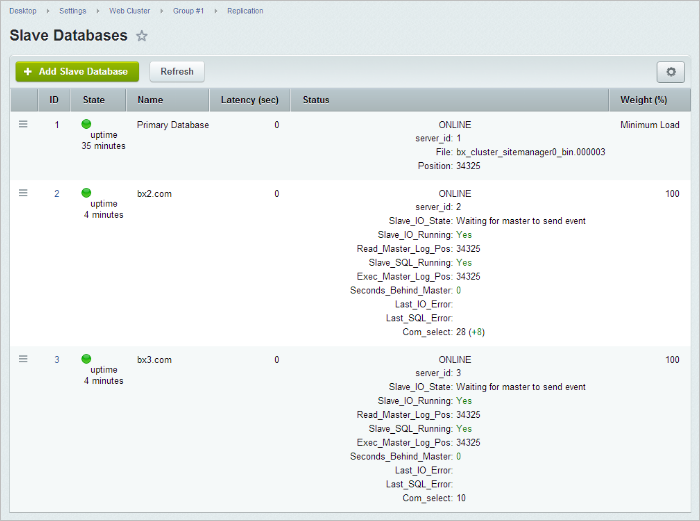
Node Drop in the Cluster
If one or several slave nodes drop(s), the project will continue operating steadily.
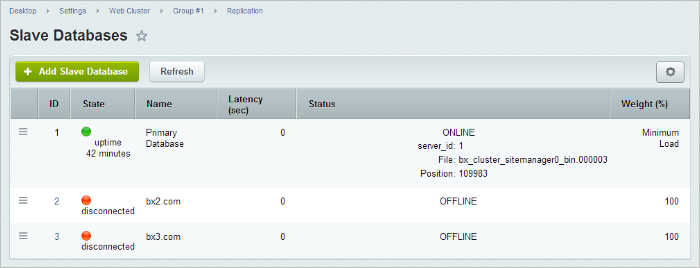
If the master node drops, the following actions must be taken to recover cluster operability:
- Change the role of one of the slave nodes to master. To do so, run wizard 12. Make slave node a master node and specify passwords to MySQL root for all nodes that remain in the cluster:
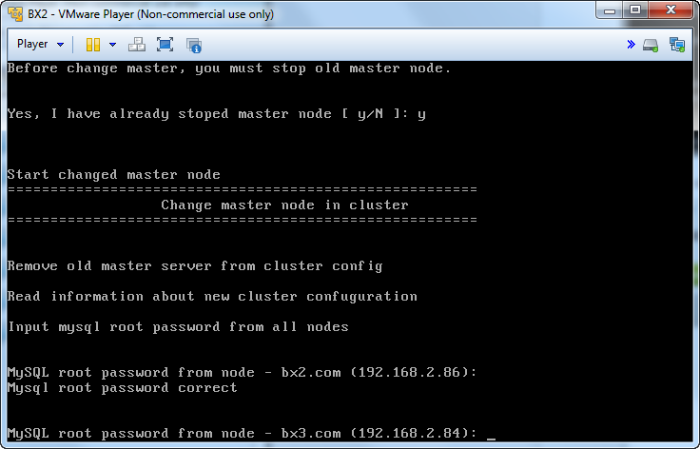
- And after the wizard completes its work, correct the list of nodes in the Web cluster module.

Adding a Site
Additional Site Creating Wizard permits to deploy several sites on the same virtual machine both on independent Bitrix installations and as a part of multi-siting.
Adding a Site
The following actions must be taken to add an additional site:
- Preset DNS server or indicate a domain name in /etc/hosts on the virtual machine and also on all machines from which this site will be accessed.
- Then, run wizard 13. Add additional site from the administrative menu:
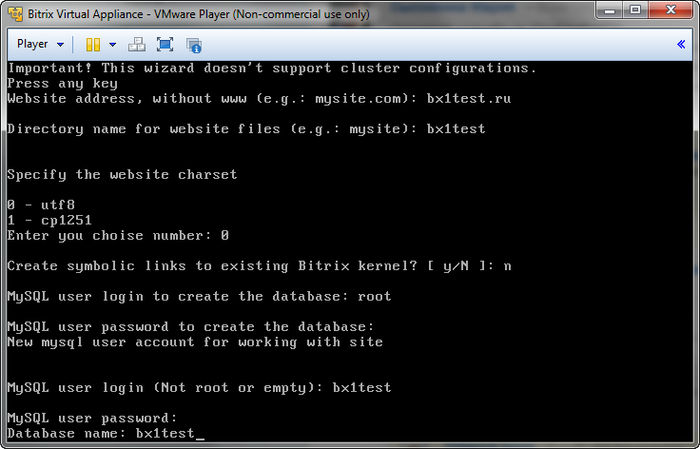
and provide the following data:
- Website address, without www - domain name of the additional site without www;
- Directory name for website files - name of the directory where the files of the additional site will be stored (directory will be created in /home/bitrix/ext_www/);
- Specify the website charset - encoding of the site under construction;
- Create symbolic links to existing Bitrix kernel - creation of symbolic links to the existing Bitrix kernel:
- N - in case of the creation of an additional site as a part of separate installation. In this case, a database must be created. To do so, the name of the new database, login, and password of a MySQL user having the necessary rights must be specified.
- Y - in case of the creation of an additional site as a part of multi-siting. In this case, a full path to the existing Bitrix product must be indicated.
New additional site is available for use.
Note: the number of additional sites is not limited. The only limit is that this wizard is not intended for work with the machines forming the cluster.
Deletion of an Additional Site
In order to delete an entry about an additional site, please choose option 14. Delete aditional site in the administrative menu of Bitrix Virtual Appliance.
Note: the additional site deletion wizard does not delete the file directory and database of the additional site; it deletes only the configuration file in Bitrix Virtual Appliance. File directory and database of the site must be deleted manually.
Automatic Backups
For a BitrixVA based project, just like for any other web project, data safety is always one of the most cherished and cared for aspects.
Since version 4.0, Bitrix Virtual Appliance includes an option to create automatic backups of the website (the contents of /bitrix/home/www/) and the database. The backup files are saved as .tar.gz archives in /home/bitrix/backup/archive/ according to the schedule.
To configure automatic backup, do the following.
That's all, actually. The backups will be created according to the schedule you have set.
To create backups for other websites previously added using the menu item 13, specify the paths to those websites in /home/bitrix/ext_www/. If the websites are found, you will be prompted to add them to the backup:
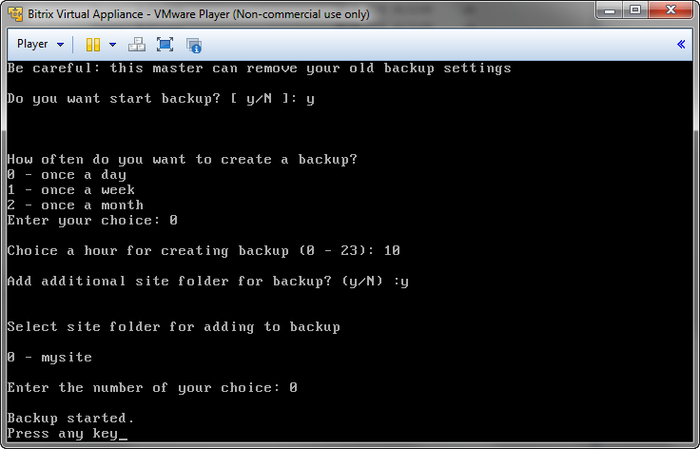
Virtual Machine Versions Prior to 4.х
When using legacy versions of BitrixEnv or BitrixVA, you can easily schedule the creation of the backup by using an external script freely available at the Birtix website. It will archive the contents of /bitrix/home/www/ and put the archive copy in /home/bitrix/backup/archive/.
By default, the backup script will start nightly at 2:30 AM. You may change the schedule in /etc/crontab.
To enable backups on a legacy virtual machine, run the following commands:
wget http://repo.bitrix.info/ext/start_site_backup.sh
chmod +x start_site_backup.sh
./start_site_backup.sh
Remember to keep track of the free disk space and occasionally delete unneeded backups.
Sphinx Search Engine Setup
The use of Sphinx as a search engine will permit to significantly increase search speed and reduce the server load.
For its setup, please do the following:
- Install and update the project up to the latest version available;
- In the virtual machine menu, choose option 18. Sphinx search server:
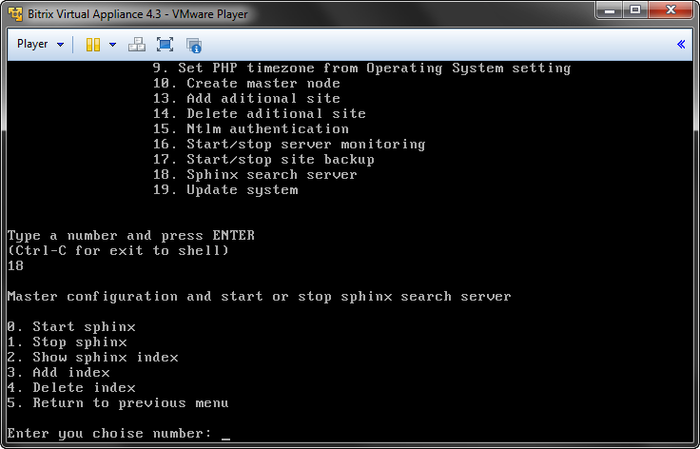
- In this menu, upon first connection, first choose option 0. Start sphinx and then 3. Add index in order to create an index for a specific site. In this case, choose the encoding in which the site works and specify a name for the index:
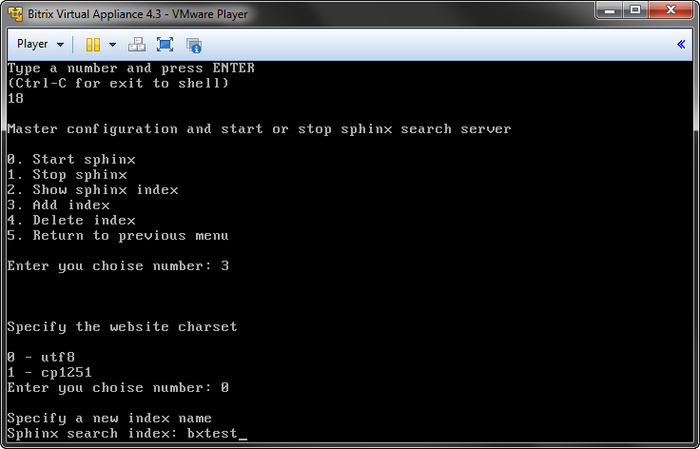
- The wizard will create the necessary index and restart Sphinx. After that, it will show the full index name and prompt you to setup the project installed on the machine for using this index:
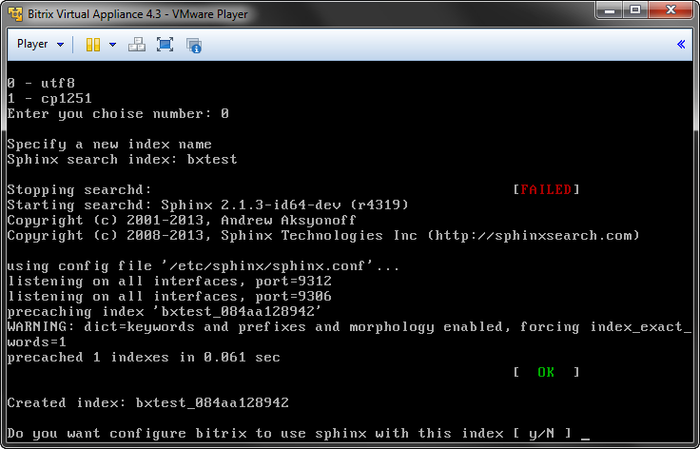
- In order to setup an existing project, please choose it from the list of available projects, and after the wizard has completed its operation, perform a full re-indexing.
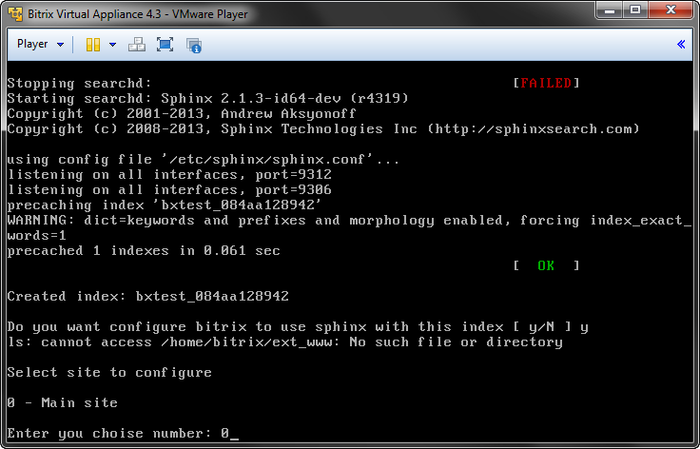
- Everything is ready for operation:
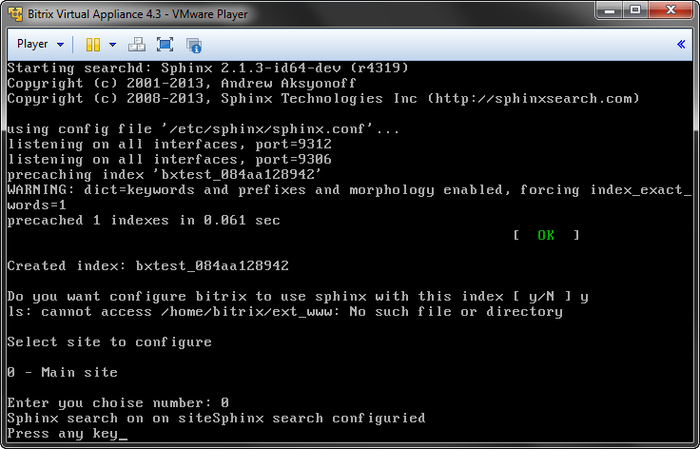
Update of Bitrix Virtual Appliance
Attention: the update of Bitrix Virtual Appliance is a complex operation during which the system files of the virtual machine operating system are updated, and proper knowledge of *nix systems is indispensable to complete this operation properly. It is recommended to perform a complete backup of the virtual machine.
Please choose option 19. Update System in the administrative menu to update BitrixVA product.
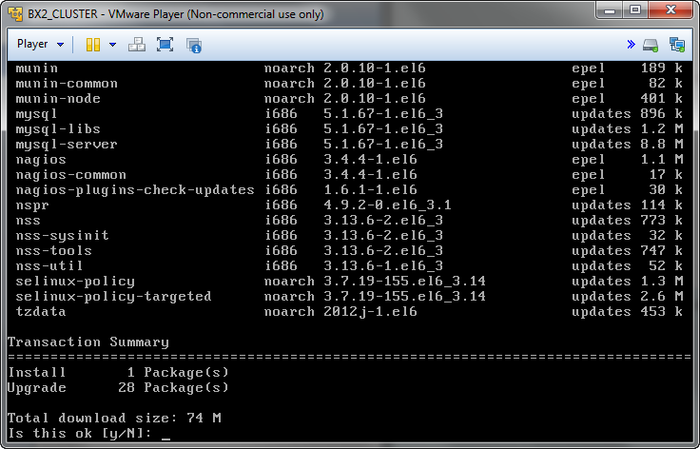
The script will automatically check for updates of the virtual machine, show the total volume for download and prompt for installation.
If something fails following the update, it is possible to recover the old setting files of the relevant service in full or in part because configuration files are not overridden during the update but are rather stored in the files *.ori.(time marker).
Also during the update some php modules may disconnect. In order to connect them, please perform the following commands:
mv -f /etc/php.d/(module).ini.disabled /etc/php.d/(module).ini
service httpd restart
Restoring a Web Project from a backup copy
This chapter shows how to use the backup and restoration tool by the example of transferring a Bitrix24 project.
Preparing to Transfer
The site archive is created on the Backup page (Settings > Tools > Backup > Create Backup):
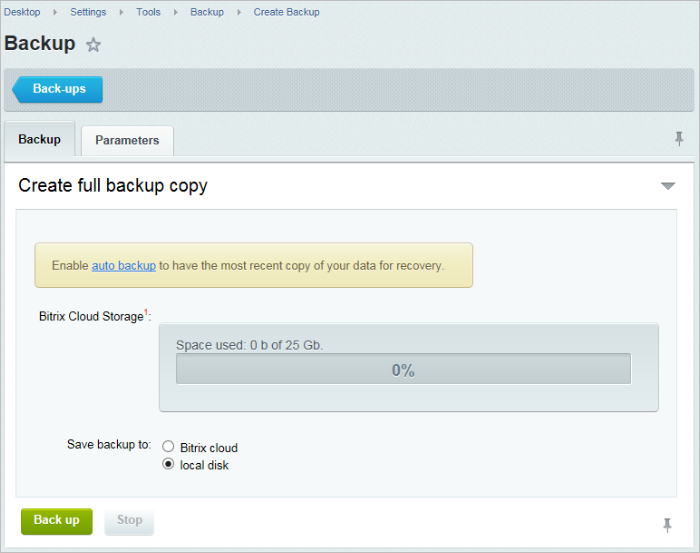
- The site archive may be saved in Bitrix Cloud;
Note: the copy option in Bitrix Cloud is only available for users with an active license. In addition, for safety’s sake, all backup copies of the site are always encrypted before they are sent to Bitrix Cloud. Bitrix, Inc. cannot recover or change the password! Be careful, the archive cannot be recovered without the password!
- Or in the site folder (site archive will be saved in the /bitrix/backup/ folder of the hosting with a unique filename).
Advanced backup settings can be selected in the tab Parameters:
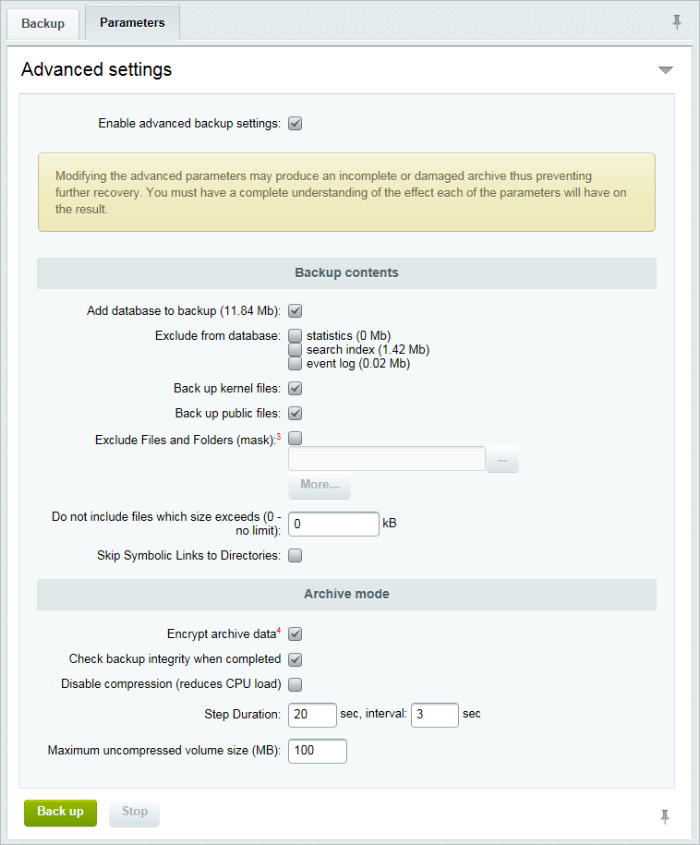
Note: to ensure data safety, it is recommended to enable the option Encrypt archive data and enter a password for the site archive.
After the successful creation of the site archive it will be available on the page View existing backups (Settings > Tools > View Existing backups). All backups will be shown here:
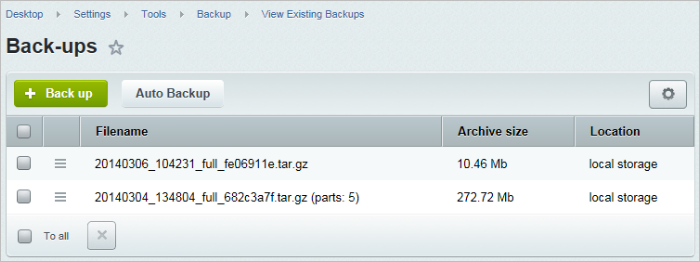
Then, you will have to Get the link for migration using the action menu:
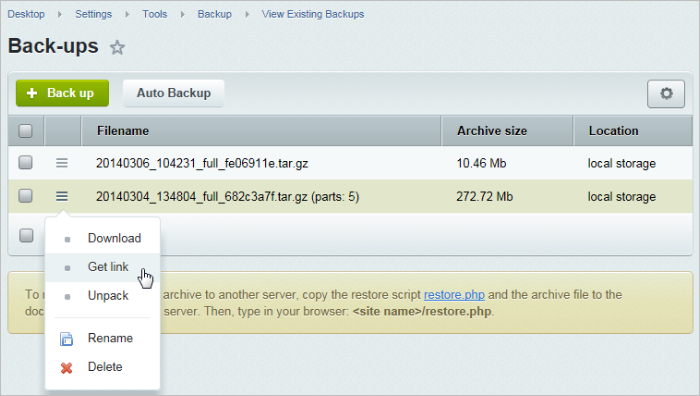
and copy it to the exchange buffer in the window that opens:
The site archive may also be downloaded to a local computer using the Download menu option.
Restoring the Website
Start up the preset virtual machine BitrixVA (see the lesson Running the Bitrix Virtual Appliance).
Enter http://virtual_machine_address/ in the browser address bar (you may indicate a domain or IP address). The Birtix product installation wizard will open. Choose the option of Restore Project:
At the stage of downloading of a backup copy, please select the required means of storing the site archive (in this case, enter the link provided by the exchange buffer on the page with the list of backup copies of the site):
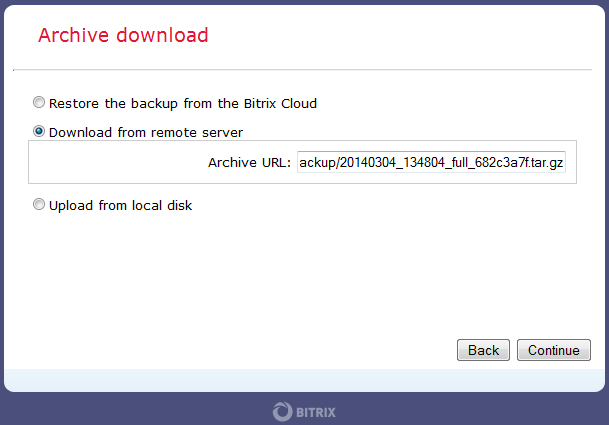
Note: it is also possible to download the archive from Bitrix Cloud (a license key with a valid license is needed) or from a local computer, if such means were selected at the stage of creating the site archive.
If the archive was encrypted, password prompting appears following the archive download.
After that, a database connection must be set up:
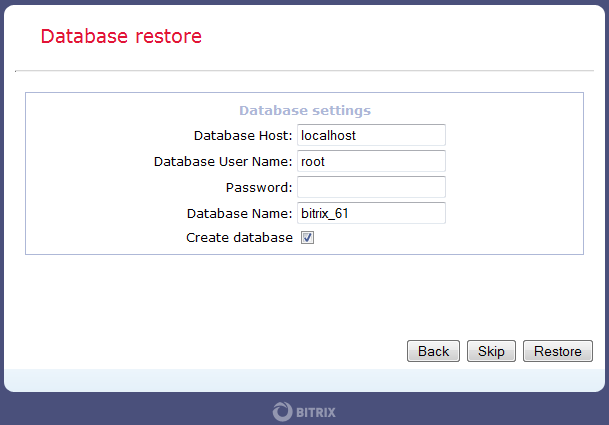
Default MySQL connection settings in the BitrixVA virtual machine are as follows:
- Server: localhost
- DB user: root
- Password: <empty>
- DB name: sitemager0
Specific database name may also be indicated, if necessary. In this case, the option Create database must be additionally selected if no database exists as yet.
For safety, having successfully restoring database, please Delete archive and temporary scripts by clicking the button with the same name.
The Bitrix product migration to the BitrixVA virtual machine is now completed.
Additional BitrixVA settings
Attention: the knowledge of the administration of *nix systems is indispensable in order to complete the operations described in this chapter. It is recommended to perform a full backup of the virtual machine.
Changing the standard settings of BitrixVA
When starting up the BitrixVA virtual machine or a physical server with BitrixEnv package installed, the bvat service automatically sets up the main parameters of Apache, PHP, and MySQL depending on the available memory. It permits to ensure optimum server settings.
However, in some cases, it may become necessary to change certain parameters without disconnecting the bvat service. To introduce such changes to the server settings there exist special configuration files that permit redefining parameters established by the bvat service.
- MySQL -
/etc/mysql/conf.d/z_bx_custom.cnf
- PHP -
/etc/php.d/z_bx_custom.ini
- Apache -
/etc/httpd/bx/conf/z_bx_custom.conf
If there are no such files you may create them yourself.
Increasing the disk space of BitrixVA
The lack of free space problem may eventually occur while using the BitrixVA virtual machine or ami-image BitrixVA. The most appropriate solution to this problem is adding additional disk and moving some content to it.
Because disk space is primarily occupied by site content and site backups located in /home/bitrix and also by the database located in /var/lib/mysql, these particular sections should be moved to separate disks.
Let us consider this task by moving the folder /home with site content and backups to a separate disk.
- To this effect, we add a new disk of a required size in the list of equipment in the settings of the virtual machine. All actions specified below must be performed under the root administrator’s account:
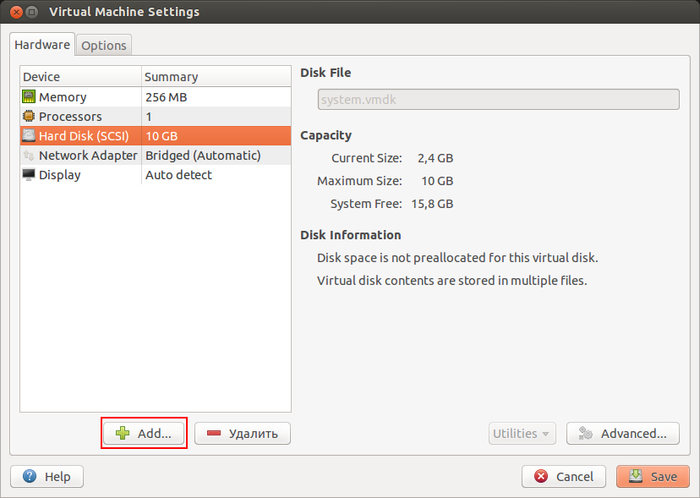
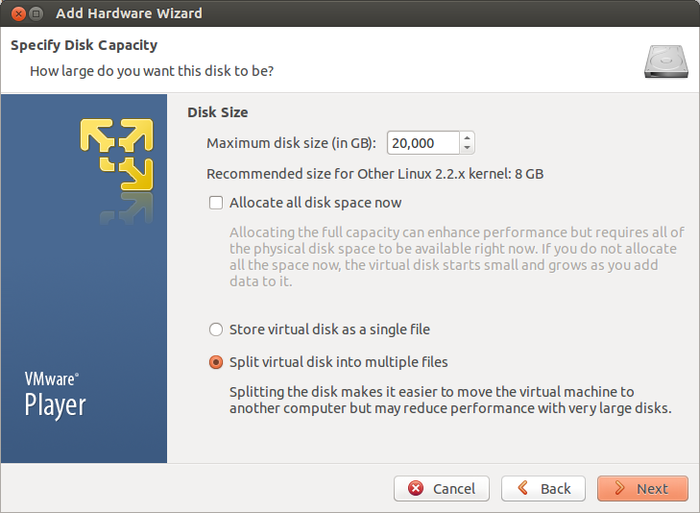
- Once the disk is added, the server may need to be reloaded for disk initialization. The new disk and the letter assigned to it may be seen by running the following command:
fdisk -l
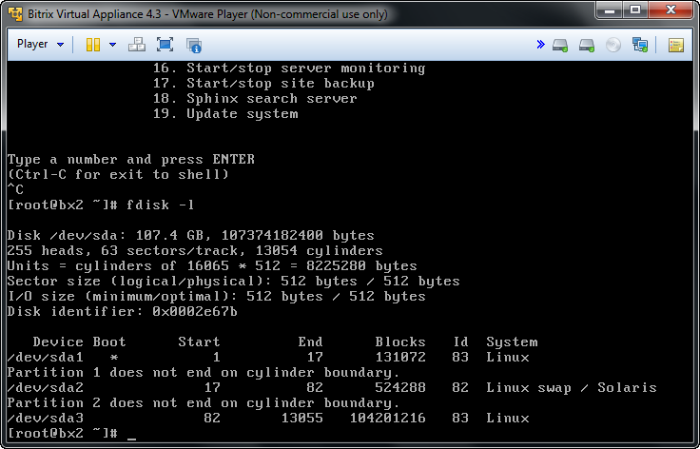
- Next, we create the primary partition on the new disk and allocate all free space of the disk to it by using the command:
fdisk /dev/sdb
- Once the partition table is saved, we format a new partition and move data from /home to it:
mkfs.ext4 /dev/sdb1
mount /dev/sdb1 /mnt
service httpd stop
service nginx stop
mv -f /home/* /mnt
umount /mnt
- Next, we determine UUID of the new disk and add an entry about it in /etc/fstab. Instead of UUID the name of the device /dev/sdb may also be used:
blkid
/dev/sda1: UUID="99066558-ba04-465c-9962-e827aa2928ec" TYPE="ext4"
/dev/sda2: UUID="8ea38ef9-1ee5-423b-a013-15fd603a678e" TYPE="swap"
/dev/sda3: UUID="08ec5c65-8fd8-47ac-a998-d81195c8f964" TYPE="ext4"
/dev/sdb1: UUID="b2e58731-b621-4bd5-909a-afe3bb5dd8a1" TYPE="ext4"
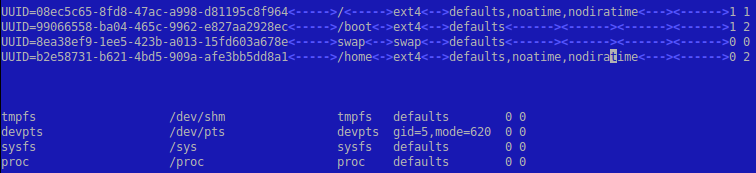
- All that is left to do is mount a new disk and start up the services that were stopped before:
mount /home
service httpd start
service nginx start
The disk adding procedure is the same for other virtualization environment or directly on a physical server.
Connection of a Swap Partition
The BitrixVA virtual machine is supplied with a swap partition of 256 Mb, which is not connected in the ami image by default. That is why it may become necessary to extend the swap partition during operation.
As in the case with increasing free disk space, the simplest way is to add another disk and place swap partition on it or create a swap file.
To this effect:
- Connect the disk to the virtual machine or create a swap file:
dd if=/dev/zero of=/swapfile bs=1M count=1024
- Create a swap partition on the disk:
mkswap /dev/sdb1
or in the file:
mkswap /swapfile
- Connect swap partition:
swapon /dev/sdb1
or swap file:
swapon /swapfile
- And finally add an entry about the new swap partition to ets/fstab to avoid its manual activation after each reloading:
/dev/sdb1 none swap sw 0 0
or about the swap file:
/swapfile none swap sw 0 0
Mounting Windows Resources Correctly
The following command may be used if Windows network drive must be connected as storage for WebDAV:
mount -t cifs -o -fstype=cifs,iocharset=utf8,username=XXXX,password=XXXX,uid=500,gid=501,fmode=0777,noserverino //xxx.xxx.xxx.xxx/folder /home/bitrix/www/docs/folder/smb
where:
uid - bitrix user identifier;gid - bitrix group identifier;//xxx.xxx.xxx.xxx/folder - a path to a network resource;/home/bitrix/www/docs/folder/smb - a folder where the disk will be mounted.
Note: the use of the
noserverino option is mandatory because PHP has a
vulnerability.
Setup of memcached
If memcached is supposed to be used in the project, it is necessary to set it up in accordance with the expected load.
To this effect:
- Set the following parameters in the file /etc/sysconfig/memcached:
MAXCONN = "10240" - the number of simultaneous connections (by default 1024);CACHESIZE="1024" - memory allocated for cache (by default 64 MB);OPTIONS="t 8" - number of memcached flows (by default 4).
Note: the parameters MAXCONN, CACHESIZE, and OPTIONS are selected experimentally depending on the nature of load and available resources.
The size of your file cache may be used to evaluate the memory size necessary for caching (CACHESIZE parameter). If file cache in your project consumes 3 GB, the use of memcache with 256 MB of memory will not be efficient due to frequent preemption
- Once memcache is set, it must be restarted using the command:
service memcached restart
- Next, connect it to bitrix/php_intarface/dbconn.php:
define("BX_CACHE_TYPE", "memcache");
define("BX_CACHE_SID", $_SERVER["DOCUMENT_ROOT"]."#01");
define("BX_MEMCACHE_HOST", "127.0.0.1");
define("BX_MEMCACHE_PORT", "11211");
In case one server is used, work with memcache may be set up through a socket to improve performance:
USER="bitrix" - the user on behalf of which memcache will be started up;OPTIONS="-t 8 -s /tmp/memcached.sock" - the number of flows and a path to the socket..
After that, the settings must be changed in bitrix/php_interface/dbconn.php:
define("BX_CACHE_TYPE", "memcache");
define("BX_CACHE_SID", $_SERVER["DOCUMENT_ROOT"]."#01");
define("BX_MEMCACHE_HOST", "unix:///tmp/memcached.sock");
define("BX_MEMCACHE_PORT", "0");
Execution of all agents on Cron
When working with large as well as not very large projects it is often feasible to move the execution of some especially complex agents to Cron.
- For a start, we will fully disable the execution of hit agents. To this effect, the following command should be executed on the php console of the administrative menu of the Bitrix product /bitrix/admin/php_command_line.php?lang=en:
COption::SetOptionString("main", "agents_use_crontab", "N");
echo COption::GetOptionString("main", "agents_use_crontab", "N");

COption::SetOptionString("main", "check_agents", "N");
echo COption::GetOptionString("main", "check_agents", "Y");
The result of the execution should be NN.
- Remove from the file /bitrix/php_interface/dbconn.php the definitions of the following constants:
define("BX_CRONTAB_SUPPORT", true);
define("BX_CRONTAB", true);
And add:
if(!(defined("CHK_EVENT") && CHK_EVENT===true))
   define("BX_CRONTAB_SUPPORT", true);
- Next, we create a file for agent testing and system message distribution /bitrix/php_intarface/cron_events.php:
<?
$_SERVER["DOCUMENT_ROOT"] = realpath(dirname(__FILE__)."/../..");
$DOCUMENT_ROOT = $_SERVER["DOCUMENT_ROOT"];

define("NO_KEEP_STATISTIC", true);
define("NOT_CHECK_PERMISSIONS",true);
define('CHK_EVENT', true);

require($_SERVER["DOCUMENT_ROOT"]."/bitrix/modules/main/include/prolog_before.php");

@set_time_limit(0);
@ignore_user_abort(true);

CAgent::CheckAgents();
define("BX_CRONTAB_SUPPORT", true);
define("BX_CRONTAB", true);
CEvent::CheckEvents();
?>
- And add this script to Cron:
*/5 * * * * /usr/bin/php -f /home/bitrix/www/bitrix/php_interface/cron_events.php
After that, all the agents and sending of system messages will be processed under cron every 5 minutes.
To avoid building up a queue for sending mail messages, the parameter responsible for a number of mail events processed at a time must be changed. To this effect, we have to run the following command on php console:
COption::SetOptionString("main", "mail_event_bulk", "20");
echo COption::GetOptionString("main", "mail_event_bulk", "5");
Mounting options
To ensure the higher performance of the file system, we recommend the time marker change for the reading of files and directories to be disabled: noatime, nodiratime.
To this effect, the parameters in the line with its UUID must be edited (added in the current line) in /etc/fstab:
UUID=abd9bdaa-e17d-40b3-aee5-37ef53a57b16 / ext4 defaults,noatime,nodiratime 1 1
where UUID=abd9bdaa-e17d-40b3-aee5-37ef53a57b16 - a unique disk identifier which may be found out by running the blkid command on the console.
Note: Instead of UUID the name of the device may be also used: /dev/sda1, /dev/sda2, /dev/sda3. Alternatively, a volume label may be used, if defined, for example: LABEL=root.
The new settings will come into effect after reloading.
To apply the new setting without server reloading the sections may be remounted by the command:
mount -o remount,noatime,nodiratime /
There is no a single steadfast rule to treat the problem of file system performance. If, for example, the disk also has a cache of some apps, the measures proposed may even reduce the performance because many applications clean the cache according to access mark which is to be disabled in the given example. In some cases, the increase of commit time may bring about a better result, especially if RAM is large. The commit time is determined by the commit parameter. For example, in order to set it on 120 seconds, it is necessary to add commit = 120. Thus, the mount options will be as follows:defaults,noatime,commit=120.
By default, the data and metadata dump to the disk may occur each 5 second. Postponement of the dump time may also reduce file fragmentation on a disk, if there are files to which data are frequently added, e.g., logs.
Setting Up NTLM Authorization
The AD/LDAP module of version 11.5.0 and higher is required in order to support NTLM authorization feature by Bitrix Site Manager and Bitrix24 Self-hosted.
After enabling and setup, the new NTLM authorization feature starts working as follows:
- An unauthorized user comes to the project to be redirected to an open Apache port (8890 for http or 8891 for https) by the event handler;
- Apache performs NTLM authorization of the user, and the user is redirected back to port 80 or 443 (for http and https, accordingly);
- The user performs the next hits normally.
Let us consider the setup procedure for Bitrix24 Self-hosted.
User NTLM Authorization Setup in Bitrix24 Self-hosted
- During installation, select Allow Active Directory users to authorize in portal in the Wizard:
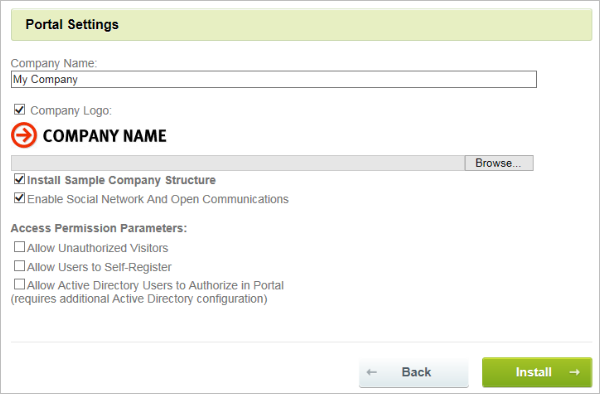
- Next, enter AD domain connection settings and check the connection:
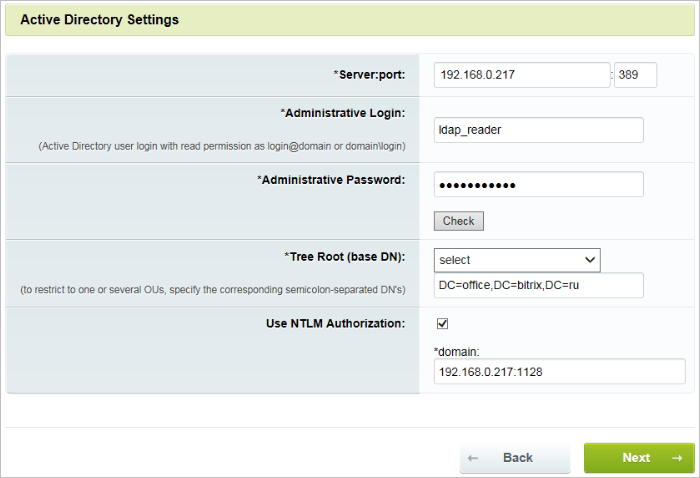
- Indicate the relation of AD groups to the corporate portal groups:
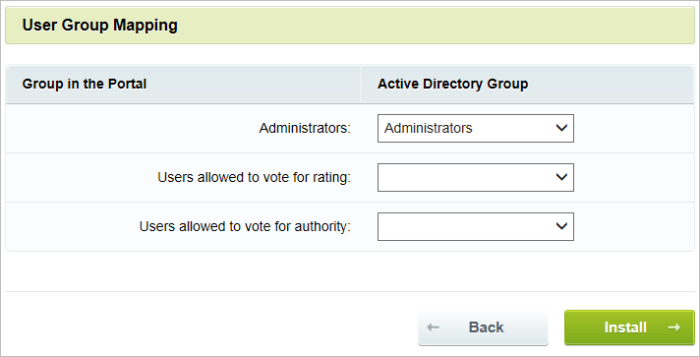
Bitrix24 is ready to use the NTLM authorization. The next step is to set up the virtual machine.
Attention: If NTLM authorization is to be set up for the local network of the company and employees who work with the portal are required to use a standard authorization, a range of IP addresses for which NTLM authorization is necessary must be additionally indicated in the AD/LDAP module settings:
Restrict NTLM redirection to this subnet (for example, 192.168.0.1/24):
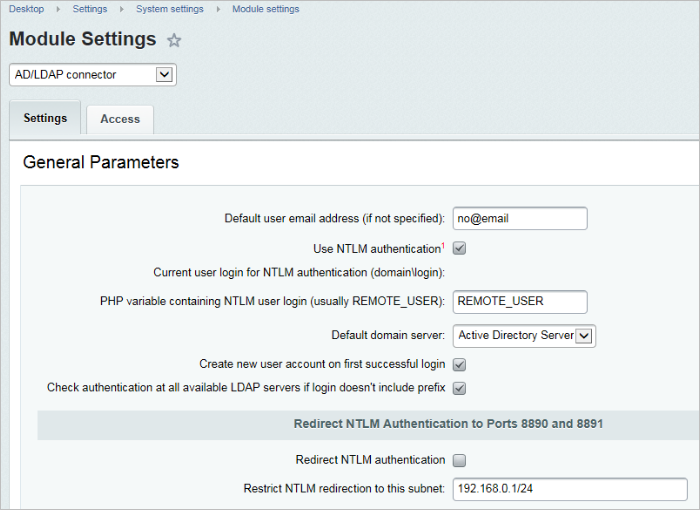
User NTLM Authorization Setup in Bitrix Virtual Appliance
In order to set up the virtual machine, please connect to it as a root user, select the menu option of 15.NTLM authentication, and enter the necessary data.
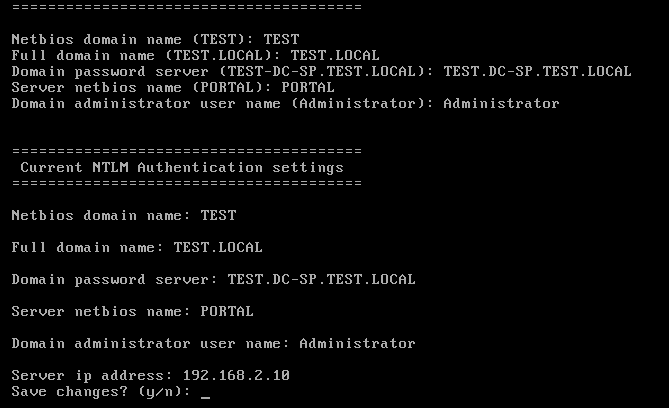
After confirmation that the data entered are correct, the Wizard will set up and start all the necessary services and also connect the virtual machine to the domain.
Note: The following command may be used to check the successful introduction of the computer into the domain:
net ads testjoin
The setup is complete. The next step is to check browser settings to ensure successful NTLM authorization.
NTLM Authorization Setup in Browsers
- Internet Explorer
To make sure NTLM authorization is successful, the web server must be located in the Local Intranet zone (if necessary it must be added there):
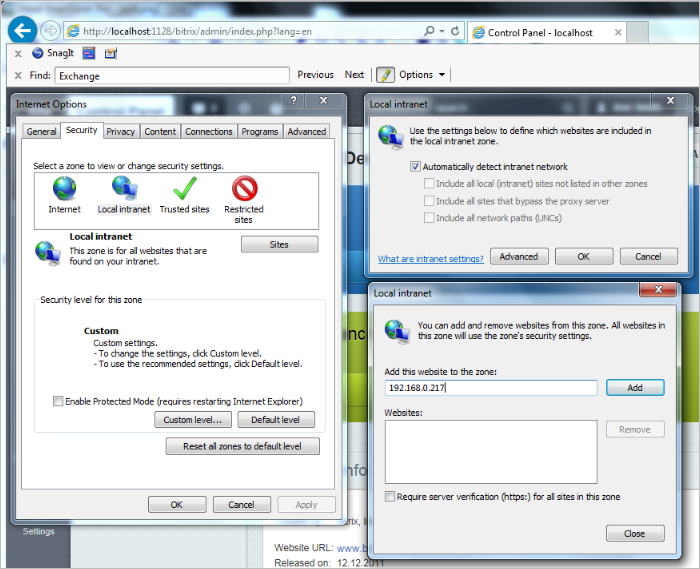
- Mozilla Firefox:
Add a web server to the list of trusted URI for automatic NTLM authorization (using the parameter network.automatic-ntlm-auth.trusted-uris on the Firefox page: about:config)

Note: The procedure for enabling NTLM authorization in the already installed Bitrix24 product and also in Bitrix Site Manager is the same as that described above, except that the Active Directory server shall be added manually in the administrative section.
IDE Connection
Xdebug is included in virtual machine to make working with Bitrix Framework easier. It works as follows:
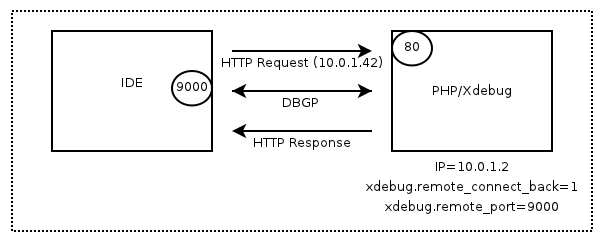
Before changing the settings, the file xdebug.ini.disabled shall be renamed to xdebug.ini, and httpd shall be restarted.
Use the following example to setup the machine:
$ cat /etc/php.d/xdebug.ini
; Enable xdebug extension module
zend_extension=/usr/lib/php/modules/xdebug.so
xdebug.remote_enable=on
xdebug.remote_host=192.168.205.1
xdebug.remote_port=9000
Note: Xdebug requires using proxy when working through Network Address Translation. Port 9000 shall be opened.
Bitrix Virtual Appliance v5.x (Archived)
This chapter is for users and developers of web systems who are installing Bitrix software (Bitrix Site Manager or Bitrix24) for evaluation or migrating to Bitrix Virtual Appliance.
Solutions for the optimization of Bitrix products installation:
- Bitrix Virtual Appliance 5.x
There are VA distribution kits available for:
- VMWare;
- VirtualBox;
- HyperV.
- Bitrix Environment for Linux
Bitrix Environment for Linux is configured for the fast and simple installation of all software (both v. 4.3 and v. 5.0) necessary to operate Bitrix products and solutions on Linux Fedora 12-15 (i386, x86_64), CentOS 5/6 (i386, x86_64), Red Hat Enterprise Linux 5/6 (i386, x86_64).
- Virtuozzo Application Template for the startup of optimized VPS Bitrix
Virtuozzo VZ Application Template Kit with Bitrix Environment for Linux solution is configured for installation (creation) on Virtuozzo containers built on Fedora 8-12 32-bit and CentOS 5 32-bit / x86_64 packaged as a Virtuozzo EZ Template.
- Amazon Elastic Compute Cloud (Amazon EC2)
Amazon EC2 – is a web-service providing scalable processing power and designed for the fast and simple deployment of web-application on Amazon sites (in clouds). Bitrix specialists prepared the preconfigured images of VA (AMI-images) allowing for the fast startup of Bitrix applications on Amazon EC2 and containing:
- CentOS 6.7;
- NGINX + Apache2;
- PHP 5.6+;
- MySQL5 with InnoDB support;
- Mail server agent;
- UNIX-like Control Menu with common tasks;
- IP address via DHCP, or configured by Amazon Elastic IP;
- HTTPS support.
See the list of AMI-images by regions on Bitrix Virtual Appliance: Amazon EC2.
Note: Bitrix Virtual Appliance version 5.x also permits managing pool server scalability in simple visual mode in the administrative interface using the module
Scalability.
A description of the virtualization software installation is not included in this manual. If you have any questions on the installation of this program, please see the documentation of corresponding software.
Note. For more information on Bitrix Virtual Appliance v 4.3 go
here.
Installation of Bitrix Environment for Linux 5.x
Bitrix Environment for Linux is useful for:
- Users and developers who previously used Bitrix Virtual Appliance product for site preparation and experienced problems with the migration of configuration to host or non-virtual hardware without prejudice to performance.
- For hosting-partners specialists planning creation of different VPS templates for Bitrix products.
- For system administrators requiring fast preparation of high-performance framework for the installation or migration of sites based on Bitrix.
- For programmers and system administrators requiring the fast deployment of a cluster based on Bitrix.
Bitrix Environment for Linux provides the fast deployment of an optimal environment for Bitrix products and solutions built on Linux Fedora 14-16 (i386, x86_64), CentOS 5/6 (i386, x86_64) and Red Hat Enterprise Linux 5/6 (i386, x86_64) with minimal costs:
- mysql-server 5.*
- web-server (Apache 2.2.*)
- php 5.6.*
- nginx 1.6.2
- memcached
- stunnel
- catdoc
- xpdf
- munin
- nagios
- sphinx
Let’s consider the installation of Bitrix Environment for Linux on hardware with a CentOS 5/6 (i386, x86_64) installation.
- Authorize on the server as the administrator.
- Download the script Bitrix Enviroment for Linux and input the following commands for execution:
wget http://repo.bitrix.info/yum/bitrix-env.sh
chmod +x bitrix-env.sh
./bitrix-env.sh
Note. If the download utility for the wget file is missing on the server install it with yum install wget command.
- During the installation, you are prompted to indicate the Environment to install (please select Version 5).
- After the installation, you have to open the ports required for the normal operation of Bitrix product in Bitrix Environmen:
iptables -I INPUT -p tcp --dport 25 -j ACCEPT
iptables -I INPUT -p tcp --dport 80 -j ACCEPT
iptables -I INPUT -p tcp --dport 443 -j ACCEPT
iptables -I INPUT -p tcp --dport 5222 -j ACCEPT
iptables -I INPUT -p tcp --dport 5223 -j ACCEPT
iptables -I INPUT -p tcp --dport 8890 -j ACCEPT
iptables -I INPUT -p tcp --dport 8891 -j ACCEPT
iptables -I INPUT -p tcp --dport 8893 -j ACCEPT
iptables -I INPUT -p tcp --dport 8894 -j ACCEPT
where the ports are designated and used for the following services:
- 25 - smtp server;
- 80 - http ;
- 443 - https;
- 5222 - bitrix xmpp server;
- 5223 - bitrix xmpp serever on ssl;
- 8890 - ntlm authorization;
- 8891 - ntlm authorization on ssl;
- 8893 - http server of instant messages;
- 8894 - https server of instant messages.
- Now the ports are indicated and you have to save the table with the following command:
service iptables save
- The installation is finished.

- Reboot the server to check if the installation is correct – you will see that the machine is running and its current version on the screen.
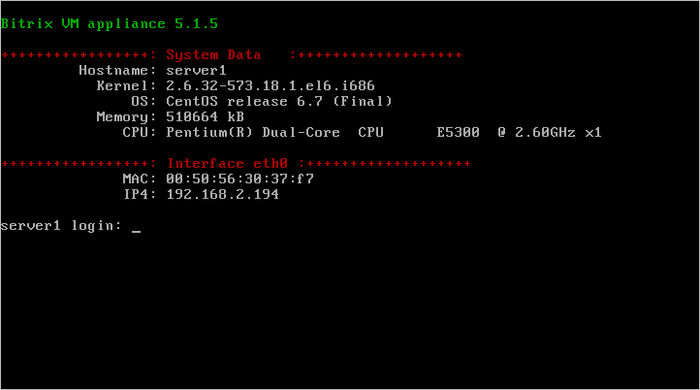
- Upon the first server logon with root user name you are prompted to change the password of the bitrix user that you will further use to operate the machine.
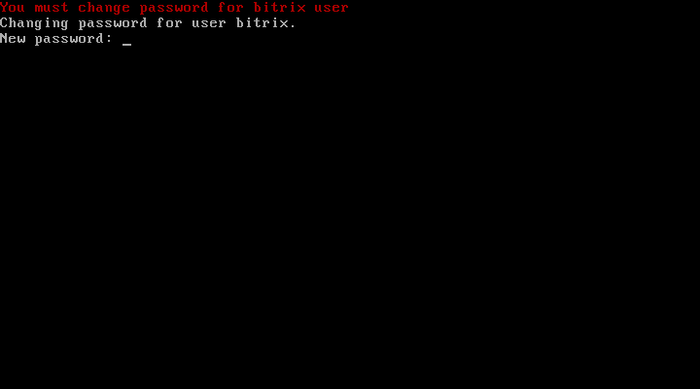
Now you are ready to work.
Installation of the VA VMware Edition
- Starts the download of the operational system installed on the virtual machine. After the download, this window opens:
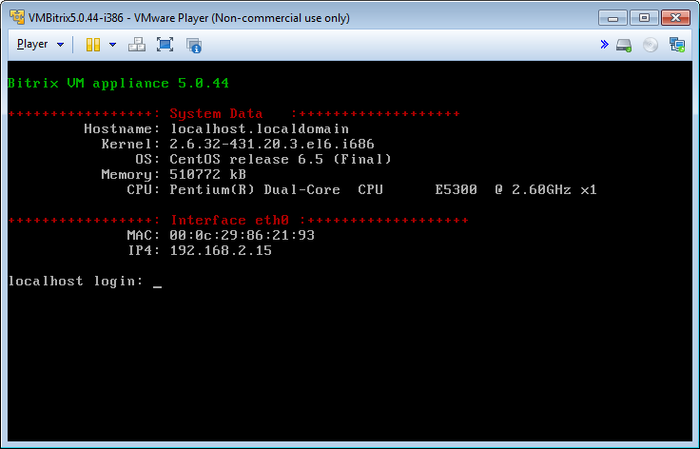
Note. Superuser root uses the password bitrix by default.
Upon the first startup of the virtual machine you are prompted to change the passwords of the superuser root and user bitrix:
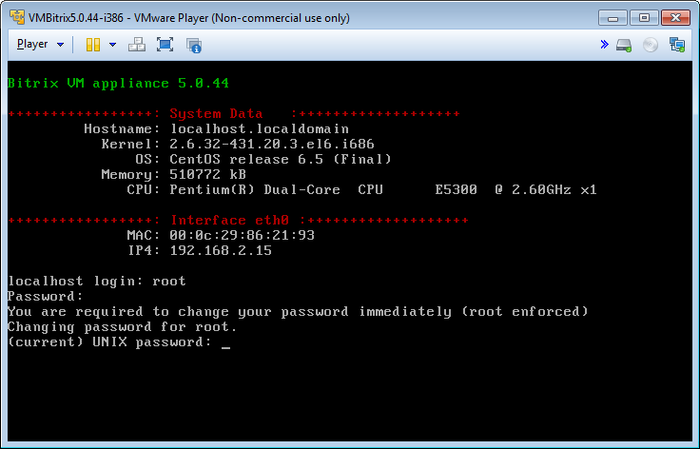
- In localhost login and Password prompts, type the current login and password (root and bitrix, respectively). Hit Enter.
- When prompter for (current) UNIX password, type the current password (bitrix) and press Enter.
- Type the new password in Enter new UNIX password; press Enter.
- Retype the new password in Retype new UNIX password; press Enter again.
Similarly, change the bitrix user password.
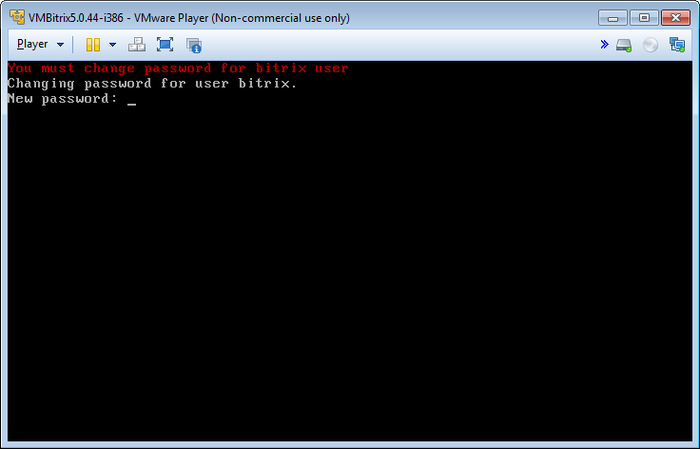
Note. You can change the bitrix user password later in the virtual server control panel using menu 1. Creat Management pool of server - Change bitrix password.
Now the virtual server is ready for use. The initial VA Available actions menu appears as follows:
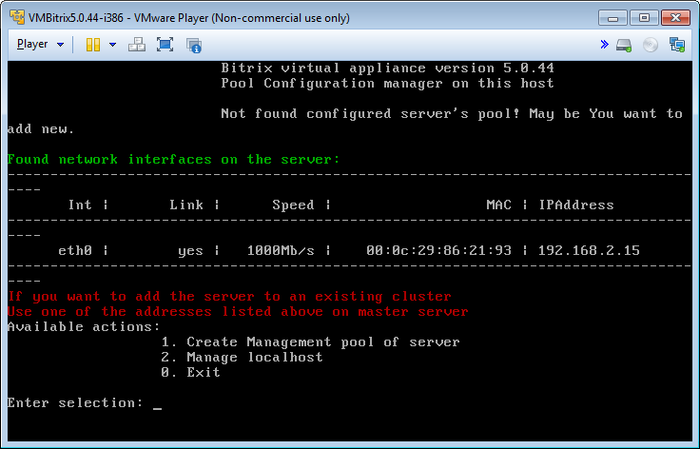
- 1. Create Management pool of server – creates server control pool;
- 2. Manage localhost – controls local virtual server;
- 0. Exit - exit to operational system console.
Type the number (0–2) and press Enter to execute any action. For example, to configure the local virtual server type 2 (Manage localhost) in the line and press Enter.
To direct control back to operating system, press Ctrl+Alt.
To return from shell to the virtual machine menu, execute:
cd ./menu.sh
Note: if you encounter problems with the network adapter, try changing the adapter mode (
Bridged,
NAT,
Host-only):
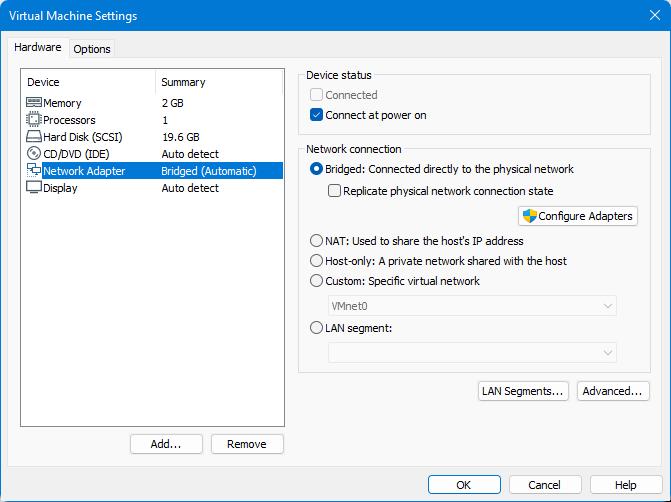
Then, restart the server by selecting the command
2. Manage localhost > 4. Reboot server and pressing
Enter.
Now that the server is running, type the address suggested by the appliance (it varies from system to system; the screenshot above shows the address http://192.168.2.15) in the web browser. You will see the following welcome screen:
Choose one of the options to continue:
- New Installation - runs the installation wizard which will download, unpack and install a new website;
- Restore Project - runs a restoration wizard to create a backup copy of your website or restore it from an existing backup.
Migration of the Bitrix product to a VA
For site migration from the host or local server to a virtual machine you need:
- Site archive;
- Configured virtual machine (see
Installation of the VA VMware Edition for more details)
- Create site archive on Backup page (Control Panel > Settings > Tools > Backup > Create Backup):
- The site archive may be saved in Bitrix Cloud;
Note: the copy option in Bitrix Cloud is only available for users with an active license. In addition, for safety’s sake, all backup copies of the site are always encrypted before they are sent to Bitrix Cloud. Bitrix, Inc. cannot recover or change the password! Be careful, the archive cannot be recovered without the password!
- Or in the site folder (site archive will be saved in the /bitrix/backup/ folder of the hosting with a unique filename).
- Advanced backup settings can be selected in the tab Parameters
Note: to ensure data safety, it is recommended to enable the option Encrypt archive data and enter a password for the site archive.
- After the successful creation of the site archive it will be available on the page View existing backups (Settings > Tools > View Existing backups). All backups will be shown here:
- Then, you will have to Get the link for migration using the action menu:
and copy it to the exchange buffer in the window that opens:
- The site archive may also be downloaded to a local computer using the Download menu option.
Restoring the Website
- Start up the preset virtual machine BitrixVA (see the lesson Installation of the VA VMware Edition).
- Enter http://virtual_machine_address/ in the browser address bar (you may indicate a domain or IP address).
- The Birtix product installation wizard will open. Choose the option of Restore Project:
Note: it is also possible to download the archive from Bitrix Cloud (a license key with a valid license is needed) or from a local computer, if such means were selected at the stage of creating the site archive.
- If the archive was encrypted, password prompting appears following the archive download.
- After that, a database connection must be set up:
Default MySQL connection settings in the BitrixVA virtual machine are as follows:
- Server: localhost
- DB user: root
- Password: <empty>
- DB name: sitemager0
Specific database name may also be indicated, if necessary. In this case, the option Create database must be additionally selected if no database exists as yet.
For safety, having successfully restoring database, please Delete archive and temporary scripts by clicking the button with the same name.
- The Bitrix product migration to the BitrixVA virtual machine is now completed.
Host management
Create and configure the pool of one or several servers to start using the services. Select main menu item 1. Create Management pool of server and type the server name into this pool.
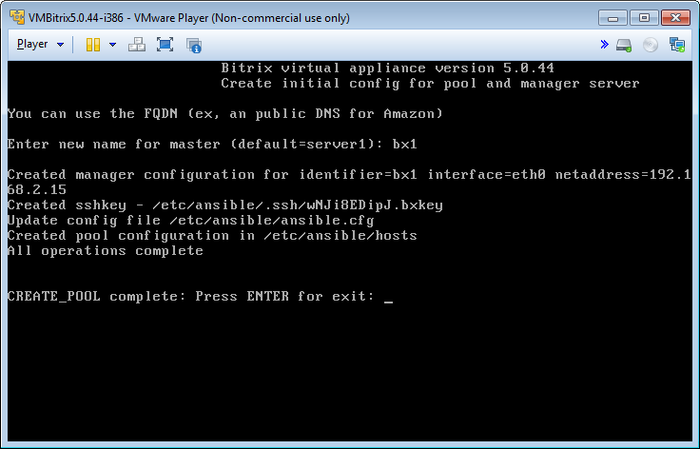
After the pool is created in the basic menu you will see new items both in the main menu:
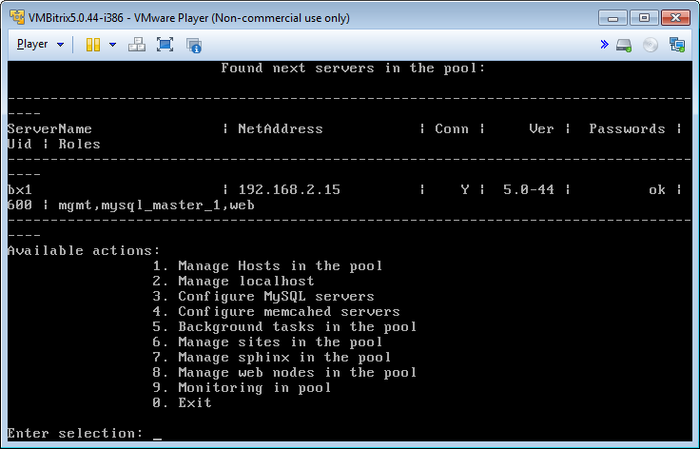
And in the Manage Hosts in the pool menu:
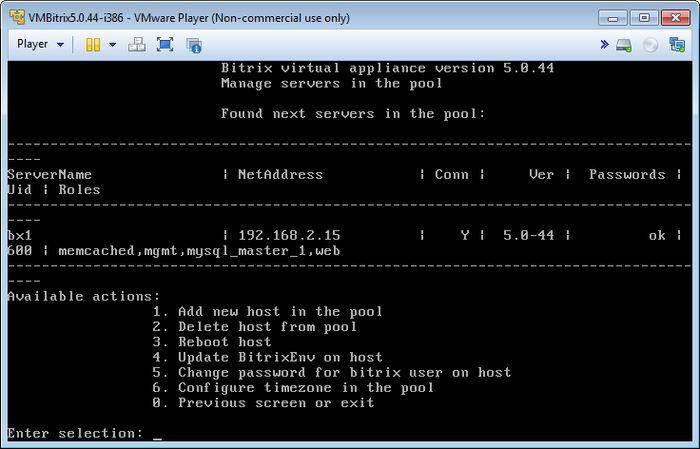
Add a new host in the pool
Select menu item 1. Manage Hosts in the pool > 1. Add new host in the pool to add new host to the pool (cluster).
Type host IP or DNS and select a short name for the server to be added to the pool:
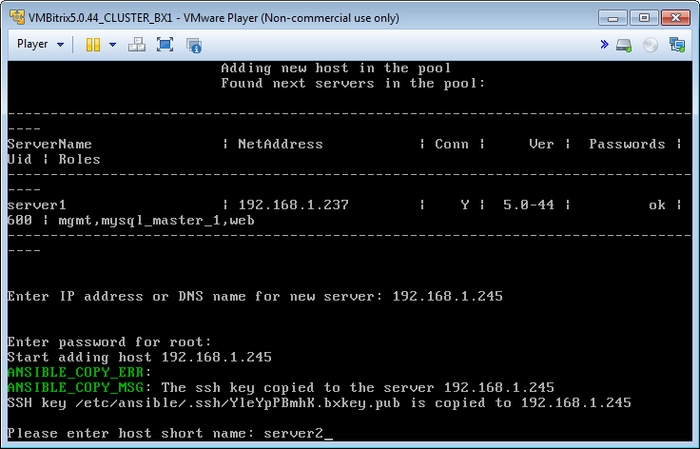
This way, you can add any number of servers to the pool:
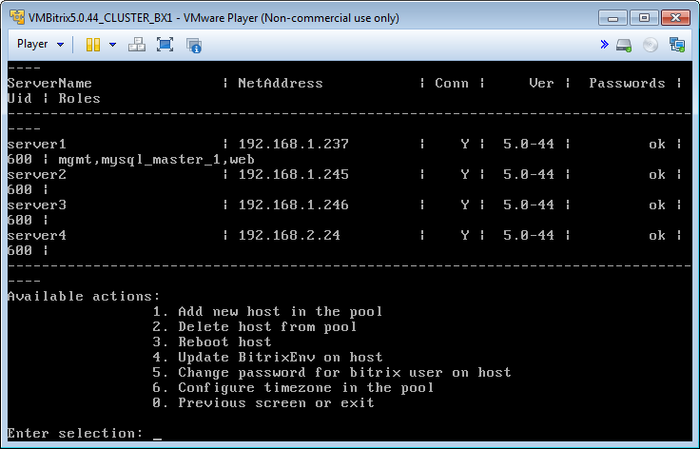
Now you can manage any pool server from a single machine.
Note. When you enter any server added to the pool the system notifies you that this server is in the pool and a manageable menu cannot be displayed:
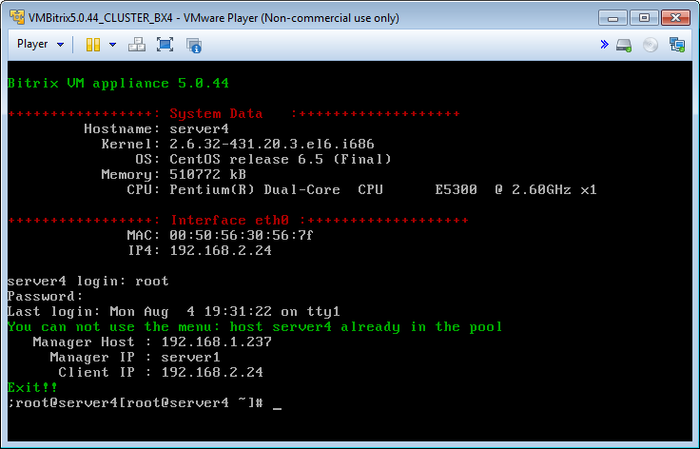
Delete the host from the pool
Delete the host from the pool using menu item 1. Manage Hosts in the pool > 2. Delete host from pool .
Type the host IP or DNS and select a short name for the server to be deleted from the pool:
After the confirmation, the server is deleted from the pool:
Reboot host
Reboot host in the pool using menu item 1. Manage Hosts in the pool > 3. Reboot host.
Type the host name (here – server4) and confirm the server reboot:
Pool Manager allows you to remotely update the Web-environment and system components on any host in the pool.
For example, the pool contains virtual machine v. 5.0.37 which should be updated to v. 5.0.44.
Use the same procedure to update the virtual machines v. 4.3 added to the pool.
You are prompted to input the name of the host where you have to change the password of the bitrix user on and to confirm the action:
Time zone configuration is a very important parameter that is mandatory for checking and correcting the configuration. The parameter governs synchronization with calendars, orders, and many other aspects requiring a date and time configuration.
The server date and time are not the certain date and time. In fact, these are three different dates and times with certain time zones:
Bitrix Virtual Appliance allows the fast deployment of the master-slave cluster configuration Bitrix Site Manager and Bitrix24 Self-hosted.
The master – slave layout is realized by MySQL means. The Bitrix platform allows for a flexible balance between the servers’ participating in replication.
Configuring server IP
Upon the first VA, start the server that gets the IP automatically provided that there is a DHCP-server configured in the network.
You can change the server IP in two modes – automatic or manual, if necessary.
Getting IP automatically using DHCP-server
- To change the local server IP using DHCP-server select main menu item 2. Manage localhost - 2. Configure network interface via DHCP.
- Select the network interface (here – eth0) and you automatically get the IP from the DHCP-server:
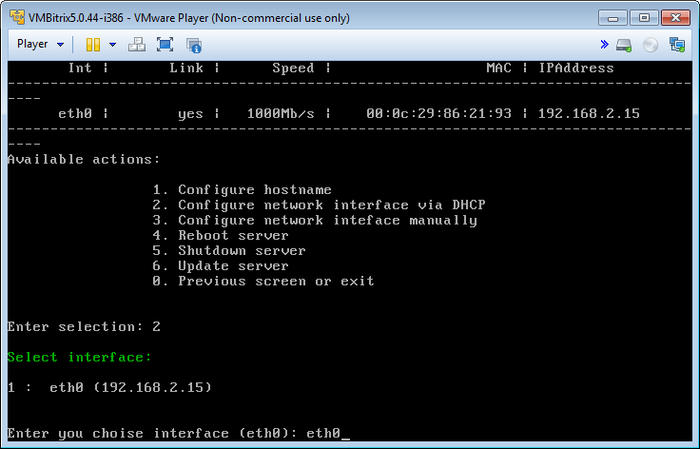
Changing the IP manually
- To set the IP manually, select main menu item 2. Manage localhost - 3. Configure network interface manually.
- Select the network interface (here – eth0).
- Input the following data:
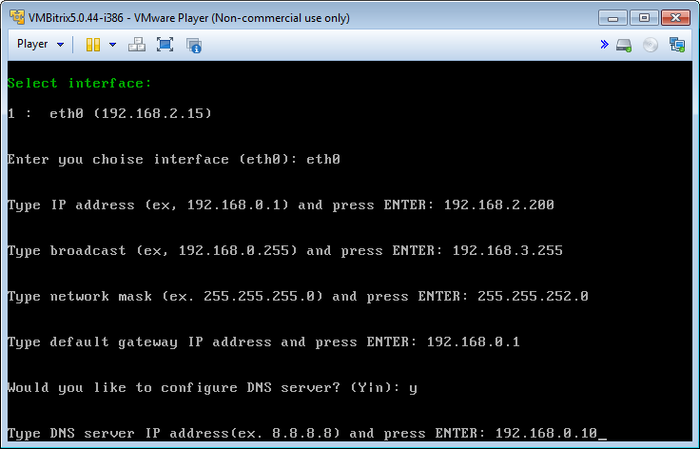
- Type IP address – new server IP;
- Type broadcast – network broadcast address;
- Type network mask – subnet mask;
- Type default gateway – default gateway;
- Type DNS server – server DNS.
- Review the input data and confirm the server network parameters change:
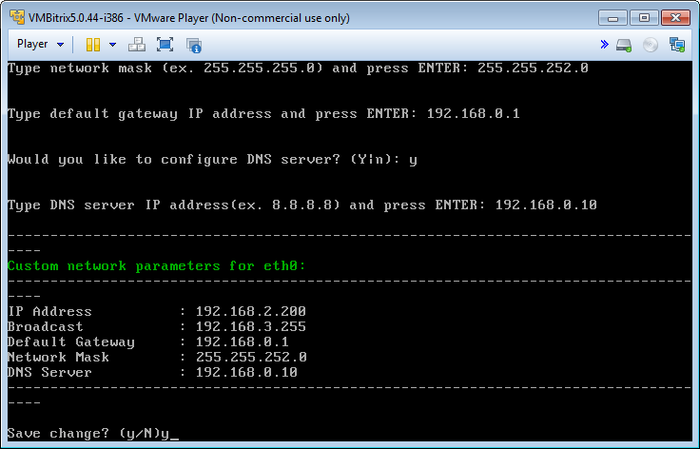
Update of Bitrix Virtual Appliance
Attention: the update of Bitrix Virtual Appliance is a complex operation during which the system files of the virtual machine operating system are updated, and proper knowledge of *nix systems is indispensable to complete this operation properly. It is recommended to perform a complete backup of the virtual machine.
Please choose option 2. Manage localhost - 6. Update server in the administrative menu to update BitrixVA product.
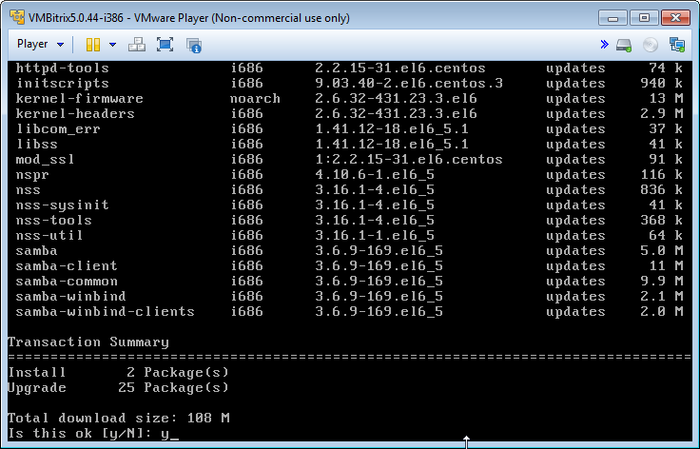
The script will automatically check for updates of the virtual machine, show the total volume for download and prompt for installation.
Note. This menu item starts updating the current virtual machine components only. If you have several servers in the pool (cluster), it is reasonable to update all the virtual machines in the pool.
Notes:
Configure the memcached servers
Bitrix products allow the use of a memcached servers pool to work with data cache.
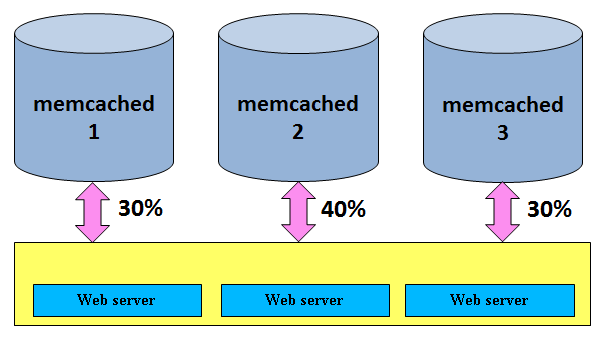
This provides:
- High productivity – due to the centralized usage of cache by web-application;
- Reliability – due to the ability to withstand the cache subsystem to the faults of separate components;
- Unlimited scalability – due to the addition of new memcached-servers.
Note. To use the
memcached server pool you need the
Web Cluster module which is not included in all the editions of Bitrix products.
Create a memcached server
To create a slave MySQL server:
- Select menu item 4. Configure memcached servers > 1. Create memcached server.
- Type the host name in the pool where the memcached server is started (here – server2):
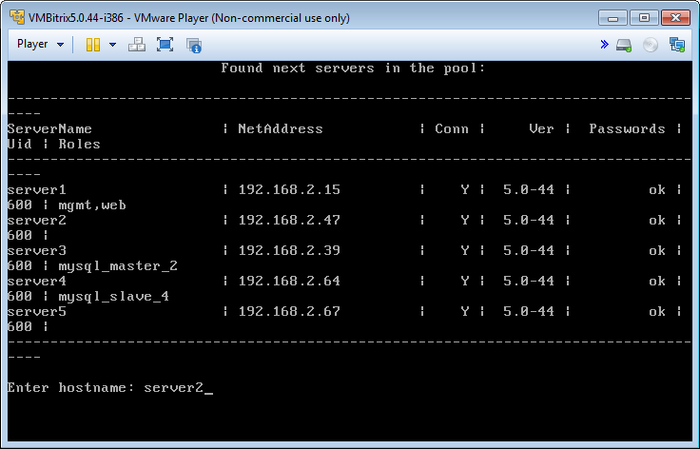
- Wait until the memcached server startup task is completed:
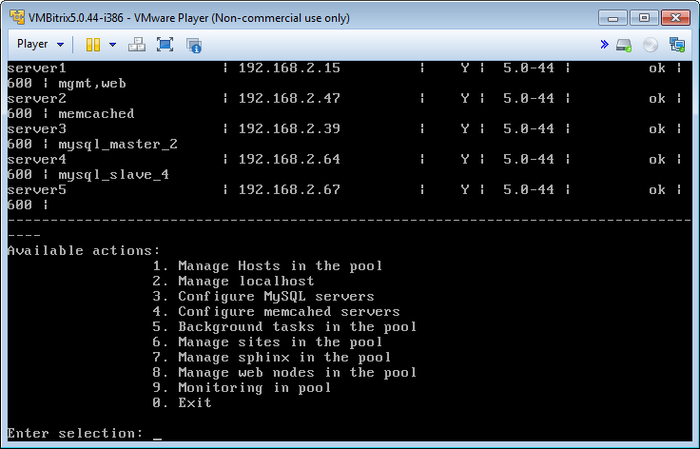
Remove the memcached server
To remove the memcached server:
- Select menu item 4. Configure memcached servers > 3. Remove memcached server:
- Type the host name of the memcached server to be removed (e.g. server5):
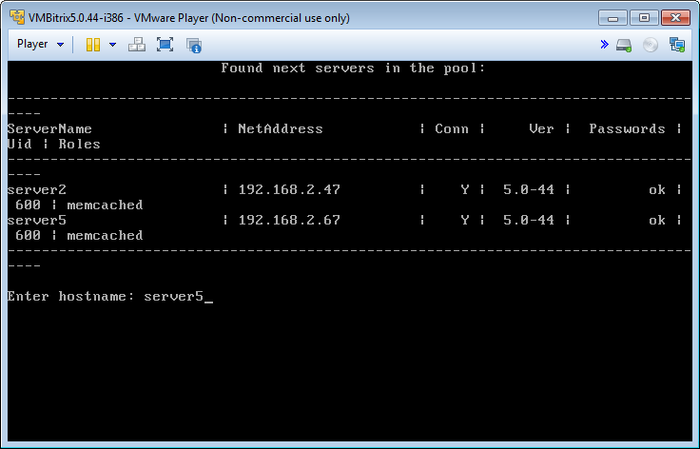
- Wait until the memcached server removal task is completed.
Note. Task execution may take a rather long time (up to 2-3 hours and more) depending on the task complexity, data volume used in such tasks, capacity and server load. You can check the currently executed tasks by using menu item 5. Background tasks in the pool > 1. View running tasks.
Background tasks in the pool
All changes to the virtual machine (such as settings, start-up of any services, synchronization and others) are executed using scripts - tasks.
To see the task history and currently executed tasks, select menu item 5. Background tasks in the pool:
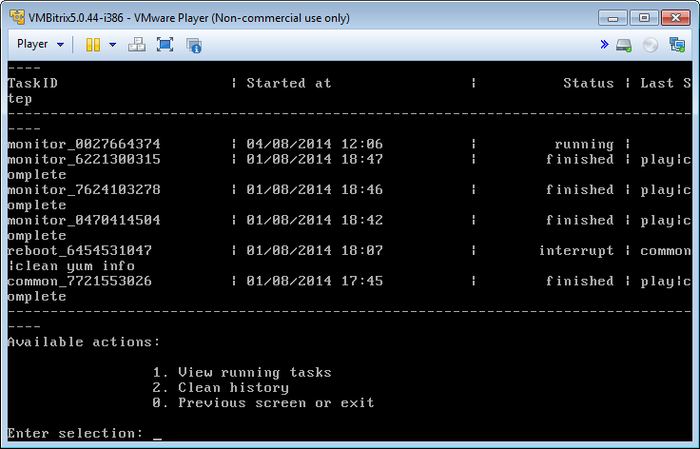
For running tasks, select menu item 5. Background tasks in the pool > 1. View running tasks:

To stop the currently executed task, select menu item 5. Background tasks in the pool > 1. View running tasks > 1. Stop task and type task ID:
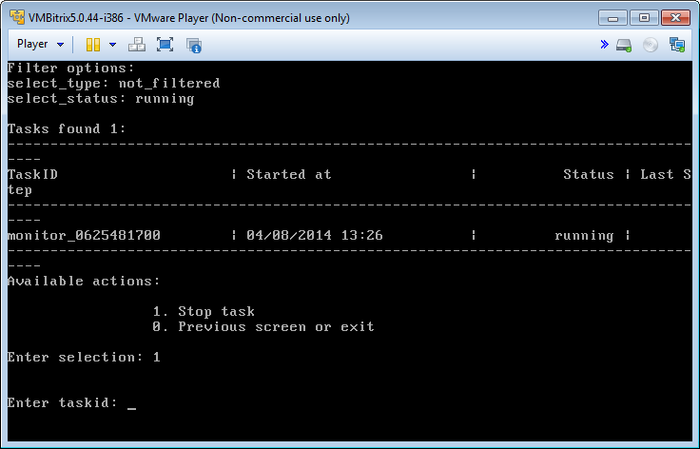
Note. Task execution may take a rather long time (up to 2-3 hours and more) depending on the task complexity, data volume used in such tasks, capacity, and server load.
To clear the task history, select menu item 5. Background tasks in the pool > 2. Clean history:
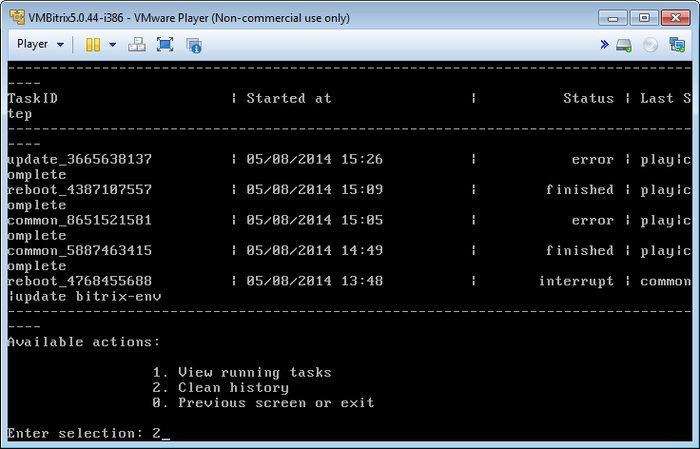
Then, select the number of days to save the history and filter to sort the tasks (e.g. let’s select all tasks with TaskID common):
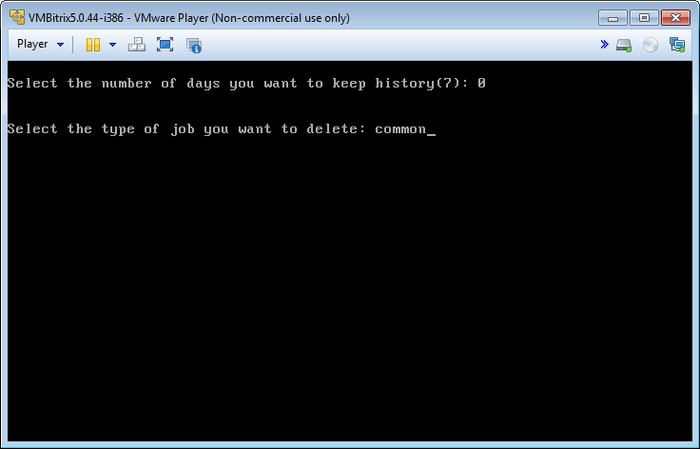
All of the tasks satisfying the set range and filter and history clear request are displayed:
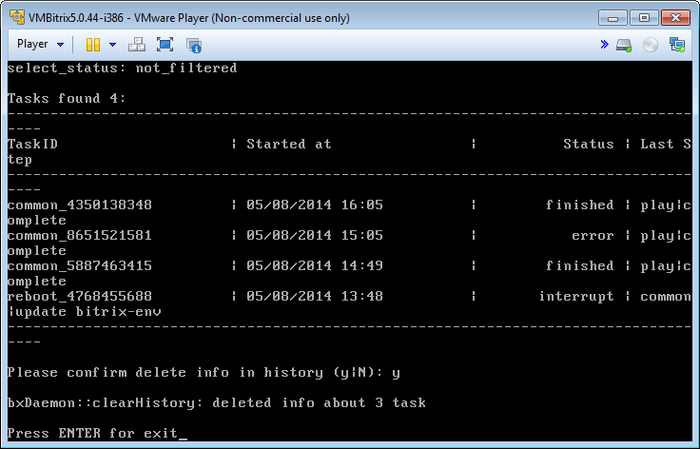
Manage the sites in the pool
Create\Delete site
Additional Site Creating Wizard permits to deploy several sites on the same virtual machine both on independent Bitrix installations and as a part of multi-siting.
Adding a Site
The following actions must be taken to add an additional site:
- Preset DNS server or indicate a domain name in /etc/hosts on the virtual machine and also on all machines from which this site will be accessed.
- Then, run wizard 6. Manage sites in the pool > 1 Create site:
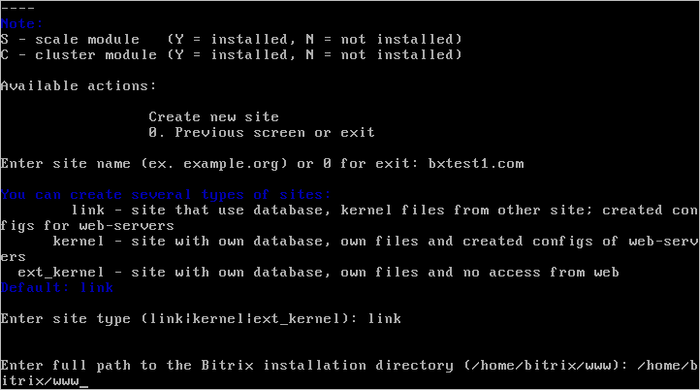
and provide the following data:
- Enter site-name - domain name of the additional site without www;
- Enter type site (link|kernel) - Bitrix installation type:
- link - if a new site in an existing, multi-site installation is being created - that is, there is a common kernel (main module) and database in an existing Bitrix install that will be shared with the new site.
- kernel - if the site is being created in a completely new installation of the Bitrix Platform - that is, this site will have a separate Bitrix kernel in a new site directory.
During the master execution, the following directory is created on the server: \home\ext_www\{host_name}, containing:
- Symbolic references to the main core in \home\www (if link option is selected).
- Directories and script BitrixSetup for the installation and restoration of the product (if the kernel option is selected).
After the completion of the task on site addition, it is ready for use.
Note: the number of additional sites is not limited. The only limit is that this wizard is not intended for work with the machines forming the cluster.
Deletion of an Additional Site
In order to delete an entry about an additional site, please choose option 6. Manage sites in the pool > 2. Delete site in the administrative menu of Bitrix Virtual Appliance.
Note. As the master on the additional site removal removes the folder and database of the additional site we recommend that you backup important data preliminarily.
Note. Task execution may take a rather long time (up to 2-3 hours and more) depending on the task complexity, data volume used in such tasks, capacity and server load. You can check the currently executed tasks by using menu item 5. Background tasks in the pool > 1. View running tasks.
Set up cron tasks
By default, cron is enabled in the virtual machine. To disable the cron service for any reason:
- Select main menu in 6. Mange sites in the pool > 3. Change cron tasks on site and input the hostname to disable the cron service for:
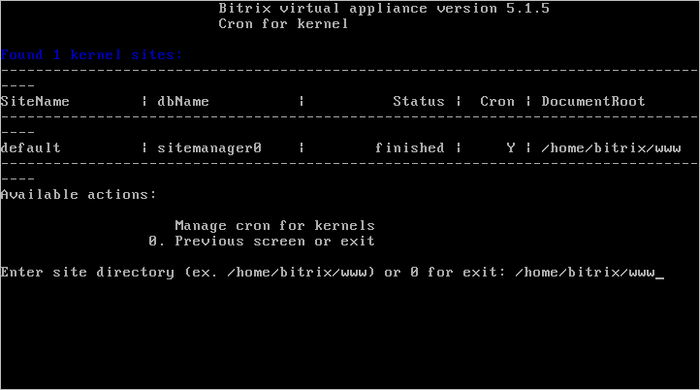
- Confirm cron disable and wait until the task is completed:
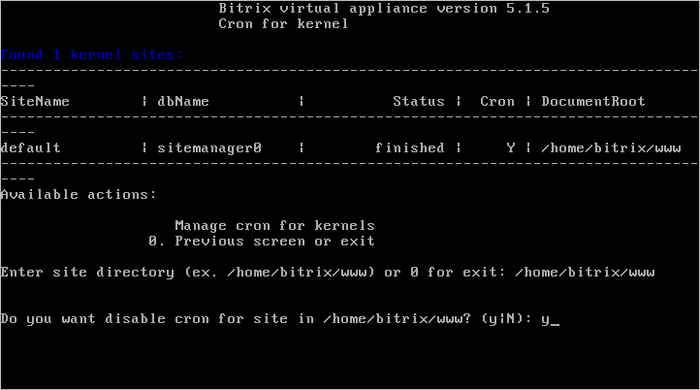
Use the same procedure to enable Cron:
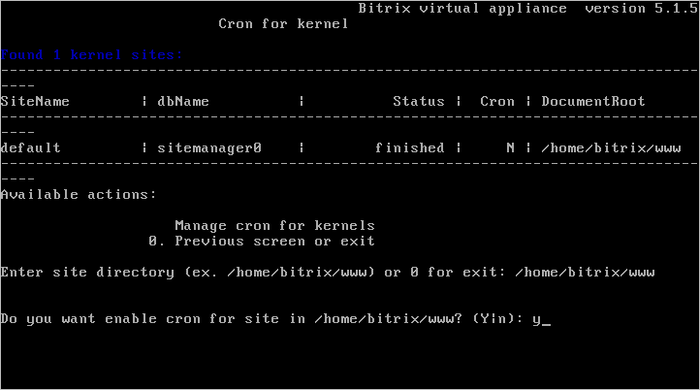
Note. For more information on how to set the processing of all agents in cron in Bitrix products click
here.
Set up the mail server
To set the integrated mail server:
- Select main menu in 6. Mange sites in the pool > 4. Change e-mail settings on site and input the hostname to set the mail delivery for:
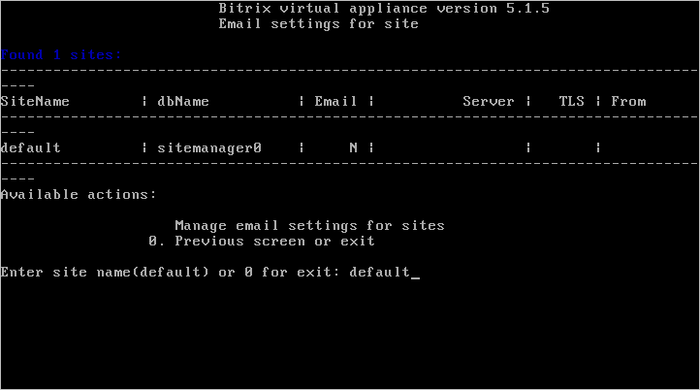
- Then, input the required mail server data:
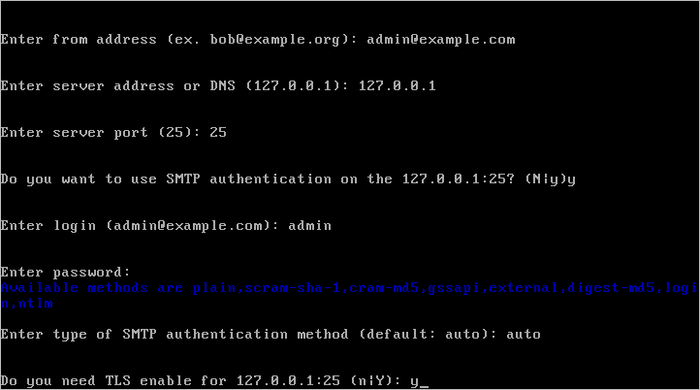
- from address – address of the sender to forward the messages.
- server address or DNS – mail server IP and DNS. Press Enter to use the default address (127.0.0.1)
- server port – server port. The port depends on connection type: 25 – for regular and 465 – for encrypted (using SSL). Press Enter to use default port (25).
- o To use SMTP-authorization, type login and password to access SMTP-server in auth authorization for line, otherwise type n.
- o To use encrypted data transfer TLS-protocol, type y in TLS enabled line, otherwise type n.
- Wait until the mail server set up task is completed.
- To review select item 6. Mange sites in the pool > 4. Change e-mail settings on site again and check if the mail server settings are correct:
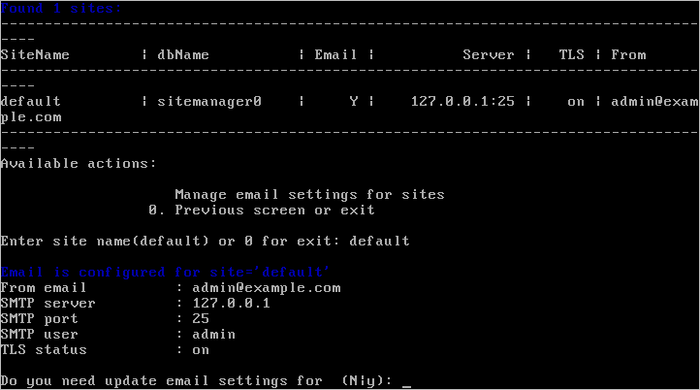
Note. Task execution may take a rather long time (up to 2-3 hours and more) depending on the task complexity, data volume used in such tasks, capacity and server load. You can check the currently executed tasks by using menu item 5. Background tasks in the pool > 1. View running tasks.
Set up https on site
By default, site access support using HTTP and HTTPS protocols is enabled in the virtual machine.
To enable site access using secured HTTPS protocol only:
- Select main menu in 6. Mange sites in the pool > 5. Change https settings on site and input the hostname to set the access protocol for:
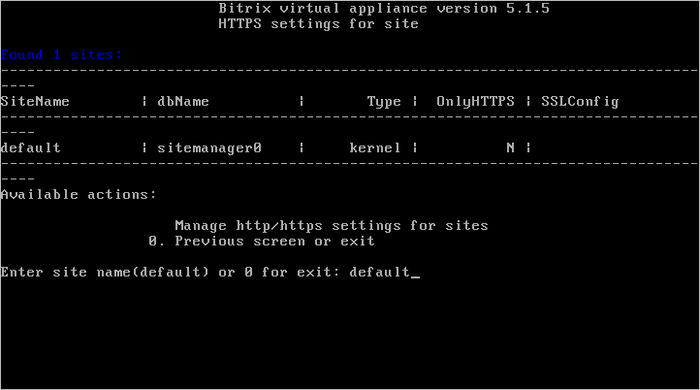
- Confirm HTTP access disable and wait until the task is completed:
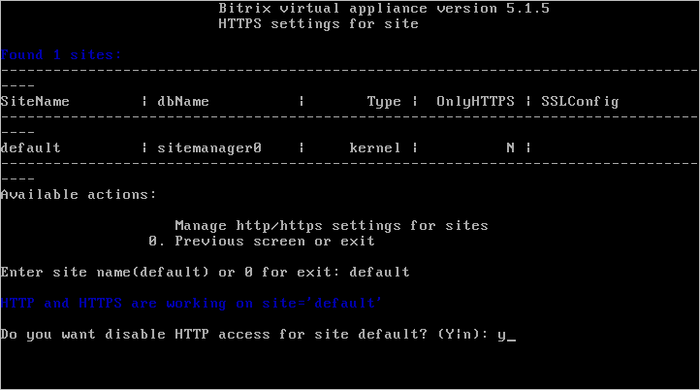
Note. To access the site using HTTPS protocol only, you need
SSL-certificate from the trusted certification center; otherwise the browsers display an error informing that the site security certificate is not trusted.
Use the same procedure to restore site access using HTTP protocol:
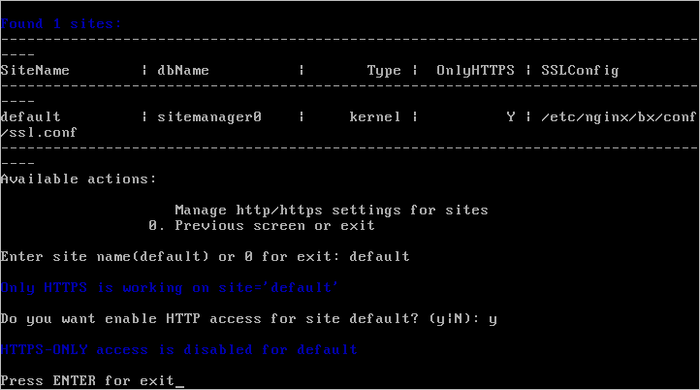
Note. Task execution may take a rather long time (up to 2-3 hours and more) depending on the task complexity, data volume used in such tasks, capacity and server load. You can check the currently executed tasks by using menu item 5. Background tasks in the pool > 1. View running tasks.
Set up site backup
For a BitrixVA based project, just like for any other web project, data safety is always one of the most cherished and cared for aspects.
Since version 4.0, Bitrix Virtual Appliance includes an option to create automatic backups of the website (the contents of /bitrix/home/www/) and the database. The backup files are saved as .tar.gz archives in /home/bitrix/backup/archive/ according to the schedule.
This method has both advantages and disadvantages compared to backup mechanism integrated into Bitrix products:
- Advantages: faster backup and no dependency on project performance capability.
- Disadvantage: you cannot backup files located in cloud storages with this method.
To schedule automatic backup using BitrixVM tools:
Note. Please check the available disk space and regularly delete old backups.
Configure NTLM auth for sites
The AD/LDAP module of version 11.5.0 and higher is required in order to support NTLM authorization feature by Bitrix Site Manager and Bitrix24 Self-hosted.
After enabling and setup, the new NTLM authorization feature starts working as follows:
- An unauthorized user comes to the project to be redirected to an open Apache port (8890 for http or 8891 for https) by the event handler;
- Apache performs NTLM authorization of the user, and the user is redirected back to port 80 or 443 (for http and https, accordingly);
- The user performs the next hits normally.
Let us consider the setup procedure for Bitrix24 Self-hosted.
User NTLM Authorization Setup in Bitrix24 Self-hosted
- During installation, select Allow Active Directory users to authorize in portal in the Wizard:
- Next, enter AD domain connection settings and check the connection:
- Indicate the relation of AD groups to the corporate portal groups:
Bitrix24 is ready to use the NTLM authorization. The next step is to set up the virtual machine.
User NTLM Authorization Setup in Bitrix Virtual Appliance
In order to set up the virtual machine, please connect to it as a root user, select the menu option of 6. Mange sites in the pool > 7. Configure NTLM auth for all sites, and enter the necessary data.
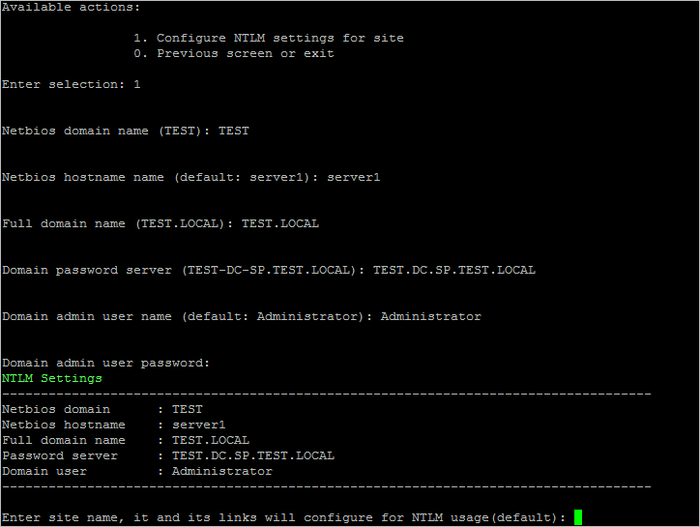
After confirmation that the data entered are correct, the Wizard will set up and start all the necessary services and also connect the virtual machine to the domain.
Note: The following command may be used to check the successful introduction of the computer into the domain:
net ads testjoin
The setup is complete. The next step is to check browser settings to ensure successful NTLM authorization.
NTLM Authorization Setup in Browsers
- Internet Explorer
To make sure NTLM authorization is successful, the web server must be located in the Local Intranet zone (if necessary it must be added there):
- Mozilla Firefox:
Add a web server to the list of trusted URI for automatic NTLM authorization (using the parameter network.automatic-ntlm-auth.trusted-uris on the Firefox page: about:config)
Note: The procedure for enabling NTLM authorization in the already installed Bitrix24 product and also in Bitrix Site Manager is the same as that described above, except that the Active Directory server shall be added manually in the administrative section.
Sphinx Search Engine Setup
The use of Sphinx as a search engine will permit to significantly increase search speed and reduce the server load.
For its setup, please do the following:
- Install and update the project up to the latest version available;
- In the virtual machine menu, choose option 7. Manage sphinx in the pool > 1. Create sphinx instance on server:
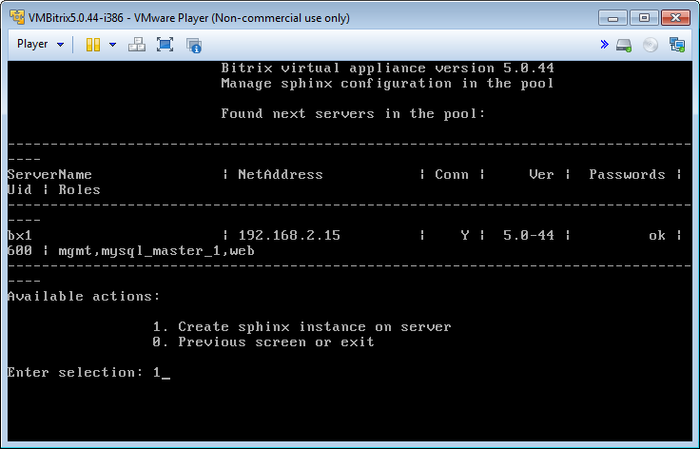
- Then, input the hostname where the sphinx search server will be started on (here server2):
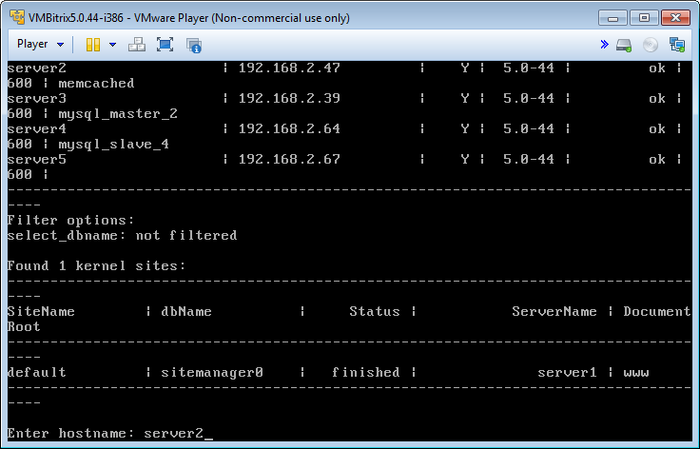
- Select the site system core data base from the list:
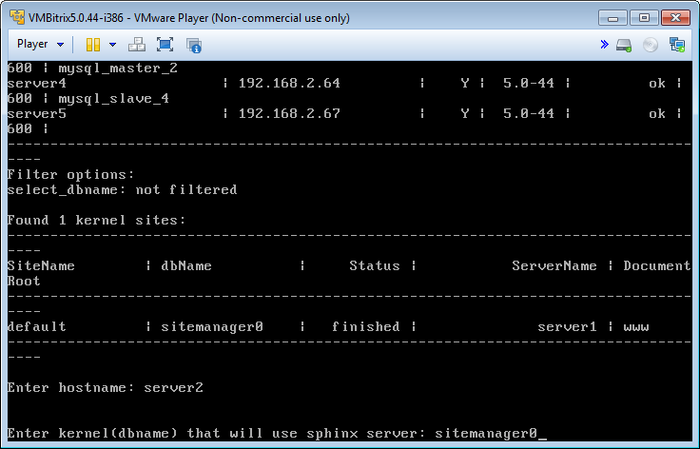
- Confirm the startup of full reindexation after the installation of the sphinx server:
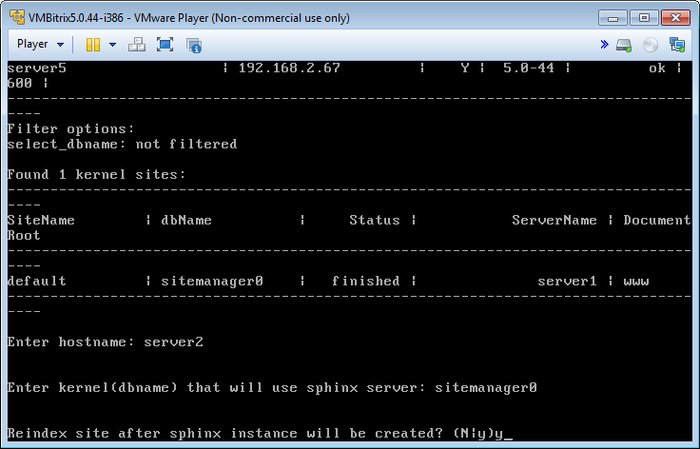
- Wait until the sphinx installation and reindexation task is completed:
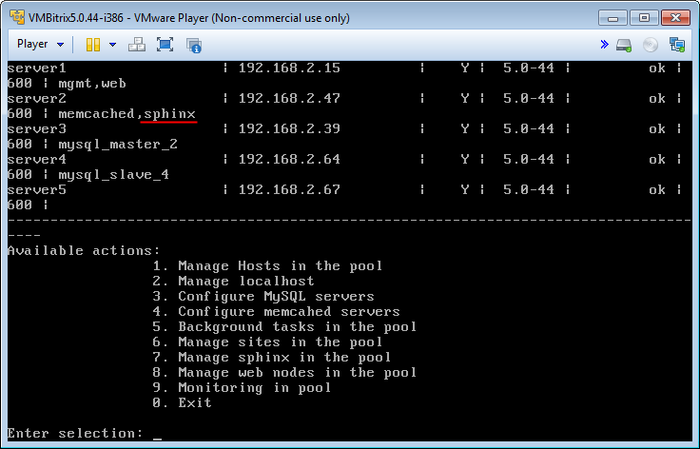
Note. Task execution may take a rather long time (up to 2-3 hours and more) depending on the task complexity, data volume used in such tasks, capacity and server load. You can check the currently executed tasks by using menu item 5. Background tasks in the pool > 1. View running tasks.
Note. For description of the manual set up of the
Sphinx search engine see this
lesson.
Manage web-servers
VA allows for the fast deployment of web-server clusterization in Bitrix Site Manager and Bitrix24 Self-hosted.
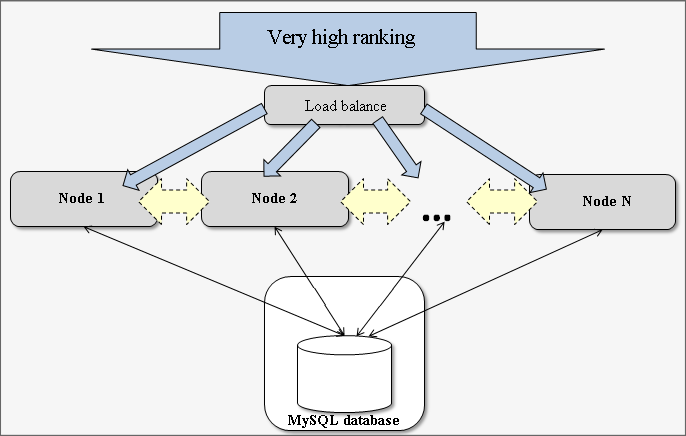
Upon splitting the project into several websites you need to solve two tasks:
- Data (file) synchronization between servers
- Load balance between servers
Note. To clusterize the web-server you need the
Web Cluster module that is not included in all the editions of Bitrix products.
Create web-server
To create a web-server:
- Select menu item 8. Manage web nodes in the pool > 1. Create web instance on server, :
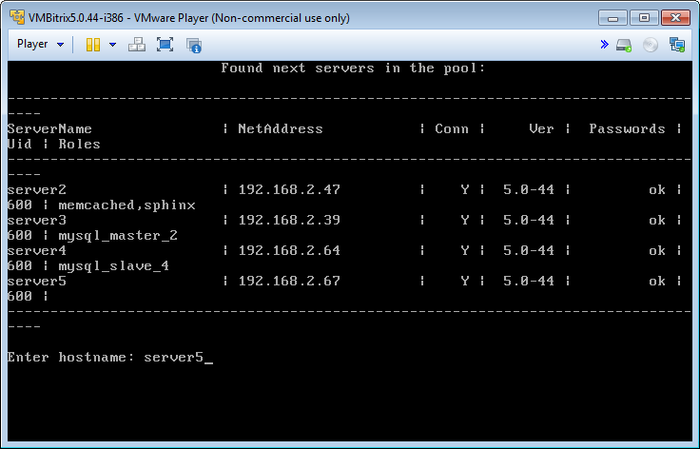
- Type the host name in the pool where the web-server is created in (here – server5):
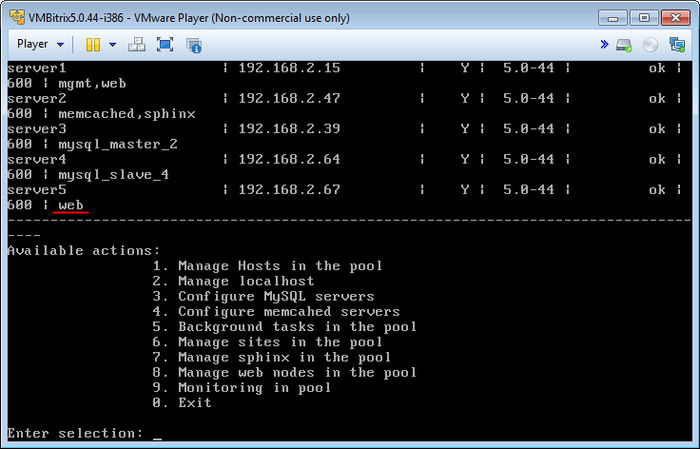
- Wait until the web-server creation task is completed.
Remove web-server
To remove the web-server:
- Select menu item 8. Manage web nodes in the pool > 2. Remove web instance on server.
- Type the hostname of the web-server to be removed (e.g. server1):
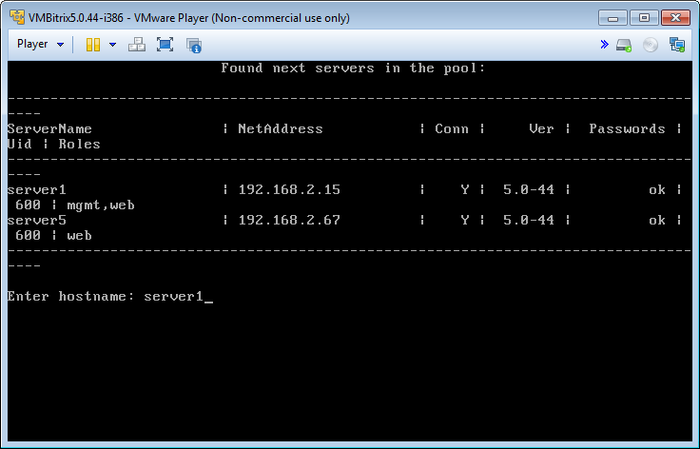
- Wait until the web-server removal task is completed.
- Finally, you have one web-server on the server5 machine:

Thus, we migrated the web-server from the server1 to server5 machine and cleared the server1 machine resources for other roles.
Note. Task execution may take a rather long time (up to 2-3 hours and more) depending on the task complexity, data volume used in such tasks, capacity and server load. You can check the currently executed tasks by using menu item 5. Background tasks in the pool > 1. View running tasks.
Monitoring in pool
Upon the deployment of projects based on VA you need to monitor the condition of the server and its individual components.
VA v. 5.x contains monitoring systems such as Munin and Nagios with a large number of different components to monitor the functions of all the server systems.
To start monitoring system operation:
- In virtual machine main menu select item 9. Monitoring in pool > 1. Enable monitoring in the pool:

- Then, the master sets the necessary parameters and starts the server monitoring services:
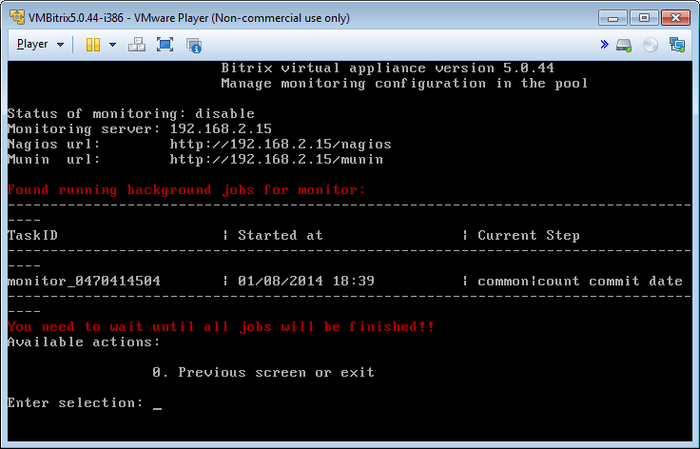
To monitor the server in the browser, click the addresses and sign in under the monitoring accounts:
- Munin - http://server_address/munin/:
login: admin
password: muninBitrixMon
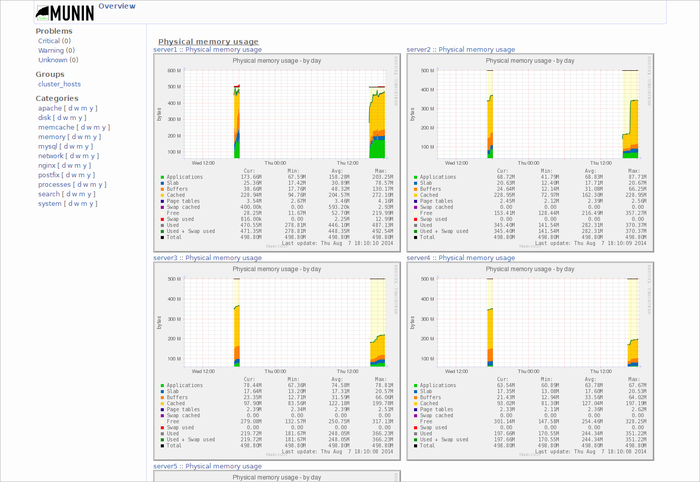
- Nagios - http://server_address/nagios/:
login: nagiosadmin
password: nagiosBitrixMon
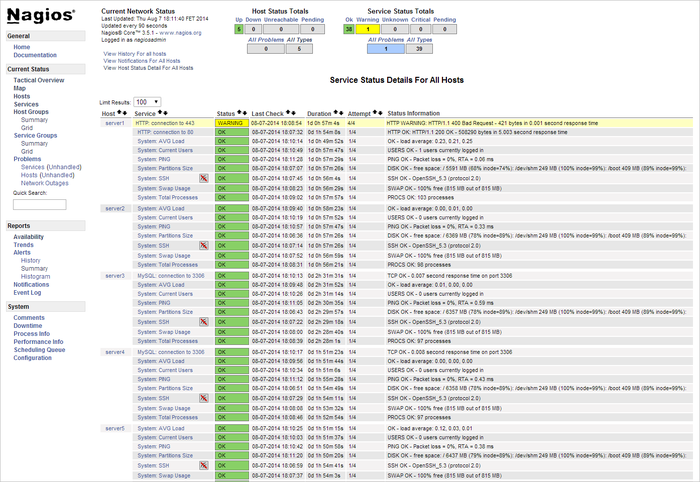
Note. Change the monitoring system passwords by using the console commands:
- Munin:
htpasswd /etc/munin/passwd admin
- Nagios:
htpasswd /etc/nagios/passwd nagiosadmin
Additional BitrixVA settings
Attention: the knowledge of the administration of *nix systems is indispensable in order to complete the operations described in this chapter. It is recommended to perform a full backup of the virtual machine.
Additional settings and debugging of msmtp
This information will be useful for the manual setup and diagnostics of errors with the mail service.
Changes to Configuration Files
The setup uses the msmtp package (it is included in standard dependences for the package bitrix-env).
The package provides for php module settings in the file /etc/php.d/bitrixenv.ini:
sendmail_path = msmtp -t -i
If the configuration is performed from the web interface or console-based menu:
- The configuration file /home/bitrix/.msmtprc is created or updated:
# smtp account configuration for default
account default
logfile /home/bitrix/msmtp_default.log
host 192.168.0.25
port 25
from name@site.com
keepbcc on
auth on
user name@site.com
password XXXXXXXXXXXXXX
tls on
tls_certcheck off
- The account named default is used by default for all websites. If a mailbox for a website other than default is being set up, changes are made to the Apache configuration file (website configuration file):
  <Directory /home/bitrix/www/>
        ...
        php_admin_value sendmail_path "msmtp -t -i -a site_name"
 </Directory>
- A symbolic link with /home/bitrix/.msmtprc at /etc/msmtprc is created (this action is necessary for mail sending jobs that are performed through crontab).
Scripts Used
These recommendations will be useful for testing the automation.
The script /opt/webdir/bin/bx-sites is used for creating from the Web or console.
During mail service setup, it accepts the following parameters:
 bx-sites -o json -a email --smtphost=smtp.yandex.com \
  --smtpuser='jhon@yandex.com' --password=XXXXXXXXXX \
  --email='jhon@yandex.com' --smtptls -s alice
где:
-a email – an action type we perform for the website (-h will permit to obtain the entire list available);--smtphost - IP address or DNS host name through which the mail will be sent;--smtpuser – user’s login (if this parameter is not used, it can be omitted);--password – password for authorization at a mail server;--email – the from field in the message;--smtptls – includes TLS when sending mail;-s|--site – website name (default will be used by default).
Problems and Solutions
The section describes the problems found and resolved and also the ways to debug mail-related problems.
- msmtp keeps a log of notices sent. For example, you may look up the log to find why a message was not sent:
Spt 04 14:41:11 host=smtp.yandex.com tls=on auth=on user=bx@ya.com from=bx@ya.com recipients=3458@gmail.com smtpstatus=554
smtpmsg='554 5.7.1 Message rejected under suspicion of SPAM adxPcTaXWc-fB4SvmKU' errormsg='the server did not accept the mail' exitcode=EX_UNAVAILABLE
- msmtp does not record the information if it failed to start or its configuration is incorrect. We execute message sending from We run sending from the console (we replace the recipient’s address with our address):
echo -e "test message" | /usr/bin/msmtp --debug -t -i name@site.com
an error can occur here, e.g. an error of configuration loading:
ignoring system configuration file /etc/msmtprc: No such file or catalog
ignoring user configuration file /.msmtprc: No such file or catalog
falling back to default account
In this case no configuration file was found, that is why sending failed.
- If everything is in order in clause 2 but messages still fail to go through:
- Place the script test_email.sh to the catalog /usr/bin/ and set execution rights:
#!/bin/bash
export HOME=/home/bitrix

tmp_dir=/tmp/mail

args=$@
if [[ ! -d $tmp_dir ]]; then
        mkdir $tmp_dir
        chmod 777 $tmp_dir
fi

message_body=""
while read line; do
  message_body="$message_body$line\n"
done < /dev/stdin

tmp_file=$(mktemp $tmp_dir/$(date +%Y%m%d_%H%M%S)_XXXXXXXXX)

echo "=========================================" > $tmp_file
echo "ARGV: /usr/bin/msmtp --debug -t -i $args" >> $tmp_file
echo "=========================================" >> $tmp_file
echo -e "BODY: $message_body" >> $tmp_file
echo "=========================================" >> $tmp_file

# send message
echo -e "$message_body" | /usr/bin/msmtp --debug -t -i $args >> $tmp_file && 2>&1
- Change the mail settings in the configuration /etc/php.d/bitrixenv.ini:
sendmail_path = /usr/bin/test_mail.sh
- Restart apache.
- This script launches msmtp with the debug option and stores information about sending parameters, body of the message, and command execution results for each message sent.
When a message is created from the web interface, all of the information is stored in the catalog /tmp/mail, and each message will be stored in a separate file.
Problem:
Messages with notices about orders from a website fail to send, statistics for the day in BitrixVA v5.0.44-5.0.45.
Solution:
The reason is that the home catalog of the scripts is set in HOME=/, which is why the messages to be sent through a Cron job fail to send.
In order to solve the problem, you have to:
- Create a symbolic link with /home/bitrix/.msmtprc at /etc/msmtprc – the configuration file /etc/msmtprc is a system file for the utility and permits to decide on the configuration file location with such a
HOME parameter.
- Or update BitrixVA to version 5.0.46 or higher.
Changing the standard settings of VA
When starting up the BitrixVA virtual machine or a physical server with BitrixEnv package installed, the bvat service automatically sets up the main parameters of Apache, PHP, and MySQL depending on the available memory. It permits to ensure optimum server settings.
However, in some cases, it may become necessary to change certain parameters without disconnecting the bvat service. To introduce such changes to the server settings there exist special configuration files that permit redefining parameters established by the bvat service.
MySQL - /etc/mysql/conf.d/z_bx_custom.cnf
PHP - /etc/php.d/z_bx_custom.ini
Apache - /etc/httpd/bx/conf/z_bx_custom.conf
If there are no such files you may create them yourself.
Increasing the disk space of BitrixVA
The lack of free space problem may eventually occur while using the BitrixVA virtual machine or ami-image BitrixVA.
There are two possible solutions to this problem:
- Adding additional disk and moving some content to it (the optimum solution);
- Increasing the space of the existing virtual hard drive.
Adding additional disk
Because disk space is primarily occupied by site content and site backups located in /home/bitrix and also by the database located in /var/lib/mysql, these particular sections should be moved to separate disks.
Let us consider this task by moving the folder /home with site content and backups to a separate disk.
- To this effect, we add a new disk of a required size in the list of equipment in the settings of the virtual machine. All actions specified below must be performed under the root administrator’s account:
- Once the disk is added, the server may need to be reloaded for disk initialization. The new disk and the letter assigned to it may be seen by running the following command:
fdisk -l
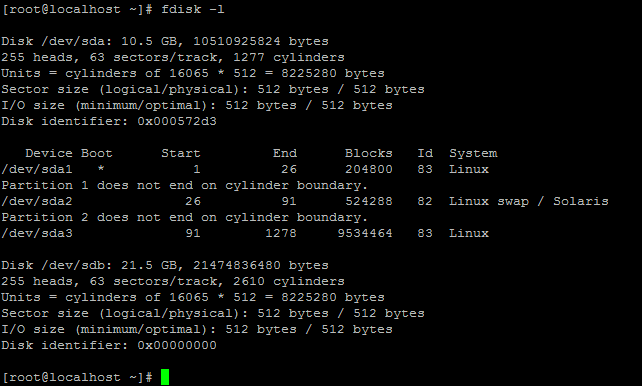
- Run the utility fdisk for work with the disk /dev/sdb:
fdisk /dev/sdb
Create a new partition using the command n:
- Primary partition – command p and
Partition number (1-4): 1;
- In this case, the first and last sectors are chosen by default; thus, a partition will be created using all of the free disk space:
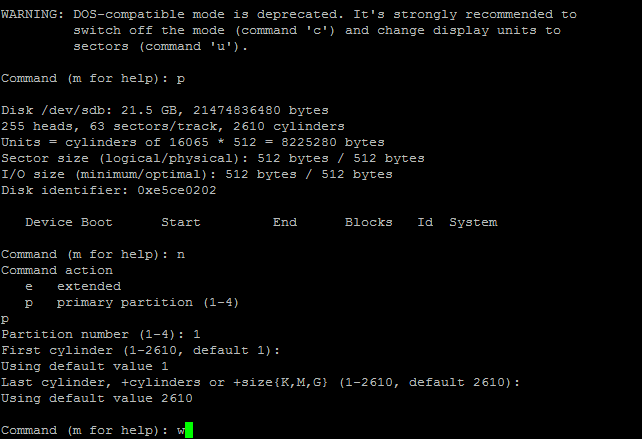
Type the command w in order to save changes to the disk and exit fdisk.
- Once the partition table is saved, we format a new partition and move data from /home to it:
mkfs.ext4 /dev/sdb1
mount /dev/sdb1 /mnt
service httpd stop
service nginx stop
mv -f /home/* /mnt
umount /mnt
- Next, we determine UUID of the new disk and add an entry about it in /etc/fstab. Instead of UUID the name of the device /dev/sdb may also be used:
blkid
/dev/sda1: UUID="99066558-ba04-465c-9962-e827aa2928ec" TYPE="ext4"
/dev/sda2: UUID="8ea38ef9-1ee5-423b-a013-15fd603a678e" TYPE="swap"
/dev/sda3: UUID="08ec5c65-8fd8-47ac-a998-d81195c8f964" TYPE="ext4"
/dev/sdb1: UUID="b2e58731-b621-4bd5-909a-afe3bb5dd8a1" TYPE="ext4"
- All that is left to do is mount a new disk and start up the services that were stopped before:
mount /home
service httpd start
service nginx start
The disk adding procedure is the same for other virtualization environment or directly on a physical server.
Increasing the size of the existing hard drive
The second way to increase disk space in BitrixVA consists in increasing the size of the already existing hard drive of the virtual machine.
In this example, let us use the BitrixVA virtual machine for VMWare and have a look at how to increase the disk space up to 100 Gb.
- Run VMWare Player, in the list of virtual machine choose the BitrixVA virtual machine and click Edit virtual machine settings:
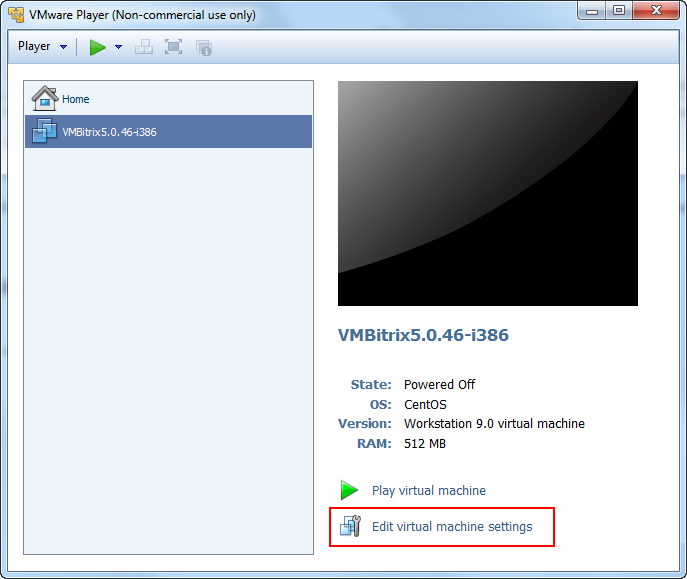
- In the device window, choose the Hard Disk for which the size should be increased and activate the option Expand in the menu Utilities:

- Indicate the necessary size of virtual disk in gigabytes (in this example – 100 Gb) in the field Maximum disk size (GB) of the newly opened window Expand Disk Capacity:

- After that, run the BitrixVA virtual machine, log in under root and go to the command prompt (console) by selecting menu option 0. Exit in the virtual machine.
- Look up the disk and its letter designation using the console command:
fdisk -c -u -l
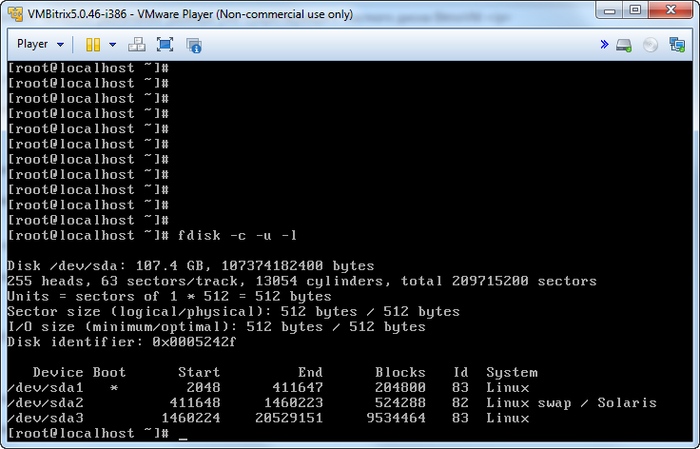
Where for the disk /dev/sda:
- sda1 – boot sector of the disk;
- sda2 – swap file;
- sda3 – partition where the operation system is installed, it is this partition that should be increased.
- Run the utility fdisk for work with the disk /dev/sda:
fdisk -c -u /dev/sda
- Use the command d to delete the partition sda3 by selecting
Partition number (1-4): 3:

Attention. In this case, no data from the disk are deleted, only the entry about the partition is deleted from the disk partition table.
- Then, let us create a new partition using the command n:
- Primary partition – command p and
Partition number (1-4): 3;
- In this case let us choose the first and the last sectors by default; thus, a partition will be created using all of the free space on the disk.
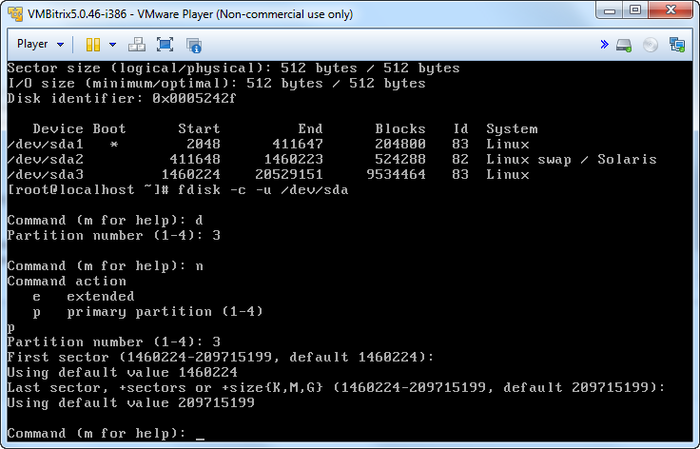
- Enter the command w to save the updated partition table and exit from fdisk:
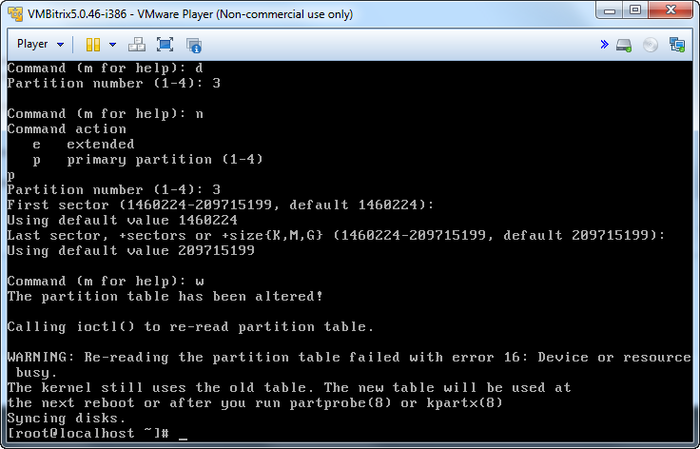
- Reboot the virtual machine to load the new partition table to the system:
reboot
- After rebooting use the utility resize2fs to increase the size of file system of the partition /dev/sda3:
resize2fs /dev/sda3
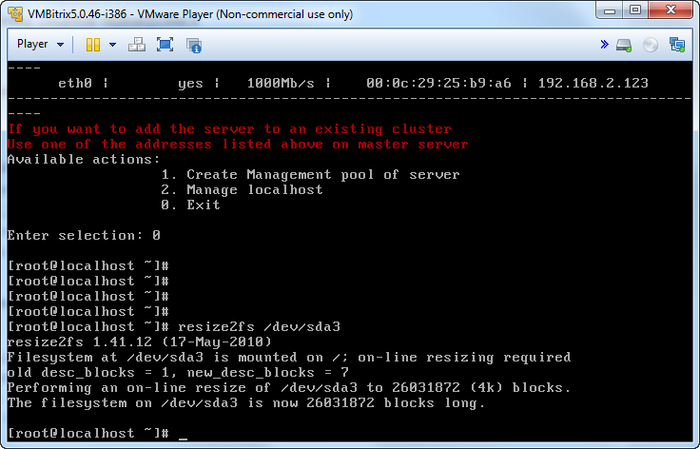
Use the command df to make sure the partition is increased:
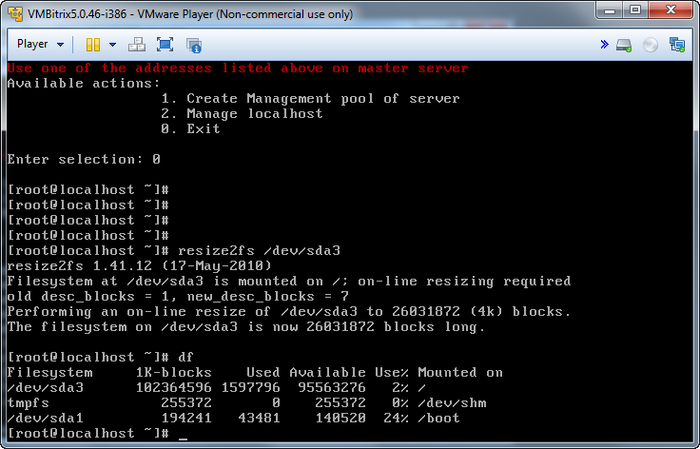
Similarly, the disk size can be changed in other virtualization environments.
Connection of a Swap Partition
The BitrixVA virtual machine is supplied with a swap partition of 256 Mb, which is not connected in the ami image by default. That is why it may become necessary to extend the swap partition during operation.
As in the case with increasing free disk space, the simplest way is to add another disk and place swap partition on it or create a swap file.
To this effect:
- Connect the disk to the virtual machine or create a swap file:
dd if=/dev/zero of=/swapfile bs=1M count=1024
- Create a swap partition on the disk:
mkswap /dev/sdb1
or in the file:
mkswap /swapfile
- Connect swap partition:
swapon /dev/sdb1
or swap file:
swapon /swapfile
- And finally add an entry about the new swap partition to ets/fstab to avoid its manual activation after each reloading:
/dev/sdb1 none swap sw 0 0
or about the swap file:
/swapfile none swap sw 0 0
Mounting Windows Resources Correctly
The following command may be used if Windows network drive must be connected as storage for WebDAV:
mount -t cifs -o -fstype=cifs,iocharset=utf8,username=XXXX,password=XXXX,uid=500,gid=501,fmode=0777,noserverino //xxx.xxx.xxx.xxx/folder /home/bitrix/www/docs/folder/smb
where:
uid - bitrix user identifier;gid - bitrix group identifier;//xxx.xxx.xxx.xxx/folder - a path to a network resource;/home/bitrix/www/docs/folder/smb - a folder where the disk will be mounted.
Note: the use of the
noserverino option is mandatory because PHP has a
vulnerability.
Setting up sending the Nagios notices in BitrixVA
Attention! In order to send notices by Nagios to email,
Monitoring (Monitoring in pool) should be activated in the BitrixVM menu.
Thus, the contacts and notice template must be set up in order to receive Nagios notices about various events on the server:
- /etc/nagios/objects/contacts.cfg specify the
email parameter which is an email of a user who will receive the notification:
define contact{
	contact_name	nagiosadmin		; Short name of user
	use			generic-contact		; Inherit default values from generic-contact template (defined above)
	alias		Nagios Admin		; Full name of user
	email		email@myaddress.com	; <<***** CHANGE THIS TO YOUR EMAIL ADDRESS ******
	}
Note: A new contact can be created, but do not forget to indicate it in the section
CONTACT GROUPS in the same file. Please refer to the
Nagios documentation for detailed instructions on how to do it.
- Afterwards, in /etc/nagios/objects/commands.cfg change the lines in the section SAMPLE NOTIFICATION COMMANDS of the MTA launch to:
# 'notify-host-by-email' command definition
define command{
   command_name   notify-host-by-email
   command_line   /usr/bin/printf "%b" "Subject: ** $NOTIFICATIONTYPE$ Host Alert: $HOSTNAME$ is $HOSTSTATE$ **\n\n ***** Nagios *****\n\nNotification Type: $NOTIFICATIONTYPE$\nHost: $HOSTNAME$\nState: $HOSTSTATE$\nAddress: $HOSTADDRESS$\nInfo: $HOSTOUTPUT$\n\nDate/Time: $LONGDATETIME$\n" | /usr/bin/msmtp --host=hostname --port=number --user=username --passwordeval=eval --from=mailfrom@email.com $CONTACTEMAIL$
   }

# 'notify-service-by-email' command definition
define command{
   command_name   notify-service-by-email
   command_line   /usr/bin/printf "%b" "Subject: ** $NOTIFICATIONTYPE$ Service Alert: $HOSTALIAS$/$SERVICEDESC$ is $SERVICESTATE$ **\n\n ***** Nagios *****\n\nNotification Type: $NOTIFICATIONTYPE$\n\nService: $SERVICEDESC$\nHost: $HOSTALIAS$\nAddress: $HOSTADDRESS$\nState: $SERVICESTATE$\n\nDate/Time: $LONGDATETIME$\n\nAdditional Info:\n\n$SERVICEOUTPUT$\n" | /usr/bin/msmtp --host=hostname --port=number --user=username --passwordeval=eval --from=mailfrom@email.com $CONTACTEMAIL$
   }
where:
--host=hostname – smtp server address; --port=number – smtp server port; --user=username – login for authorization on smtp server;--passwordeval=eval – password for authorization on smtp server;--from=mailfrom@email.com – from whom the letter will be sent.
Note: Also, additional msmtp keys can be set up (TLS options etc.); the list of all msmtp keys can be looked up using the console command:
msmtp --help.
- Restart Nagios to apply settings:
service nagios restart
In other words, in the Nagios configuration file we basically change MTA from mail to msmtp with keys and slightly modify the message text. Since msmtp has no Subject: key, we include it in the body of the letter, and it will be correctly processed when received by a mail client.
We can check the work of notifications by, for example, stopping MySQL:
service mysqld stop
By default Nagios will write 3 messages to log with the status CRITICAL\SOFT every minute, and every fourth message will receive the status of CRITICAL\HARD. After that, the command notify-service-by-email will be initiated. It will send the text of the message through msmtp with keys set up above. As a result, within 4-5 minutes, a message similar to this one must be sent to mail:
Subject: ** PROBLEM Service Alert: test1/MySQL: connection to 3306 is CRITICAL **

 ***** Nagios *****

Notification Type: PROBLEM

Service: MySQL: connection to 3306
Host: server1
Address: 192.168.2.130
State: CRITICAL

Date/Time: Tue Jan 27 20:15:15 MSK 2015

Additional Info:

Connection refused
After launching the MySQL service by using the command # service mysqld start the message must be delivered to mail:
Subject: ** RECOVERY Service Alert: server1/MySQL: connection to 3306 is OK **

 ***** Nagios *****

Notification Type: RECOVERY

Service: MySQL: connection to 3306
Host: server1
Address: 192.168.2.130
State: OK

Date/Time: Wed Jan 28 12:30:50 MSK 2015

Additional Info:

TCP OK - 0.001 second response time on port 3306
Note: Please refer to the
Nagios documentation for more details about email notices.
Execution of all agents on Cron
When working with large as well as not very large projects it is often feasible to move the execution of some especially complex agents to Cron.
- For a start, we will fully disable the execution of hit agents. To this effect, the following command should be executed on the php console of the administrative menu of the Bitrix product /bitrix/admin/php_command_line.php?lang=en:
COption::SetOptionString("main", "agents_use_crontab", "N");
echo COption::GetOptionString("main", "agents_use_crontab", "N");

COption::SetOptionString("main", "check_agents", "N");
echo COption::GetOptionString("main", "check_agents", "Y");
The result of the execution should be NN.
- Remove from the file /bitrix/php_interface/dbconn.php the definitions of the following constants:
define("BX_CRONTAB_SUPPORT", true);
define("BX_CRONTAB", true);
And add:
if(!(defined("CHK_EVENT") && CHK_EVENT===true))
   define("BX_CRONTAB_SUPPORT", true);
- Next, we create a file for agent testing and system message distribution /bitrix/php_intarface/cron_events.php:
<?
$_SERVER["DOCUMENT_ROOT"] = realpath(dirname(__FILE__)."/../..");
$DOCUMENT_ROOT = $_SERVER["DOCUMENT_ROOT"];

define("NO_KEEP_STATISTIC", true);
define("NOT_CHECK_PERMISSIONS",true);
define('CHK_EVENT', true);

require($_SERVER["DOCUMENT_ROOT"]."/bitrix/modules/main/include/prolog_before.php");

@set_time_limit(0);
@ignore_user_abort(true);

CAgent::CheckAgents();
define("BX_CRONTAB_SUPPORT", true);
define("BX_CRONTAB", true);
CEvent::CheckEvents();
?>
- And add this script to Cron:
*/5 * * * * /usr/bin/php -f /home/bitrix/www/bitrix/php_interface/cron_events.php
After that, all the agents and sending of system messages will be processed under cron every 5 minutes.
To avoid building up a queue for sending mail messages, the parameter responsible for a number of mail events processed at a time must be changed. To this effect, we have to run the following command on php console:
COption::SetOptionString("main", "mail_event_bulk", "20");
echo COption::GetOptionString("main", "mail_event_bulk", "5");
Mounting options
To ensure the higher performance of the file system, we recommend the time marker change for the reading of files and directories to be disabled: noatime, nodiratime.
To this effect, the parameters in the line with its UUID must be edited (added in the current line) in /etc/fstab:
UUID=abd9bdaa-e17d-40b3-aee5-37ef53a57b16 / ext4 defaults,noatime,nodiratime 1 1
where UUID=abd9bdaa-e17d-40b3-aee5-37ef53a57b16 - a unique disk identifier which may be found out by running the blkid command on the console.
Note: Instead of UUID the name of the device may be also used: /dev/sda1, /dev/sda2, /dev/sda3. Alternatively, a volume label may be used, if defined, for example: LABEL=root.
The new settings will come into effect after reloading.
To apply the new setting without server reloading the sections may be remounted by the command:
mount -o remount,noatime,nodiratime /
There is no a single steadfast rule to treat the problem of file system performance. If, for example, the disk also has a cache of some apps, the measures proposed may even reduce the performance because many applications clean the cache according to access mark which is to be disabled in the given example. In some cases, the increase of commit time may bring about a better result, especially if RAM is large. The commit time is determined by the commit parameter. For example, in order to set it on 120 seconds, it is necessary to add commit = 120. Thus, the mount options will be as follows:defaults,noatime,commit=120.
By default, the data and metadata dump to the disk may occur each 5 second. Postponement of the dump time may also reduce file fragmentation on a disk, if there are files to which data are frequently added, e.g., logs.
IDE Connection
Xdebug is included in virtual machine to make working with Bitrix Framework easier. It works as follows:
Before changing the settings, the file xdebug.ini.disabled shall be renamed to xdebug.ini, and httpd shall be restarted.
Use the following example to setup the machine:
$ cat /etc/php.d/xdebug.ini
; Enable xdebug extension module
zend_extension=/usr/lib/php/modules/xdebug.so
xdebug.remote_enable=on
xdebug.remote_host=192.168.205.1
xdebug.remote_port=9000
Note: Xdebug requires using proxy when working through Network Address Translation. Port 9000 shall be opened.
)
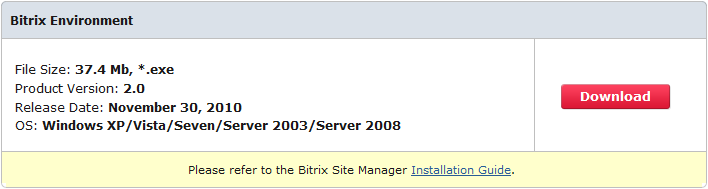
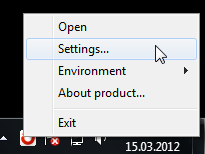
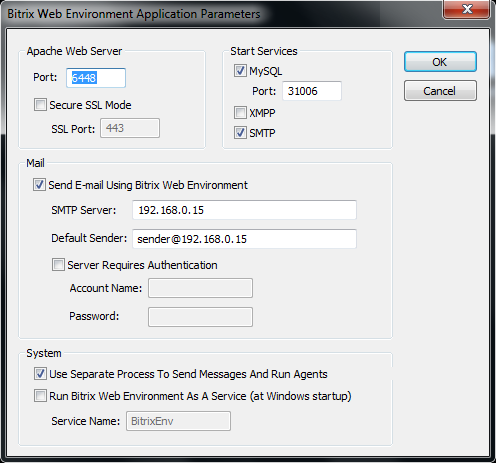
)
)