Last Modified: 26.09.2017
|
|
|
Views: 20168
Last Modified: 26.09.2017 Attention! For Bitrix24 On-Premise and Bitrix Site Manager - AD/LDAP integration module version 11.5.0 and higher is required to support NTLM-authorization tool.
After enabling and configuration, new NTLM-authorization mechanism starts to work as follows:
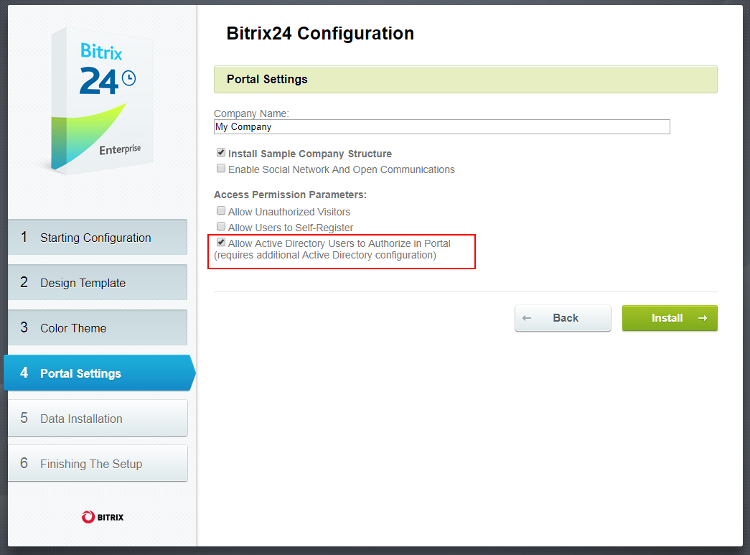
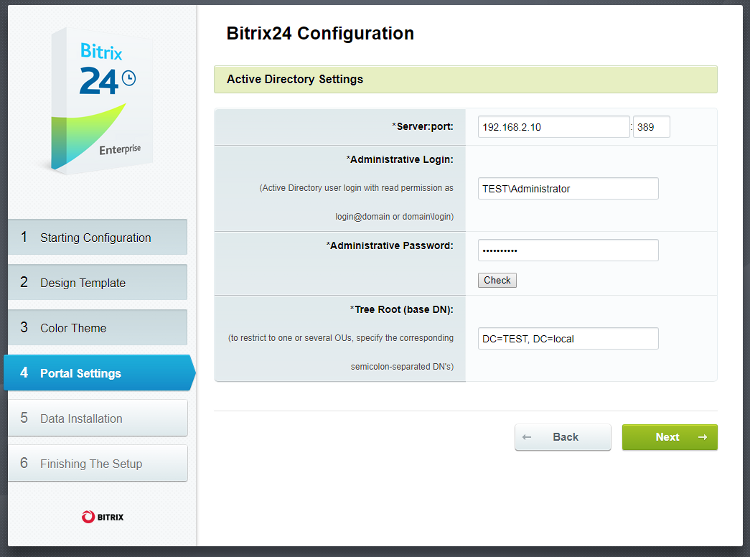
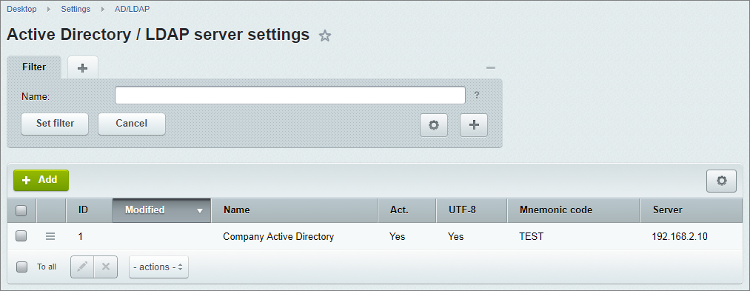
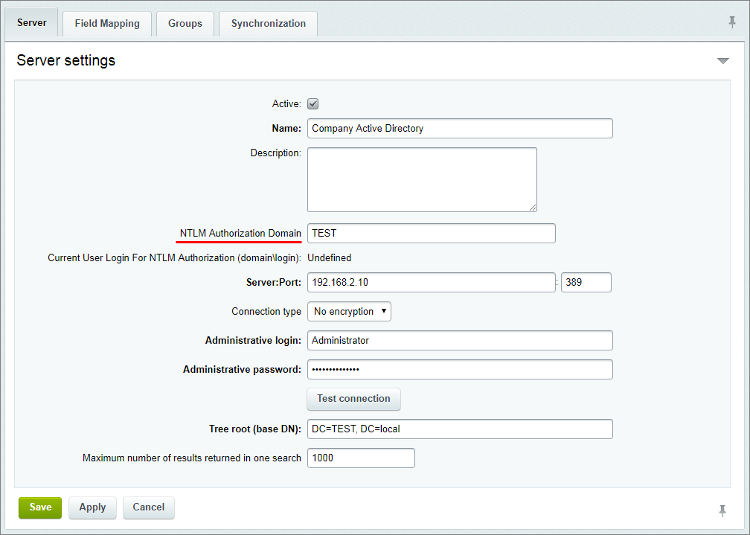
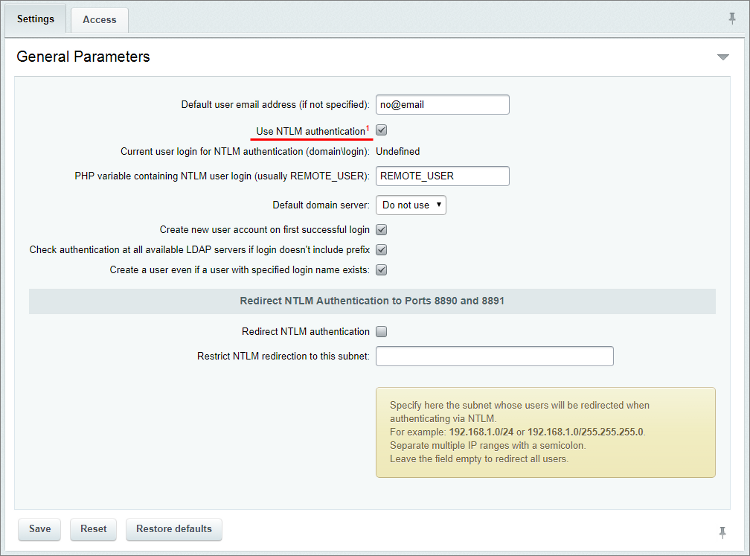
The following is an example of Bitrix24 On-Premise settings. Configuring NTLM-user authorization in Bitrix24 On-Premise
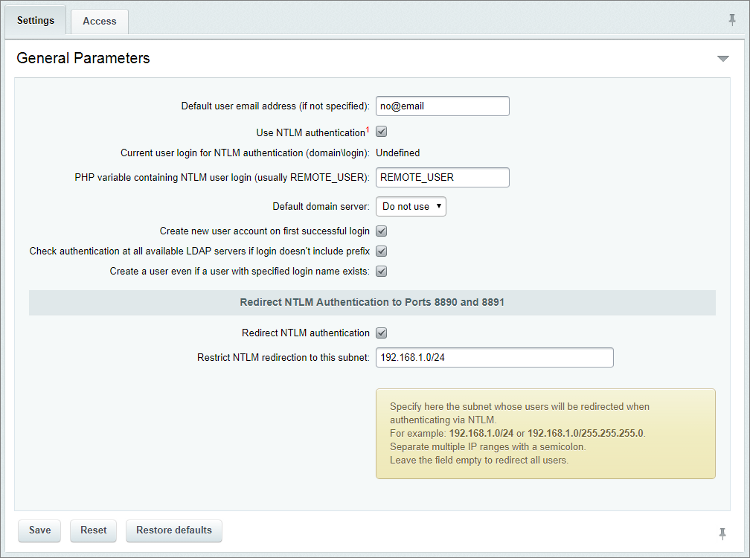
Bitrix24 product is ready to use of NTLM-authorization. Next and final step: configure Virtual Appliance. Note! If the company's local network requires a configured NTLM-authorization and employees need to work with the portal via standard authorization, then it is necessary to indicate the IP-addresses range for which the NTLM-authorization is required in the AD/LDAP module settings - Restrict NTLM redirection to this subnet (for example, 192.168.0.1/24):
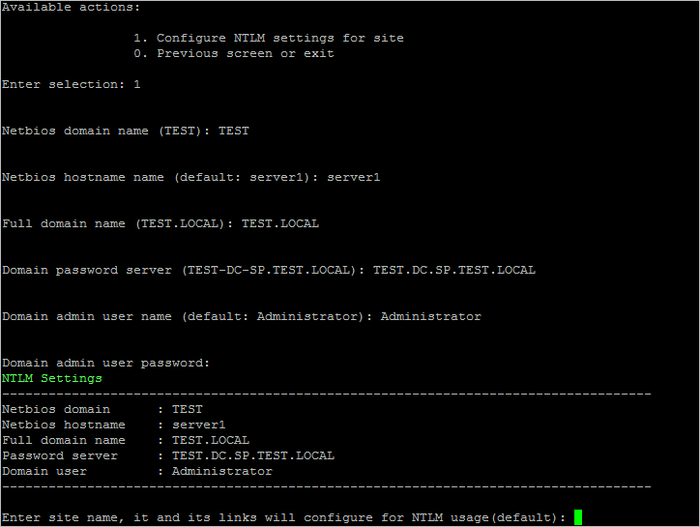
Configuration of NTLM-user authorization in Bitrix24 Virtual ApplianceTo configure Virtual Appliance, connect to it under root user, select menu item 6. Manage sites in the pool > 7. Configure NTLM auth for all sites and input the required data:
After the correctness of inputted data is confirmed, the wizard will configure and launch all the necessary services, as well as connect the Virtual Appliance into the domain. Note: The following command can check if the computer has successfully joined the domain:
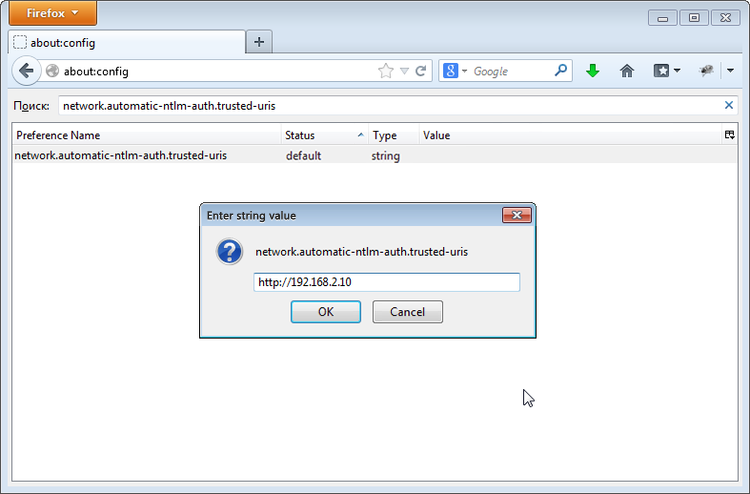
net ads testjoin The setup is complete. Next, check the browser settings to ensure successful NTLM-authorization. Configuration of NTLM-authrization in browsers
Note: Actions to enable NTLM-authorization on pre-installed Bitrix24 On-Premise are similar to the above listed, except that the Active Directory server is added manually in the administrative section.
Courses developed by Bitrix24
|
