Views: 16736
Last Modified: 13.07.2020
The following is required to transfer a website from a hosting (cloud) or local server to BitrixVA or BitrixEnv virtual environment: site archive and configured BitrixVA or BitrixEnv Virtual Environment. This process consists of two stages:
Website archive creation
Go to page Reserve Backup page ( Settings > Tools > Backup > Create Backup):
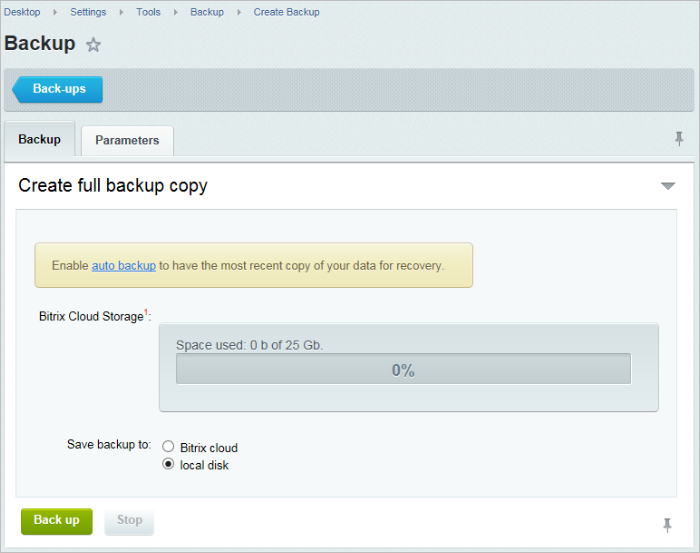
- site archive can be saved in Bitrix Cloud;
Note: The option to copy into Bitrix Cloud is only available for users with an active license. Also, all site backup copies are always sent to Bitrix Cloud in an encoded format for security purposes. Bitrix Inc. cannot restore or modify the password! Please be advised, without this password, the archive cannot be restored!
- or in site folder (site archive will be saved in the
/bitrix/backup/ hosting folder with a unique filename).
- Advanced backup settings can be selected in the Parameters tab:
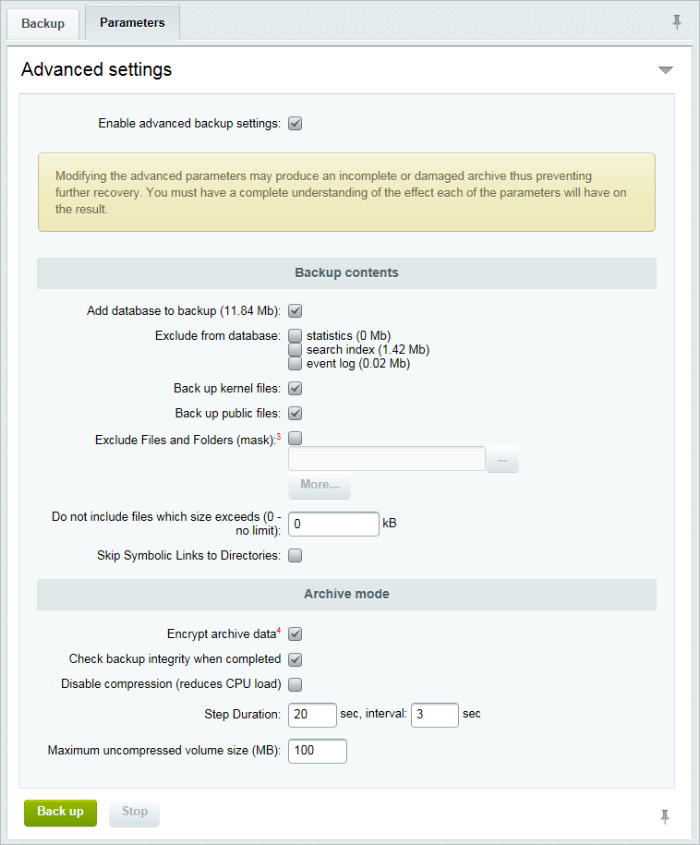
Note: To ensure data safety, it is recommended to enable 'Encrypt archive data' option and to enter a password for the site archive.
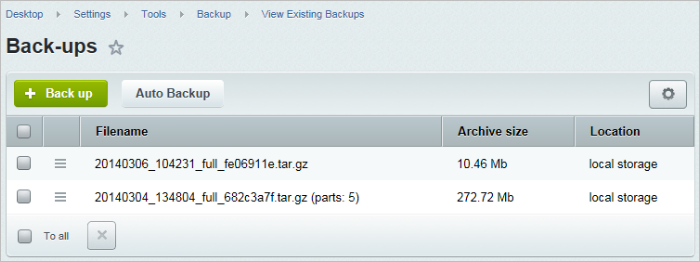
- After the site archive is successfully created, it will be available on the View existing backups page (Settings > Tools > View Existing backups). All backups will be shown here:
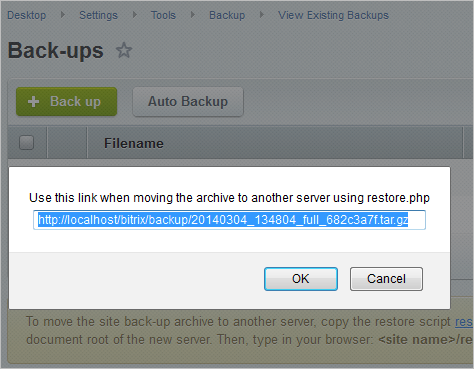
- Then, you will have to Get the link for migration using the action menu:
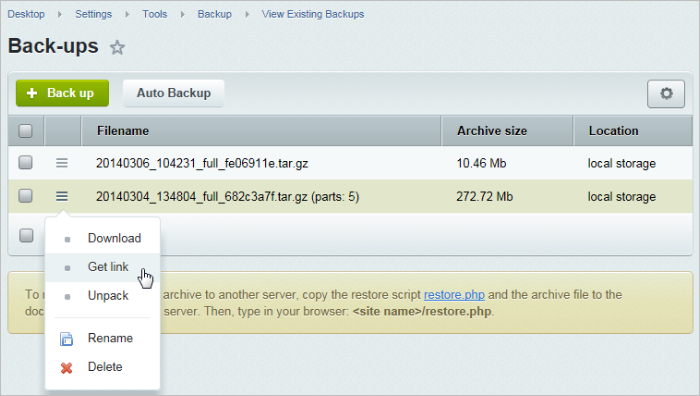
and copy it to the clipboard of the window that opens:
- The site archive may also be downloaded to a local computer using the Download menu option.
Restoring the Website
- Start up the BitrixVA or BitrixEnv.
- Enter http://virtual_machine_address/ in the browser address line (you may indicate a domain or IP address).
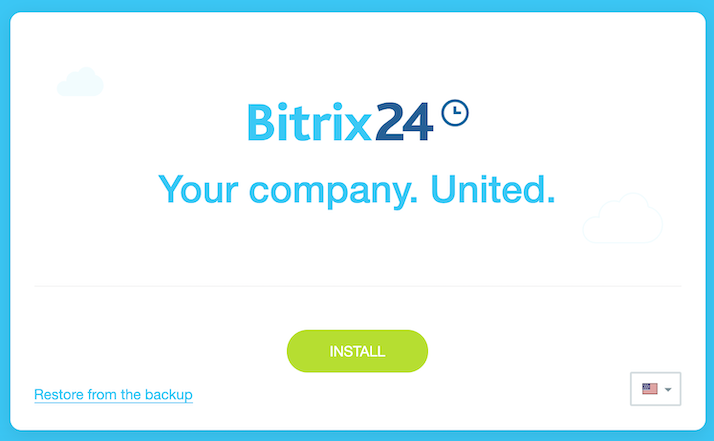
- Birtix product Installation Wizard will open. Choose the of Restore from the backup option:
- When the backup download is in progress, select the required archive storage option (in this case, select the clipboard link, received at the site backup copies page):
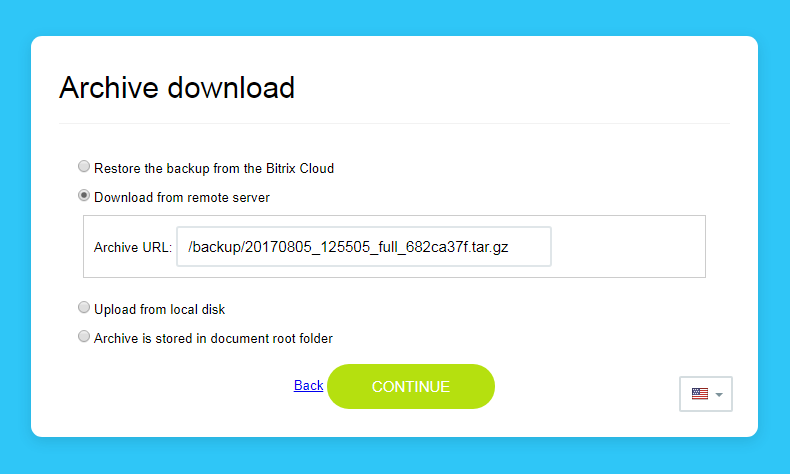
Note: It is also possible to download the archive from Bitrix Cloud (a license key with a valid license is needed) or from a local computer, is these options were selected at the site archive creation stage.
- If the archive was encrypted, password prompting appears following the archive download.
- After that, a database connection must be set up:
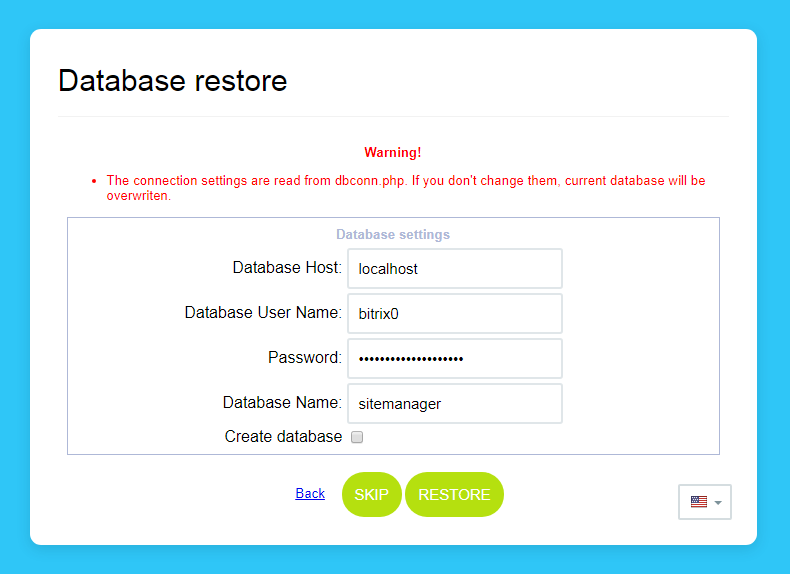
By default, MySQL connection settings in BitrixVM/BitrixEnv are taken from /home/bitrix/www/bitrix/php_interface/dbconn.php.
Individual MySQL connection parameters can be indicated - in this case, also select the Create database.
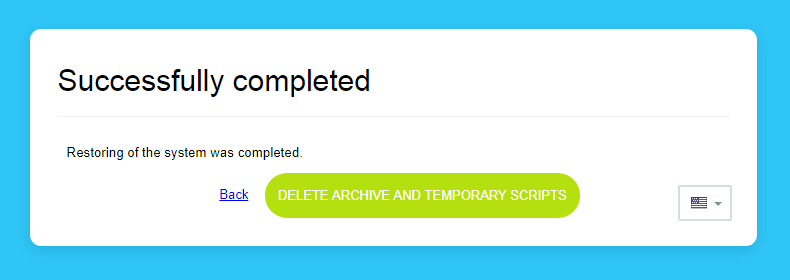
- After the database is successfully restored, it is necessary to Delete archive and temporary scripts for security purposes, by clicking on the button with the same name:
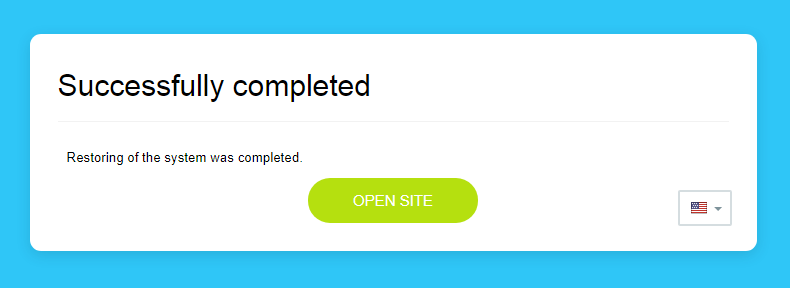
- The Bitrix product migration to the BitrixVA/BitrixEnv is now completed:
Error "Call to undefined function mysqli_init()"
Error "Call to undefined function mysqli_init()" can occur during the transition to a new version of BitrixVA/BitrixEnv platform. Reason: previously, .mysql extension was used in MySQL database (declared obsolete in PHP 5.5.0). Mysqli. extension is used in new versions.
Solution:
- Add in the file
\bitrix\php_interface\dbconn.php the following:
define("BX_USE_MYSQLI", true);
- In the file
\bitrix\.settings.php:
'className' => '\\Bitrix\\Main\\DB\\MysqlConnection',
to change to:
'className' => '\\Bitrix\\Main\\DB\\MysqliConnection',
- Check the availability in the
/etc/php.d/30-mysqli.ini file (or in a similar file):
extension=mysqli.so
Execute a restart of httpd: