Views: 20815
Last Modified: 09.10.2024
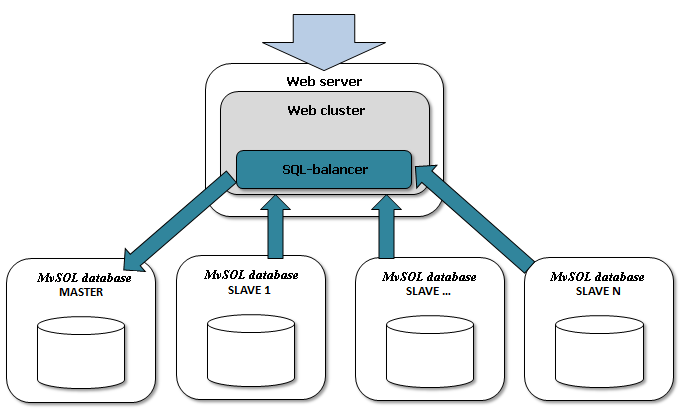
Bitrix Virtual Appliance allows the fast deployment of the master-slave cluster configuration Bitrix Site Manager (legacy product, no longer available) and Bitrix24 Self-hosted.

Core features:
- Flexible balance of SQL load
- Easy administration
- Cheap and fast unlimited scalability
- Online backup
- No web-application logic adaptation required
The master – slave layout is realized by MySQL means. The Bitrix platform allows for a flexible balance between the servers’ participating in replication.
Note. To create a MySQL master-slave configuration you need the
Web Cluster module that is not included in all the editions of Bitrix products.
Create a slave MySQL server
To create a slave MySQL server:
Change master MySQL server
To migrate the master MySQL server to another machine:
- Select menu item 3. Configure MySQL servers > 3. Change master MySQL server.
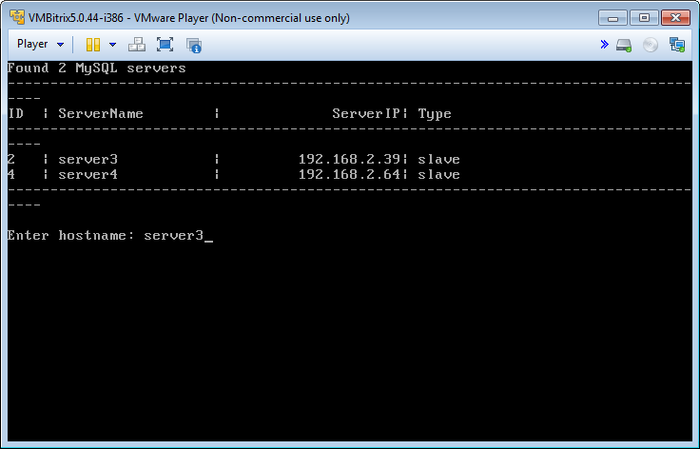
- Select the host name of future master MySQL server from the list of available slaves (e.g. server3):

- Wait until the slave MySQL server change task is completed.
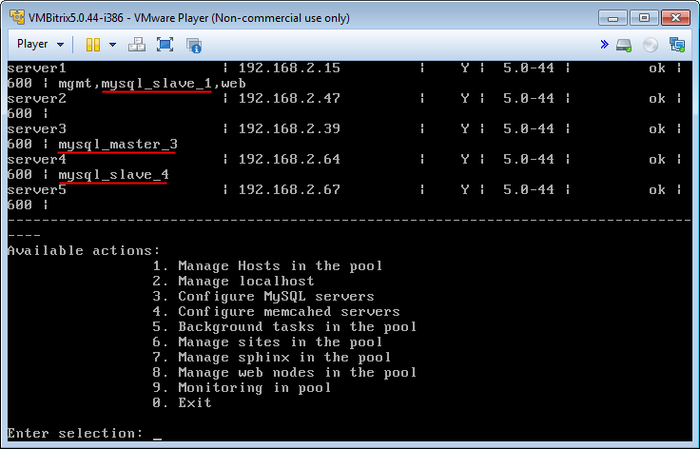
- As a result, you have the following MySQL servers: master (server3) and two slaves (server1 and server4):

Remove the slave MySQL server
To remove the slave MySQL server:
- Select menu item 3. Configure MySQL servers > 4. Remove slave MySQL server.
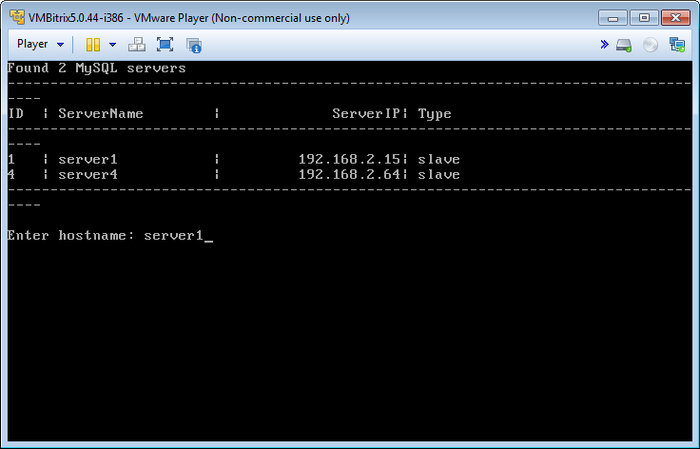
- Type the host name of the slave MySQL server to be removed (e.g. server1):

- Wait until the slave MySQL server removal task is completed.
- As a result you will have the following MySQL servers: master (server3) and one slave (server4):

Thus, we migrate the master MySQL server from the server1 to server3 machine, create an additional slave MySQL server on the server4 machine and free up the resources of server1 machine for other roles.
Note. Task execution may take a rather long time (up to 2-3 hours and more) depending on the task complexity, data volume used in such tasks, capacity and server load. You can check the currently executed tasks using menu item 5. Background tasks in the pool > 1. View running tasks.