Note: you can also change the password using the
Change root password command.
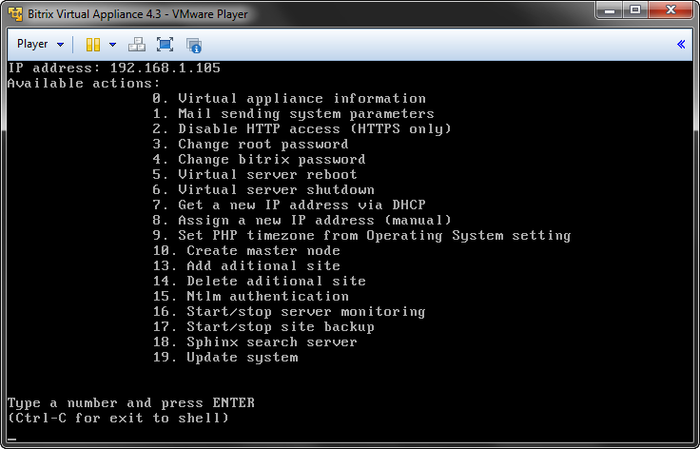
Now your virtual server is running and ready for use:

The Available actions list enumerates possible administrative options.
- 0. Virtual appliance information – shows information on the current settings and parameters for the current environment;
- 1. Mail sending system parameters – configures the parameters of the built-in mail server;
- 2. Disable/Enable HTTP access (HTTPS only) – enables or disables access to the website using HTTP protocol;
- 3. Change root password – changes the superuser password;
- 4. Change bitrix password – changes the password for the "bitrix" user;
- 5. Virtual server reboot – restarts the virtual server;
- 6. Virtual server shutdown – stops the virtual server;
- 7. Get a new IP address via DHCP – obtains a new IP address for the server from a DHCP server;
- 8. Assign a new IP address (manual) – enables an administrator to set the server IP address manually;
- 9. Set PHP timezone from Operating System setting – sets the virtual appliance's time zone according to the operating system preferences;
- 10. Create master node – creates a master node in a web cluster;
- 11. Add slave node – adds a slave node to an existing web (available only on a master appliance);
- 12. Make slave node a master node – converts a slave node into a master node (available only on a slave appliance);
- 13. Add additional site – adds another website in multisite mode;
- 14. Delete additional site – deletes an existing website when in multisite mode;
- 15. NTLM authentication – enables or disables NTLM authentication;
- 16. Start/Stop server monitoring – enables or disables server status and health monitoring;
- 17. Start/Stop site backup – enables or disables website data auto backup;
- 18. Sphinx search server - setting for the Sphinx search server;
- 19. Update System - updates the virtual appliance to the latest version.
To execute any command, type the command number and press Enter. For example, to disable the virtual server type 6 (Virtual server shutdown) and press Enter.
To direct control back to operating system, press Ctrl+Alt.
To return from shell to the virtual appliance menu, execute:
cd ./menu.sh
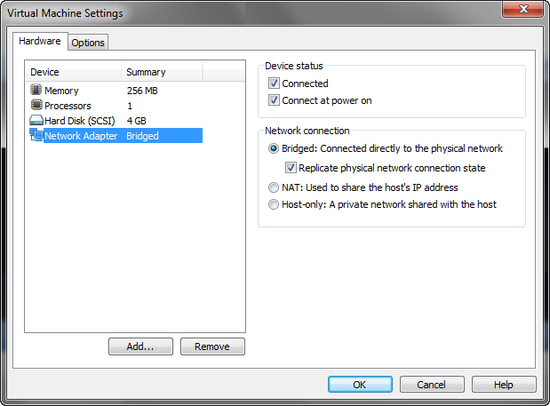
Note: if you encounter problems with the network adapter, try changing the adapter mode (
Bridged,
NAT,
Host-only):

Then, restart the server by selecting the command
5 and pressing
Enter.
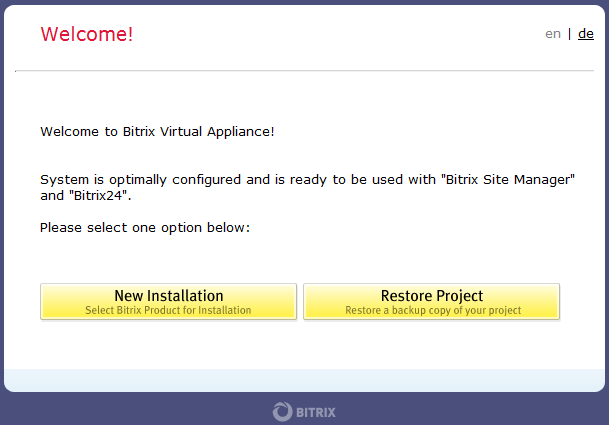
Now that the server is running, type the address suggested by the appliance (it varies from system to system; the screenshot above shows the address http://192.168.1.105) in the web browser. You will see the following welcome screen:

Choose one of the options to continue:
- New Installation - runs the installation wizard which will download, unpack and install a new website;
- Restore Project - runs a restoration wizard to create a backup copy of your website or restore it from an existing backup.