Views: 623
Last Modified: 20.01.2025
Attention!
-
For operations, described in this chapter, knowledge of *nix-systems administration is required. Prior to start of these operations, it is recommended to perform full backup of Bitrix Virtual Appliance.
- Provided settings are listed outside the scope of the Virtual Appliance menu. This means that the details below are provided for informational purposes only and should be used with clear understanding of your actions and under your own liability. Bitrix24 technical support reviews the questions related to Virtual Appliance menu items only.
Sequence of actions
To increase space available at the VA disk, complete the four steps as follows:
- increase specified system disk space in the hypervisor
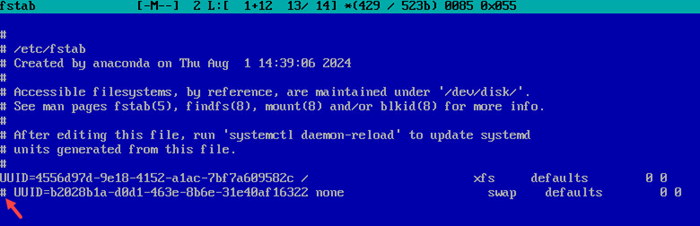
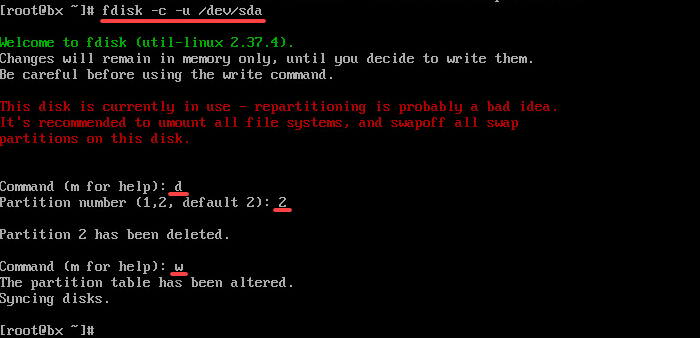
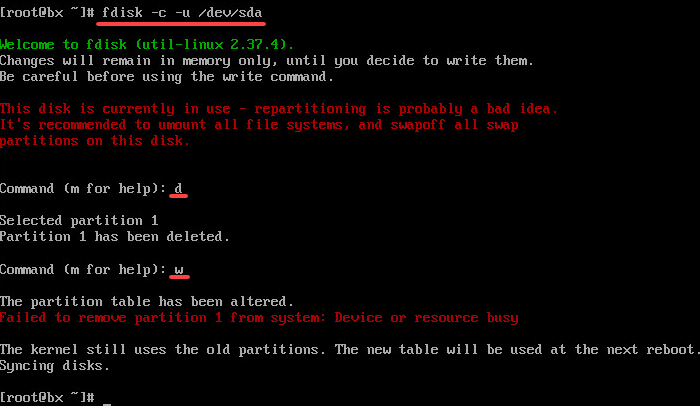
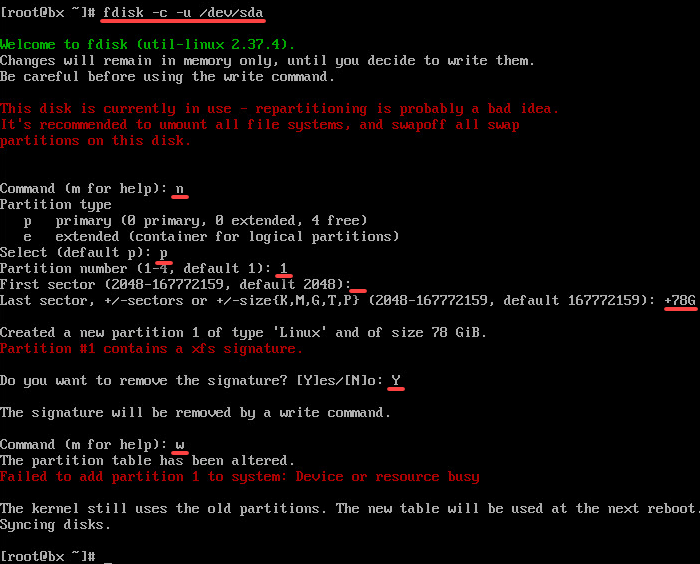
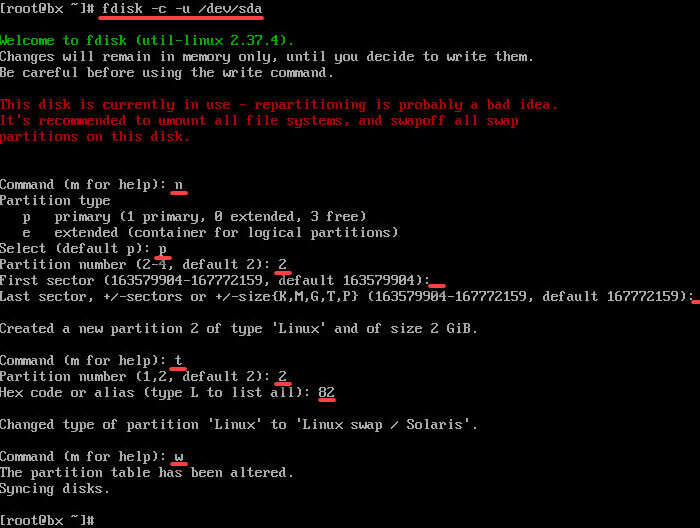
- disable and delete the swap
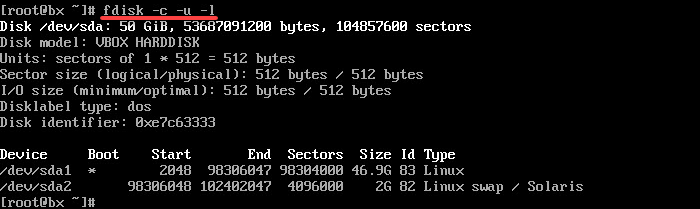
- increase the space available for the main partition
- create and connect swap once again
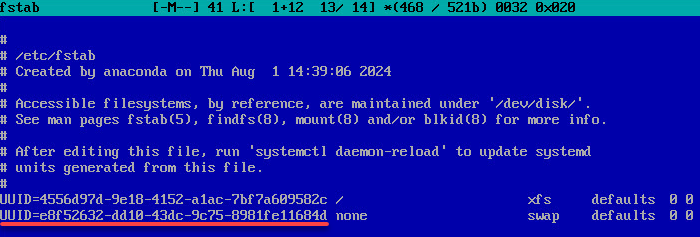
Swap — is a specially dedicated disk space, used by the system as backup space when employed ram memory is not sufficient. For Linux swap can be implemented in two ways: as a separate partition and as an individual file.
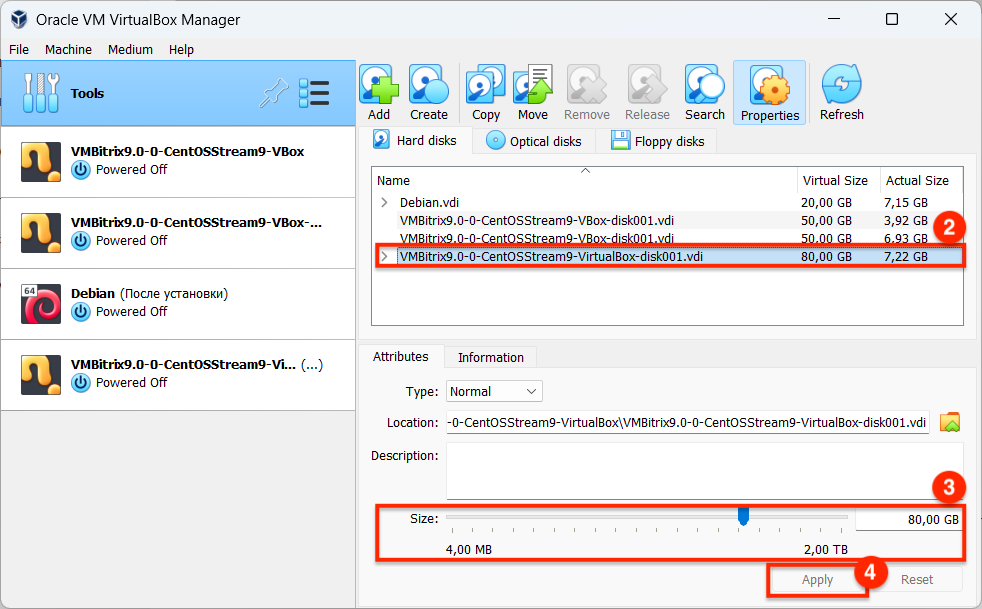
Step 1. Increase system disk space in hypervisor
Modify space available in the virtualization software: VirtualBox, VMWare or HyperV. You can find more details about such software in the documentation for corresponding software.
Example for VirtualBox:
- Inside VirtualBox menu, select File > Tools > Virtual Media Manager.
- Select your Virtual Appliance.
- Indicate the required disk space.
- Click Apply button.

After you have increased the system disk inside the player, launch the Bitrix Virtual Appliance. Get authenticated under the 'root' user and switch to command string mode. To do that, select the menu item 0. Exit.
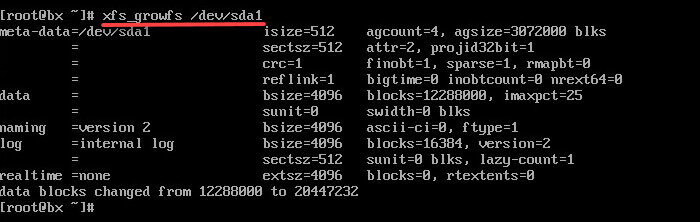
You can check the current parameters for the disk using the following command:
df -Th
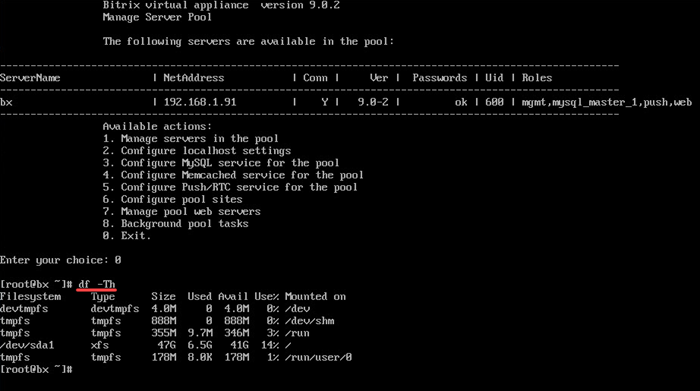
Disk size didn't change. Partition on the disk /dev/sda1 is 47 GB space, the remaining space from current 50 GB is used by temporary tmpfs.


)

)


)
)