Attention! When Virtual Appliance starts and a black screen appears and disappears right away, but BitrixVA doesn't start, check your processor VT-x/VT-d hardware virtualization. VT-x/VT-d hardware virtualization can be enabled in your PC BIOS. Also, check your bits number for operating system used for launching Bitrix Virtual Appliance – it must be 64-bit system.
Extract files from the downloaded archive to any folder, for example, C:\BitrixVA\, and launch Virtual Appliance via suitable software.
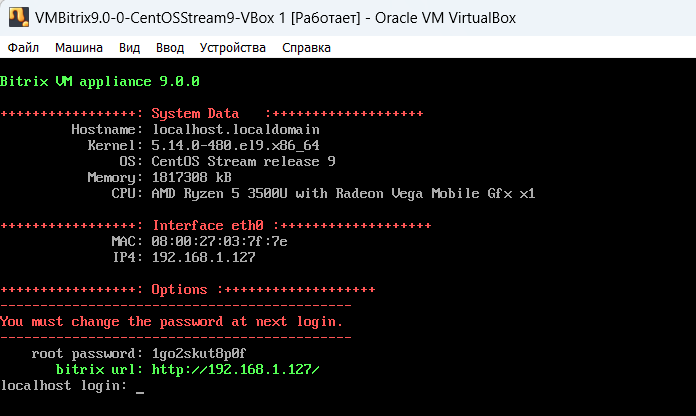
System downloads the OS installed at the virtual appliance. When finished, opens the
window
containing IP address and current root user password.
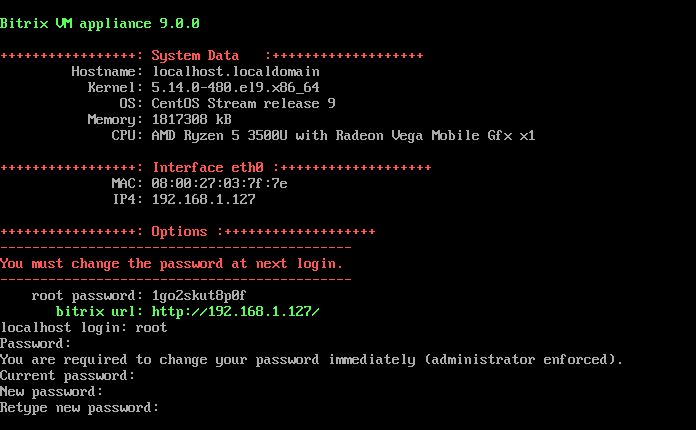
During the first launch of Virtual Appliance, the program will prompt you to change password for both root and bitrix users:
Complete the following fields to change password for root user:
localhost login — enter root login: root
Current password — enter current password again
New password — indicate new password with length not less than 8 characters
Retype new password — re-enter new password
Similarly, change bitrix user password:
Note: It is possible to change bitrix user password later at the virtual server control panel via menu items
1. Manage servers in the pool
>
3. Change 'bitrix' user password on host
.
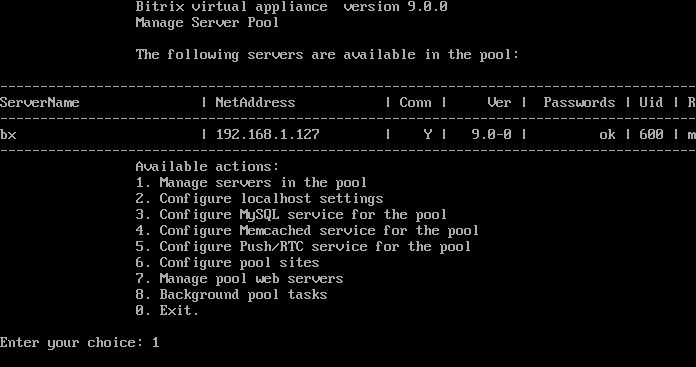
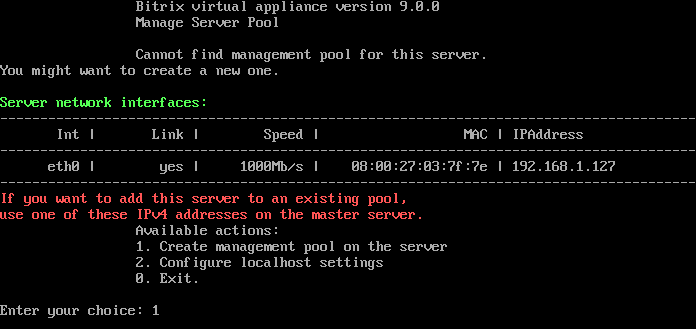
Proceed to Virtual Appliance menu. If it didn't open, enter the console command /root/menu.sh.
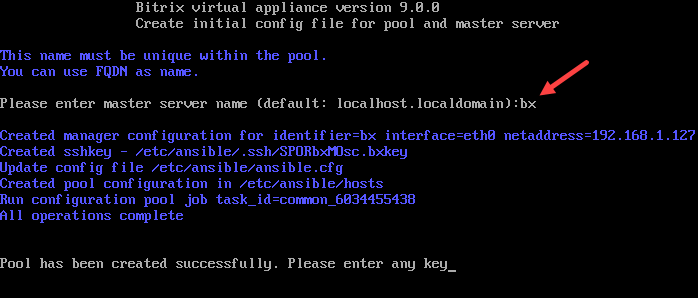
Next, you must create server's management pool using the menu 1. Create Management pool on a server.
Come up with and enter
master server name
. Next, after server pool is created, return to the menu by clicking any button.
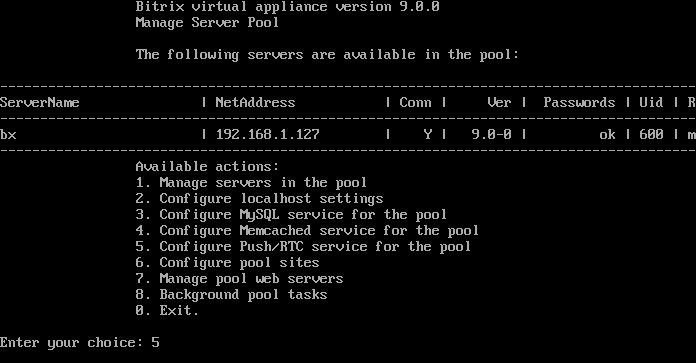
You must configure Push/RTC service for the pool by selecting item 5. Configure Push/RTC service for the pool:
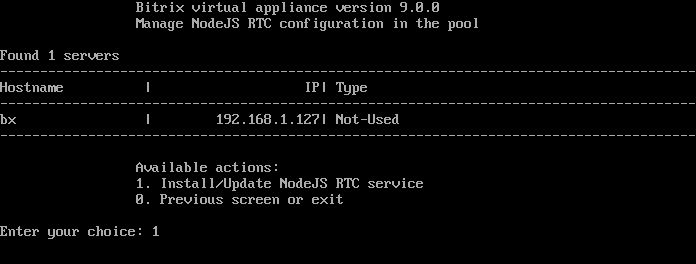
Select and open
1. Install/Update NodeJS RTC service
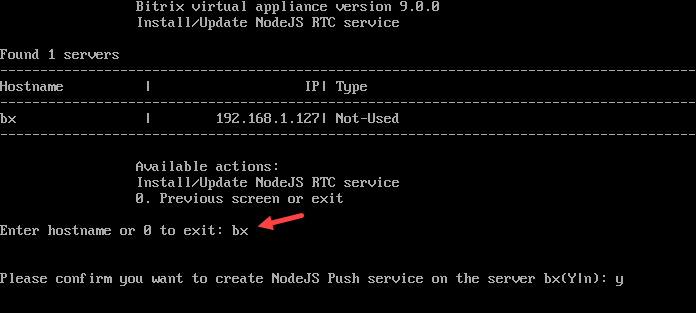
, enter
server host name
and confirm your actions, by entering y.
Virtual server is ready for further use. To launch Bitrix24 installation wizard or open already installed site, go to the path, specified in the field bitrix url.
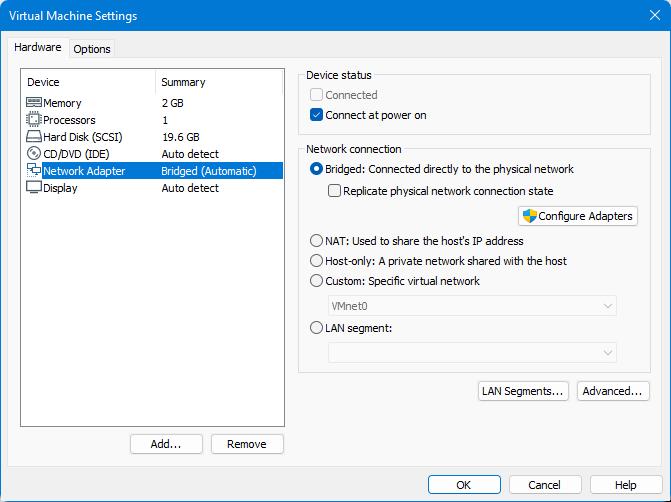
Note: If problems occur with VMWare Player network adapter or VirtualBox (e. g. when opening site at the virtual appliance URL), you need to go to network adapter settings (Virtual Appliance > Removable Devices > Network Adapter > Settings...), select one of modes (Bridged, NAT, Host-only):
and re-launch virtual server, by selecting 2. Manage localhost > 4. Reboot server menu item.
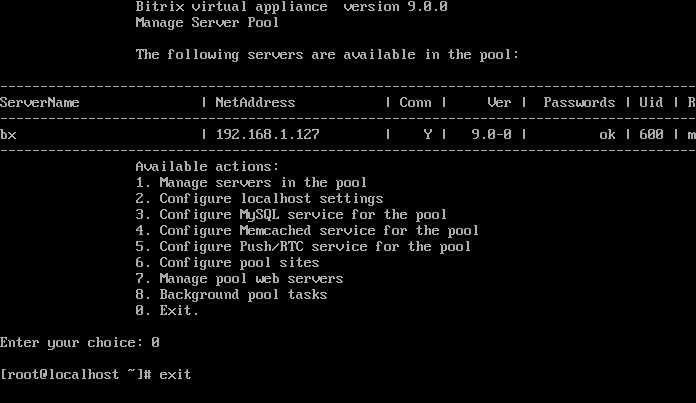
After all server settings are configured, don't forget to exit the root account for security purposes:
Exit to console, by selecting 0. Exit in the menu (or press Ctrl+C)
Then, run the
exit command
Note: The root and bitrix user passwords are also used when connecting to site via SFTP.
How to manage BitrixEnv
To proceed to execution of any action in the Virtual Appliance, please input the number and press Enter. For example, to configure virtual server, input 2 in the (Manage localhost) line and press Enter.
To return from the command line (when clicking 0. Exit) back to Virtual Appliance menu, enter the following command in the console:
/root/menu.sh
If wizard errors occurred during BitrixVA operation, wizard logs can be found in the folder /opt/webdir/temp/.
When launching several hosts on a single BitrixVA on a local computer or within a local network, indicate arbitrary custom domains instead of IPs for these sites, by writing them beforehand in the operating system's hosts file or the network's DHCP server. Then sites can be accessed using domain names, but within this computer or local network.