Views: 4221
Last Modified: 25.09.2024
Installation of Bitrix Environment (BitrixEnv) for Linux will be helpful for:
- Users and developers who previously used Bitrix Virtual Appliance product for site preparation and experienced problems when migrating the configuration to host or non-virtual hardware with loss of performance.
- For hosting-partners specialists planning to create different VPS templates for Bitrix24 products.
- For system administrators requiring fast preparation of high-performance framework for the installation or migration of sites based on Bitrix24.
- For programmers and system administrators requiring the fast deployment of a cluster, based on Bitrix24.
Bitrix Virtual Environment for Linux provides fast deployment of Bitrix products and solutions to operate with minimal expenses in an optimal environment of CentOS 9 Linux-based platform:
- percona server 8.0
- web-server (Apache 2.4.x)
- php 8.x
- nginx 1.26.x
- redis
- memcached
- catdoc
- xpdf
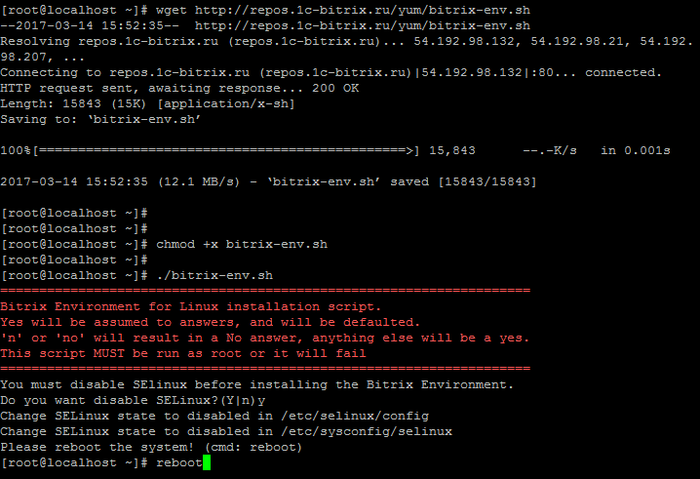
"Silent" BitrixEnv installation (silent mode) and launch keys
You can install the environment in "silent" mode with keys specified. This way allows creating a pool immediately with necessary host name after installing BitrixVA environment, launch the Push server and set a password for root MySQL.
Script launch command syntax, with all keys:
./bitrix-env-9.sh [-h] [-s] [-p [-H hostname]] [-P] [-t] [-M mysql_root_password]
где:
-s - Silent mode for installation. Don't ask any questions. -p - Create pool after Bitrix Environment is installed. -H - Host name for pool creation procedure). -F - Used as firewalld. -I - Used as iptables firewall (by default). -M - MySQL root password (Mysql password for root user).-h — Print list of all script launch keys (print help messager)
Example:
Objective:
- launch the environment setup in "silent" mode
- create pool with server1 host name
- launch Push server
- set root password for MySQL user — 'BX123bx@#MYSQL'
./bitrix-env-9.sh -s -p -H server1 -P -M 'BX123bx@#MYSQL'
Important! Launching push server (-P) when installing the environment works only jointly with pool creation (-p).
How to manage BitrixEnv
The menu below is used to manage Bitrix Virtual Appliance:
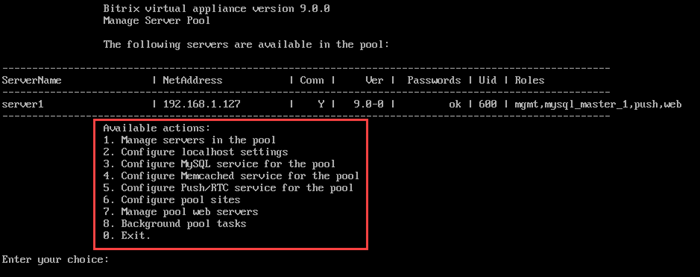
To proceed to execution of any action in Virtual Appliance, please input the number and press Enter. For example, to configure virtual server, input 8. (Background pool tasks) and press Enter.
To return from the command line (if you have pressed 0. Exit or Ctrl+C) back to the BitrixEnv menu, input the following command in the console:
/root/menu.sh

)