Views: 6713
Last Modified: 10.10.2012
The customization of visual components may involve:
- modification of the component design and layout: colors, fonts, button forms etc;
- changing the component source code (for example, to change the component output formatting).
Before you start customizing a Component 2.0 to a website template, copy the component template to the default or destination website template.
To customize a component for use with a certain website template, the component must be copied to a directory in which that website template exists.
If a customized component needs to be made available to all website templates, such component must be copied to the default website template directory.
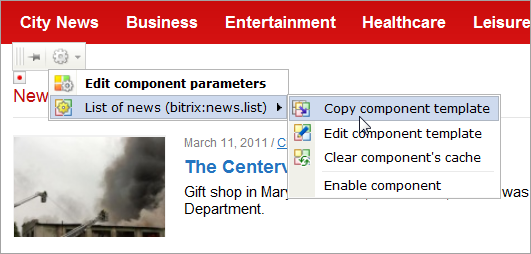
To copy the component template, use only the system copy commands. Switch to Edit Mode, click the service button on the component toolbar and select Copy component template:
Once the component template has been duplicated in the destination location, you can modify it as required.
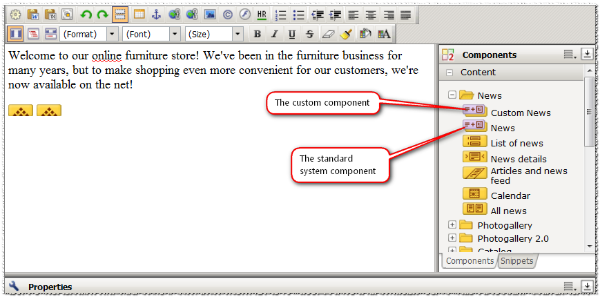
However, if your task is to change the component logic, the component must be copied completely to a new namespace (that is, to a subfolder of /bitrix/components/) which must be created beforehand. In the visual editor components bar, the new component will show beside the standard component:
If required, you can group the new components in a separate section for easier access by editing the component’s file .description.php.
In this file, find the $arComponentDescription array declaration. The PATH/ID keys define the tree branch in which the visual editor will place the component. The ID key has a range of predefined values which add the component to one of the standard component groups (see here for details). To create your own, custom group, simply define a new name here. For example, the code:
"PATH" => array(
      "ID" => "custom",
      "NAME" => "My Awesome Components"
    ),
will effectively create the group "My Awesome Components" and place your component in it.