Views: 9396
Last Modified: 26.05.2014
Menu is controlled using both tools of the administrative and public sections.
Creating Menu
The command Add menu of the Add button located on the context panel of the File Manager makes it possible to start creating the section menu from the administrative section:
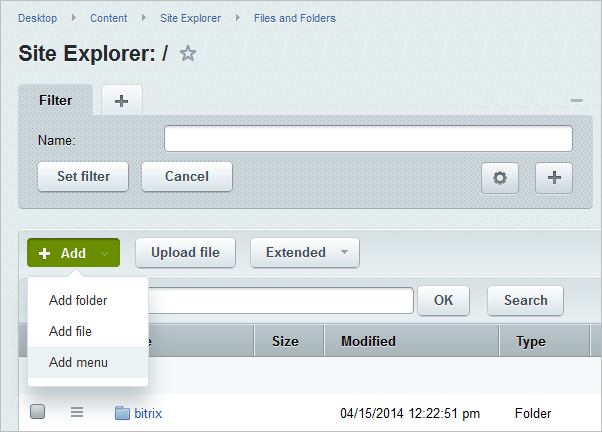
The menu will be created for a section in which the folder is currently opened in the File Manager.
Note: As a result of these actions, a file with menu data is created with a name .<menu_type>.menu.php. However, the name of the data file in the file manager is automatically represented as a link of the “<menu_type>” Menu type.
Menu Editing
Note: When editing the file .<menu_type>.menu.php is changed (e.g., .top.menu.php). However, work with this file is carried out through a special interface of the system. It makes the work directly with source code unnecessary and gives the possibility to edit the menu options in visual mode.
In order to edit the menu from the administrative section go to File Manager and open the file of a relevant menu for editing.
The system provides for two modes of menu editing (use the button located in the context panel of the menu editing page to switch between them):
- Simple mode of editing;
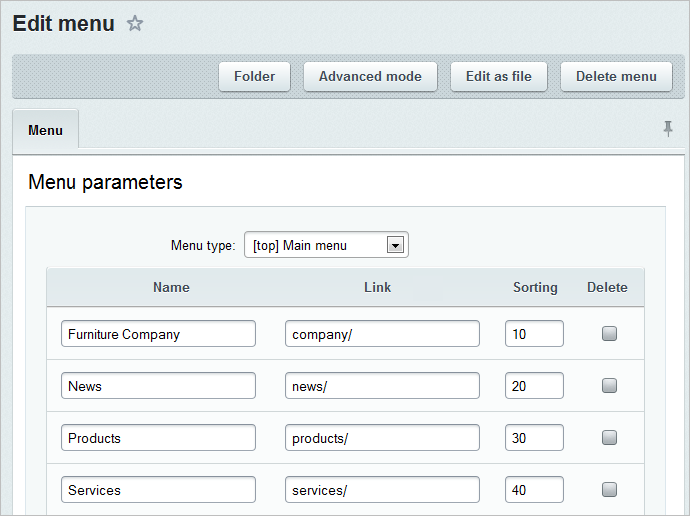
The mode permits to determine the menu type and indicate a name of menu option, navigation link, and a sorting index value.
- Advanced mode of editing.
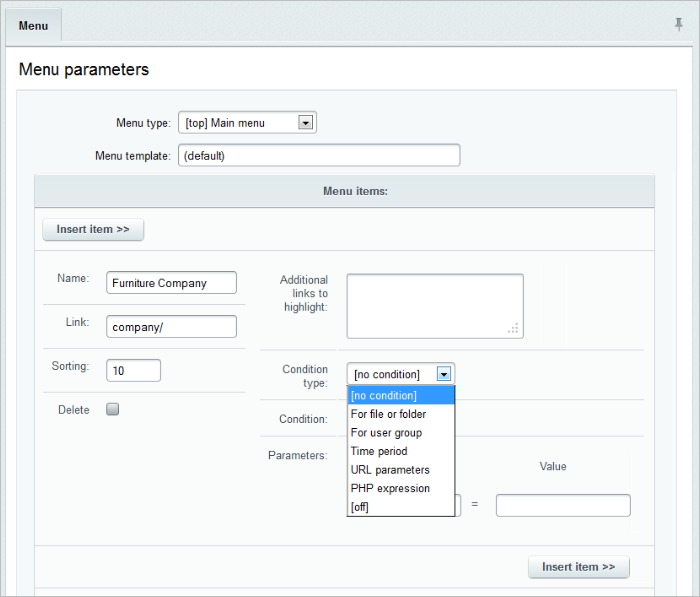
The following data are available for control in this mode:
- type of the menu being edited;
- template which serves as a basis to generate the menu (the field is used if the new menu must be generated based on a template which is different from the default template);
- name of the menu option;
- navigation link;
- sorting index;
- a set of additional links that correspond to the same menu option. A set of links to pages that, when accessed, will also highlight this menu option that is established in this field. For example, in order to have the Book catalog menu option highlighted when any Book catalog section page is viewed, this field must contain a link to the folder with all the pages of the section (or necessary pages): /e-store/books/;
- viewing conditions. For example, it permits you to introduce viewing restrictions that are applicable to this menu option for users with certain access rights;
- Additional parameters is a set of arbitrary parameters that may be processed in the menu display template and are represented accordingly. For example, if a menu option is a section header, it may be specified in the option parameters as follows: parameter name – SEPARATOR, value – Y. When creating a template, this parameter may be verified and this option may be marked with a separator.
Parameters are stored in an associated array $PARAMS as name => value pairs. When creating a menu according to a template, the template itself may include parameter verification, for example:
if ($PARAMS["MY_PARAM"]=="Y")
Note: The number of additional parameters in the form may be increased using the option Number of additional menu parameters in the settings of the Site Explorer module, Website Parameters section.