Last Modified: 18.09.2014
|
|
|
Views: 14416
Last Modified: 18.09.2014 Work OrderWhen creating a web section using information blocks, a certain work order should be followed. This order may differ depending on the degree of project readiness and a complexity of a specific assignment. Almost in every case you will have to:
Standard CapabilitiesBuilt-in tools of the Information Blocks module are extensive enough. There is no limit either to infoblock types, infoblock number, number of properties of each infoblock, or number of sections or elements. Infoblock PropertiesElements of each infoblock have a set of system properties that may be extended with user properties. The infoblock properties differ according to their types:
Each type of properties has its own set of parameters established in relevant forms. Properties may be multiple and of mandatory completion. Note. It is recommended that only the characteristics that are to be used as filters should be converted into separate properties. The remaining characteristics should be incorporated in product description as text.
Properties of Infoblock SectionsIt is possible to set the user properties for infoblock sections. The code of user fields must always contain the prefix UF_. The list of field types is somewhat smaller than that for the infoblock proper:
Similarly to the properties of the infoblock itself, section properties may be multiple and mandatory. In addition, it is possible to establish whether the property will participate in search and sorting, whether the user can edit the property value, and whether the property will be displayed in the general list of properties. Export-ImportAdding a big number of infoblock elements manually is a very laborious task Data import/export can be applied using different file formats in order to make the information adding process easier. The following formats are supported:
Export and import in RSS format are arranged using the special components RSS news (export) (bitrix:rss.out) and RSS news (import) (bitrix:rss.show), accordingly. Data from the infoblock are exported to CSV file using the form Information block export (Control Panel > Content > Information blocks > Export > CSV). Data stored in a separate CSV file, are imported to the information block using the form of Information block import (Control Panel > Content > Information blocks > Import > CSV). Note: Starting from module version 14.0.5, the section nesting depth for CSV export/import is determined by the settings of the Information Blocks module.
In earlier versions, export to CSV was limited to three nesting levels. Note: If an infoblock is to be exported as a product catalog, the following path should be used: Control Panel > e-Store > Settings > Data export. In addition, import from a CSV file is possible: as a product catalog. In this case, it is necessary to use the following path: Control Panel > e-Store > Settings > Data import.
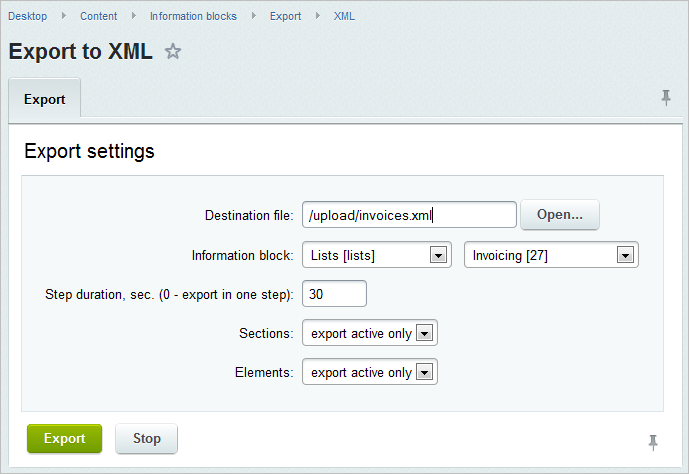
The functional capacity of the infoblock import/export feature permits moving to and from XML not only the contents of the infoblocks but also their properties and images. Export can be made at the page Export to XML (Control Panel > Content > Information blocks > Export > XML). Import can be made at the page XML Import (Control Panel > Content > Information blocks > Import > XML).
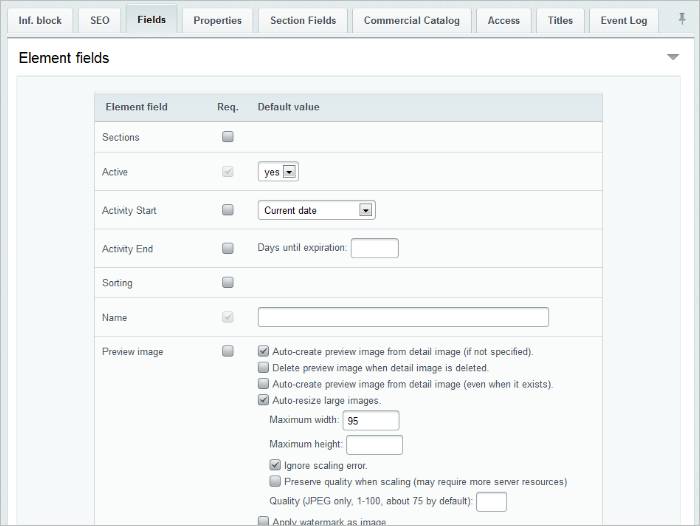
Setting Up Fields of the Element Adding FormThe task of creating a large number of elements of an information block can be made easy by using the presettings of the fields of the element adding form. The settings are made in the Administrative section using the tab Fields of the infoblock editing form (Control Panel > Content > Information blocks > Information block types). Note: The tab Fields permits you to establish preset data for the infoblock element fields.
This form has three columns:
Let us take a closer look at certain fields: The form type for this field that will open by default shall be set in the fields Description type type (for a preview text and a detailed description): a text field or a visual editor. You have to decide what type of field suits you better. For a preview text, the – text description type is recommended; and for a detailed description – html. It permits using text with html tags when importing data from a CSV file. In this case, the description will be imported with an already set format. Fields in the Default value can be used as a prompt for the content manager about the data that should be introduced in the field. For example, a text can be entered in the fields Preview text and Detailed description to help the content manager to complete forms. Let us suppose that the comment for the preview text will be: "Introduce a summary of the piece of news", and for the detailed description: "Introduce full text of the piece of news". Note: Similarly, the tab Section Fields can be set up.
System Processing of PhotographsAs a rule, several pictures are used on websites for an infoblock element: a small preview and a big picture. If multiple elements must be created, normally it takes a lot of time to create small pictures from big ones. However, it is actually not necessary. Just upload one big picture, and indicate in the Fields tab the way you would like it to be processed. Let us set up the infoblock operation in such a way that when we upload one big picture we obtain one small and one big picture, both of a preset size and with a preset quality.
In order to set up processing quality, you can also use the options of the Fields tab. Please note that free server resources are required to use these fields.
Enter similar settings in the Detailed image fields in order to set up a picture shown in detailed view. Setting Up the Element Adding Form DisplayThe form for editing/adding an infoblock element can be changed and set up according to the requirements of the website content manager. The changed form is displayed and works both for adding/editing an element to the administrative part and for adding/editing an element to the public part. Note: The form can be set up only from the administrative part of the website.
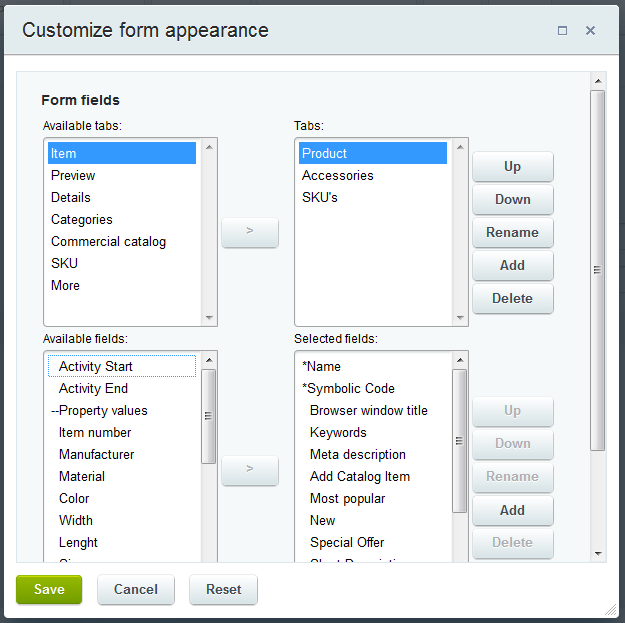
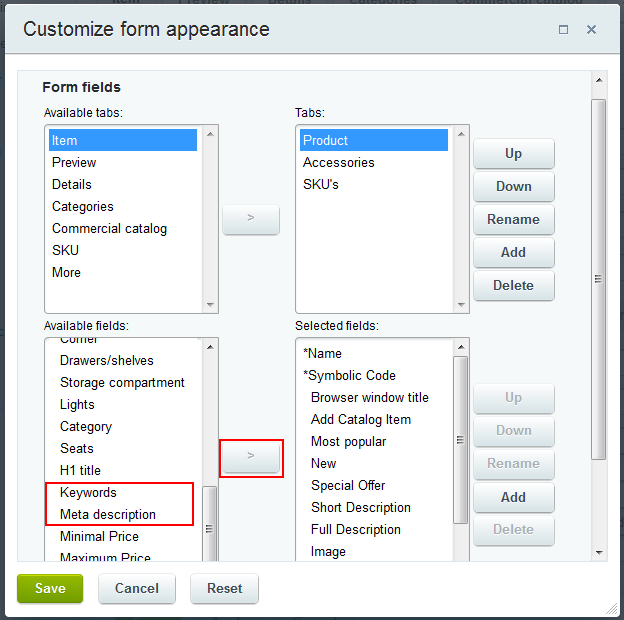
Follow the steps below in order to set up the form:
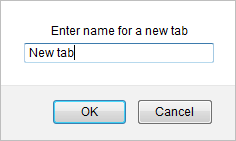
This form permits you to rename and change the sequence order both for fields and tabs of the element editing form. You can also move fields not only within one tab but also from one tab to another, thus forming a visual appearance of the element adding/editing form which is convenient to you. Set up tabs and fields as necessary:
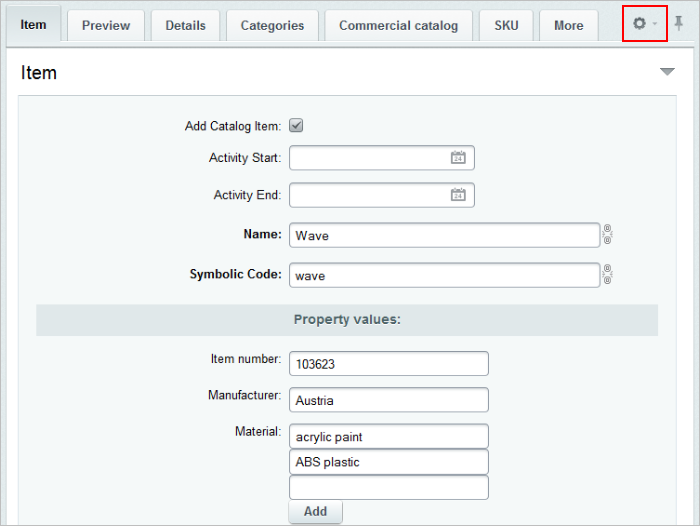
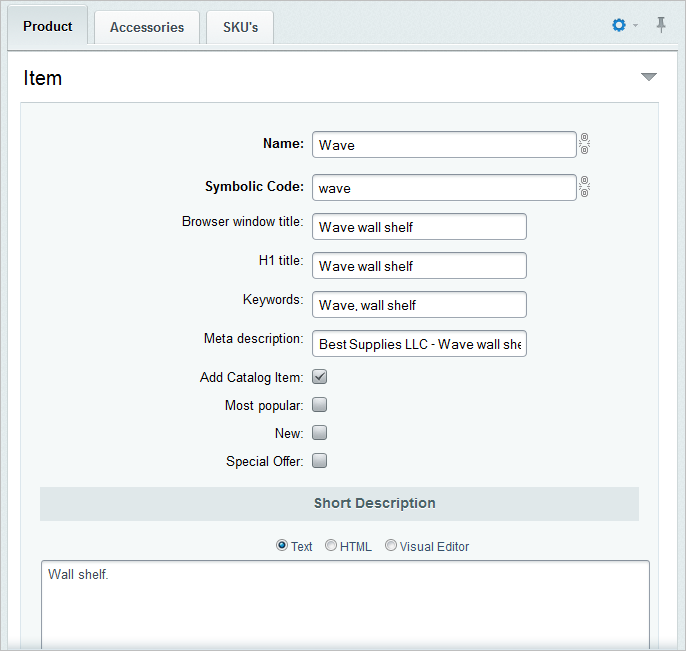
The option Set these settings for all users by default permits you to establish form settings for all users as default settings. Save the changes made. Now, you have a changed infoblock element editing form with no unnecessary fields where the remaining fields are grouped up in a necessary order. Once set up is completed, the form looks like this:
This form will also be used to create/edit elements in the public section. Note: The settings of the external appearance of the element creating/editing form can be reverted in the administrative part of the website using the command Disable custom form settings from the menu of the Settings button:
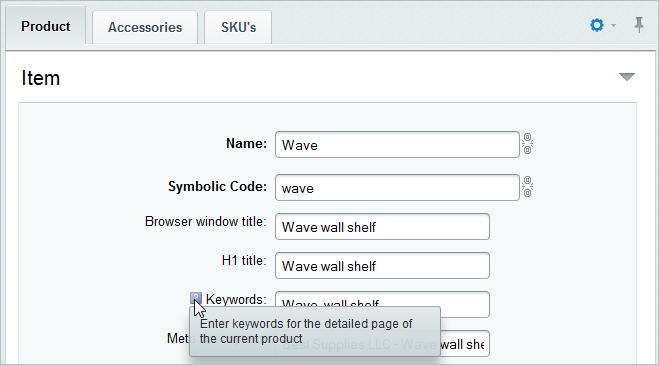
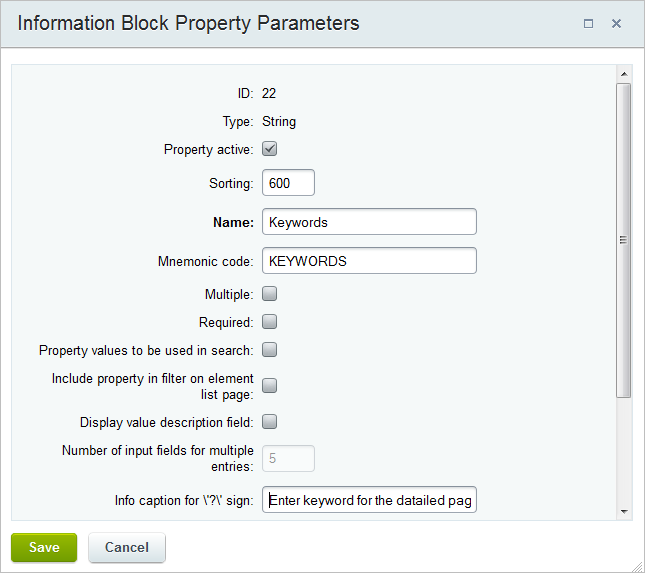
Setting Up PromptsIt is rather unusual to find a highly qualified employee working as a content manager in website support. Moreover, in case of a large number of created properties of an information block, even a highly qualified employee may experience difficulties when it comes to deciding which value should be entered in any other property field. A website administrator can create prompts to make it easier for a content manager to complete forms. The prompts look as follows in the form itself:
Just use the field Info caption for '?' sign in the properties form of the information block.
Storage Types for InfoblocksWhen creating information blocks, infoblock properties should be stored in a separate table, and all of the property values of each element shall be stored in the same string. This technique is called Information Blocks 2.0 and permits you to significantly speed up system operation and also to lift a number of restrictions of the previous version of infoblocks. For example, now there is no need to make the additional request CIBlockElement::GetProperty when selecting property values with the function CIBlockElement::GetList. Infoblock 2.0 performance options:
Full compatibility with API is important. I.e. the technique for using infoblocks, properties, elements, and their values is the same for both versions of infoblocks. Connection between InfoblocksBitrix Framework permits creating interconnections between information blocks using properties of the type Link to elements, Link to section, Link to elements (drop-down list), Link to elementы autocomplete text box and Link to product items (SKU).
Courses developed by Bitrix24
|
