Views: 8837
Last Modified: 09.10.2019
Importing and exporting into CSV file
CSV file Import/Export feature is used to handle localization files manually.
- Go to the required folder (for example, activity) to the Export files tab (Settings > Localization > Browse files) select entirely replace language files to export all localization strings of this folder (module), or export only new messages to export only translated strings into CSV file.
- Click Export and the created localization CSV file window ill appear.
By default, the name of the CSV file will consist from the folder (or module) names, included into the localization. Otherwise, the file will have the name bitrix_activities.csv
- Edit the required strings and save all changes in the same CSV file.
- In the similar manner, you can select the way of adding localization into the system via Browse files: import only new messages or entirely replace language files, select CSV file and click Import:
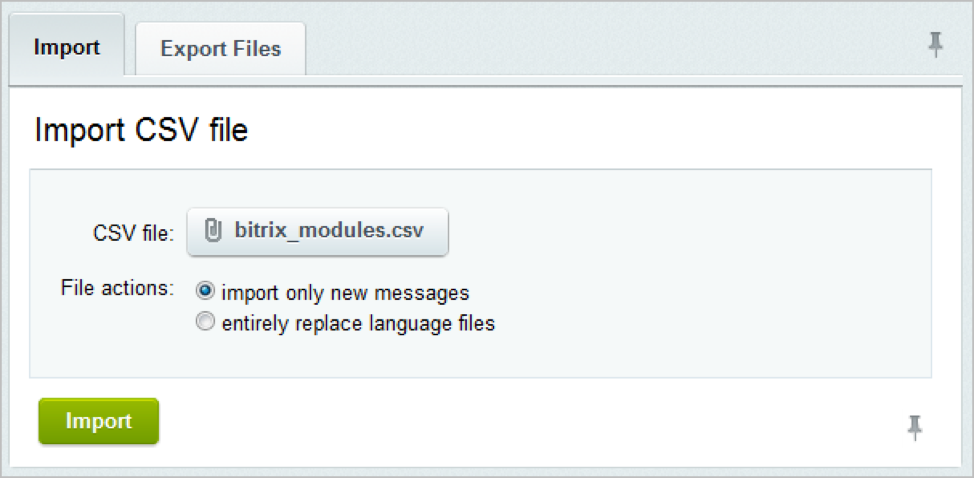
The module has been translated.
Collect localization strings
After the system localization archive was created, a full localization package for each system language can be created.
- Go to the page Collect strings (Settings > Localization > Export and Import).
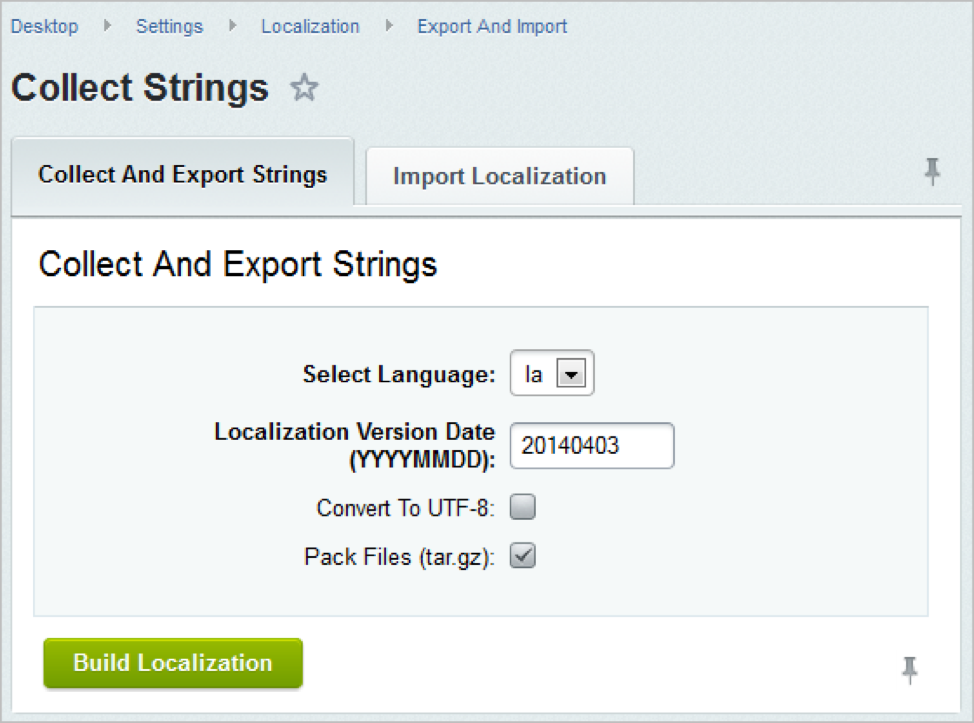
- Select the required options in the Collect strings tab:
- Select language - indicate which language phrases are to be exported;
- Localization version date - date format YYYYMMDD for the localization archive;
- Convert To UTF-8 - select the option to convert into a national encoding (UTF-8) for all localization files (by default, the files will be collected in the current site encoding otherwise);
- Pack Files (tar.gz) - option to compress files into the archive of tar.gz format;
- To launch the collection of localization package, click the Build Localization button.
After the localization archive is collected, a link with the archive location is provided (if the option to build archive with tar.gz format is selected) or to files of the complete archive.
To import the localization archive into the system:
- Go to the page Browse files (Settings > Localization > Export and Import):
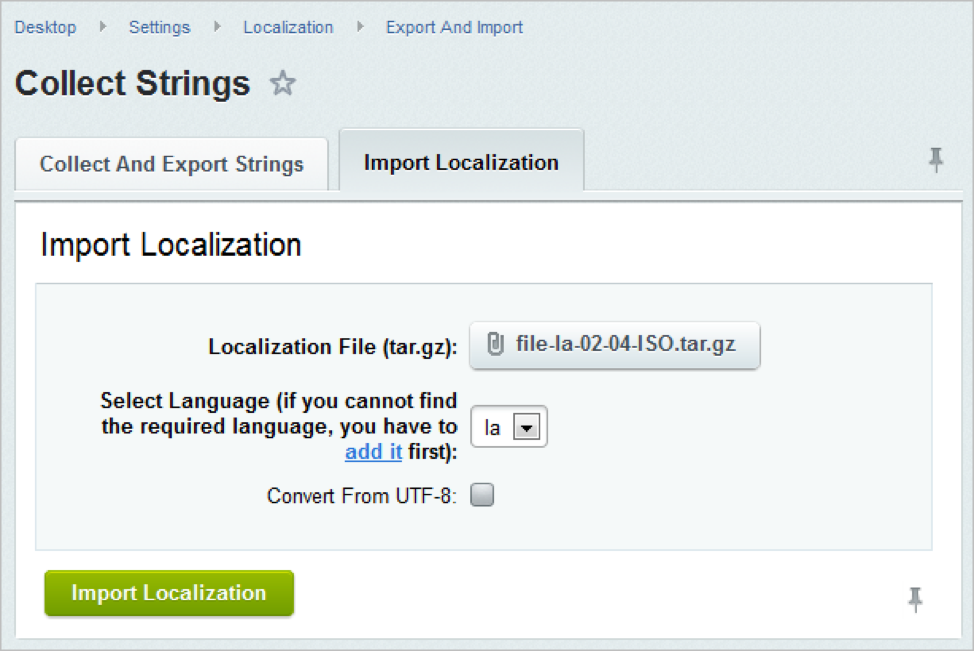
- Select the required options in the Collect Strings:
indicate the language phrases of which language are to be imported
- Localization archive (with tar.gz format);
- Select Language (the required language can be already installed in the system, or can be created via the Add link);
- Convert from UTF-8 - select this option if your project is in national encoding and the localization archive to be imported is in UTF-8;
- To launch the localization package import into the system, click the Import Localization button.
Related Links:
Bitrix Framework Localization Guide.