 [/di].
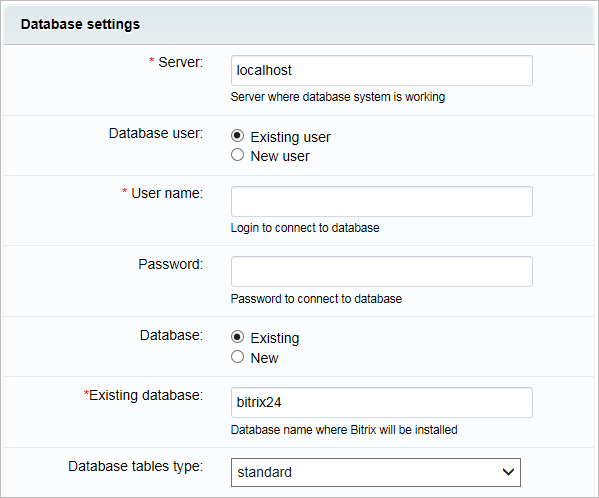
 [/di].

 [/di] to remove application from the app list.
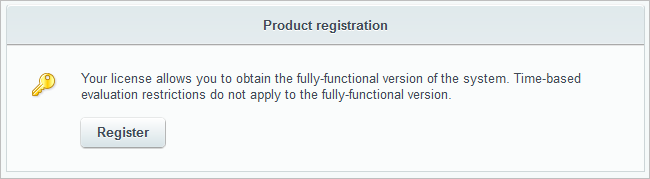


)
)

|
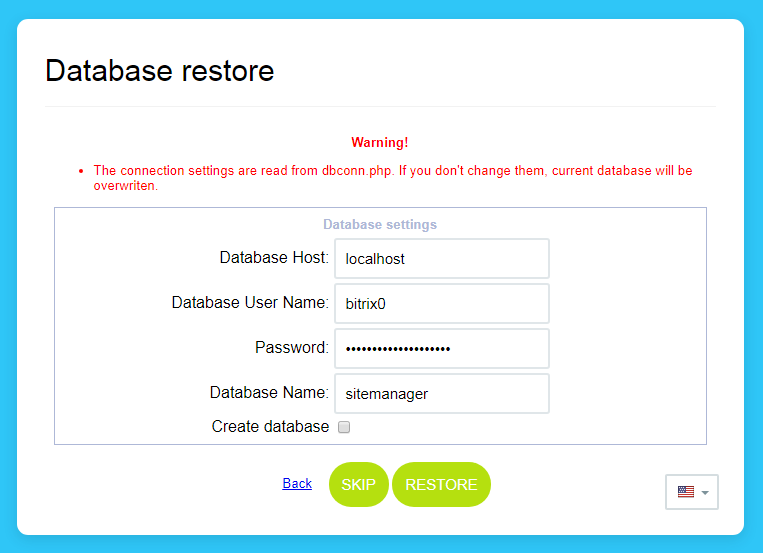
When downloading archive in cloud
|
|---|
When site archive was located on client's site (in cloud), indicate the option Download from remote server and set the path to archive:
|
|
|
|
Table of Contents
System requirementsServer software requirements
Apache (recommended) – the Bitrix software was developed for Apache 2.0 and higher. PHPBitrix24 Self-hosted requires PHP version [dw]7.1.х[/dw][di]From 30 June 2019.[/di] or higher. It is recommended that you use the latest stable release of PHP to prevent PHP failures and to provide the maximum security at the server side. The following PHP extensions are required:
Note. UTF-8 is available for MySQL. To ensure the correct support of UTF encryption, check if the mbstring module is installed in PHP. In this context, the php.ini file in the PHP settings must include:
 mbstring.func_overload=2
 mbstring.internal_encoding=UTF-8
MySQL[dw]MySQL 5.6[/dw][di]From 30 June 2019.[/di] version and higher is recommended. To support MySQL, the system requires the MySQL support for PHP to be installed. Attention! From 1 January 2017, Bitrix24 has limited support for products using Oracle Database and MS SQL Server: clients cannot download product updates and use new product versions.
Note: Encoding MySQL utf8mb4 is not supported.
Web server configurationFor proper functioning, Bitrix24 requires the following parameters to be set.
The following PHP parameters are essential.
Supported standards. Client software requirements
HTML/XHTML The system places no restrictions on templates developed with HTML/XHTML. JavaScript The system unconditionally supports the use of JavaScript in the site templates, menus and pages. AJAX This technology is widely used in the Control Panel and Components 2.0 to speed up the system response and decrease server-to-client data traffic. The system places no restrictions on using AJAX in the public section. CSS The design of each site template can be controlled via separate CSS files. Analogously, separate style sheets can be used with public components as well as module templates (e.g. forum, helpdesk, polls). The Control Panel features the use of visual themes: users can create their own custom visual themes through the cascading style sheets. Flash The system has limited support for the Macromedia (now Adobe) Flash technology. Flash plug-ins can be used in the following ways:
RSS The system supports RSS versions 0.92 and 2.0. In the core, RSS is used to exchange information between the Information Blocks and Blogs modules. CSV The system uses the CSV standard to exchange information between the Information Blocks module and other systems. Browser support Bitrix Site Manager and Bitrix24 were developed to support the most popular browsers (Internet Explorer 11.0 and higher). The Control Panel is optimized for the maximum performance with them. The public section appearance is browser-independent. Known problems
Installing Bitrix24 Self-hostedThis chapter describes the preliminary steps for the product installation, steps of the installation wizard, as well as selection and initial set-up of the portal for a faster deployment of your project. It's recommended to install Bitrix24 Self-hosted on a Bitrix Virtual Appliance. You can learn more in a dedicated Bitrix Virtual Appliance. Preliminary operations
Now, ensure your system corresponds minimum requirements.
Attention: Bitrix24 can only install and operate correctly if your system conforms these minimum requirements.
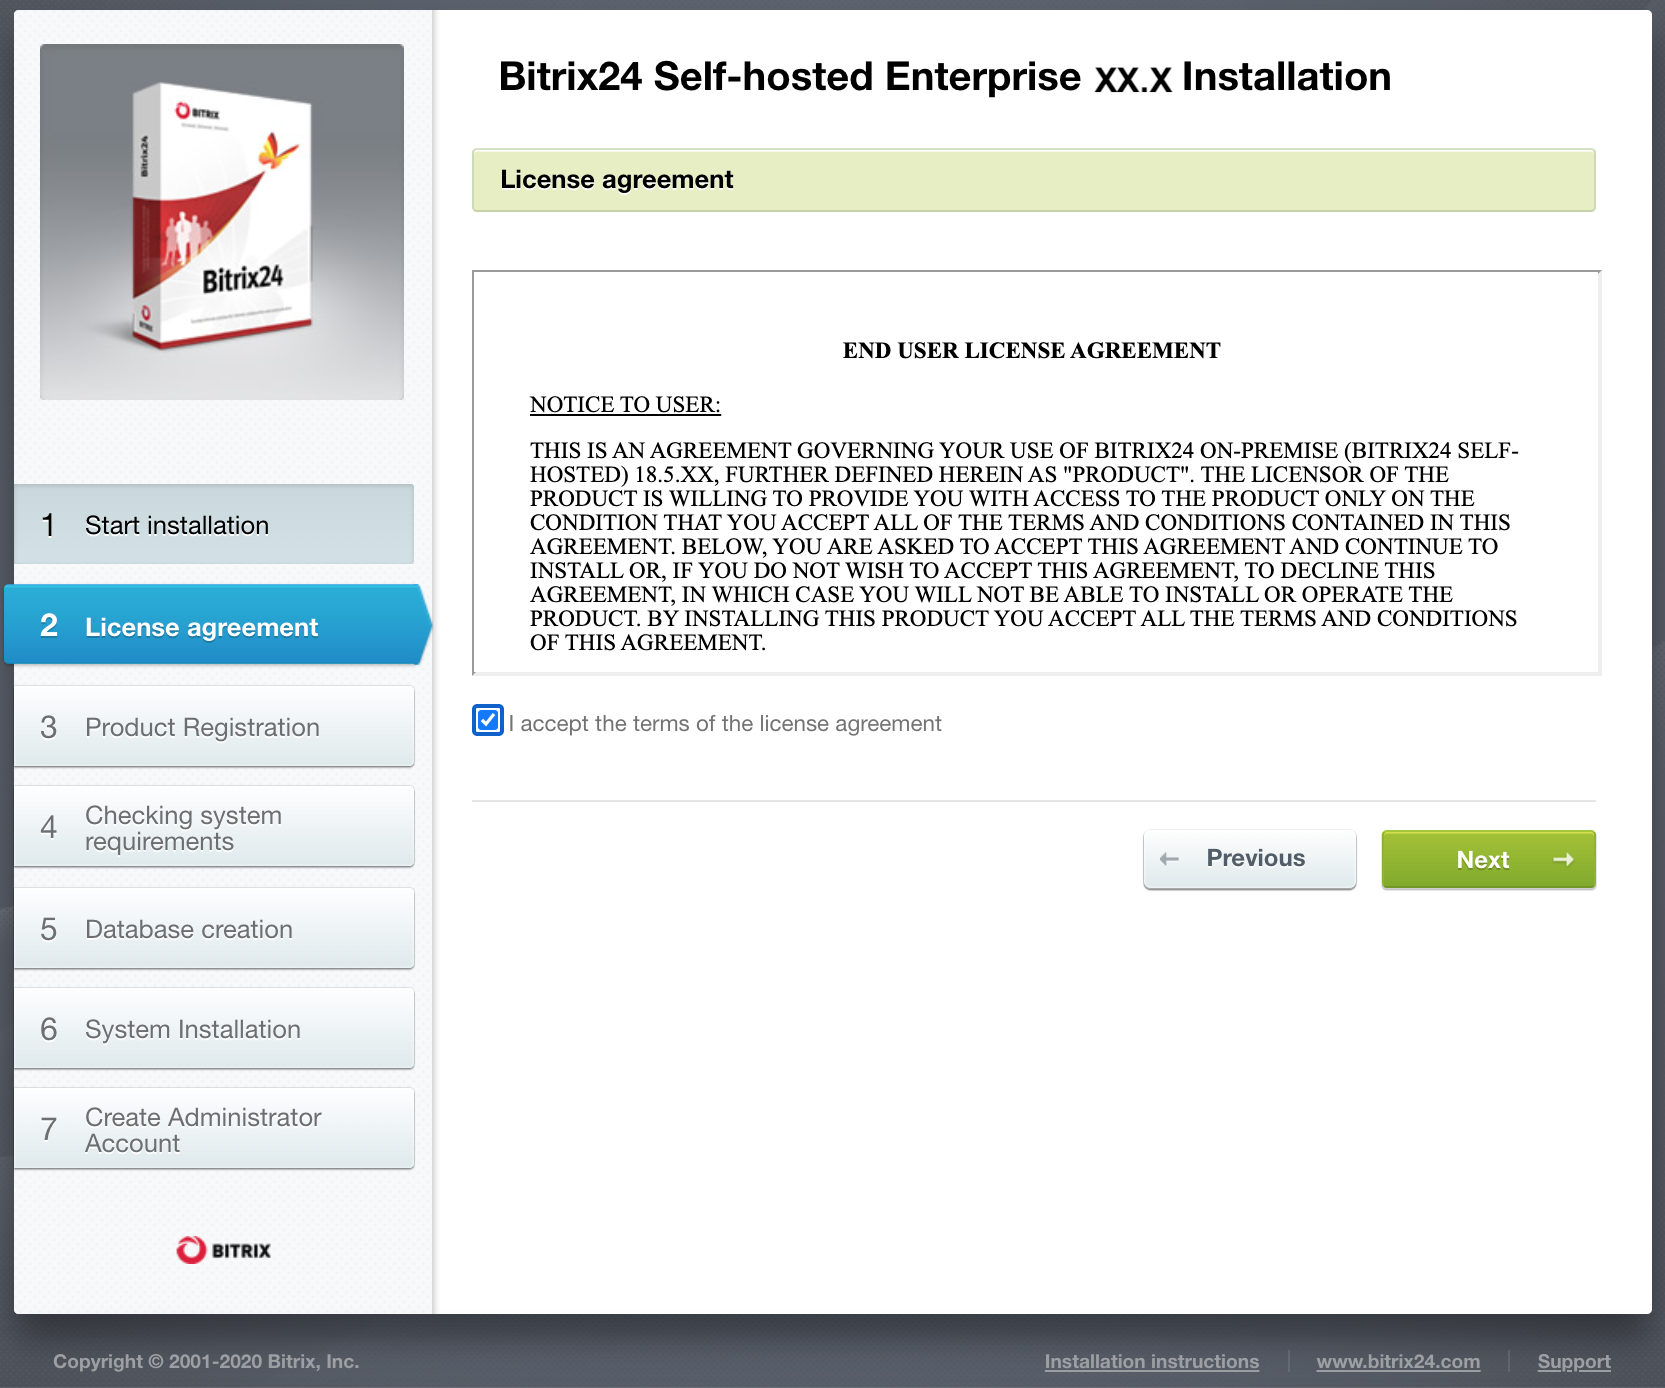
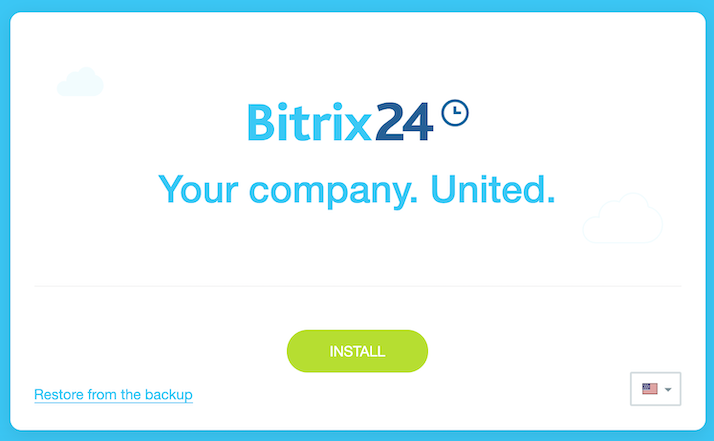
To start installation, open http://<your_site>/index.php in your browser. Replace here <your_site> with the real address of your site. Step 1. The license agreementThis section contains general description for the Bitrix24 Self-hosted installation procedure. Note: Installation Wizard can have various number of installation steps depending for different versions of Bitrix24 products. Specifically, first BitrixVM installation window no longer has a [dw]greetings window[/dw][di]Installation Wizard first window shows details on the start of installation process and displays
product's main information. 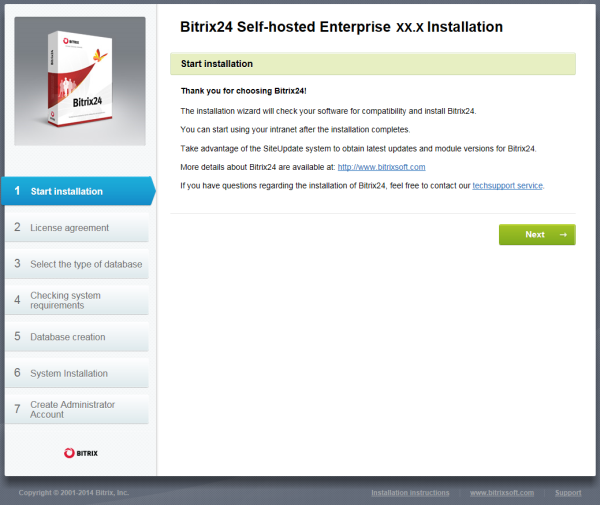 [/di]. This step is skipped in the installation description. [/di]. This step is skipped in the installation description.Note: Starting the Installation Wizard with the parameter
clear_db=Y (for example, http://localhost/?clear_db=Y) deletes all data tables with associated entities in the database before starting the installation.
Attention! Use this option only if you are completely aware about consequences of your actions.
Please, carefully read all details of the License agreement. When you are in agreement with conditions, set the checkbox I accept the terms of the license agreement. Click Next button to proceed Step 2. Product registration
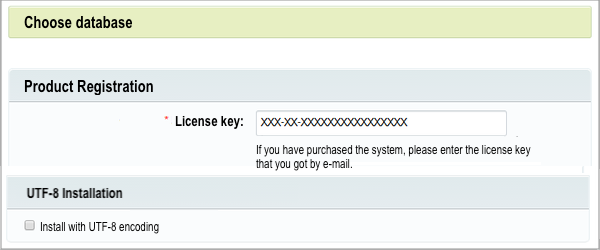
Product registrationEnter the Registration license key that you received upon successful purchase of Bitrix24 product. Note: When installing demo product version you will have the available option [dw]I want to register my copy of the program and get updates[/dw][di]
 [/di]. Fill out the registration fields and get access for product updates during the trial period. [/di]. Fill out the registration fields and get access for product updates during the trial period. Otherwise, your Bitrix24 will be installed, but updates will not be available. You can always register a trial version and receive a trial key for updates (find more in the section Registering a trial version (DEMO)). Development onlyStarting from version 16.5.7 and higher, Bitrix24 products now have a checkmark option for new or old Bitrix24 product instances allowing to avoid blocking of the update system, and consequently for appearing error [dw]ERROR_WRONG_CODE[/dw][di]Product update system is associated to a specific installation and "remembers" the state of the operating system after a new update. An error ERROR_WRONG_CODE occurs if the current state does not match with the state at the moment of the last update. Development only allows to perform testing without closing out public access to site and without installing product locally. This feature helps to solve the issue of collective access to a single product installation. This option is also useful when several developers need to have a custom public product instance for testing purposes. Selecting databaseMySQL database have available UTF-8 encoding. If you choose to install UTF-8 version, mark the Install with UTF-8 encoding. However, selecting UTF encoding requires the mbstring PHP module to be installed. You can verify the availability of this module by examining the contents of php.ini file: mbstring.func_overload=2 mbstring.internal_encoding=UTF-8 Attention! From 1 January 2017, Bitrix24 has limited support of products using Oracle Database and MS SQL Server: clients cannot download product updates and use new product versions.
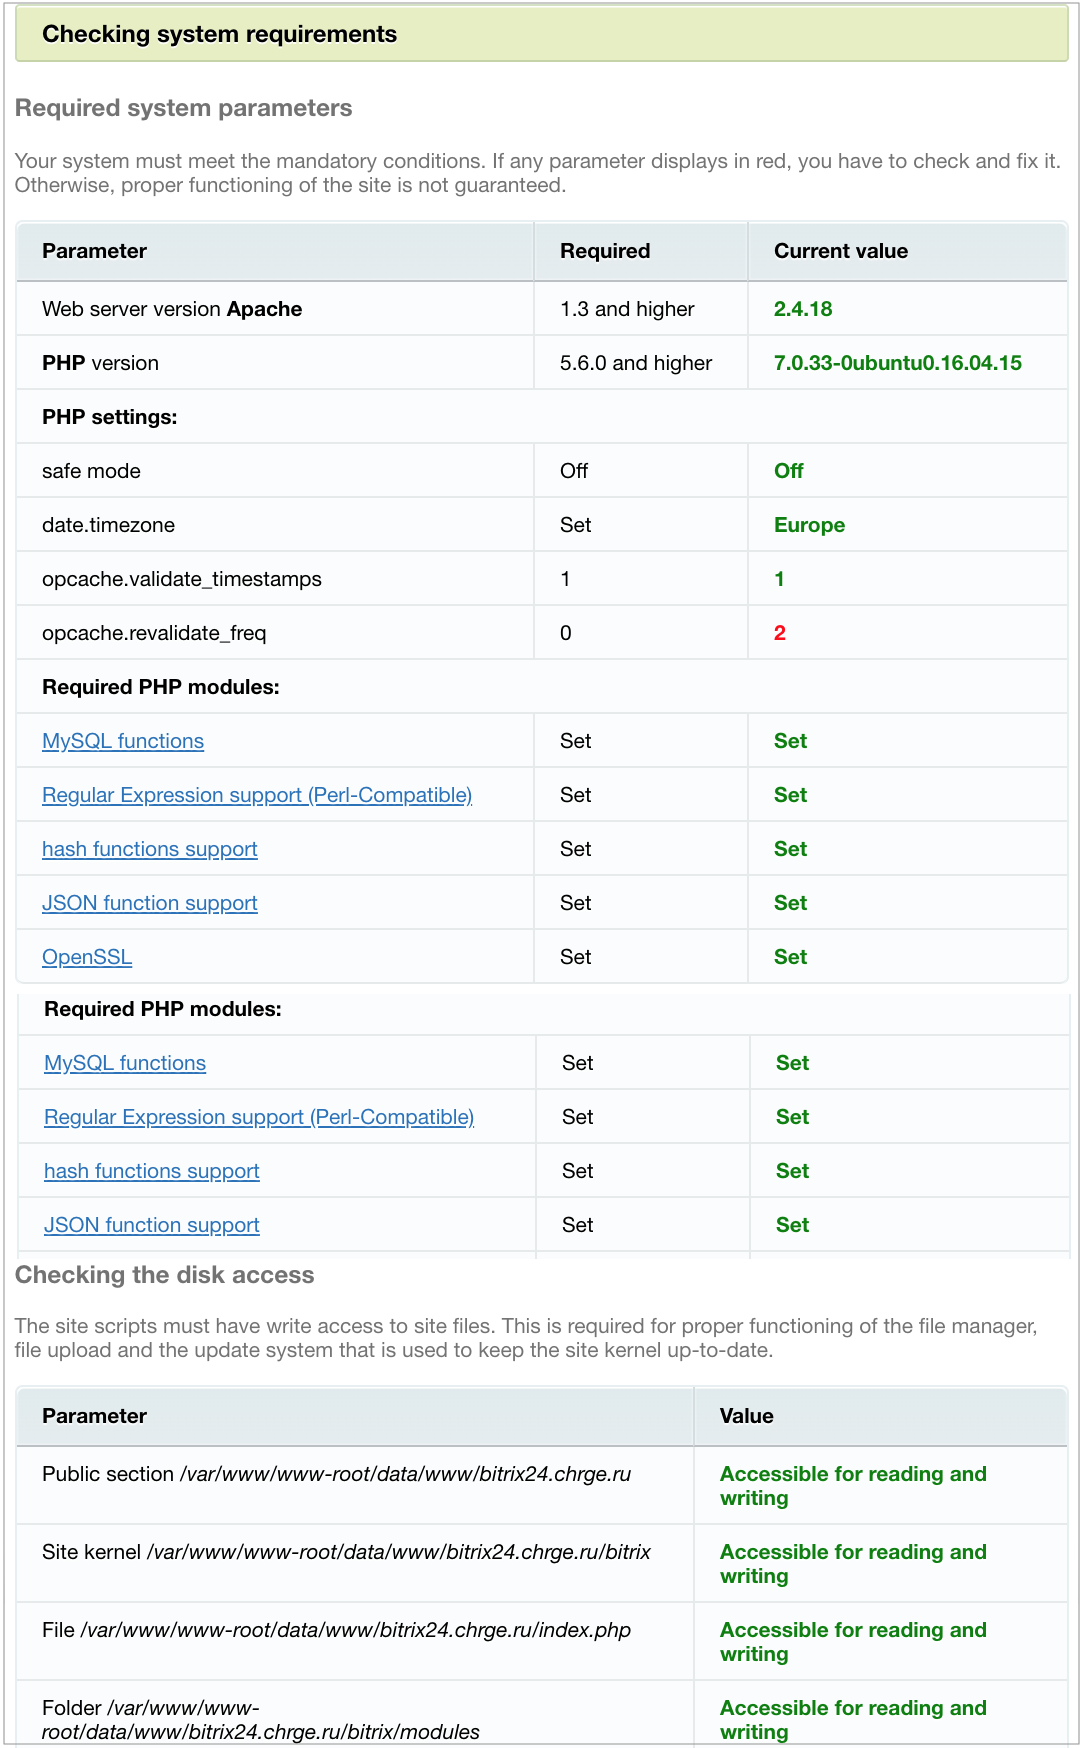
Site encodingMark the option to use the UTF-8 encoding for your Bitrix24 instance. Presently, HTML document ending has two options between WIN-1251 and UTF-8. Using the encoding WIN-1251 is appropriate with old versions of MySQL (before version 4.х), which worked with UTF-8 incorrectly. These drawbacks are not present in modern MySQL databases. To correctly support the UTF-8 encoding, mbstring module must be installed in PHP. To verify it, php.ini file in PHP settings must contain the following: mbstring.func_overload=2 mbstring.internal_encoding=UTF-8 It is recommended to use UTF-8 encoding for proper versatility and full applicability of existing characters. Click Next button to proceed with installation Step 3. Preliminary verificationNote: When the product is installed using BitrixVM (VMWare/VirtualBox), this step is skipped.
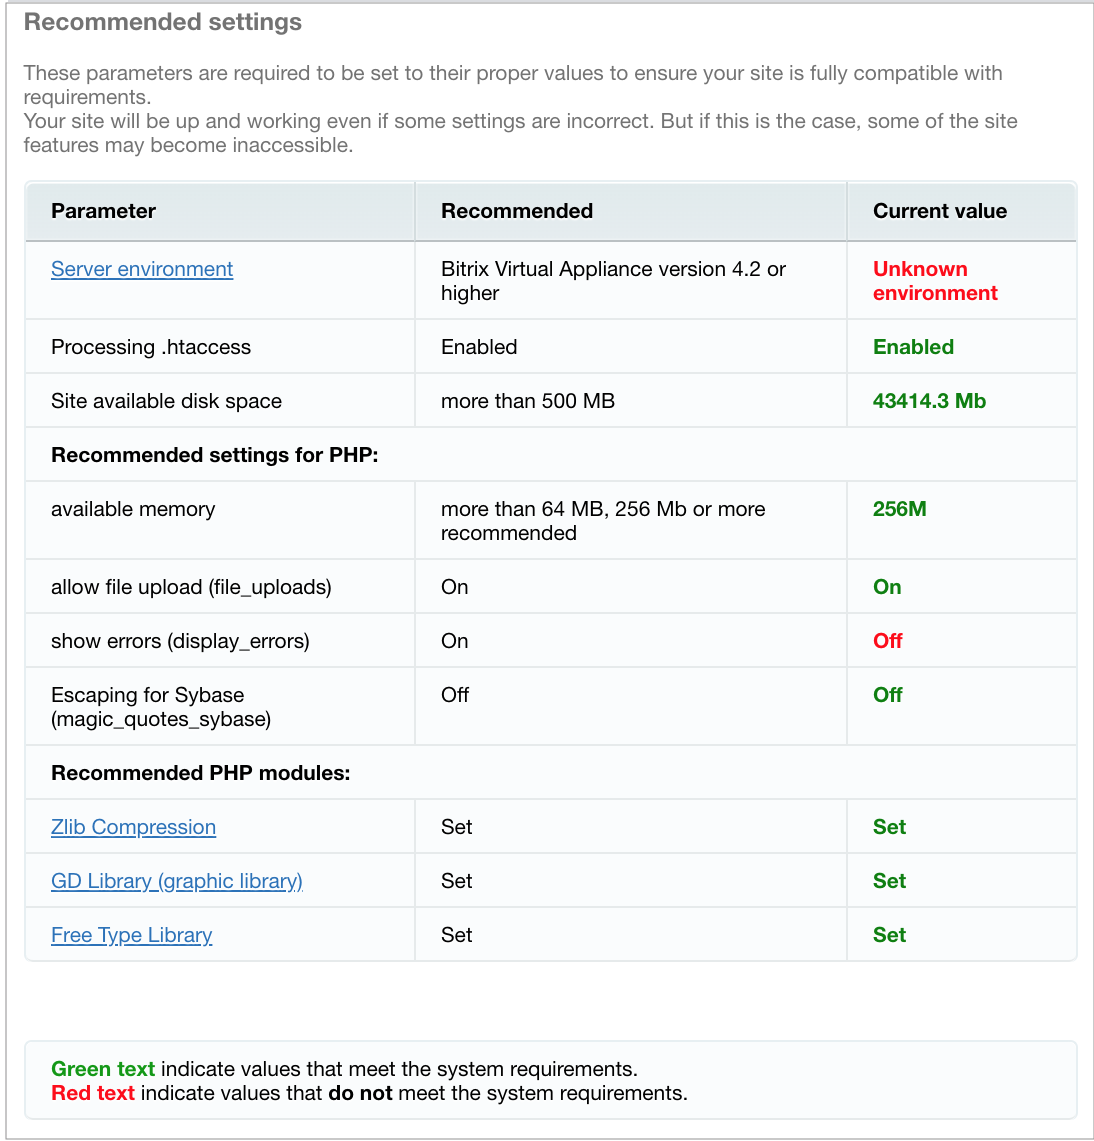
The system is checked for:
When check has failed the upper part of screen will show description with details on what conditions were not satisfied. It's not recommended to continue product installation [dw]until incompatibility issues are removed[/dw][di]Technically you can proceed with installation, but it's strongly advised to satisfy Important specificsAttention! When installing product in the UTF-8 encoding, the
mbstring.func_overload parameter must be equal to 2. This encoding cannot have other values.When installing product in the UTF-8 encoding at the preliminary check, parameters mbstring.func_overload and mbstring.internal_encoding can be highlighted in red. In this case, specify these strings in the php.ini file: mbstring.func_overload = 2 mbstring.internal_encoding = UTF-8 Note. Site can be installed with win-1251 encoding, when it's required for the value
overload to be qual 2. Use cp1251 for parameter encoding as follows:
mbstring.func_overload = 2
mbstring.internal_encoding = CP1251
Step 4. Database creationNote: When the product is installed using BitrixVM (VMWare/VirtualBox), this step is skipped.
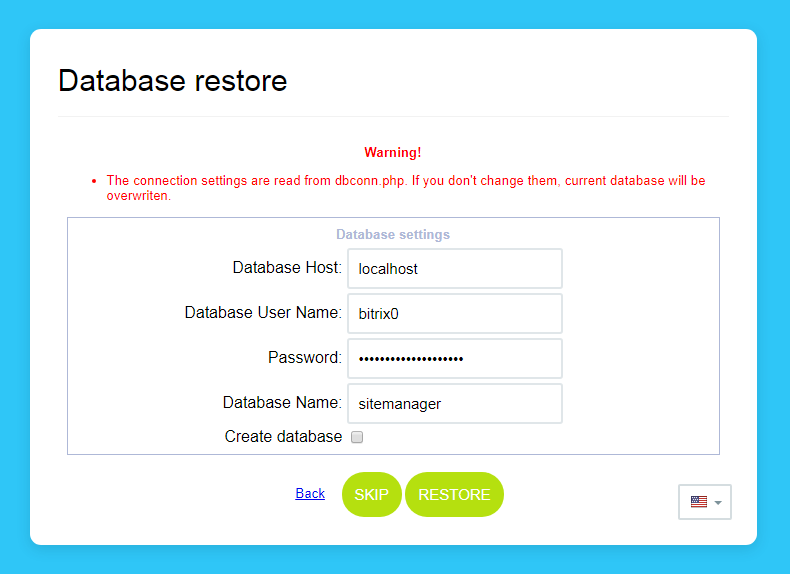
Config file for connection with database is created and data is uploaded to the database.
When installing to local computer with already pre-installed application for correct operation (Apache, PHP, MySQL) fill out the fields as follows:
When specifying database parameters on remote server, request technical support and complete the following fields:
Attention! Standard table type will be suitable in most in cases. For site with increased load requirements such as online stores, for example, InnoDB type is preferable for MySQL databases.
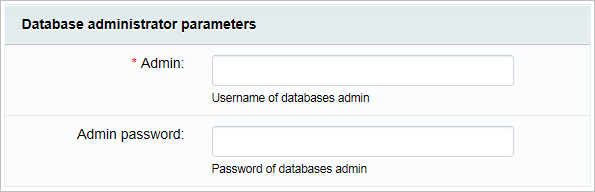
Attention! When during installation process new user or new database must be created, a database administrator Login and Password are required. In case no database was created previously, you must select new in the Database field. Usually, database is created on server by the hosting server itself. You need only retrieve name and parameters for accessing it.
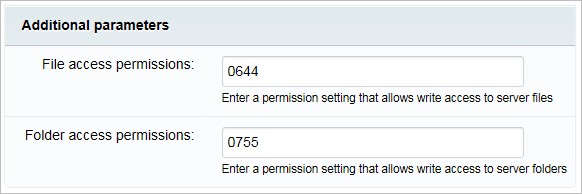
These parameters defines access permissions to site files (for all database types).
Complete the fields:
Note: Manual database connection parameter setup (including maximum memory size for executing the script) can be executed in file
/bitrix/php_interface/dbconn.php and /bitrix/.settings.php. Files will be created after installation is complete.Click Next to continue installation. Step 5. System installation
It's an automatic process when database tables are created and system files are installed. The progress can be traced using the visual progress bar. When the database creation progress is complete the system automatically proceeds to the next step. 
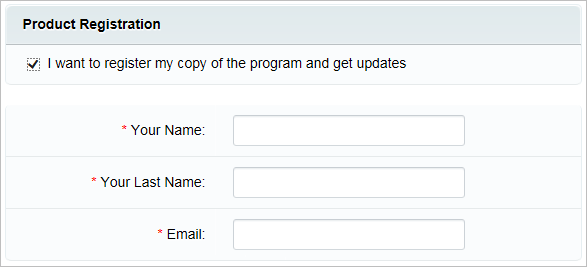
Step 6. Creating an administrator's account
At this stage, site is configured and administrator account is created that will have access to all site management configs. After the system is installed, administrator can create additional account instances for users with lower access permissions level. 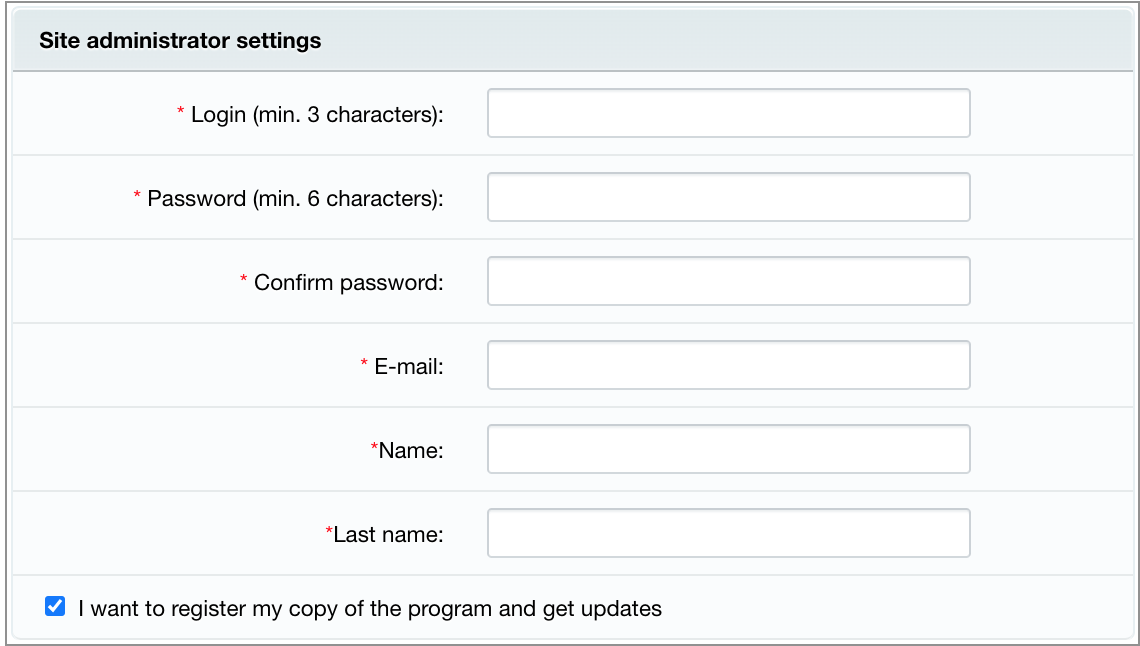
Fields, marked with * are required for completion.
Note: Specified password and login can be used further for authentication when entering the system.
Click Next to continue installation to open Site Configuration Wizard. Bitrix24 Configuration Wizard
This chapter provides detailed step-by-step instructions regarding portal and extranet site set up. Note: the number of steps in the portal and extranet setup wizards may differ depending on installation options.
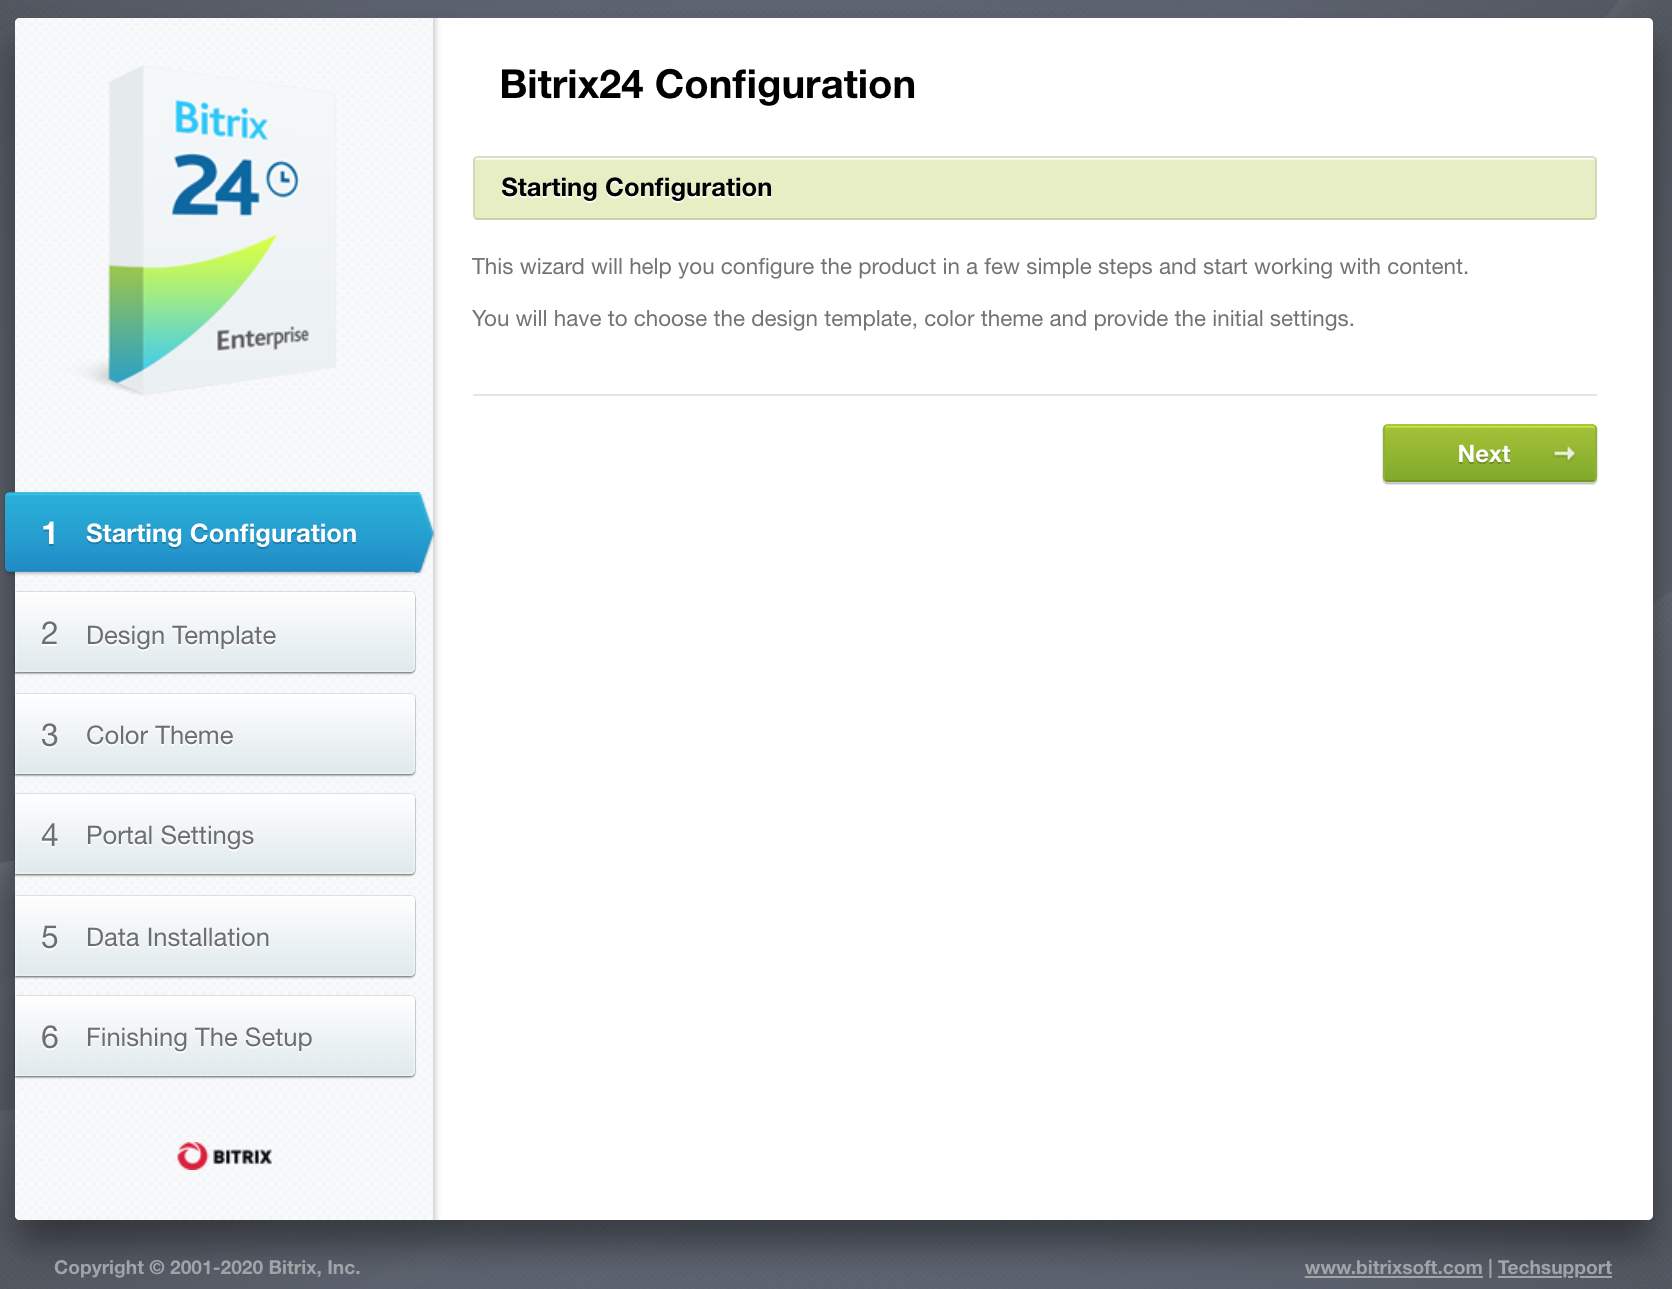
Bitrix24 Configuration
This screen informs you that the configuration wizard has started.
Choose the design template for your Bitrix24. Templates vary in layout, colour, appearance of the main page and settings. 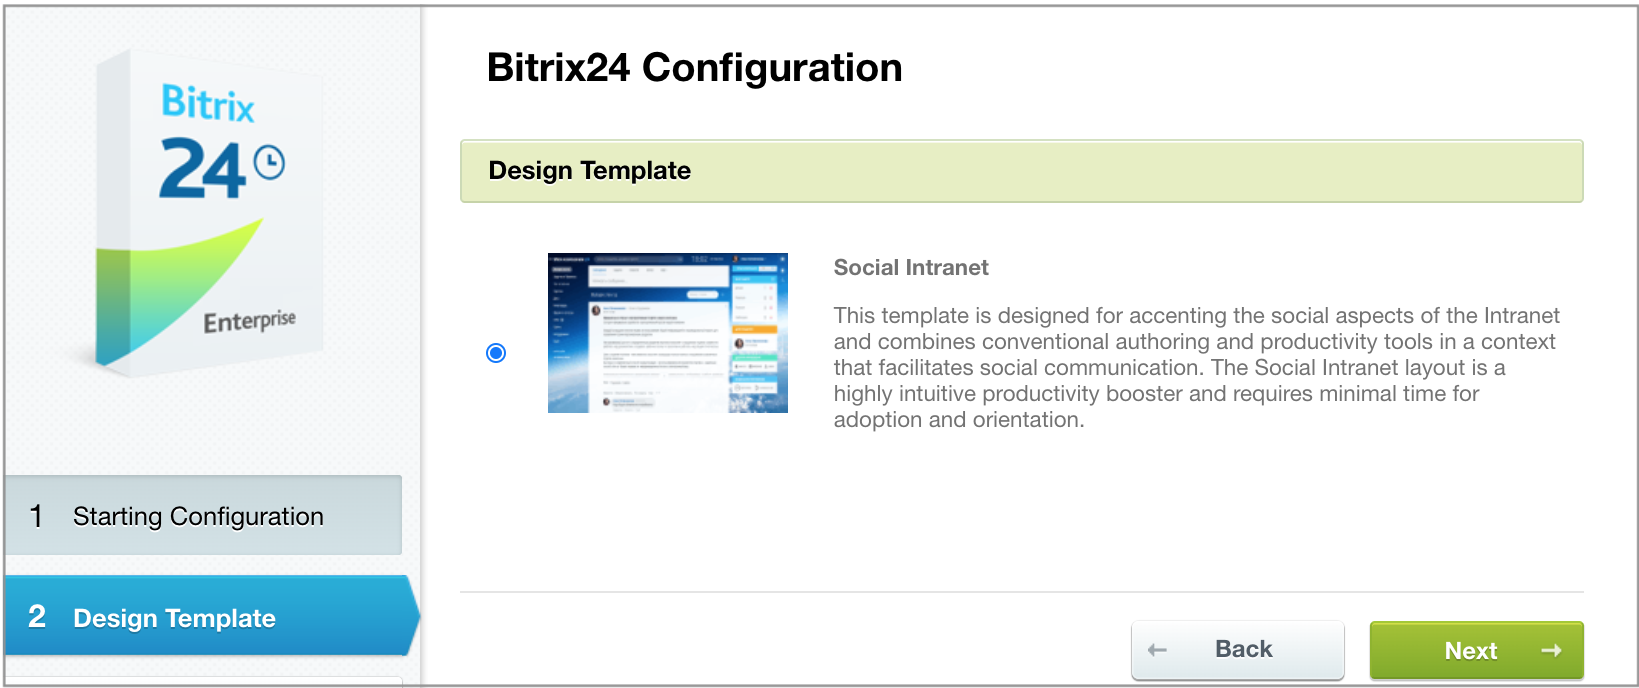
Note. Portal templates are system templates and cannot be customized! There is a technical possibility to copy, customize, and apply the template, but in this case the backward compatibility will be lost.
Here you will choose the desired colour theme for your Bitrix24. Different site design templates offer different colour schemes. 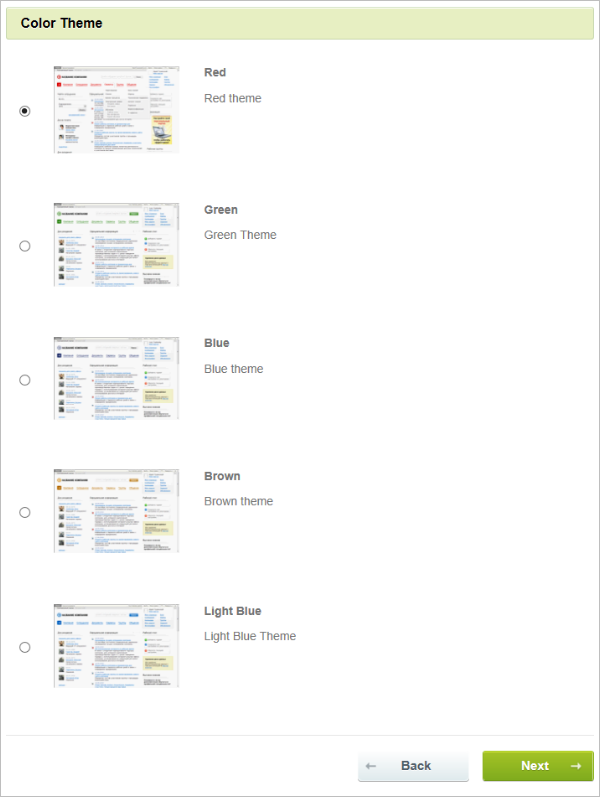
Provide here the name and the logo of your company. Select the features you want to enable on your Bitrix24. 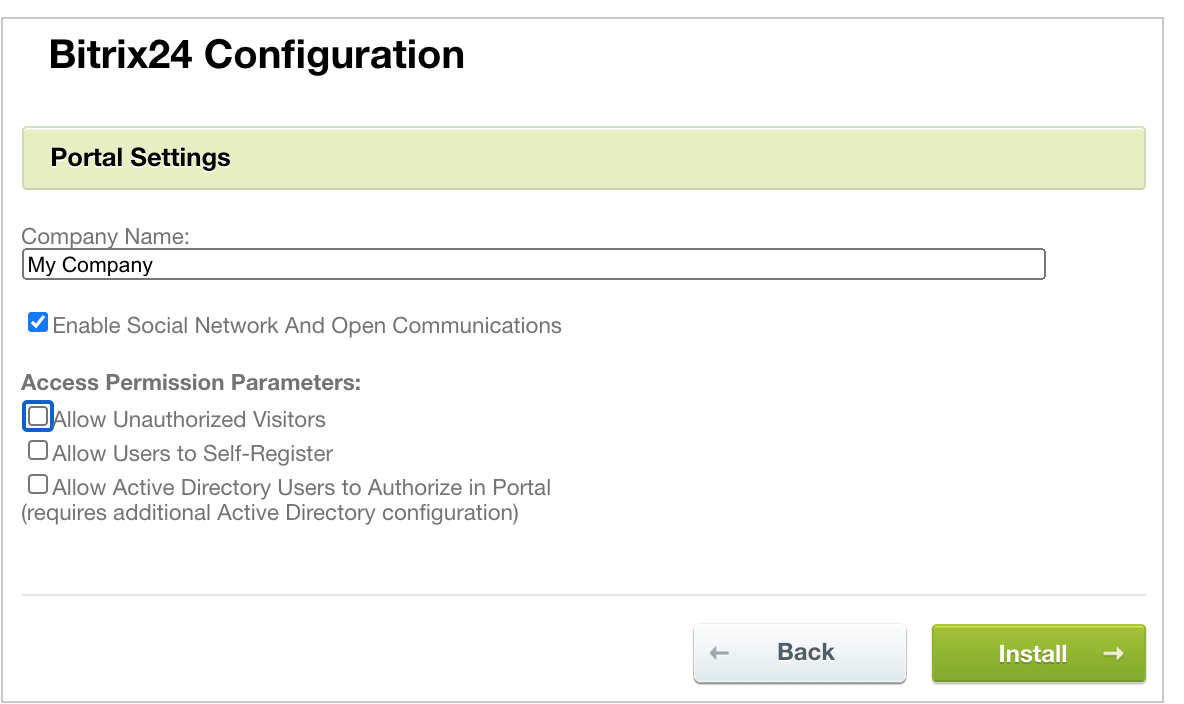
This is an unattended step that installs Bitrix24 according to the selected preferences. You can watch the process proceeding in the progress bar. Upon completion the wizard will open the next step automatically.
The system has been installed and the initial configuration has been applied. 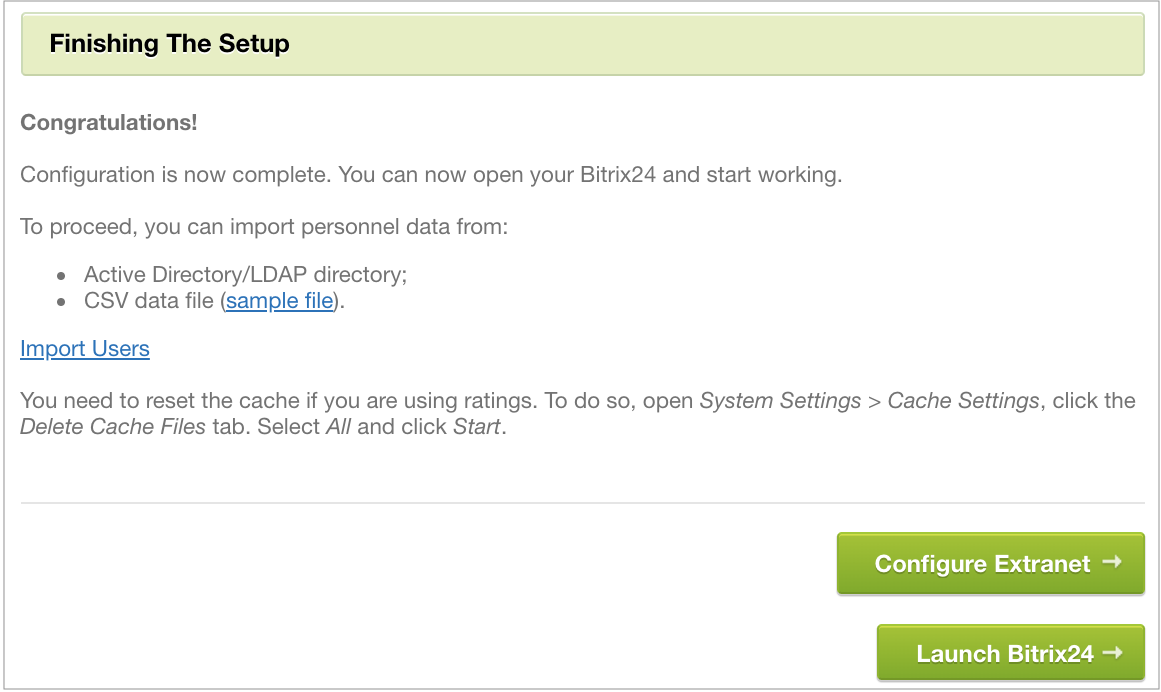
Now you can:
Note: the Configuration Wizard may also be launched again after the product installation. For example, in order to change a template or color set of the portal or include additional modules (depending on the license), etc
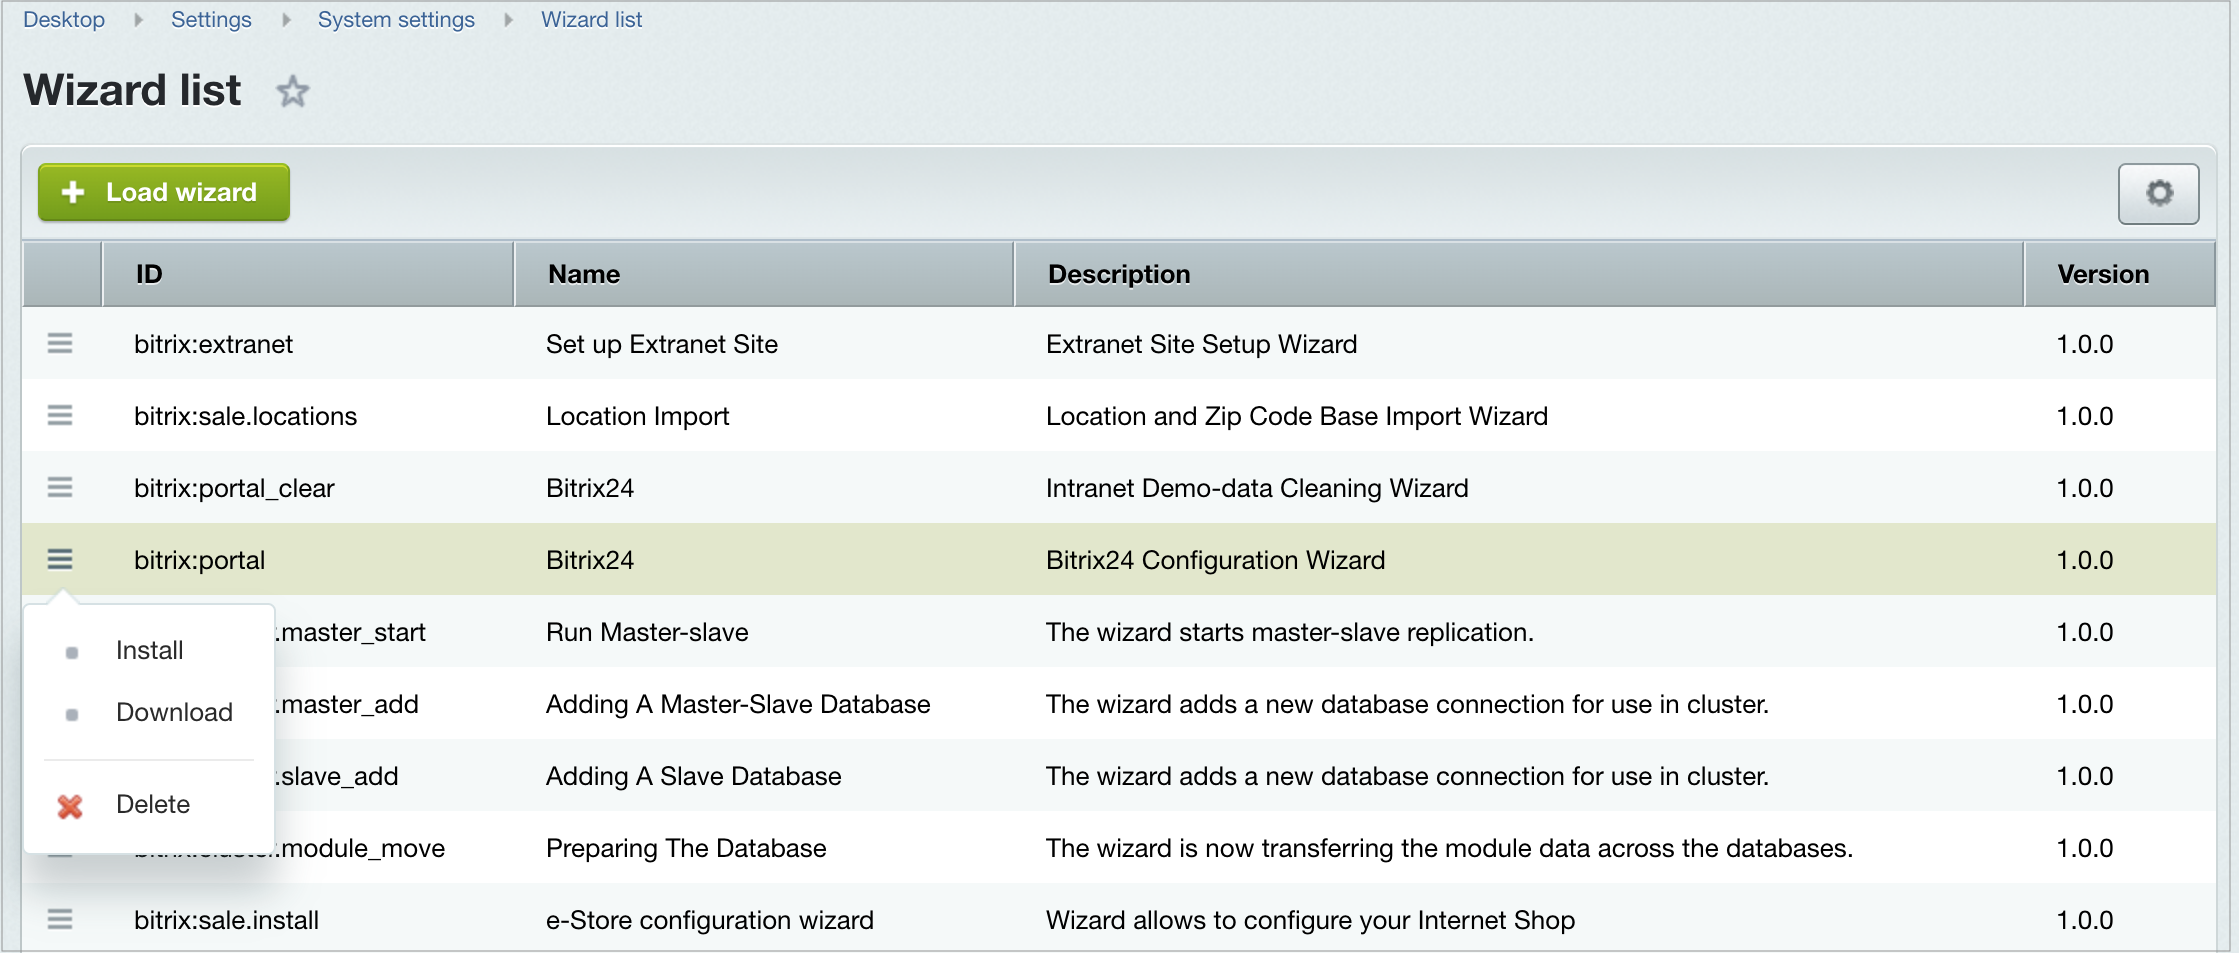
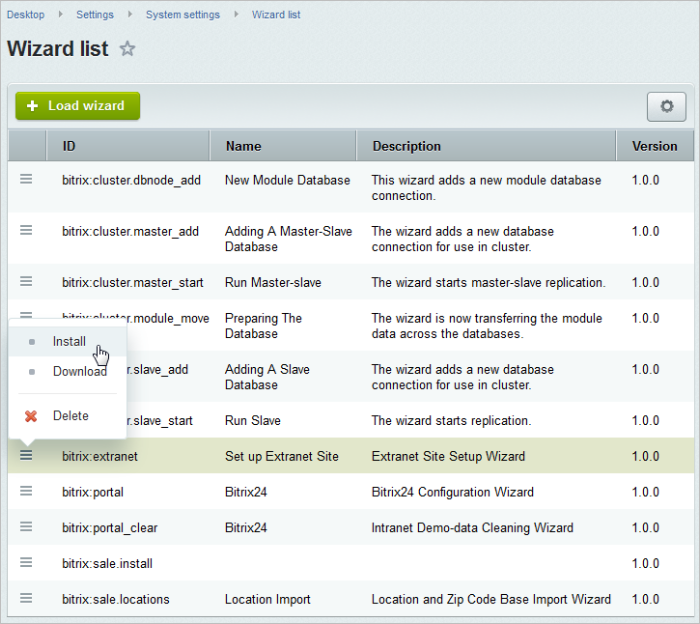
Administrator’s interface: select Install option in the actions menu in Corporate Portal Wizard (Settings > System settings > Wizard list):
Extranet Configuration
The first window informs about the wizard’s start. 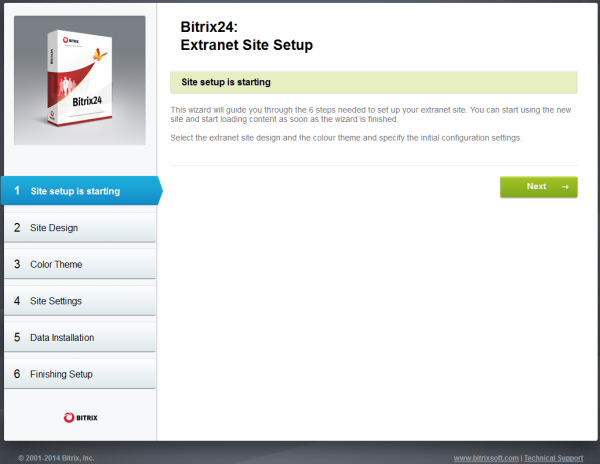
Automatic step where template is selected.
Automatic step where the color set is selected.
Here, the main extranet settings are established: Company Name, Extranet Site ID, and Extranet Site Folder. 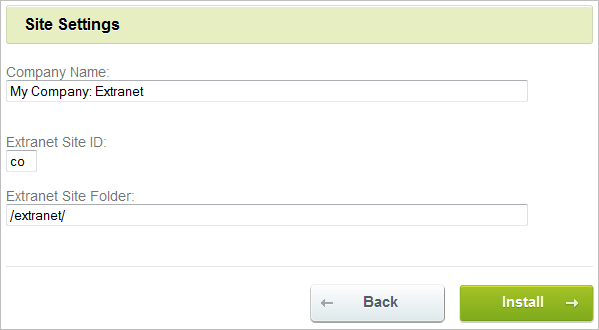
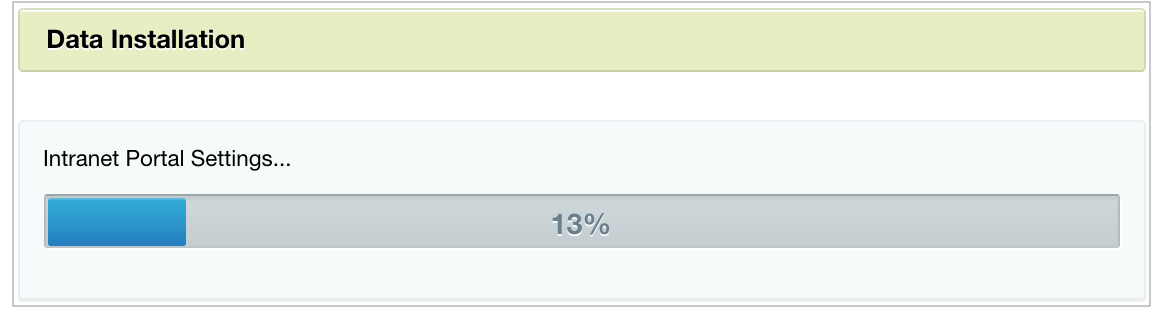
Automatic step where all the extranet settings are determined. Graphic indicator helps to monitor the progress. When the installation is completed, the system will automatically move on to the next step.
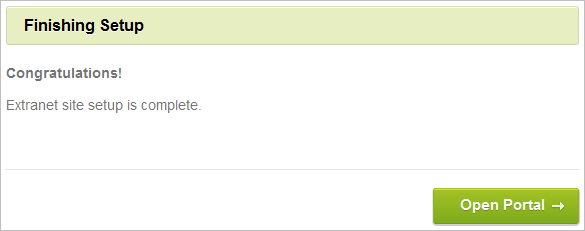
The installation and setup are completed.
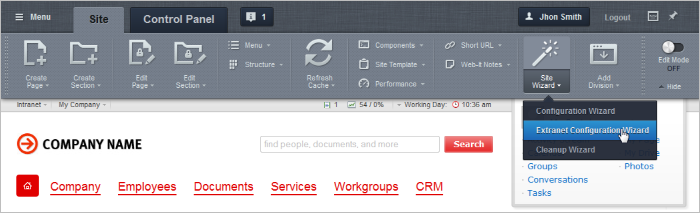
Note: the Extranet Wizard may also be launched again after the product installation. For example, in order to change the extranet template or other settings. The wizard may be launched by either of the following two manners:
Site installation in BitrixVA/BitrixEnv
To install Bitrix24 product, it is necessary:
Installing using BitrixSetup
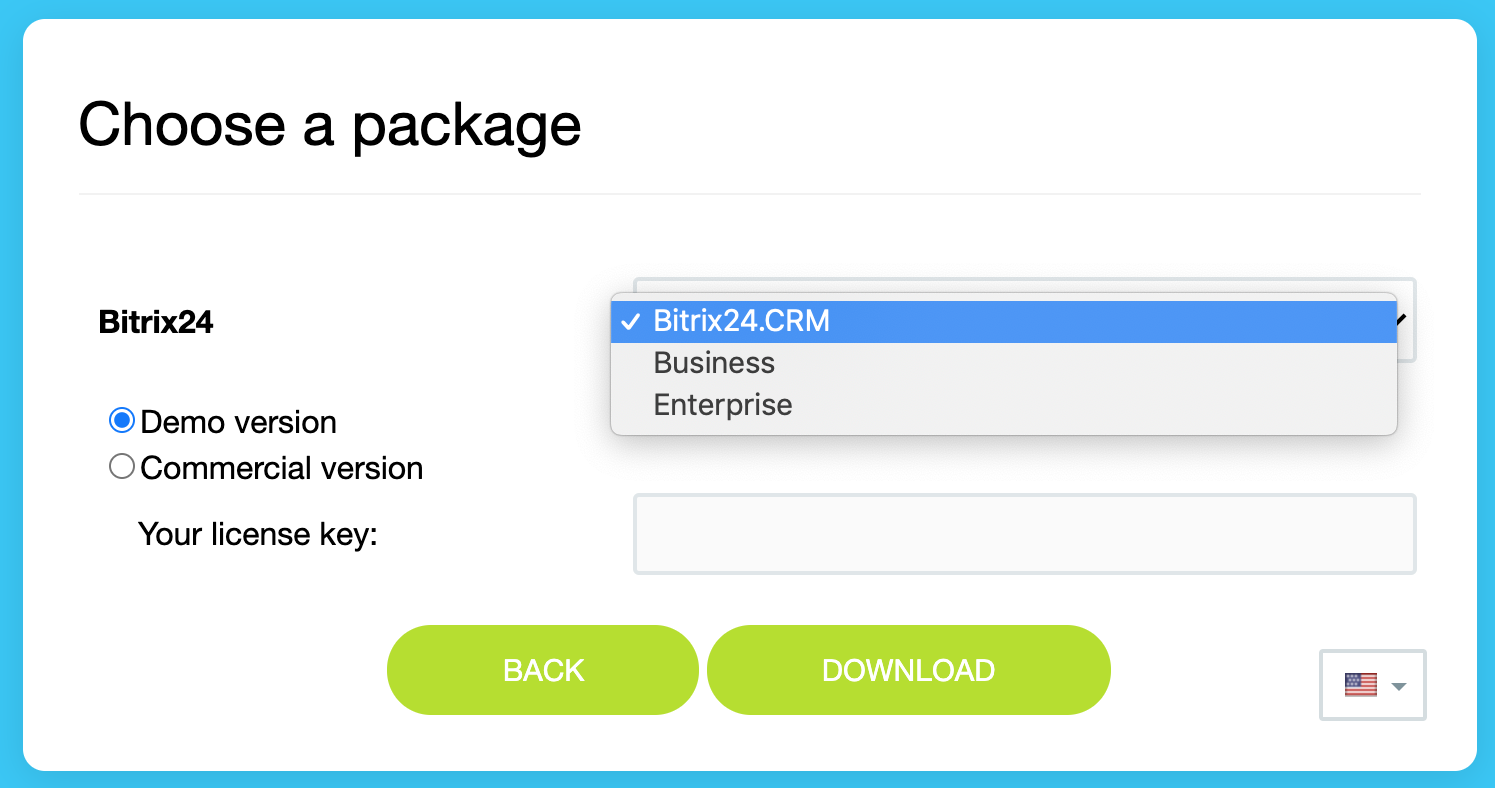
Bitrix24 can be easily installed at a remote server by uploading the installation files via the FTP or using the BitrixSetup script. In the first case, download the commercial or trial version and unpack it at a local machine. Then, use any FTP client to upload the extracted files to the root folder of your web server. Otherwise, upload the archive to the server and extract files remotely. However, we strongly recommend that you use the special BitrixSetup script to avoid upload errors and eliminate a frequently occurring problem of different FTP and Apache user access permissions. BitrixSetup uploads the trial or commercial version of Bitrix Site Manager to your site directly from www.bitrixsoft.com without the intermediate downloading step. Furthermore, the script can extract files from the installation package if you cannot access your site via SSH or third-party software.
Warning: Please ensure that your web server has enough permissions to create and write files.
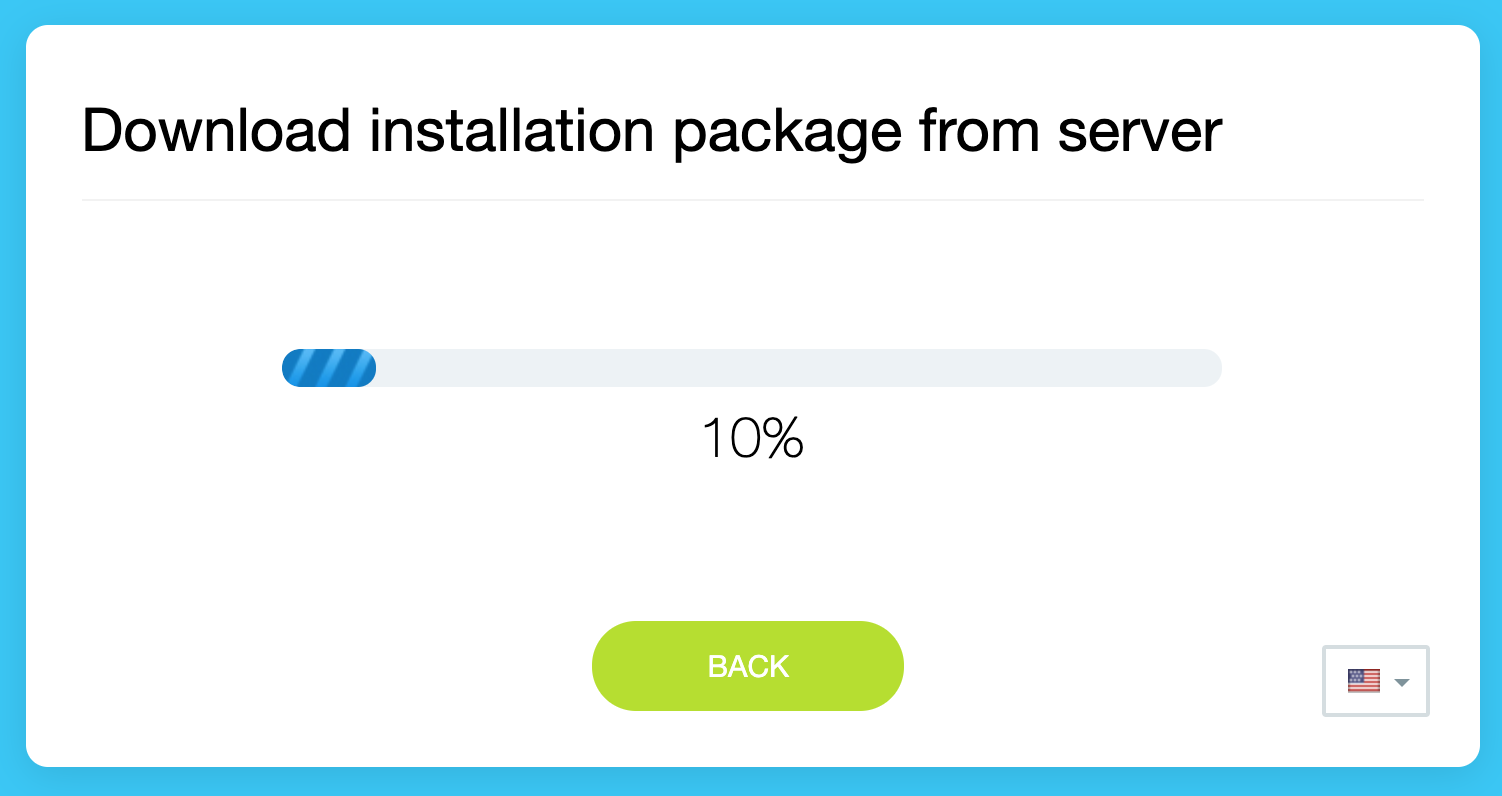
BitrixSetup will connect to the Bitrix server directly. The script will copy the installation files to the root directory of your site and unpack them if you have chosen to do so. The Back button allows you to return to the previous section where you can alter the installation settings (e.g. product edition). The status bar displays diagnostic messages about the current operation (e.g. downloading or extracting files). The progress bar reflects the operation flow. After the process of loading and extraction is complete, the browser will display the Installation Wizard (e. g., for Bitrix24 Self-hosted) Important! For security reasons, bitrixsetup.php is deleted from the root directory of your site after installation procedure is complete.
Uninstalling Bitrix24
You can uninstall the Bitrix24 by selecting one of the commands:
Removing Bitrix24 from a remote server deletes the database files as well as all files and folders from the root folder of your web server. Check that …/www folder was removed from the Bitrix Environment folder as well. Installing Bitrix24 Self-hosted on other environmentsThis section details settings, required for installing Bitrix24 Self-hosted to third-party environments. Attention! Operations, described in this section, require knowledge of server administration. Because the installation on other environments is tested by the vendor, but is not a main platform for Bitrix Framework product use, undocumented issues can be encountered during installation. Please, be aware of actions taken by you within the system during product installation.
Installing environment for SLES 15This section details environment settings for operations system SUSE Linux Enterprise Server 15 used to install Bitrix24 Self-hosted products, including installation and setup of operation system itself, required packages and service configuration. OS installation and setupStart from installing SUSE Linux Enterprise Server 15 (SLES 15) distribution package. Review selection of additional modules and extensions available for installation and select the server with minimum setting. Attention: Further settings are based on this installation specifically.
Also, activate the subscription. It can be done during installation: configure it after installation is complete via the command: SUSEConnect -e EMAIL_ADDRESS -r REGISTER_CODE Subscription is issued to an account. That's why, during activation, indicate email_address and password used for registration at the official SUSE website. For the main package manager, SUSE uses [dw]zypper[/dw][di]Zypper - console package manager, based on libzypp library, used in the GNU/Linux openSUSE distribution package.[/di].
zypper refresh zypper update # python modules SUSEConnect --product sle-module-python2/15.2/x86_64 # for php and nodejs (push-server) SUSEConnect --product sle-module-web-scripting/15.2/x86_64 View all available repositories using the command: SUSEConnect --list-extensions Be default, SELinux is not installed for minimum installation, that's why no additional settings are required to disconnect it.
Package installationBelow is the complete list of packages needed for Bitrix24 Self-hosted. Installation step-by-step
zypper -n install apache2

zypper -n install php7 php7 php7 \
    php7 php7-opcache php7-zip php7-posix \
    php7-zlib php7-openssl php7-mbstring \
    php7-bz2 php7-curl php7-iconv \
    php7-json php7-pecl php7-devel php7-sockets  \
    php7-gd apache2-mod_php7 php7-mysql
zypper -n install nginx zypper -n install mariadb zypper -n install nodejs10 zypper -n install redis Nginx configurationExecute Nginx configuration.
Server nginx configuration: /etc/nginx/nginx.conf # main config file
|_conf.d/upstreams.conf # configuration for upstream servers: apache && push-server
|_conf.d/maps-composite_settings.conf # variable used for cache
|_conf.d/maps.conf # additional variables
|_conf.d/http-add_header.conf # CORS headers
|_sites-available/*.conf # connect sites
|_default.conf # default site (configure port 80 only)
|_conf.d/bx_temp.conf # BX_TEMPORARY_FILES_DIRECTORY configuration
|_conf.d/bitrix.conf # default site configuration
|_rtc.conf # query proxying at push-server (publication)
Default site configuration: conf.d/bitrix.conf # main blocks with cache enabled by default in files
|_conf.d/bitrix_general.conf # sending statistics, quick transfer for external storages and etc.
|_conf.d/errors.conf # error processing
|_conf.d/im_subscrider.conf # query proxying to push-server (receiving)
|_conf.d/bitrix_block.conf # blocking by default
Configuration is sourced from virtual appliance and can be deemed excessive, but in effect supports the same options as the virtual appliance. All configuration files can be downloaded in archive. Config files for Nginx are located in the folder as follows: Place them in the directory The service uses names for proxying to specific services:
For configuration to be operational, write the services in local addresses. When services are located on another host, indicate the correct address here: echo "127.0.0.1 push httpd" >> /etc/hosts Start the service: systemctl --now enable nginx Add rules for firewalld: firewall-cmd --zone=public --add-service=https --permanent firewall-cmd --zone=public --add-service=http --permanent firewall-cmd --reload PHP configurationThis installation version has centralized configuration storage: It requires such settings as a minimum:
opcache.max_accelerated_files = 100000 opcache.revalidate_freq = 0 display_errors = Off error_reporting = E_ALL error_log = '/var/log/php/error.log' ; Set some more PHP parameters enable_dl = Off short_open_tag = On allow_url_fopen = On # Security headers mail.add_x_header = Off expose_php = Off ... All configuration files can be downloaded in archive . Config files for PHP are located in the folder as follows: Place them in the directory Set user as the owner and the group root: chown root:root /etc/php7/conf.d/ -R Apache configurationBy default, Apache is configured for default site in the catalog The main setup is required for Apache config is as follows:
All configuration files can be downloaded in archive . Config files for Apache are located in the folder: Place them in the directory Two files must be configured:
After that, start the service systemctl --now enable apache2 MariaDB configurationMariaDB configuration requires executing the following settings:
All configuration files can be downloaded in archive . Config files for MariaDB are located in the folder: Place them in the directory Start the service: Service setup is executed via mysql_secure_installation. Push-server configurationThe setup: ----------------------- --------------------------------------------------- | nginx: 0.0.0.0:80 | -> /bitrix/sub|/bitrix/subws -> | node server.js --config push-server-sub-80XX.json | ----------------------- --------------------------------------------------- ----------------------- --------------------------------------------------- | nginx: 127.0.0.1:8895 | -> /bitrix/pub -> | node server.js --config push-server-pub-90XX.json | ----------------------- --------------------------------------------------- Nginx proxies query to push service of selected type. Message getting queries (for example, sub) are public and proxied from standard ports 80/443. Publication queries (pub) are available only from internal server address. Nodejs processes are split into two types:
To start Push-server we need:
For installation we require Python or a make utility: zypper install python3 make wget -y Execute the following actions:
Installing environment for RedHat8This section details environment settings for operations system RedHat8 used to install Bitrix24 Self-hosted products, including installation and setup of operation system itself, required packages and service configuration. OS installation and setupStart from installing Red Hat Enterprise Linux 8 (RedHat8) distribution package. Review selection of additional modules and extensions available for installation and select the server with minimum setting. Attention: Further setup are based on this installation specifically.
When installation is complete, activate the subscription, otherwise system updates and preferences won't operate correctly: subscription-manager register --username email_address --password password --auto-attach Subscription is issued to an account. That's why, during activation, indicate email_address and password used for registration at the official RedHat website. During authorization, you can use login, specified during registration instead of an email.
Only official repositories from RedHat can be used for installation. dnf is used as the package manager. Update the system to the latest stable version. Disable selinux su - dnf update -y echo 'SELINUX=disabled' > /etc/sysconfig/selinux reboot Package InstallationThe list below contains packages required for Bitrix24 Self-hosted.
Nginx configurationExecute Nginx configuration. Server nginx configuration: /etc/nginx/nginx.conf # main config file
|_conf.d/upstreams.conf # configuration for upstream servers: apache && push-server
|_conf.d/maps-composite_settings.conf # variables used for cache
|_conf.d/maps.conf # additional variables
|_conf.d/http-add_header.conf # CORS headers
|_sites-available/*.conf # connect sites
|_default.conf # default site (configure port 80 only)
|_conf.d/bx_temp.conf # BX_TEMPORARY_FILES_DIRECTORY configuration
|_conf.d/bitrix.conf # default site configuration
|_rtc.conf # query proxying at push-server (publication)
Default site configuration: conf.d/bitrix.conf # main blocks with cache enabled by default in files
|_conf.d/bitrix_general.conf # sending statistics, quick transfer for external storages and etc.
|_conf.d/errors.conf # error processing
|_conf.d/im_subscrider.conf # query proxying to push-server (receiving)
|_conf.d/bitrix_block.conf # blocking by default
Configuration is sourced from virtual appliance and can be deemed excessive, but in effect supports the same options as the virtual appliance. All configuration files can be downloaded in archive. Config files for Nginx are located in the folder as follows:
Place them in the directory The service uses names for proxying to specific services: For configuration to be operational, write the services in local addresses. When services are located on another host, indicate the correct address here: echo "127.0.0.1 push httpd" >> /etc/hosts Start the service: systemctl --now enable nginx Add rules for firewalld: firewall-cmd --zone=public --add-service=https --permanent firewall-cmd --zone=public --add-service=http --permanent firewall-cmd --reload PHP configuration This installation version has centralized configuration storage: It requires such settings as a minimum: All configuration files can be downloaded in archive . Config files for PHP are located in the folder as follows:
Place them in the directory Apache configurationBy default, Apache is configured for default site in the catalog The main setup is required for Apache config is as follows: All configuration files can be downloaded in archive . Config files for Apache are located in the folder: Place them in the directory Configure these files: PHP module for apache operates only with prefork process manager. Enable it. Start the service systemctl --now enable httpd MariaDB configurationMariaDB configuration requires executing the following settings: All configuration files can be downloaded in archive . Config files for MariaDB are located in the folder: Place them in the directory Start the service: systemctl --now enable mariadb Service setup is executed via mysql_secure_installation. Push-server configurationThe setup: ----------------------- --------------------------------------------------- | nginx: 0.0.0.0:80 | -> /bitrix/sub|/bitrix/subws -> | node server.js --config push-server-sub-80XX.json | ----------------------- --------------------------------------------------- ----------------------- --------------------------------------------------- | nginx: 127.0.0.1:8895 | -> /bitrix/pub -> | node server.js --config push-server-pub-90XX.json | ----------------------- --------------------------------------------------- Nginx proxies query to push service of selected type. Message getting queries (for example, sub) are public and proxied from standard ports 80/443. Publication queries (pub) are available only from internal server address. Nodejs processes are split into two types: To start Push-server we need: For installation we require Python or a make utility: dnf install python3 make -y Execute the following actions: Development only option
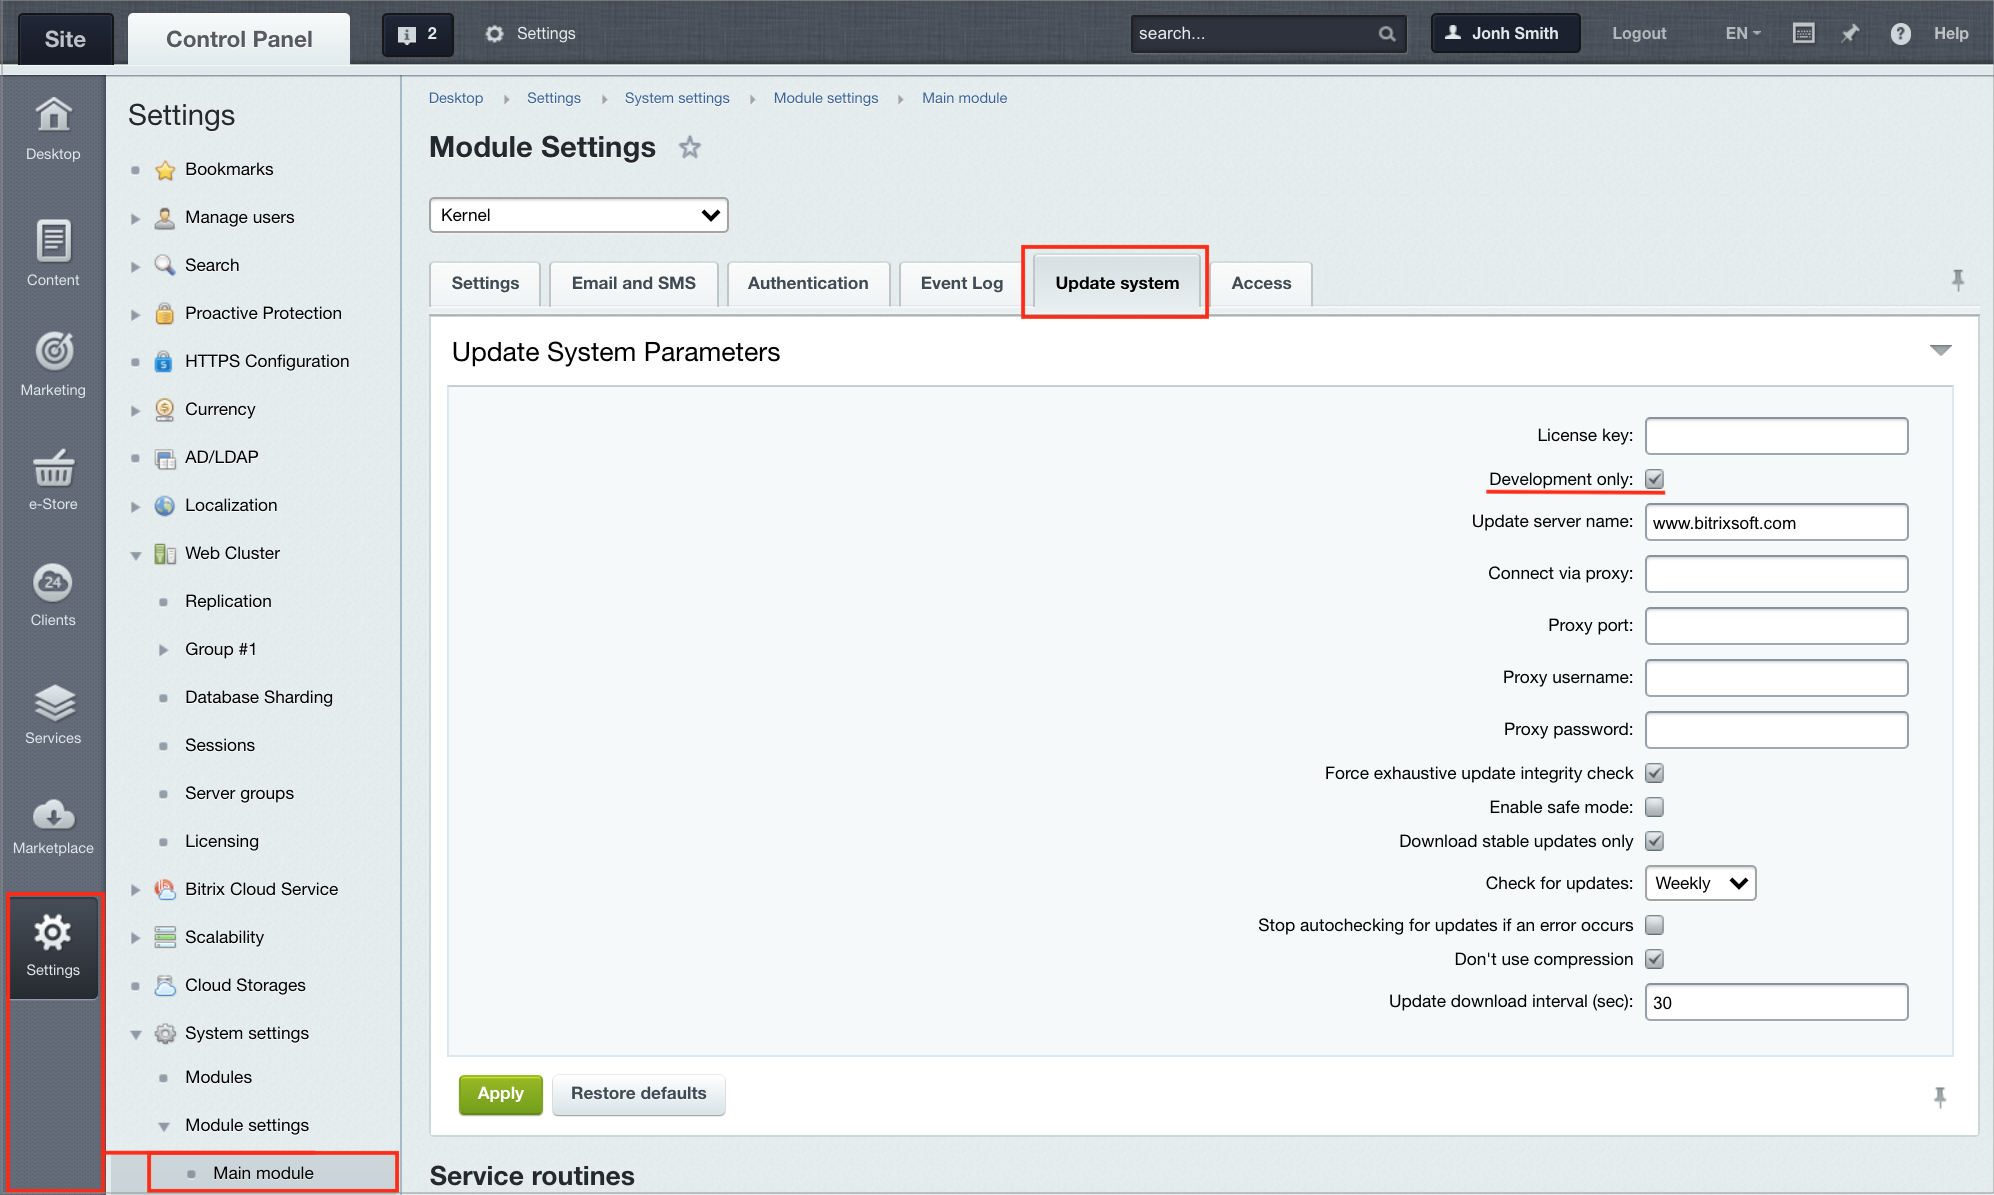
Starting from version 16.5.7 and higher, Bitrix24 editions have a new Development only special option available at newly created and already existing instances. It can be enabled at Desktop > Settings > System Settings > Module Settings This option allows to perform testing without installing Bitrix24 Self-hosted instance locally: now several developers can access a single developer Bitrix24 Self-hosted instance without [dw]ERROR_WRONG_CODE[/dw][di]Product update system is associated with a specific instance and "memorizes" system status after the latest update. ERROR_WRONG_CODE occurs in case when the current status doesn't match with the status when the latest update was performed. Attention! It is futile to attempt to trick the system by switching on and off this option, because all switches to Developer only mode are traced. Using this mode as an operational site (for everyday use) is prohibited. When necessary, Bitrix24 can disable this option, and in case of severe violations, a commercial licence key can be blocked as well as the product updates available retrieved using such licence key.
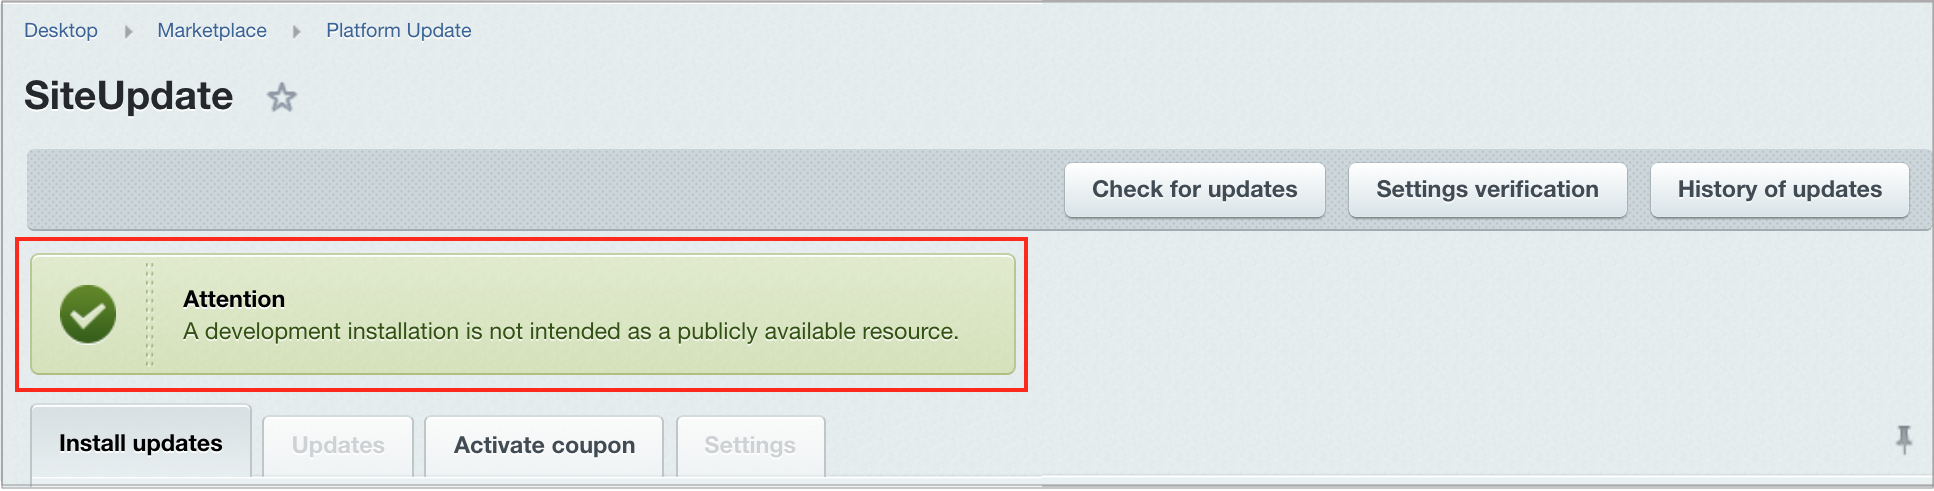
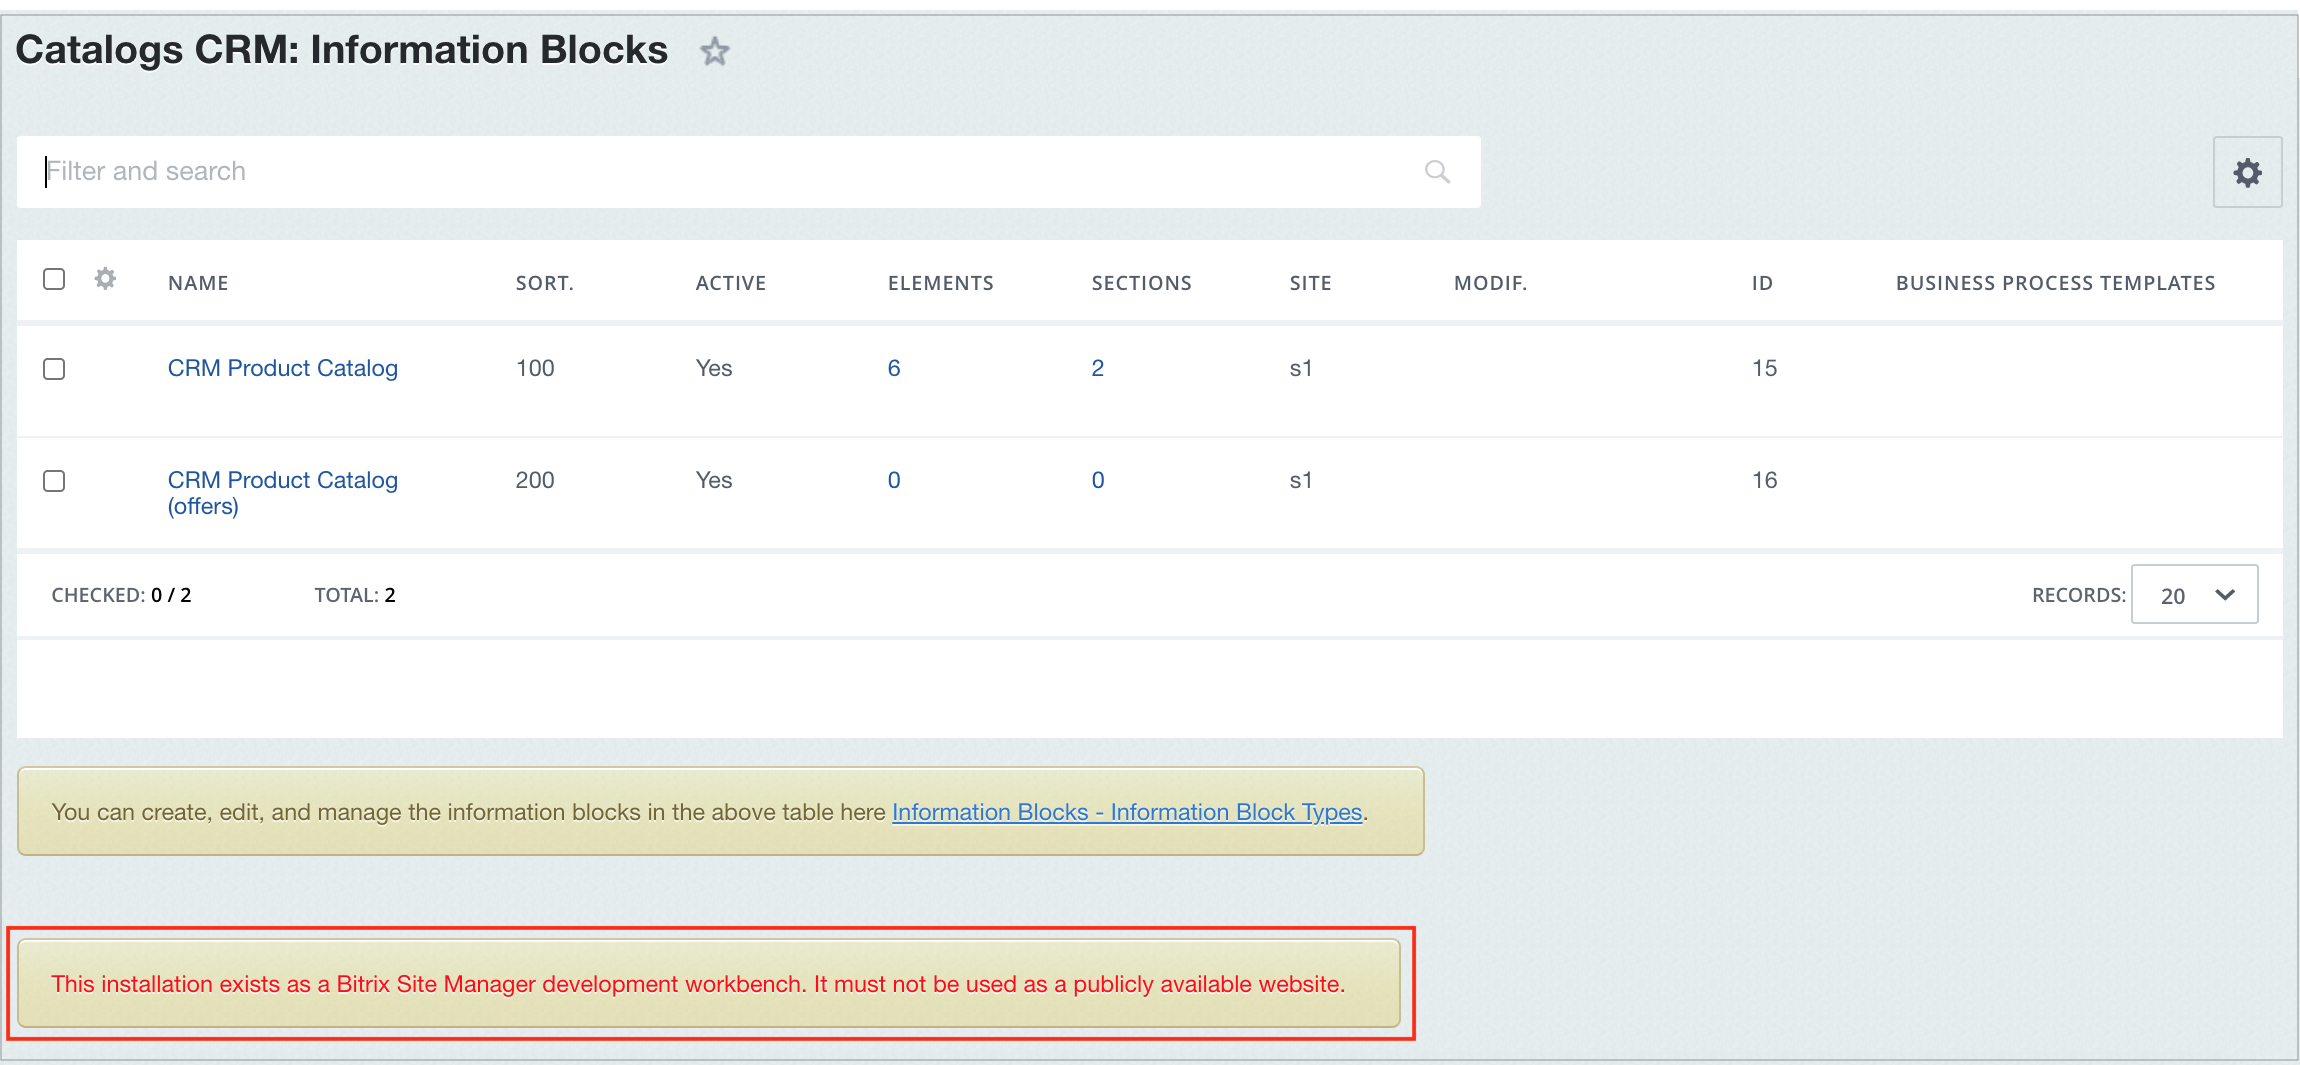
The most optimal procedure is to enable this option during the whole development and testing period at the required Bitrix24 Self-hosted instance and do not disable it. When any development updates are finalized, this Bitrix24 Self-hosted instance can be deleted, or removed from active use until new updates must be developed. In this case, a full backup from active Bitrix24 Self-hosted instance can be restored for this testing instance. Please, use this option for handling Bitrix24 test instances only to avoid these instances being blocked by the update system. Enabling the Development only option shows several notifications in the administrative section:
This option can be enabled: In the site administrative section Update system tab inside an existing Bitrix24 Self-hosted instance ( Settings > System Settings > Module Settings > main module > Update system):
Marketplace applications
Bitrix24 product features can be supplemented by using various applications from Bitrix24 Marketplace catalog when standard methods aren't not enough to solve the required objectives.
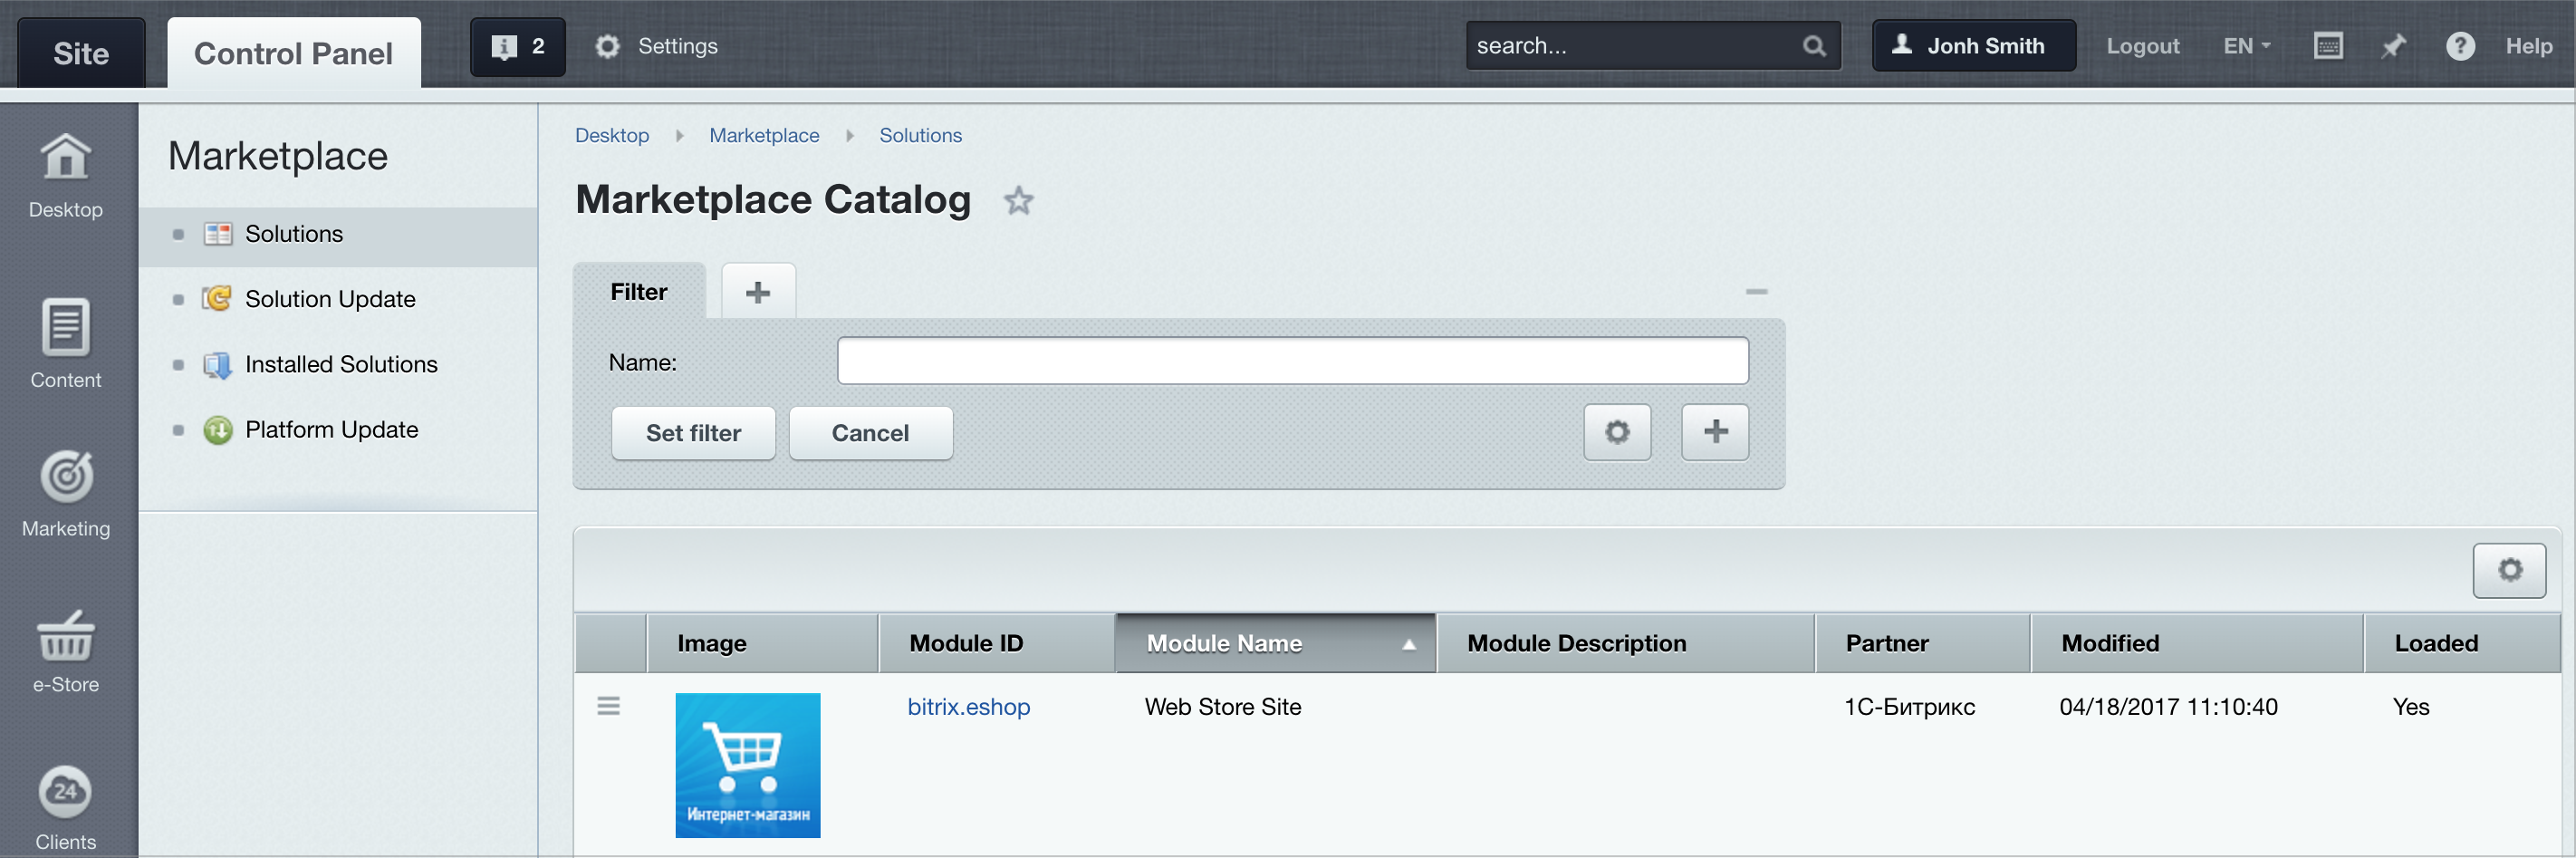
By using Marketplace applications you can easily add unavailable product features. You can view free/commercial as well as recommended/discounted apps in the Marketplace catalog listed inside the Bitrix24 portal admin section (Marketplace > Solutions via icons with app names. Please be advised that listed apps are created by Bitrix24 Partners and not by the Bitrix24 vendor. Attention! Bitrix24 is not liable for software solutions developed by third party developers. Please contact the respective developers for all questions regarding third-party solution operational issues, as well as site stability issues caused by incorrectly operating third-party solutions.
Installation of new applications is quick and doesn't require additional knowledge or skills. Attention! All solutions from Marketplace are installed only oni>Bitrix24 Self-hosted instances with active updates period (with active licence). You can check status of your licence key in the Platform Updates menu of your account's Control Panel or at the Bitrix24 website.
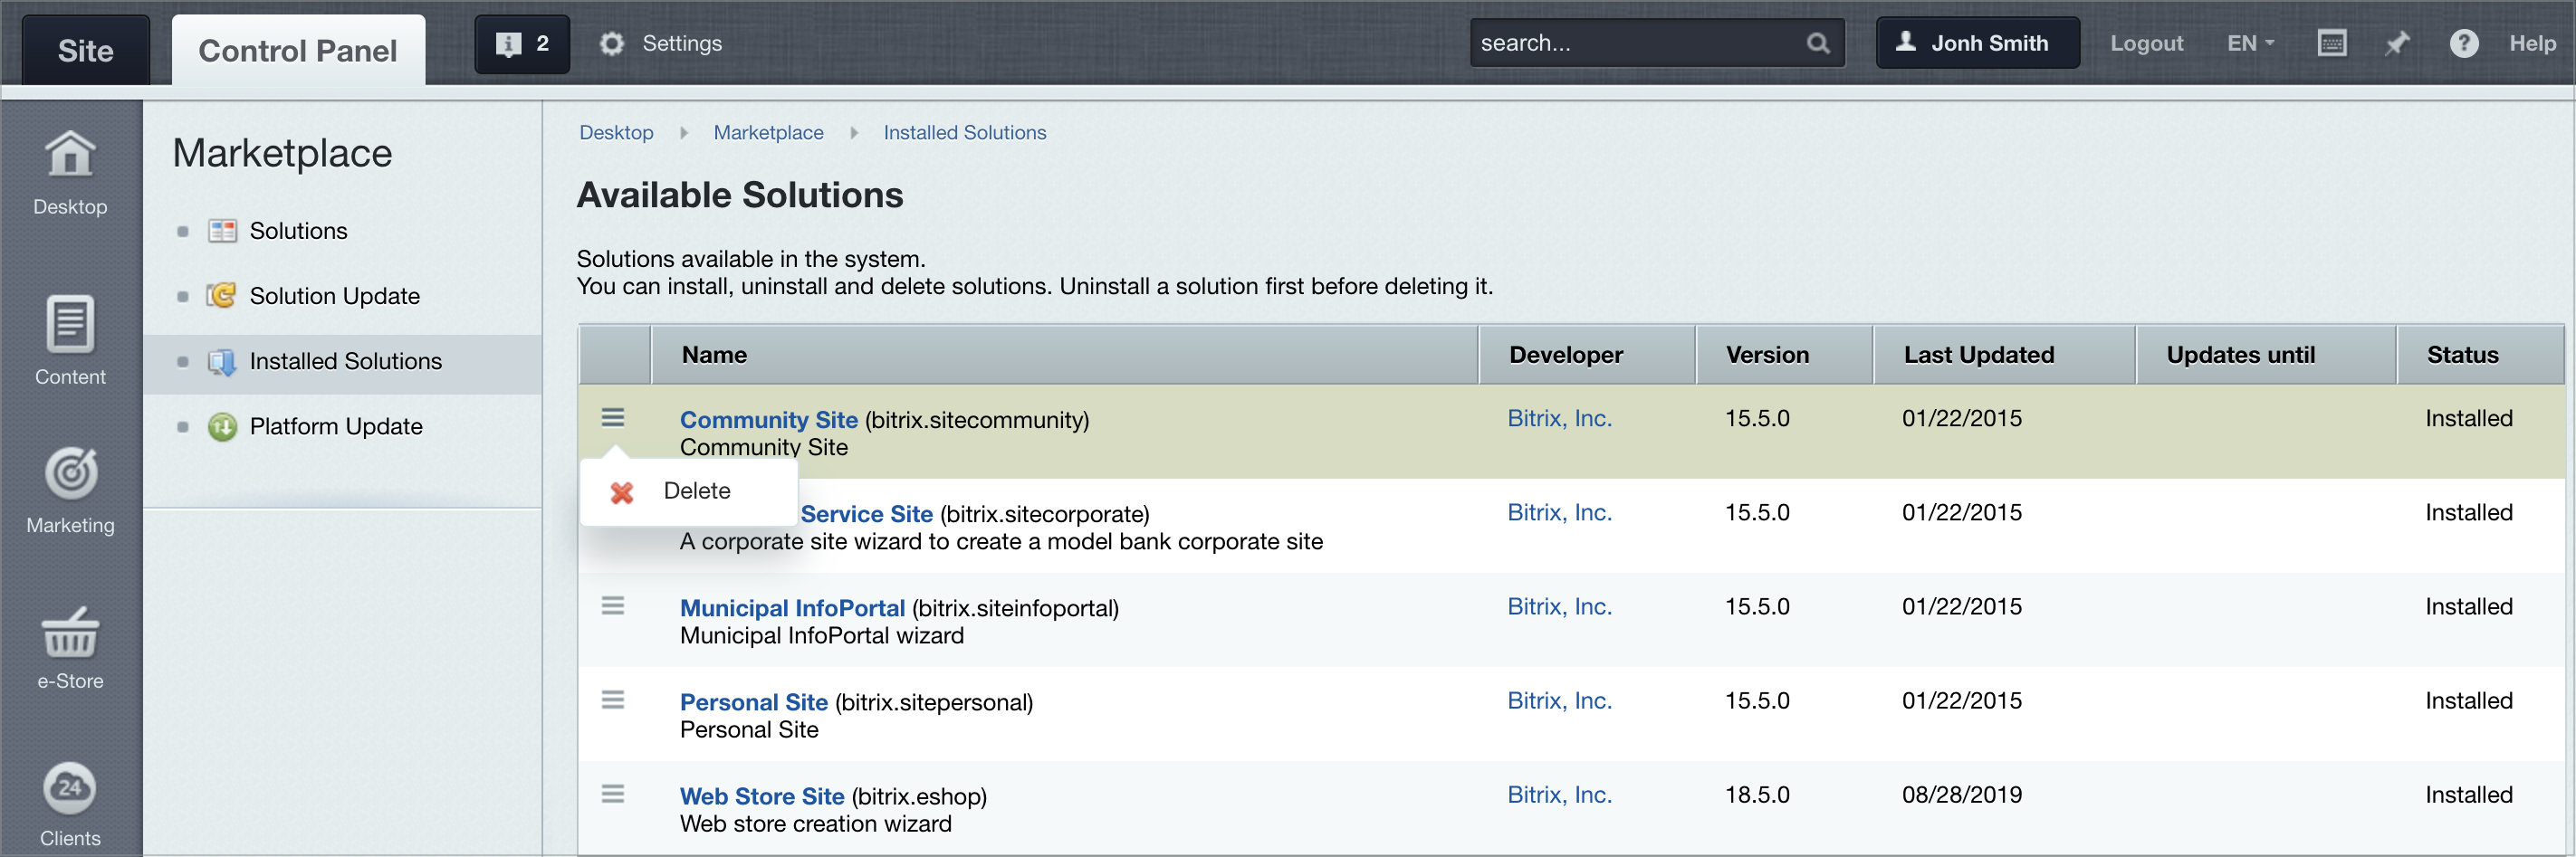
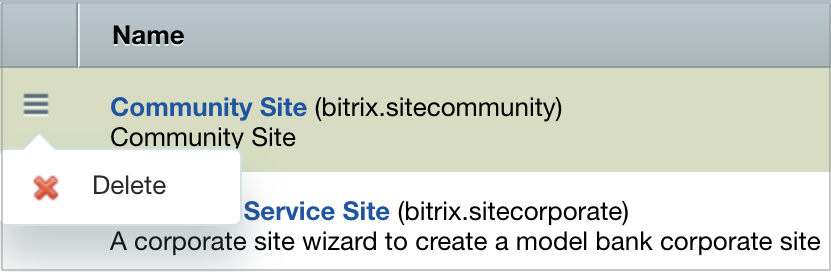
Unistalling the applications
The Marketplace> Installed Solutions shows the complete list of all installed or even deleted applications:
Click [dw]Delete[/dw][di] The app will be deleted from the account and this app page will show the Install button. Registration procedureBefore you start using the commercial version, you have to activate your license key. If you install the trial version, you can omit registration yet it is recommended that you proceed to enable system updates during the trial period. Registering a commercial versionAttention: According to the license agreement, one key allows only two installations of the system: a public installation and a local (developer) installation, the latter being unavailable from the Internet. Should an error message appear about exceeding the acceptable number of product installation please contact Helpdesk.
Registration entitles you to obtain latest system updates and receive support from the Bitrix technical support service. Moreover, having your commercial copy registered you can access the Bitrix private forum where users and Bitrix developers communicate and discuss important issues, resolve user's problems. To register your copy: Since your copy is not registered yet, you will see the following error message: 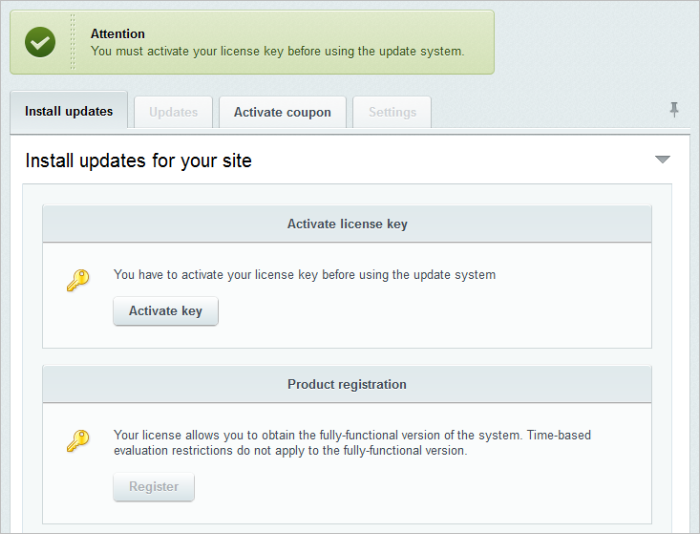
You will see the following form: 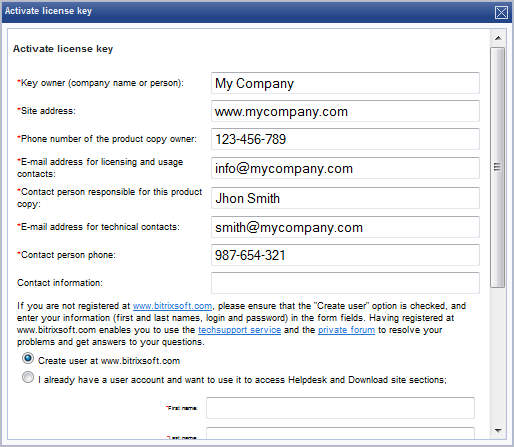
Note: fields marked with asterisk (*) are required.
Note: If for some reason, the license key has already been activated, you will be offered to register the product in the update system.
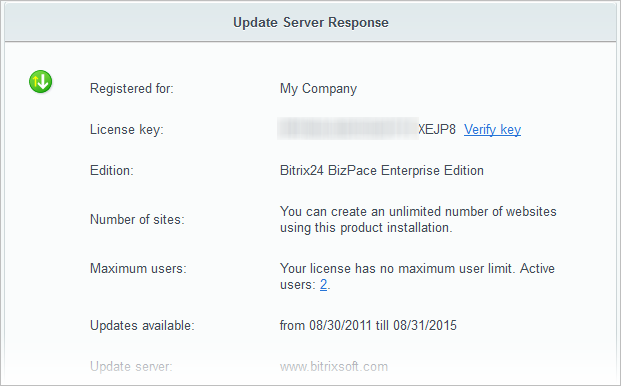
When finished, the license information will be available:
Registering a trial version (DEMO)
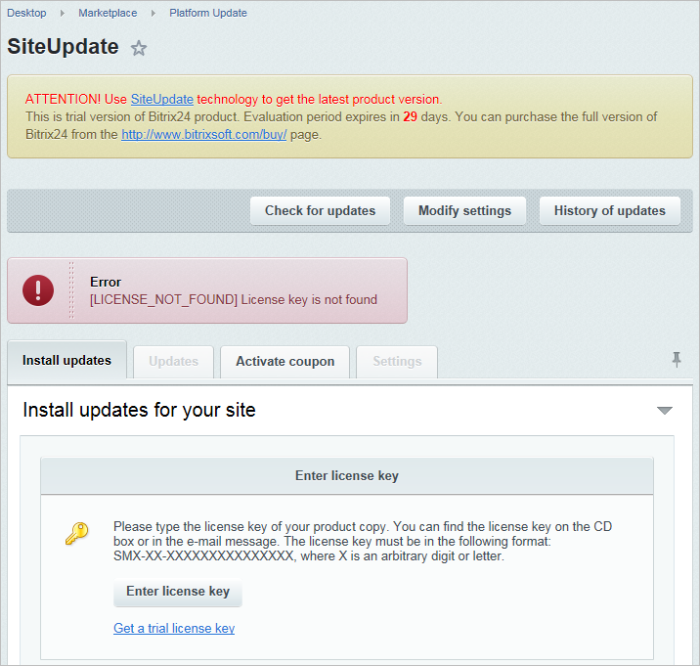
If you install the trial version, you will see the License key is not found message when opening the Marketplace > Platform Update page.
Essentially, a local trial version does not require that you obtain a license key. It only enables the system to receive updates. Obtaining a trial key requires that you register at the Bitrix web site. Click Get a trial license key. This will open the trial registration page at the Bitrix web site. 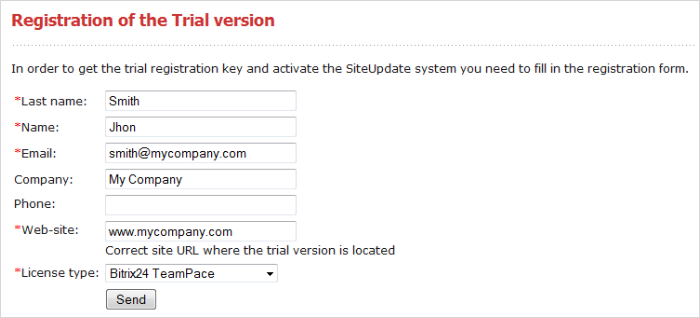
Note: fields marked with asterisk (*) are required.
Fill in the form fields: Complete the form and click Send. The system will inform you that your request is now put in the submission queue. A message containing the license key and the period of validity will be sent to the address you have previously specified in the trial registration form. You can copy and paste this key in the Control Panel form where you clicked the Get a trial license key link, or in the Kernel module settings page.
Now you can obtain updates during the 30-day trial period. Note: If during the installation of the trial version of the product on the step Product registration you check the option I want to register my copy of the product and get updates and provide data for the registration of the trial version, then there will be no link to Get a trial license key after the installation of the product. Thus, the trial version will be activated for 30 days.
Registering a trial version using a commercial key
Having tried the demo version of the product you can register it and upgrade it to the commercial version. To do so, you have to: Update systemThe system updates, like the technical support, are available within a year after the moment of registration of the purchased license. If you want to access these services after that period, you will have to renew your license. Attention: For each installation of Bitrix24, a special token is stored in the Bitrix clients database. When a project is moved to another location (server), the token is replaced once the system requests the Bitrix server for updates for the first time from the new location. Since then, you cannot update the system from the old location.
Your computer must be connected to the Internet to receive updates. Overview
The update system serves to interact between and transfer data from the update server to a client (installed product copy). The main types of interaction are:
The following terms are used with the update system. System core - the /bitrix/modules/ folder (all paths are specified relative to the root folder unless otherwise is explicitly stated). The notion of system core often implies the database structure. Service area - all subfolders of the /bitrix/ folder except /bitrix/modules/ (i.e. the system core) and /bitrix/updates/. The notion of service area often implies the contents of the auxiliary database tables (for example, b_event_type). Update system folder - the /bitrix/updates/ directory. This folder is for exclusive use by the update system and cannot be used otherwise. Public section - all folders related to a given product copy save the system core, service area and the update system folder. The notion of service area often includes the database contents except for the data of the auxiliary tables. Product registration - results in removing the trial version restrictions from a given product installation (e.g. time restriction). License key - a special key (a chain of symbols) which is the statement of the right to use the given product copy. Site coupon - a special key allowing to create one more site using the given product copy. Update server - a server that is used to send bits of update data to the update system. The update server address can be explicitly specified on the module settings page (must be www.bitrix24.com).
The update system does not alter the public section in any way. The service area may be changed in case of absolute necessity; but even so, existing files and records remain since they might have been changed by a user. The system core can be modified extremely, but the backward compatibility is guaranteed. Important! If you have changed even one file of the system
core or the database structure manually, the automatic update may cause unpredictable results.
The update system does not collect or send any confidential data regarding the installed product copy. The update system and the update server exchange only the technical data which is required by the update system to function correctly (e.g. current module versions or last update dates). The modification that the update system performs on the system core is technically complex and intricate. If it fails or completes with errors, the dependent sites may become inoperative. Before update, you are recommended to ensure that a back-up copies of the database, scripts of the system core and the service area are created. It is desirable to perform update when the server load is minimum. If you encounter update problems, you need to contact the Bitrix technical support service immediately.
You can open the update system page by selecting Marketplace in the top left menu, and then choosing Platform Update. If you see a message showing that your license key is invalid (or the license is not found), the following reasons are possible: If the update system main page displays a message reading that a license key is not activated, you have to fill in all the fields of the activation form. After you complete and send the form, the license key will become activated. The update system main page may tell that a new version of the update system is available, you must install it first. You will not be able to proceed with other updates until you install a new version of the update system. If you have already provided a valid license key, and the update system is up-to-date, the update system main page will offer the following actions which are available according to your license terms. Update via proxy server
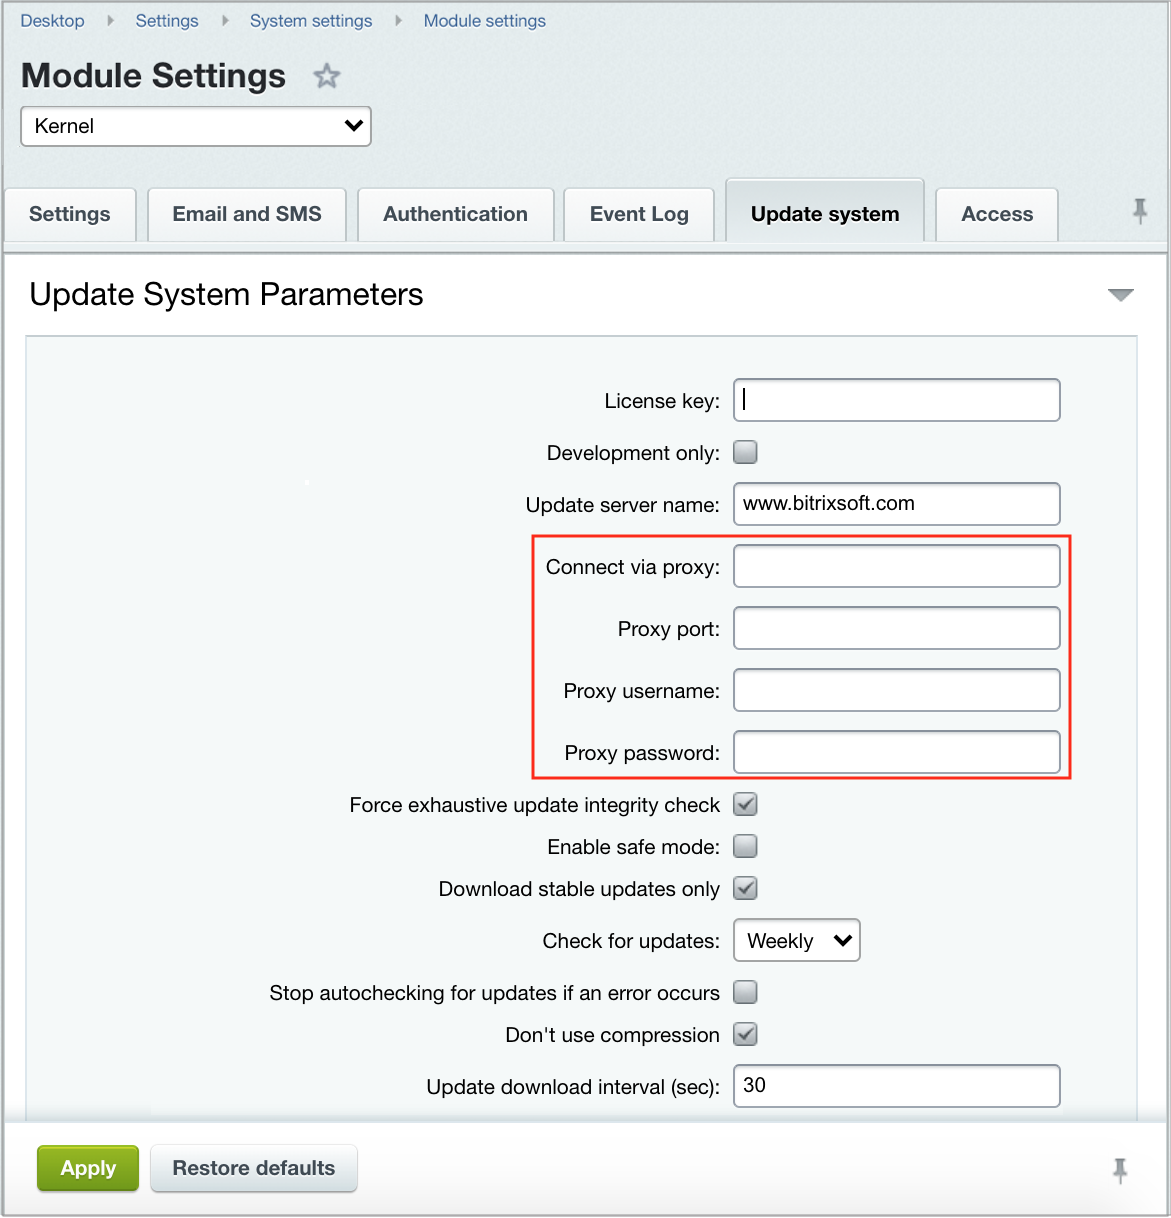
You can configure the update system to communicate via proxy server on the Kernel module settings page (the Update system tab), Settings > System settings > Module settings, select Kernel in the drop-down list:
After you fill all the required fields and save settings, the update will be performed via the specified proxy server. Update system via proxy operates based on the following principles: Additional security measuresWhen required, network administrator can establish additional security measures: Downloading Updates
Important: Before proceeding with updates, please make sure you have a backup of both the database and the product kernel and service area scripts. The update procedure should be carried out at a time that the server load is minimal.
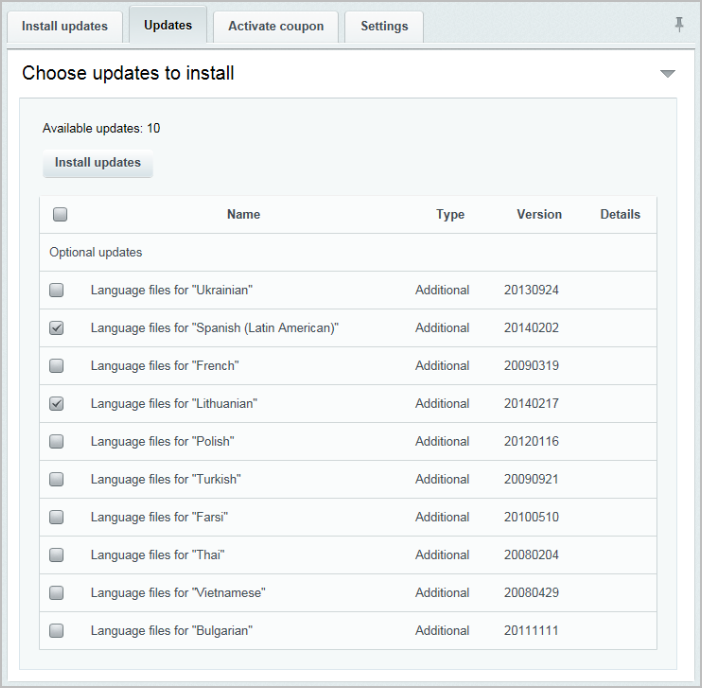
Please follow the steps below to download system module updates: If you choose not to install all the updates at once, please check only the updates you wish to install on the tab Updates and click Install updates. If necessary, the update process may be stopped by clicking the Stop button. In this case, the system will not interrupt the update immediately and fully but will complete the downloading of the module that was being updated when the Stop button was clicked. Should any failure occur during installation, the system will notify you about it, and the process will just have to be repeated. If you update modules one by one rather than all at once, then after you have installed each “portion” of the modules you will have to click Check for updates and then install the chosen modules. Important: If any related module updates are available, either all related modules must be chosen for an update or none of them. The elimination of one related module from the list of updates will result in the automatic elimination of all others.
Attention: Please read the module update descriptions carefully. They contain important information about update installation; they also may contain warnings about possible problems in operation. Downloading Interface language Files
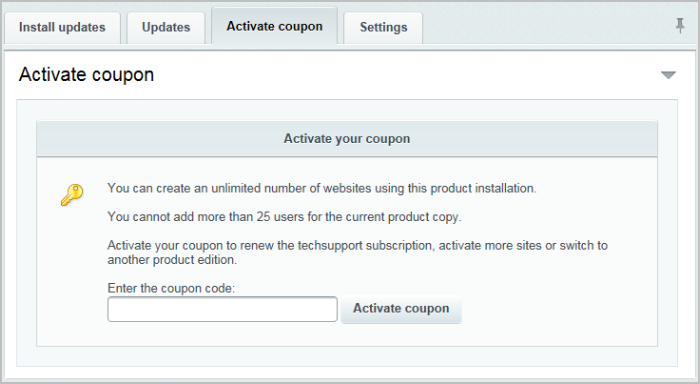
Coupon activation
When acquiring licenses for additional users you will be given a coupon for the required number of portal users. Additional licenses (and coupons, accordingly) do not depend on the portal version. If you already use commercial Bitrix24 version, you can expand your portal features by upgrading the product. To do so, you need to acquire a coupon for upgrading to the version you need.
In order to have access to the latest product updates and technical support at all times, the coupon for extended technical support and updates must be acquired upon completion of the update availability period. Having received the coupon, you need to activate it as follows: Common errors
This error indicates that the update script cannot connect to update the server www.bitrixsoft.com on port 80. This may occur due to the following reasons: Please contact the server administrator and provide them with the error description. Update error [SITE_LICENSE_VIOLATION] Number of licensed site exceededThis error indicates that either no sites were registered in the system, or all sites are deactivated, or number of active sites, permitted by the current licence has been exceeded. Register at least a single site to solve this issue and to allow to download and install updates. You can also activate an existing пышеу from the same section or deactivate number of sites until your instance has the number of sites permitted by your current licence: Desktop > Settings > System Settings > Websites > Websites. Update error [ERROR_WRONG_CODE]The product update system becomes related to a specific installation and “remembers” the status of the system after the latest update. An error occurs if the current status is inconsistent with that at the time of the last update. This feature is intended to prevent the update attempts of an unlimited number of product installations using one license key. According to the license agreement, two system installations are permitted for each license key – one public and one local (for developer) installation, the latter being inaccessible from the Internet. Accordingly, the system is set to save data about two installations. In this case, two copies may be updated independently without any problems and without the need to move a copy from a local computer to the server and back. If you have to move the product to a local computer, only one of two copies should be updated – either that on the server or the local one (at your discretion). The same procedure should be followed when moving your site to a new server. Copy file structure and database onto a new server, and after that, without updating the product on the old server, delete it immediately after updating the DNS. Configuring IIS for use with the systemIIS 7.0, a new web publication service, comes as a part of Microsoft Windows Server 2008. The key difference of this version, as far as work with Bitrix Framework is concerned, is the use of FastCGI, a request queue, and also the abandonment of nginx. Installation and setup of Bitrix, Inc. products on servers with Windows OS has become much simpler. There are no significant differences in the installation of the Bitrix Framework onto IIS comparing with the installation on Apache. Only a general sequence of actions changes: Attention: Currently, the Document library (webdav) module works improperly on web servers controlled by IIS 7.x. The architecture of such web servers in its basic variant does not permit organizing the work of PHP scripts according to the WebDav protocol – the server picks up all the requests and they fail to go through to the Bitrix24 system.
PHP Installation and Setup
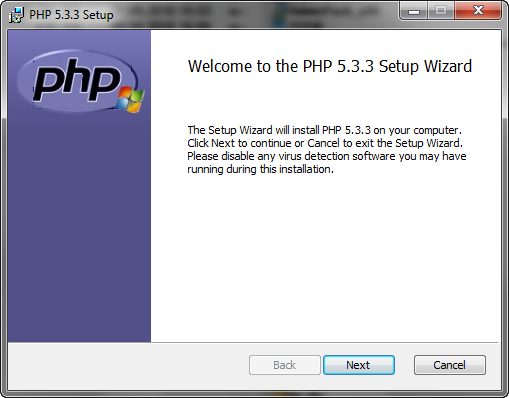
Launch the installation package and follow the instructions of the Setup Wizard. First Step (Installation Start)
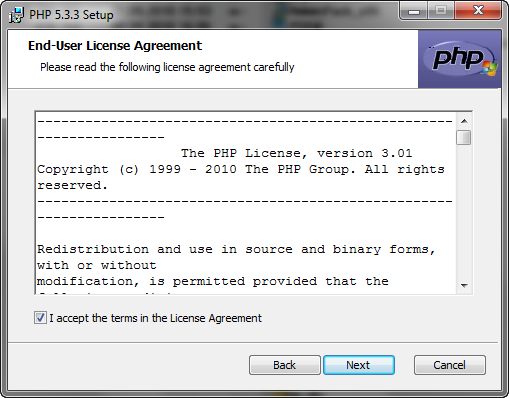
The first window of the Wizard informs about the commencement of the installation and provides information about the product. Click Next. Second Step of the Wizard (License Agreement)
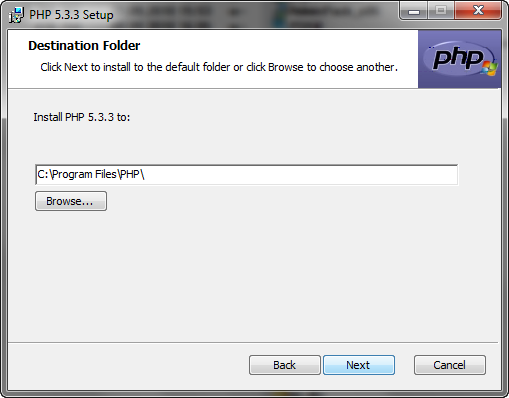
Read the license agreement carefully. If you agree with its terms and conditions, check the box I accept the terms in the License Agreement. To proceed with the installation please click Next. Third Step of the Wizard (Directory Selection)
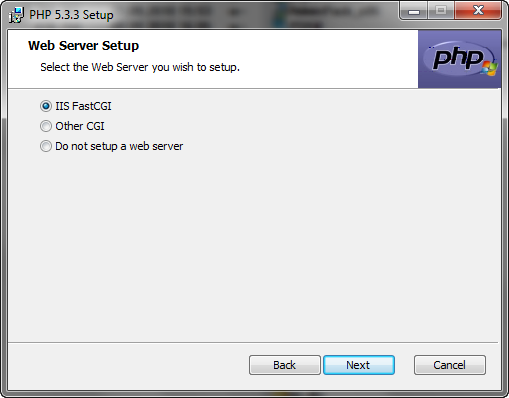
Please choose the directory to install the software and click Next. Fourth Step of Installation (Web Server Selection)
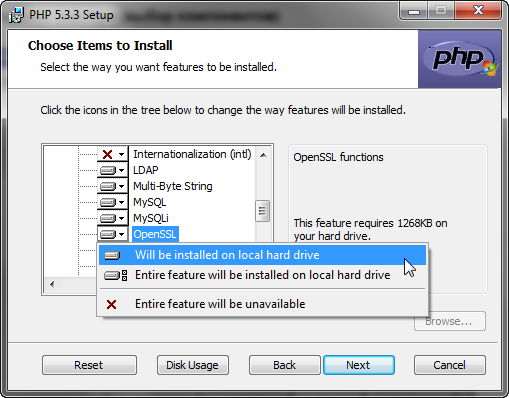
Please select IIS FastCGI as the installation web server and click Next to proceed with the installation. Fifth Step of the Wizard (Component Selection)
Include the necessary Extensions (PHP add-ins) to be installed: Note: said extensions may be manually added later as extension=name_of_extension_file.dll in the file php.ini in the folder where PHP was installed. For example:
extension=php_win32scheduler.dll.To continue the installation, please click Next. Sixth Step of the Wizard (Installation)
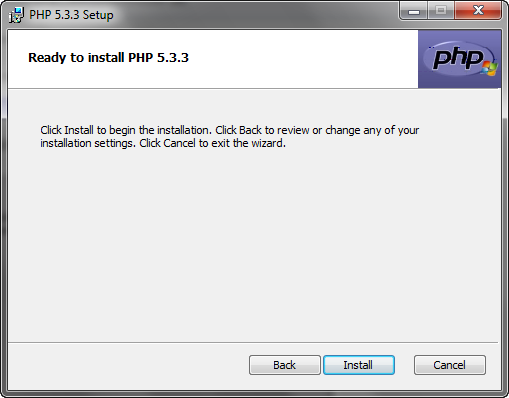
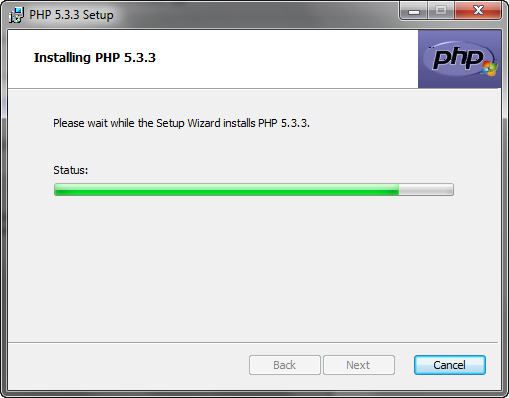
Click Install to start the installation process:
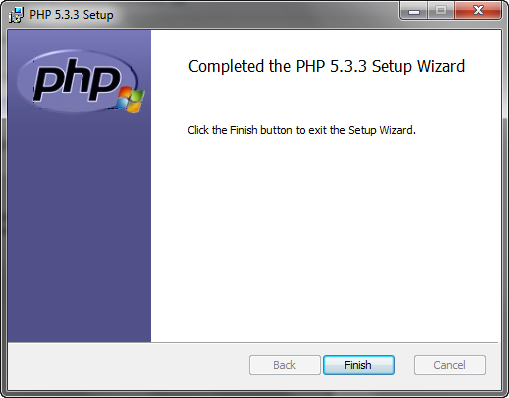
Please wait while the Setup Wizard copies and installs files. Seventh Step of the Wizard (Completion of Installation)
PHP has been installed successfully. Please click Finish to exit the Wizard. PHP SetupPHP must be setup immediately after its installation: Please do the following to check the PHP setup: If everything was done properly, the same configuration file will be offered (php.ini). FastCGI Module SetupIn order to improve performance, php files must be processed with the FastCGI module. Please do the following: Note: if you set 1 as the parameter of fastcgi.logging in the php.ini file, errors will be output to the log and not to the monitor. It increases the security of PHP.
Checking PHPPHP parameters may be checked as follows: 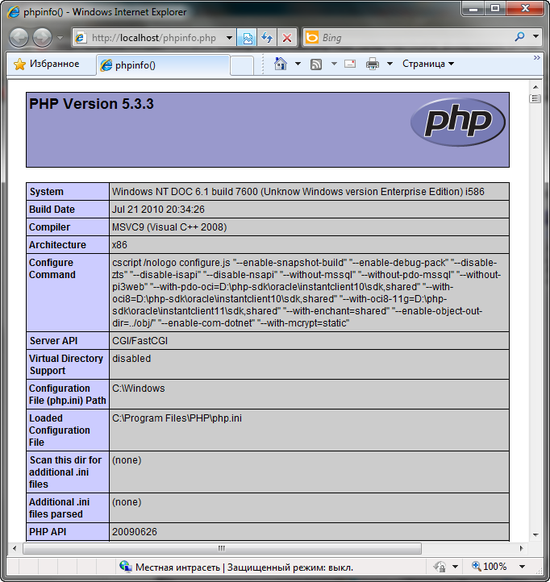
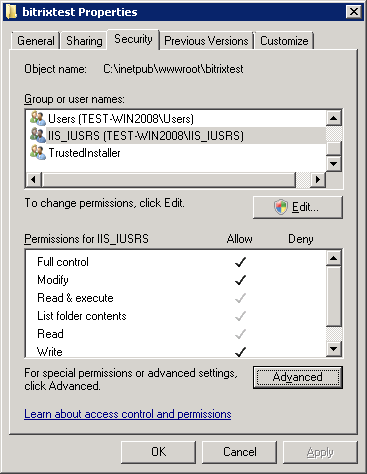
Preparatory OperationsPreparation of the Installation PackageDownload the product installation package as a zip-archive. Create a folder for the extraction of the installation package in the folder Open the Properties form of the folder
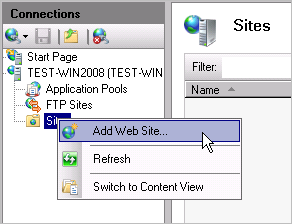
Adding a WebsiteUsing IIS manager on the Connections panel go to Sites and eliminate Default Web Site. Note: you may keep the default website, but in this case you will have to change the port settings for one of the sites during the setup of a new site.
Right click to call the context menu and click Add Web Site
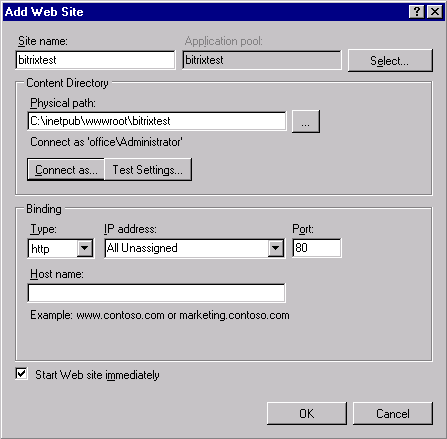
The window for adding a new site will open:
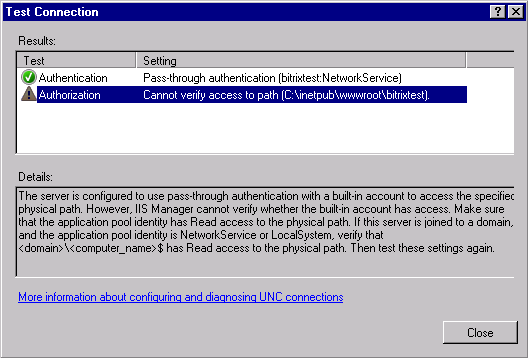
In the Site name box please specify the host name (in our example: bitrixtest), and in the Physical path box, enter the path to the folder containing the installation package. Click Test Setting…. The system will verify the connection parameters and display a message indicating the errors found, if any.
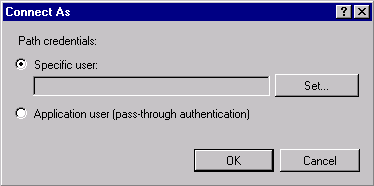
As a rule, authorization errors occur due to the user’s insufficient access rights to perform the operation of verifying folder access rights. Please do the following to correct this error: Close the Test Connection window. Click Connect as…, and the following window will open:
Please check the box Specific User and press Set…. Enter the login and password in the window that opens. Click OK. Verify the connection parameters once again using the Test Setting… button. If the verification is successful, the system will show the following message:
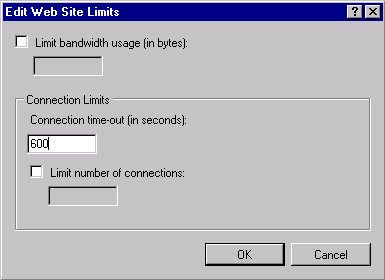
Configuration of LimitsNow, a time-out must be set. For this, do the following: Please activate bitrixtest in IIS Manager on the Connection panel. The Action panel will be refreshed. Choose Limits in the Configure group.
The limit setting form will open.
In the box Connection time-out (in seconds) type 600. This command establishes an intentionally long timeout for the web server while it waits for the script to complete its operation – 600 seconds. Open the file php.ini for editing and specify the following values: max_execution_time = 240 and max_input_time = 240. Note: the indicated values may be user-defined depending on your hosting parameters.
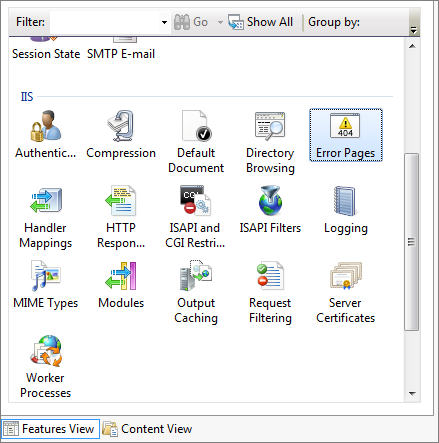
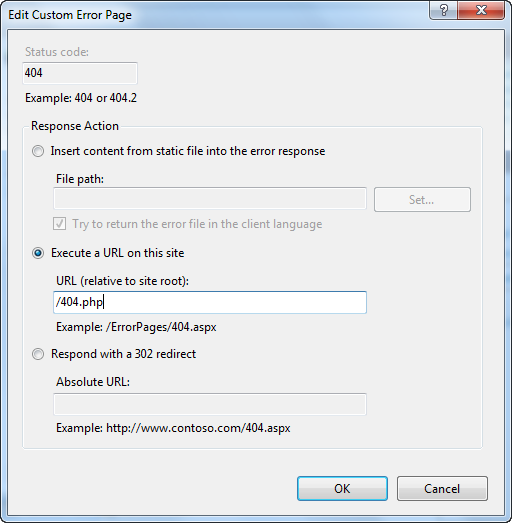
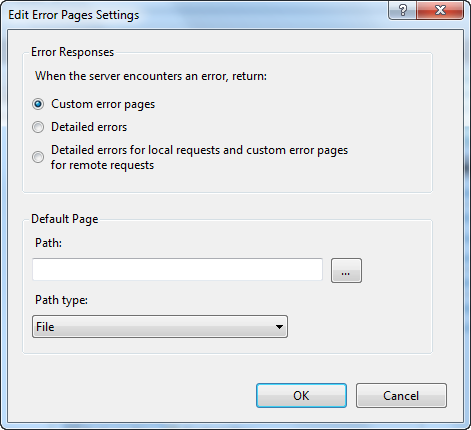
mimetype setup for files without extensionAdditional IIS 7.5 settings for mimetype is required for files without extension, otherwise video player won't be working in the installed product. To avoid this, add '.' extension with type video/x-flv in mime types inside server settings. Configuring The Error 404 and SEF URL’sSEF URL’s are implemented by handling a 404 error. Backup and restoration toolsUsing the back-up and restoration built-in tools
A special backup feature may be used to move the site to a remote server (or from a remote server to a local computer). Please note: The backup feature may only be used for an MySQL database.
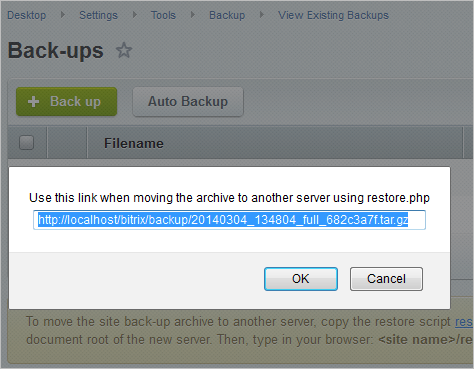
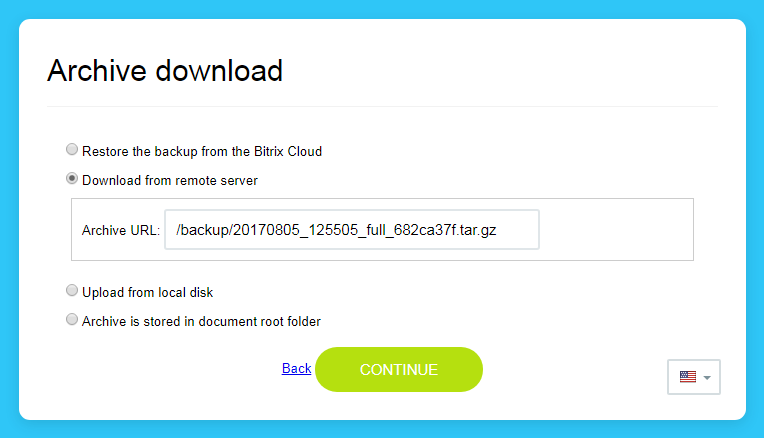
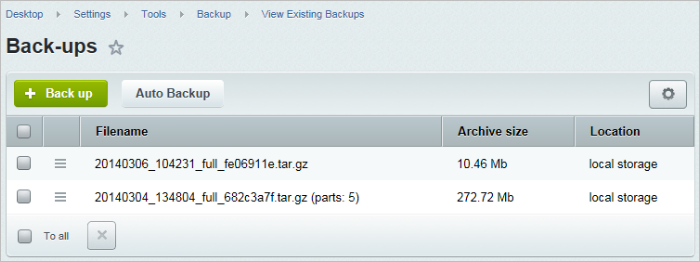
Before moving the site from a local computer to a remote hosting or from one remote hosting to another using the incorporated backup function and special script restore.php, it is necessary to do the following: The next step is the creation of a site archive. The archive may be created on the Backup page (Settings > Tools > Backup > Create Backup). After that, you may proceed with the actual site moving. Please follow the steps indicated below: Note: This link contains a script that corresponds to your installation package version. The latest version of the script is available at bitrix24.com.
Note: The options Archive is stored in document root folder and Archive is already extracted will appear when the archive has been copied or extracted to the site root, accordingly.
Note: If the site archive was located in the client’s cloud, please choose the option Download from remote server and indicate the path to the archive:
Special considerations:
Possible Errors during Migration
The migration of site to hosting should be performed using backup/restore tools built in Bitrix Framework. Although a site on Bitrix24 Self-hosted is a set of files and a database, copying of files directly to a remote server in most cases will not be a proper solution. Due to a big number of small files, such copying may take several hours. In addition, the use of standard features enables the avoidance of possible future problems with access rights to the site files. Among the most common problems are the following:
The following problems may occur during the migration of the site to hosting due to the PHP settings:
Sometimes hosting does not permit sending email without authorization. In this case, you will have to redefine email sending function in accordance with the product documentation in order to send emails from the site.
After extracting a backup copy, the only thing shown on the site is the authorization form. Possible reasons and solutions:
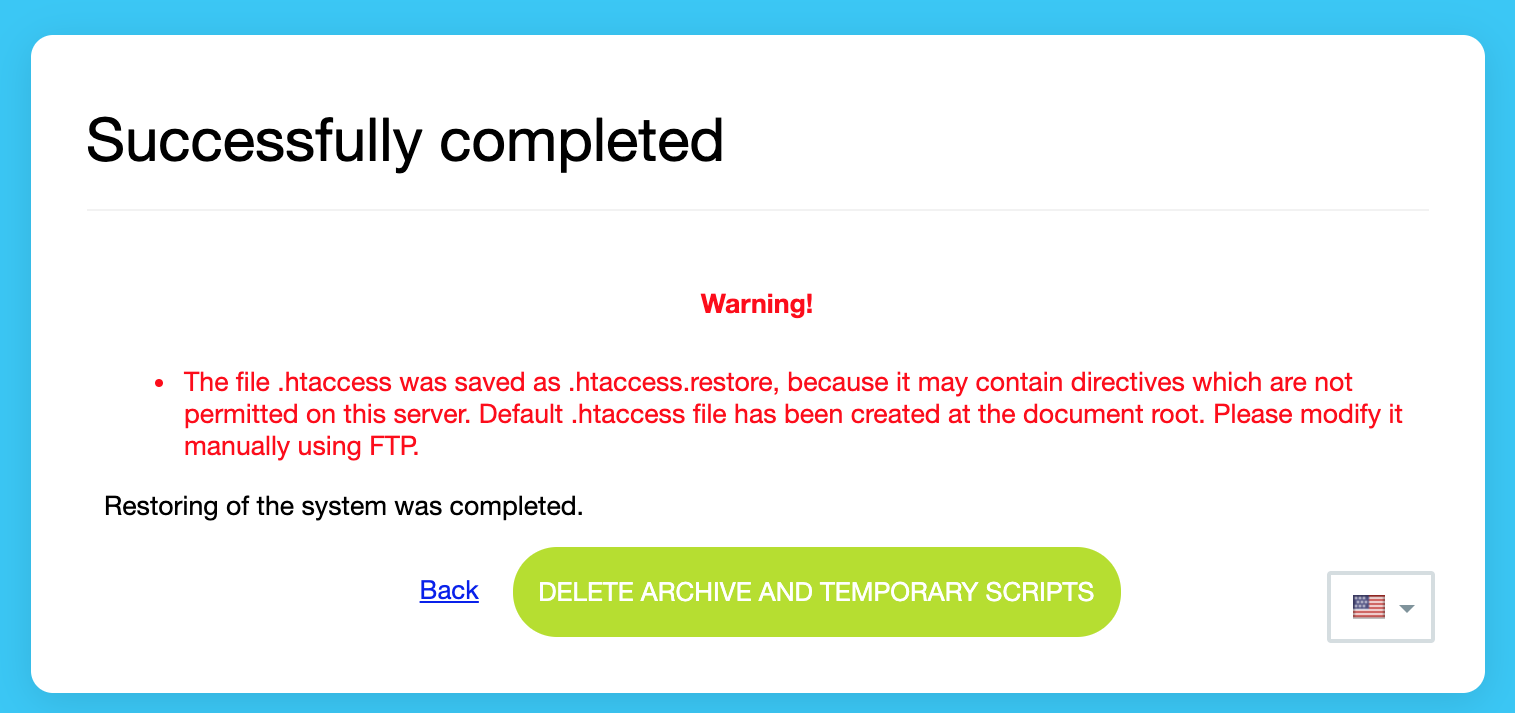
When looking through WinRar, the archive created by the standard backup system, it becomes evident that the archive contains far fewer files than there are files on the site. Reason: the point is that the tar format has several dialects. The system zips archive in the format GNU tar the way tar does it in Linux by default. WinRar understands tar, but does not support this dialect in full. Backup archive must be extracted by the system restore.php downloaded from the backup copy page. If in this case some files are also missed, the problem should be solved through the helpdesk service. ERROR 1062 (23000)When extracting a backup copy, the following error occurs: Reason: the error occurs if the encoding of the archive is different from the encoding used on the new database server. This error may be bypassed or eliminated by way of one of the following ways: Errors in .htaссessSome errors (for example, error 404 when going to a page with detailed news information) during site migration occur because the file .htaссess is getting renamed by adding “_” (low line). In order to solve this problem, just check the file name and correct it if the error is detected. If IIS is Used as a Web ServerIn this case, the file web.config is also archived causing problems with extraction. After extraction, restore.php will not work. Solution: eliminate the extracted file web.config. The server will create a new customized file. Transfer to hosting
To migrate the site to a remote server or vice versa, use the Backup feature. With this function you can: Note: the backup feature is supported for MySQL database only.
Bitrix and hosting
Otherwise, you have to make sure the hosting service of your choice is capable to meet the following provisions: Note: Modules suhosin or mod_security are not recommended because they may cause system malfunction.
To test your server configuration, run the script bitrix_server_test.php on the server. Migrating Bitrix v.12 or higherPreparing for migrationBefore you start migrating your site from a local machine to a remote server, you have to engage the Backup function and the restore.php script to make sure:
Now that you are done with the checks, you can create an archive file with the contents of your site. Open the System Backup page (Settings > Tools > System Backup) and follow the instructions.
Once the archive file is ready, you can start actually migrating the site: Note: This link will download the script as per your current system version. The latest version of the script is always available at Bitrix24 website.
Important things to note:
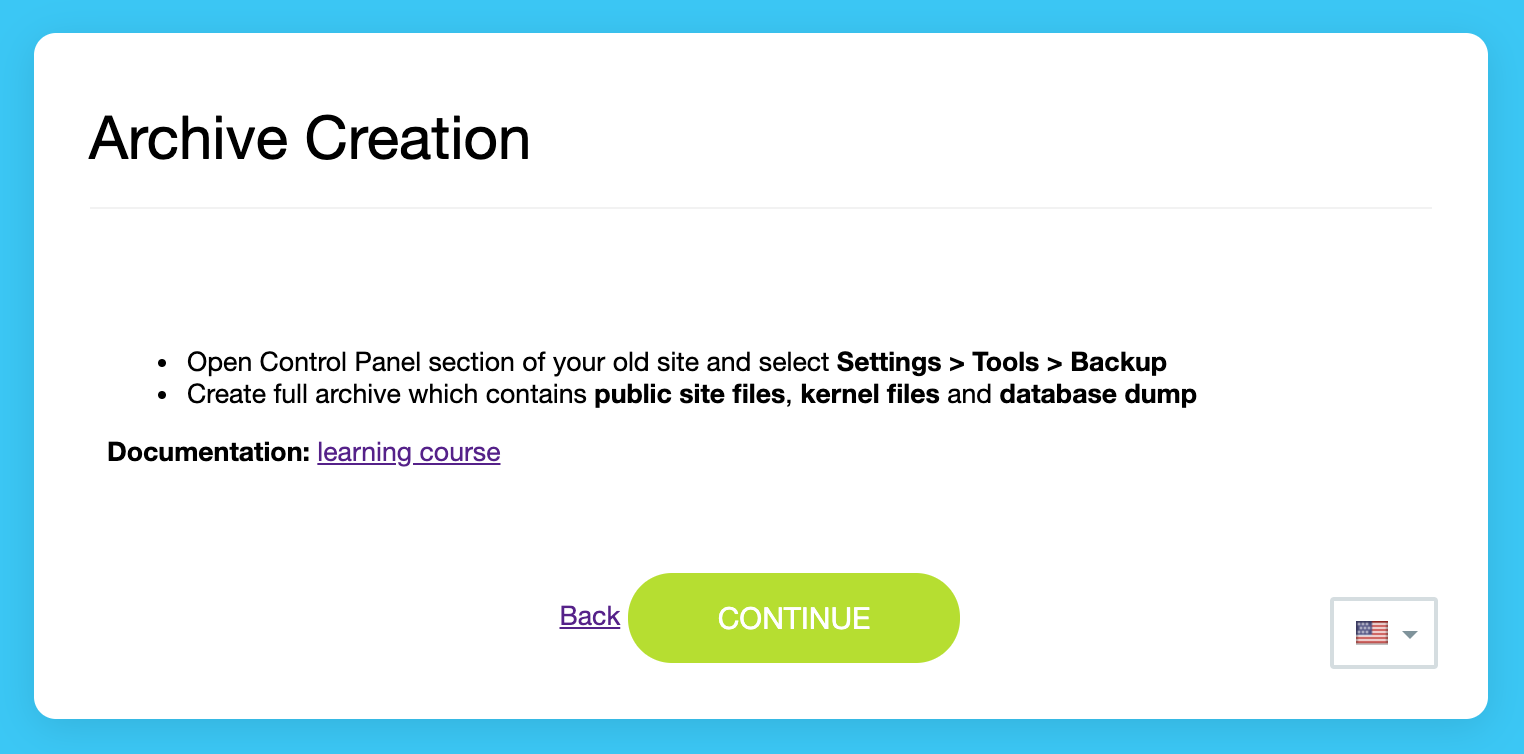
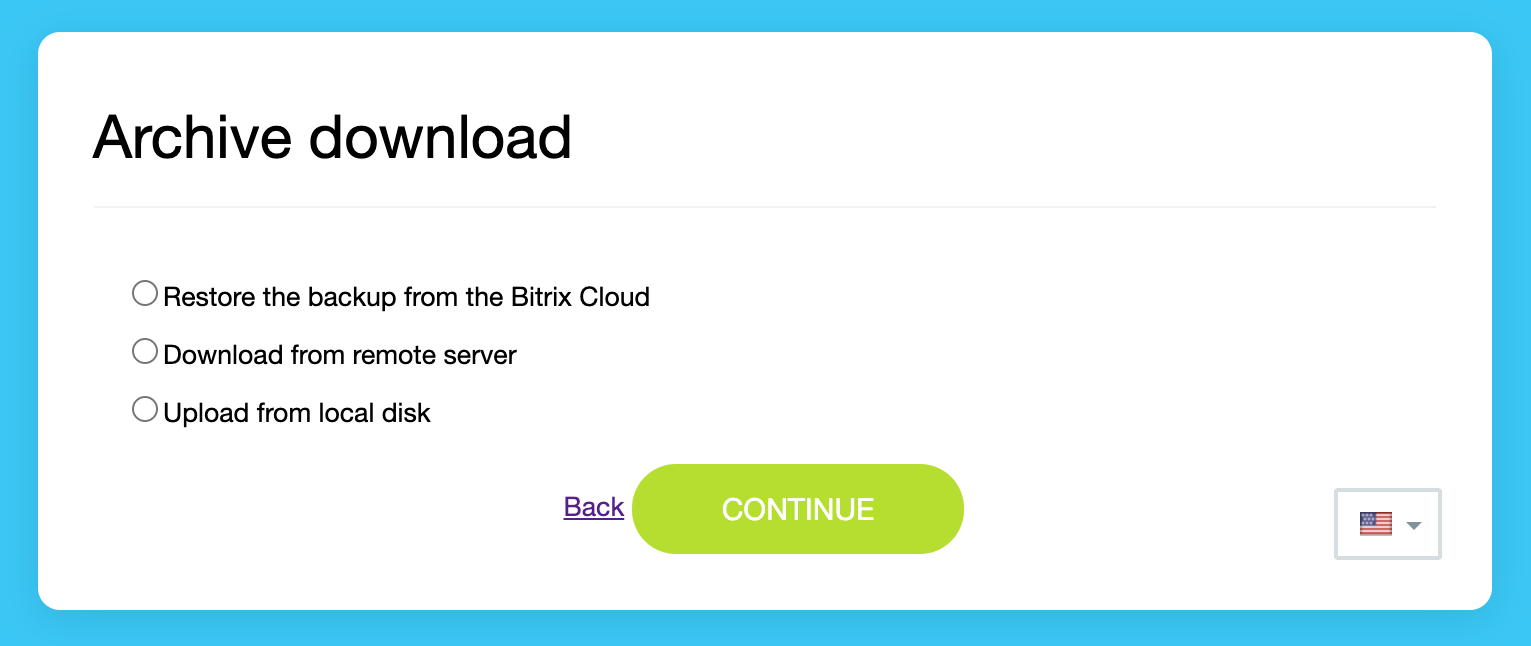
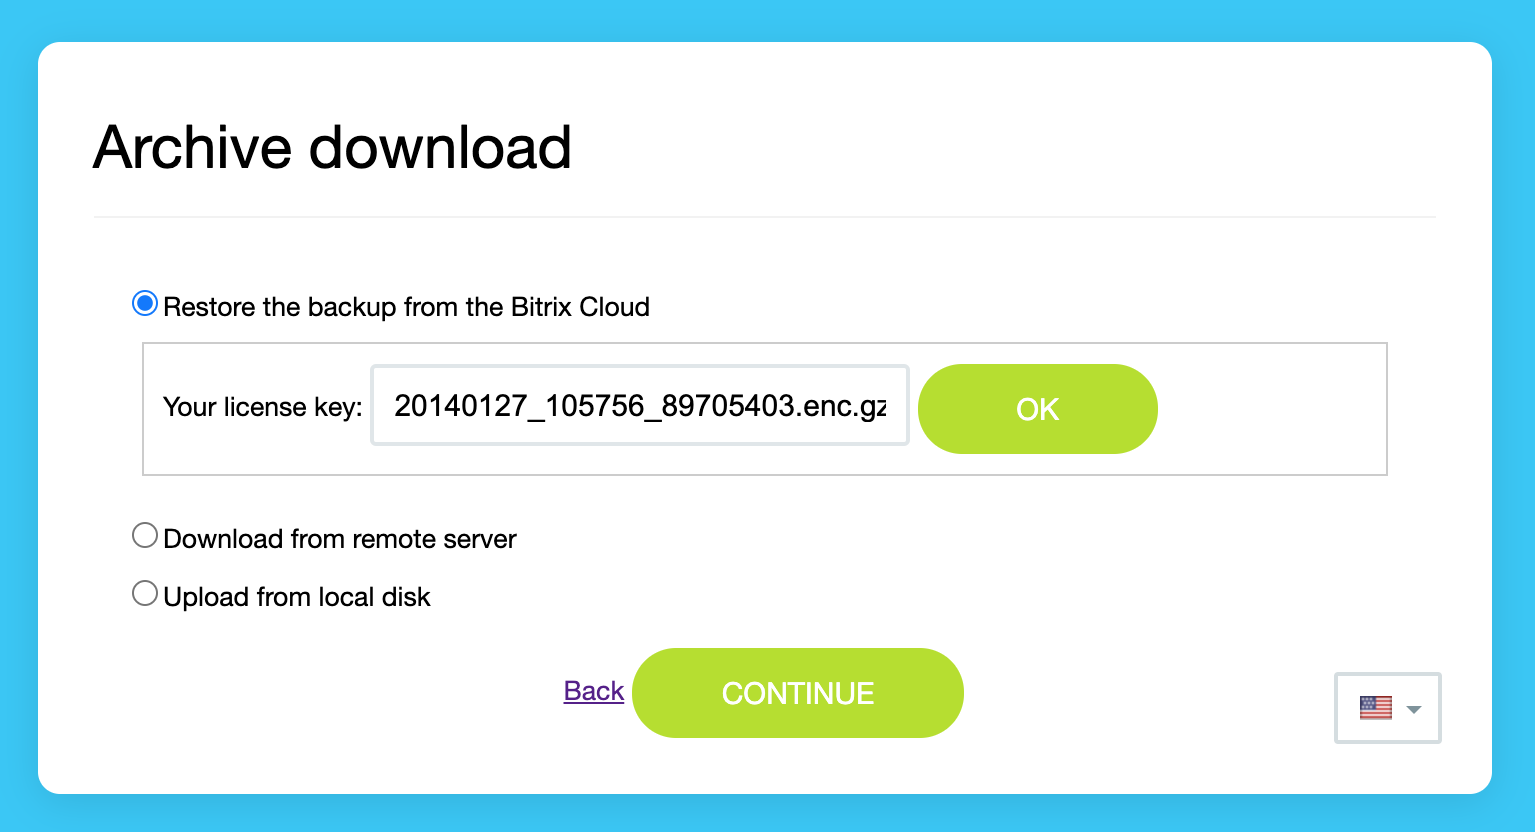
Migrating Bitrix products to BitrixVM or BitrixEnv
To migrate a website from a remote hosting, cloud service or a local server to BitrixVM or BitrixEnv virtual environment, you will need two things: a site archive and a properly configured BitrixVM or BitrixEnv instance. Let's assume you have already created the site archive it's now resting comfortably in its mancave on the [dw]Backups page[/dw][di] Select the [dw]Get backup link[/dw][di]
As an alternative, you can download the archive to your computer (select Download in the action menu).
Error "Call to undefined function mysqli_init()"Error "Call to undefined function mysqli_init()" can occur during the transition to a new version of BitrixVA/BitrixEnv platform. Reason: previously, .mysql extension was used in MySQL database (declared obsolete in PHP 5.5.0). Mysqli. extension is used in new versions. Solution: Online chat widget setup with multisite configurationGeneral descriptionIn some cases, customer uses Bitrix24 [ds]Single sign on[/ds][di]
Single sign authentication is enabled in the Main module settings (option "Spread authorization across all domains").
For example, when a customer sends a request via [ds]Open Channels[/ds][di]
Bitrix24 Open Channels unify multiple digital communication channels: Facebook, Telegram, WhatsApp, Viber and others.
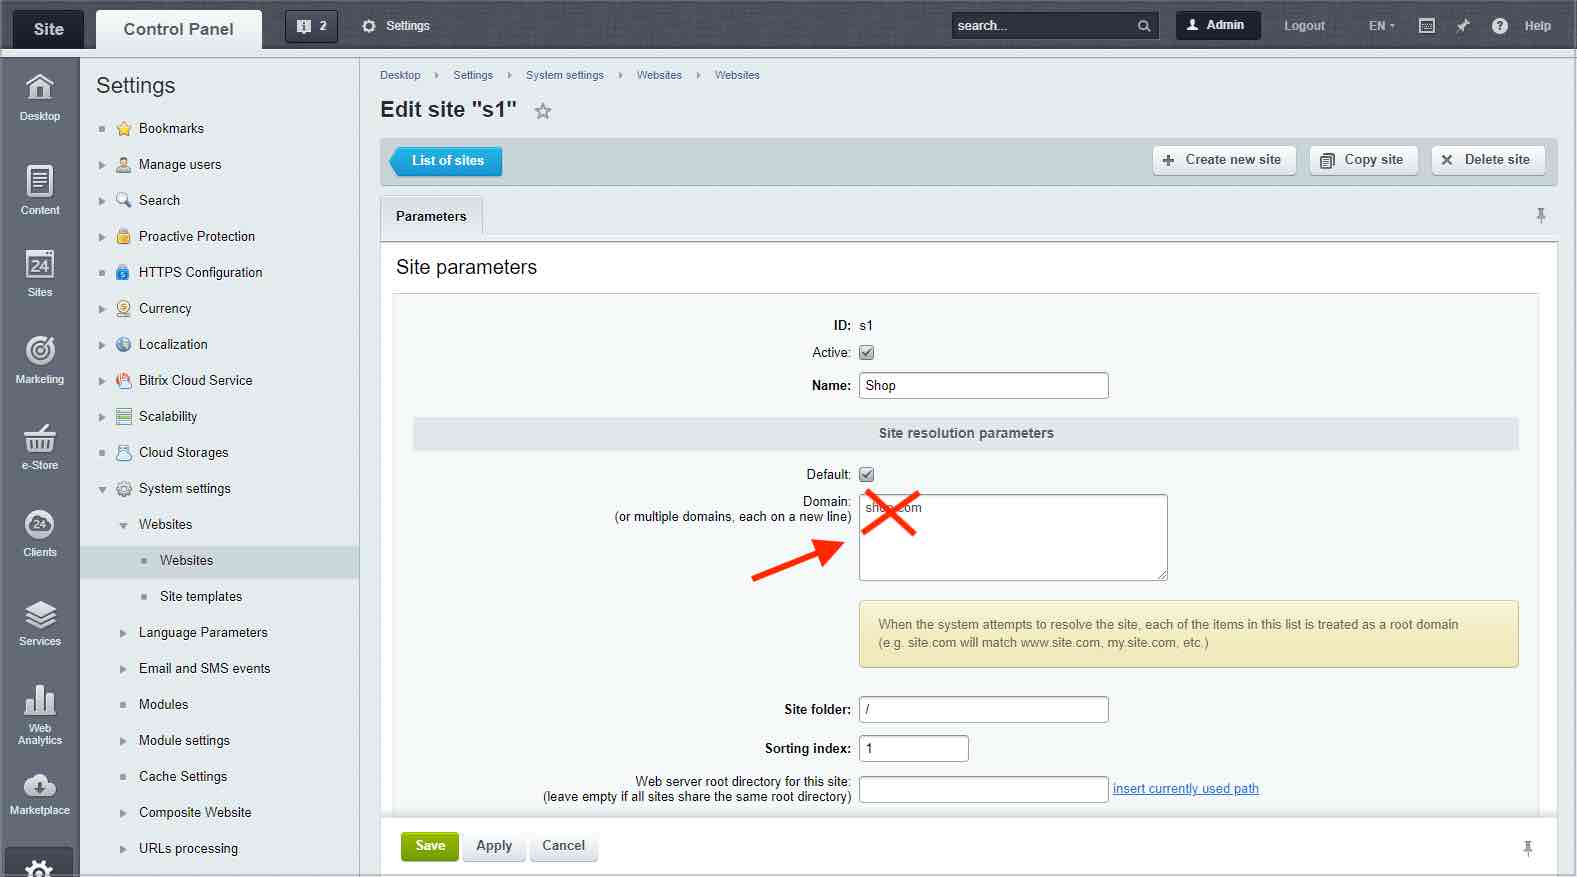
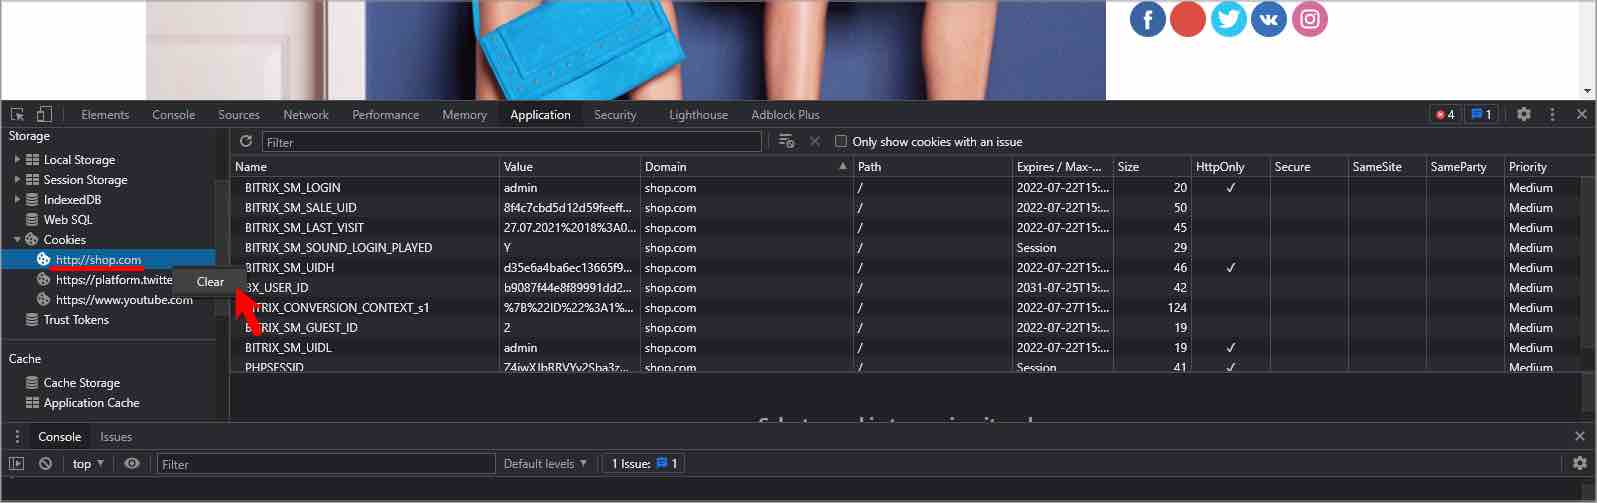
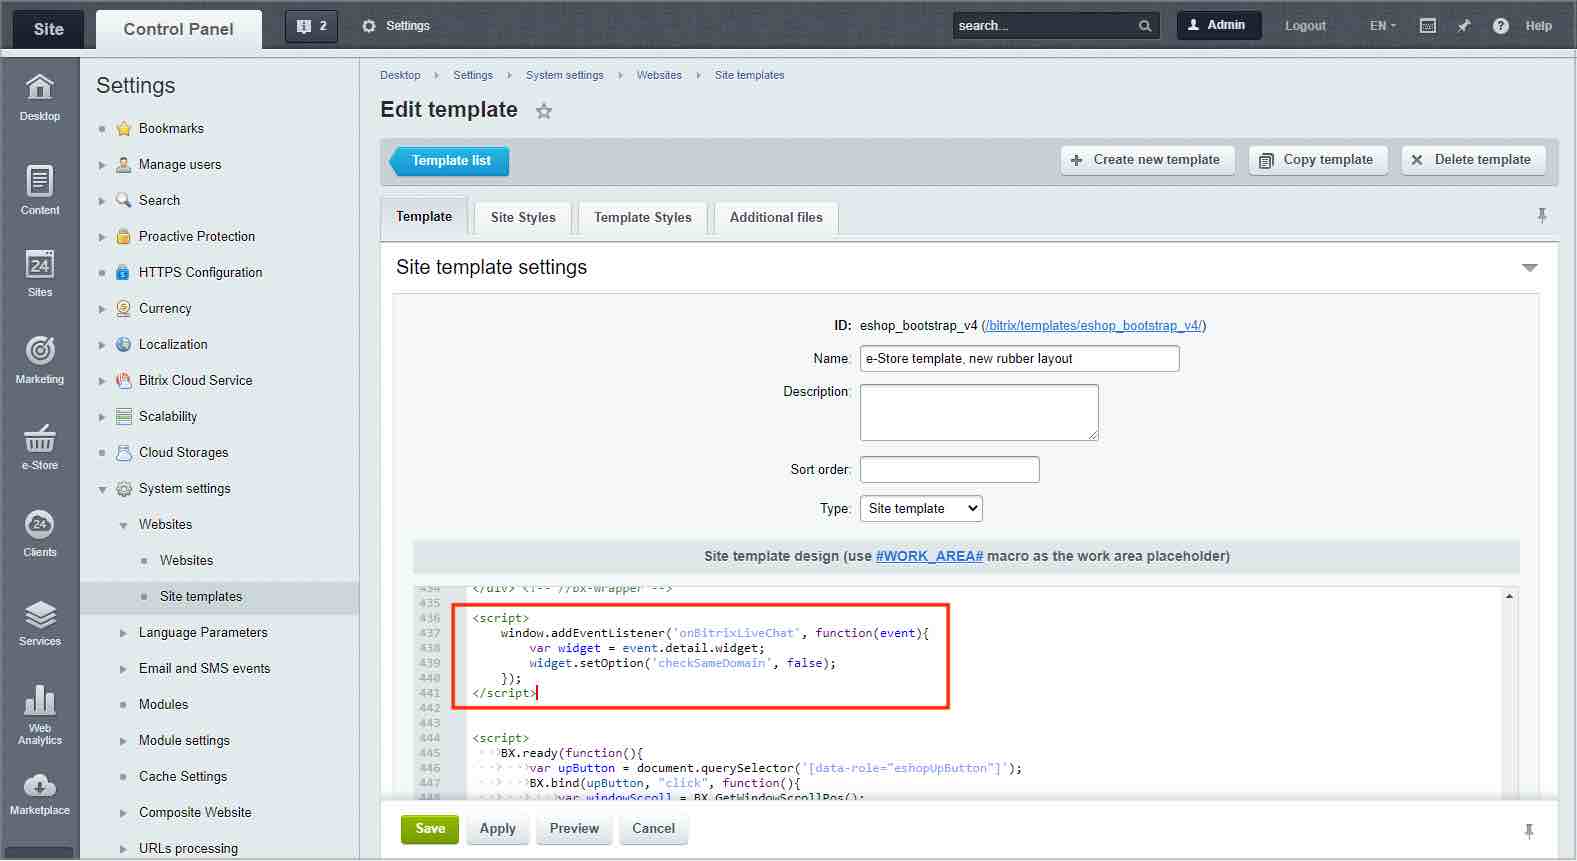
Your online store is located at With enabled single sign on authentication, upon customer communication via Bitrix24 - this user's current authentication will be updated at the main website ( To avoid this, disable single sign-on at the online store website with 2-level domain ( SolutionAll is ready. Now, both online store and Bitrix24 website will have different authentications and customers will no longer have issues with loosing their shopping cart contents and Open Channel messages. Possible site migration errors
You will get the best results migrating your site by using the standard backup and restore tools included in Bitrix Framework. While a Bitrix powered site is essentially a number of files and a database, making a blind copy of the site at another location is not the best way. Thousands of small files will take a very long time to copy over the Internet, and then there is a file permission problem. The following are the most frequent issues that can be encountered:
Incorrect PHP settings can cause other issues, for example:
Make sure your hosting provider will support your multisite strategy. Not all hosting companies provide correct environment to configure Bitrix Framework to support multiple sites.
There are hosting companies that don't allow sending email without authentication. If this is the case, you will have to write a custom email sending function according to documentation.
Sometimes, after the archive was unpacked, all a site can show to a user is the authentication form. There are several possible reasons for that:
Sometimes users notice that, if they open the site archive in WinRAR, there are a lot fewer files than on the source site. Reason: the tar format is rather fluid and varies. The system creates a GNU tar, archive, just like the tar command does in Linux. WinRar understands tar, in general, but does not provide full support for this dialect. You have to unpack the archive using the restore.php script available on the Backups page. However, if you notice some of the files are missing even then, you have to contact the Helpdesk.
Sometimes users encounter this error when unpacking the archive: Reason: archive encoding does not match target database server encoding. Solution 1:
Unexpected errors like a 404 when trying to view a details page are often due to the remote system incorrectly renaming the .htaссess file by adding an underscore ("_") to the filename. Find all files whose filename match .htaссess and correct the name if necessary.
The system adds the web.config file to the archive, which may cause the restore.php script to malfunction. Solution: Delete the extracted web.config. The server will create a new one as required. Possible errorsThis section contains information about possible errors that can occur with server settings and databases during the product use. Server configuration errorsRequisite access rights at server
You (or your hosting service) can configure access permissions on the remote server as desired, but the result must be the only one: scripts should be able to access files for both reading and writing, which means that a primary "user" under which the Apache server runs, must be able to access files with these modes. At the same time, if a shared hosting is the case, other users must not be able to read or write your files via their scripts. Your "user" should be able to rewrite files via the FTP as well as modify uploaded files from within scripts. The problem is that each hosting provider has their own security policy and preferences. Some hosting providers launch the server process under user nobody:group by default. The files that a hosting client stores on a server, should be accessible by the Apache. It means that they has the attribute read for all set, or a user (file owner) and server must belong to the same group. In the latter case, files must be accessible by the group members for reading (FTP servers assign this kind of permission). This approach hits hard the security because if all users belong to the same group, they can read each other's files. Say, a user opened a page in the browser which runs a CGI script. As the script in fact is executed by the Apache server which runs under nobody, the script will run with permissions assigned to this user. The Bitrix24 remains fully functional with any access permission that you have specified at the installation time. To allow the Bitrix24 work correctly with your CHMOD, you have to set the following constants in /bitrix/php_interface/dbconn.php: define("BX_FILE_PERMISSIONS", 0644);
define("BX_DIR_PERMISSIONS", 0755);
These are the standard settings of rights used on the majority of hosting types. Should any problems occur, please contact the support service of your hosting. You can set the access permission level manually by using CHMOD in console. The following command sets the access permission level for both files and folders: chmod -R 644 * You can use the following command to set rights for folders only: find . -type d -exec chmod 0755 {} ';'
If you need to establish different rights on folders and files, please execute the following script: <?php
define("BX_FILE_PERMISSIONS", 0644);
define("BX_DIR_PERMISSIONS", 0755);
function chmod_R($path) {
$handle = opendir($path);
while ( false !== ($file = readdir($handle)) ) {
if ( ($file !== ".") && ($file !== "..") ) {
if ( is_file($path."/".$file) ) {
chmod($path . "/" . $file, BX_FILE_PERMISSIONS);
}
else {
chmod($path . "/" . $file, BX_DIR_PERMISSIONS);
chmod_R($path . "/" . $file);
}
}
}
closedir($handle);
}
$path=dirname(__FILE__);
umask(0);
chmod_R($path);
echo $path;
?>
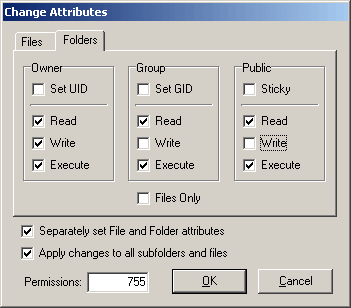
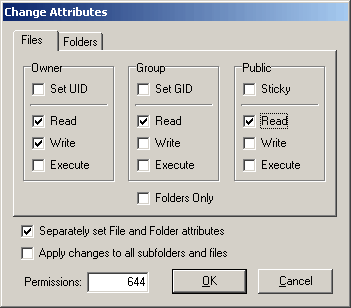
Some FTP clients allows to recursively set rights for files and folders. For example: FlashFXP version 3.xx. Please pay attention to check the appropriate boxes: Separately set File and Folder attributes; Apply changes to all subfolders and files Each instance has its own level:
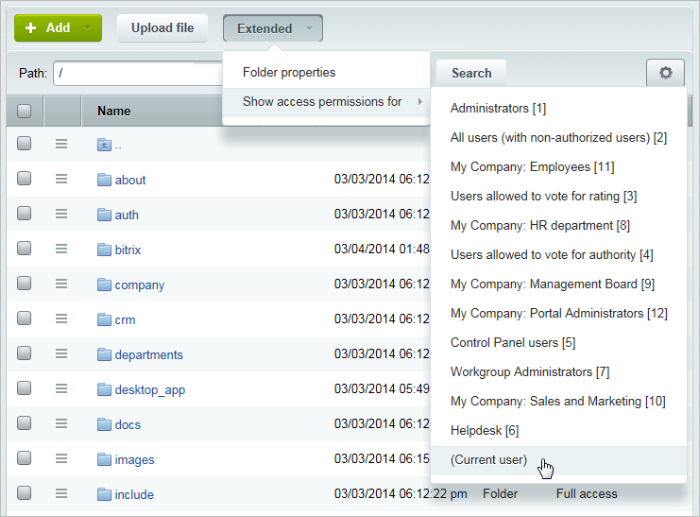
Important: The Site Explorer allows to view the system-level attributes of files and folders.
When viewing the file structure in the Site Explorer, the level of access rights to files and folders for each user group may be seen in the Access permissions column using the Extended button.
Using .htaccess.htaccess htaccess (hypertext access) is a file of an additional configuration of the Apache web server. It permits you to set a large number of additional parameters and permissions for web server operation in a separate catalog without changing the main configuration file httpd.conf.
The file .htaccess is similar to httpd.conf, the only difference is that it applies only to the catalog where it is located and to its child directories. The file .htaccess may be located in any catalog unless these directives are redefined by directives of underlying .htaccess files. Proper settings of the main configuration file httpd.conf are necessary for the .htaccess files to become usable (the value of the directive AllowOverride must be set as All). The paths to files and catalogu must be indicated from the server root. You do not need to restart server after you have modified the .htaccess file. This file is checked each time the server is queried, that’s why changes take into effect right away. As this is the system file, it cannot be accessed by users from their browser. Note: During installation, the processing of .htaccess files is verified in the preliminary check step.
In the demonstration site, the file .htaccess contains the following directives by default: Options -Indexes
ErrorDocument 404 /404.php
<IfModule mod_php5.c>
php_flag allow_call_time_pass_reference 1
php_flag session.use_trans_sid off
#php_value display_errors 1
#php_value mbstring.func_overload 2
#php_value mbstring.internal_encoding UTF-8
</IfModule>
<IfModule mod_rewrite.c>
Options +FollowSymLinks
RewriteEngine On
RewriteCond %{REQUEST_FILENAME} -f [OR]
RewriteCond %{REQUEST_FILENAME} -l [OR]
RewriteCond %{REQUEST_FILENAME} -d
RewriteCond %{REQUEST_FILENAME} [\xC2-\xDF][\x80-\xBF] [OR]
RewriteCond %{REQUEST_FILENAME} \xE0[\xA0-\xBF][\x80-\xBF] [OR]
RewriteCond %{REQUEST_FILENAME} [\xE1-\xEC\xEE\xEF][\x80-\xBF]{2} [OR]
RewriteCond %{REQUEST_FILENAME} \xED[\x80-\x9F][\x80-\xBF] [OR]
RewriteCond %{REQUEST_FILENAME} \xF0[\x90-\xBF][\x80-\xBF]{2} [OR]
RewriteCond %{REQUEST_FILENAME} [\xF1-\xF3][\x80-\xBF]{3} [OR]
RewriteCond %{REQUEST_FILENAME} \xF4[\x80-\x8F][\x80-\xBF]{2}
RewriteCond %{REQUEST_FILENAME} !/bitrix/virtual_file_system.php$
RewriteRule ^(.*)$ /bitrix/virtual_file_system.php [L]
RewriteCond %{REQUEST_FILENAME} !-f
RewriteCond %{REQUEST_FILENAME} !-l
RewriteCond %{REQUEST_FILENAME} !-d
RewriteCond %{REQUEST_FILENAME} !/bitrix/urlrewrite.php$
RewriteRule ^(.*)$ /bitrix/urlrewrite.php [L]
RewriteRule .* - [E=REMOTE_USER:%{HTTP:Authorization}]
</IfModule>
<IfModule mod_dir.c>
DirectoryIndex index.php index.html
</IfModule>
<IfModule mod_expires.c>
ExpiresActive on
ExpiresByType image/jpeg "access plus 3 day"
ExpiresByType image/gif "access plus 3 day"
ExpiresByType image/png "access plus 3 day"
ExpiresByType text/css "access plus 3 day"
ExpiresByType application/javascript "access plus 3 day"
</IfModule>
Note
To activate the commented PHP directives, you have to remove the comment operator (#) at the beginning of each line. If your Apache server does not allow PHP flags, these directives will incur an internal server error (500). If this is the case, comment these directives back. Other uncommented PHP directives are enclosed in the verification condition statements ensuring the required Apace modules are present in the system. These directives will never cause the server errors. Note: The file .htaccess must be saved in the UNIX format (Save as UNIX text option in the FAR manager editor).
Authorization in the CGI ModeSometimes authorization during data exchange with 1C will not work. The problem is often caused by php operating in the CGI mode. This mode experiences problems with HTTP data transmission to php. It can be verified by viewing phpinfo() in the section The problem may be bypassed, but .htaccess processing and mod_rewrite must be activated on the server. To activate them, please proceed as follows: To check the operability of HTTP authorization, please use the script. Attention: sometimes this bypass option fails to solve the problem. If after all the recommendations are implemented HTTP authorization fails, please contact your hosting provider about this problem.
Database failuresDatabase connection errorsWhen a database connection error occurs, the following error message is displayed:
The visual aspect of the message is defined by the contents of the file /bitrix/php_interface/dbconn_error.php: <br>
<table cellpadding="1" cellspacing="0" width="35%" bgcolor="#9C9A9C">
<tr>
<td>
<table cellpadding="5" cellspacing="0" width="100%">
<tr>
<td bgcolor="#FFFFFF" align="center">
<FONT face="Verdana, Arial, Helvetica, sans-serif" size="-1">
<font color="#FF0000"><b><?echo "Error connecting to database."?></b></font><br>
Please try again.</font></td>
</tr>
</table>
</td>
</tr>
</table>
<br><br><br>
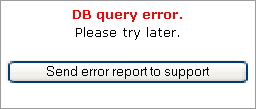
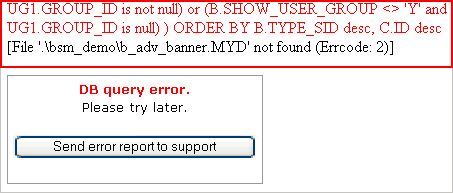
To resolve the problem, do the following: Database query errorsWhen a database query error occurs, the following error message is displayed:
The visual aspect of the message is defined by the contents of the file /bitrix/php_interface/dbquery_error.php. Situations may happen when a site denies to reply and returns an empty page to visitors. In this case, open the file bitrix/php_interface/dbconn.php containing the database connection parameters, and set the parameter: <?
define("DBPersistent", true);
$DBType = "mysql";
$DBHost = "localhost:31006";
$DBLogin = "root";
$DBPassword = "";
$DBName = "bsm_demo";
$DBDebug = true;
$DBDebugToFile = false;
set_time_limit(60);
define("BX_FILE_PERMISSIONS", 0644);
define("BX_DIR_PERMISSIONS", 0755);
@ini_set("memory_limit", "64M");
?>
This will cause the error message to be printed. The message usually contains names of damaged tables.
Run perror.exe (can be found in mysql/bin) with the error code to get the error description:
Note:
The error 28 displays the following description:
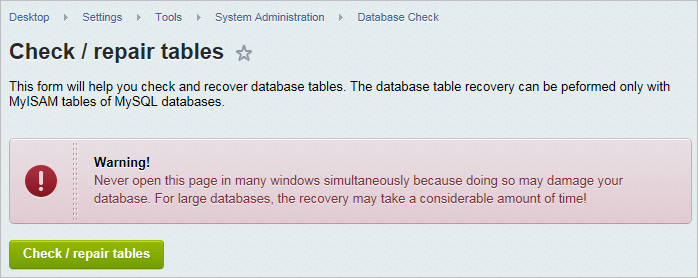
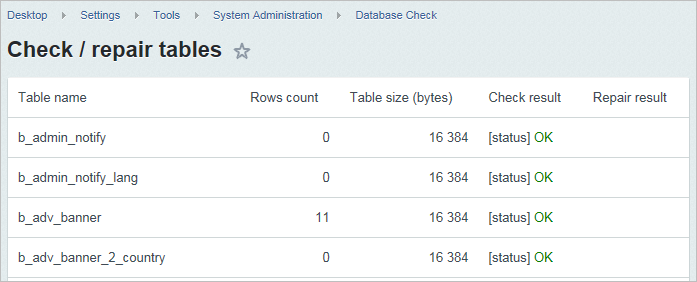
If the database damage is the case, you are recommended to use the built-in database check and repair tool. This will allow you to restore the site functionality in the shortest possible time. Note!
Problem: The following error appears on the screen:
Solution: Memory size must be increased in MySQL settings. The following MySQL parameters should be used and entered in the MySQL configuration file my.cnf: key_buffer = 128K max_allowed_packet = 16M table_cache = 4 sort_buffer_size = 128K read_buffer_size = 128K read_rnd_buffer_size = 128K net_buffer_length = 128K thread_stack = 128K MySQL will have to be reloaded after you change the parameters. Possible server failures500 - Internal Server Error
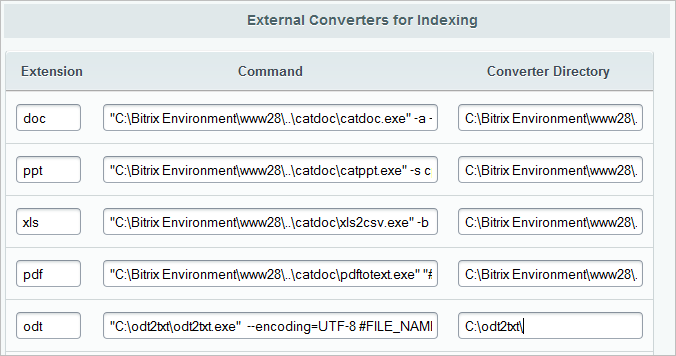
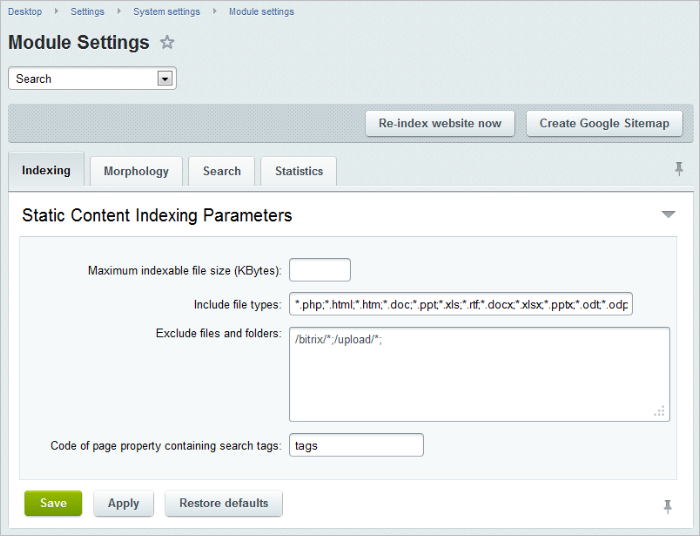
Since there are a lot of reasons which may cause server errors, their diagnostics is very complex and tedious. If a server error occurs, the first thing to do is view the error.log file. This file may contain a line with the error description. Thus, everything depends on the server configuration. It is important to know that the said restrictions are not determined through PHP settings in php.ini. Normally, such an error and its cause are recorded in server logs. You have to refer to the hoster requiring that the reason of the error be indicated and the error be eliminated (for example, by increasing the resources). If the hoster could not find a solution, please contact Bitrix helpdesk providing an accurate description of the error and the reasons indicated by the hoster. Helpdesk will not be able to assist you without knowing the reason of the error. Document Search SetupBy default, the product supports MS Office 2007 document search. In order to search all the documents, a number of settings described in this chapter must be made. Adding new formats
Note: when working with PDF files, some Russian language files may be indexed improperly. In this case, replace the package XPDF by The Poppler Developers (included in the installation package) to the package Poppler-Utils by the Glyph and Cog.
Setting Up Web Environment with PHP Version below 5.2.6
This error indicates that the system will not index files of MS Office 2007 or OpenOffice. Note: In Bitrix Web Environment version 2.0 the library php_zip.dll is already enabled.
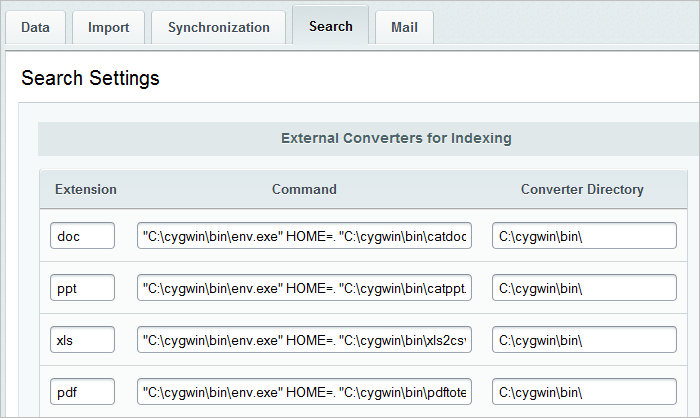
In order to eliminate the error, please proceed as follows: Search of MS Office documents of earlier versionsSearch of the documents created in earlier versions of MS Office (before MS Office 2007) (doc, xls, and ppt formats) is possible using Catdoc – a special program package for the conversion of documents into plain text format. If Bitrix24 is installed in the Bitrix Web Environment, starting from version 1.1, you already have the Catdoc package installed and enabled. Checking for Catdoc InstallationYou may check the availability of the Catdoc package as follows: Go to Start > Run. In a opened window, type cmd. Click ОK. Command prompt window opens. Press enter. The system must display a message similar to this:
If the message is as follows:
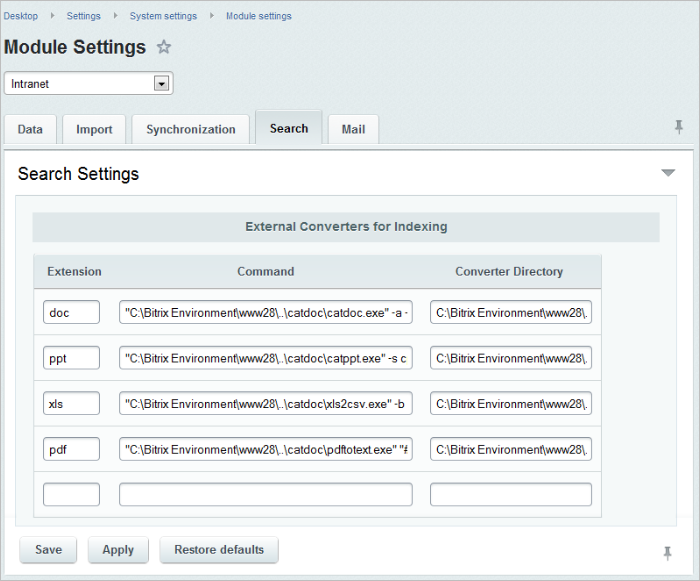
then either the specified path is incorrect or Catdoc is not installed. Note: the path to the package must be specified in the settings of the Intranet module in the Search tab (Settings > System settings > Module settings > Intranet).
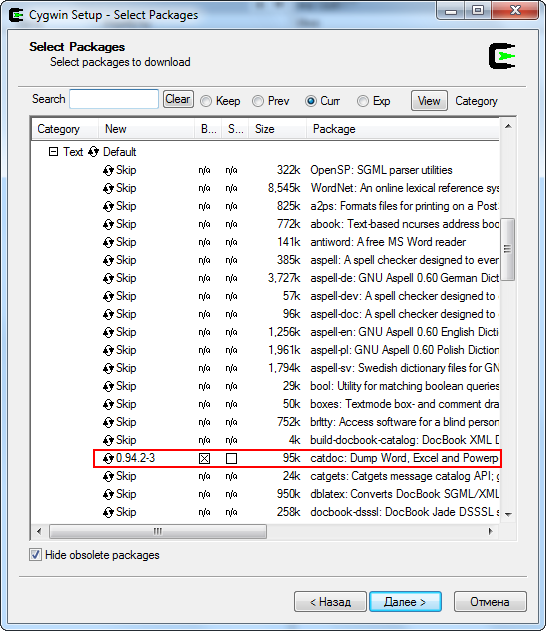
Installation of the Catdoc PackageIf the Catdoc program package is not installed due to any reasons, please follow the following steps: |
 [/di] (
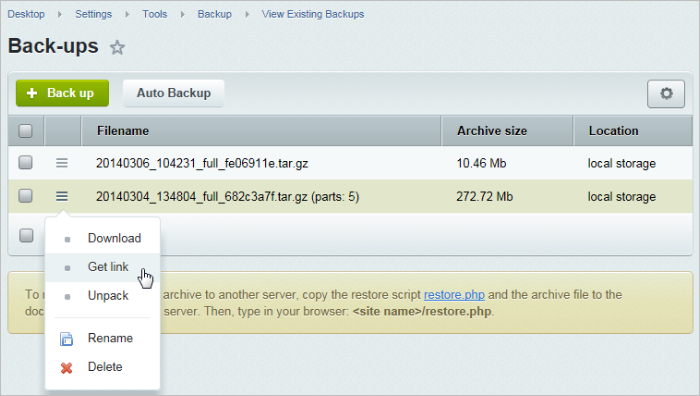 [/di] item in the action menu. This link is only available for locally stored backups. Copy the link to the Clipboard:
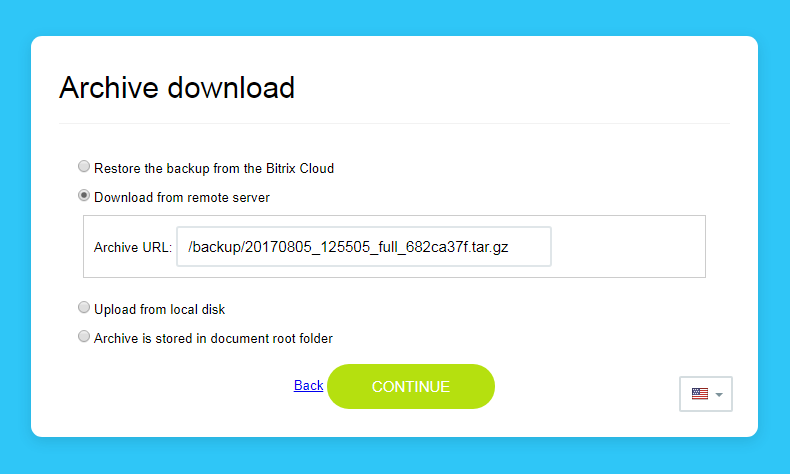
 [/di] of the store website (