Before you start migrating your site from a local machine to a remote server, you have to engage the Backup function and the restore.php script to make sure:
the hosting environment conforms the product minimum requirements;
the user running Apache and PHP has permissions at least 0644 for files and 0755 for folders in the site root directory.
If you have a valid commercial license, you are strongly recommended to update the system to the latest version.
Site archive
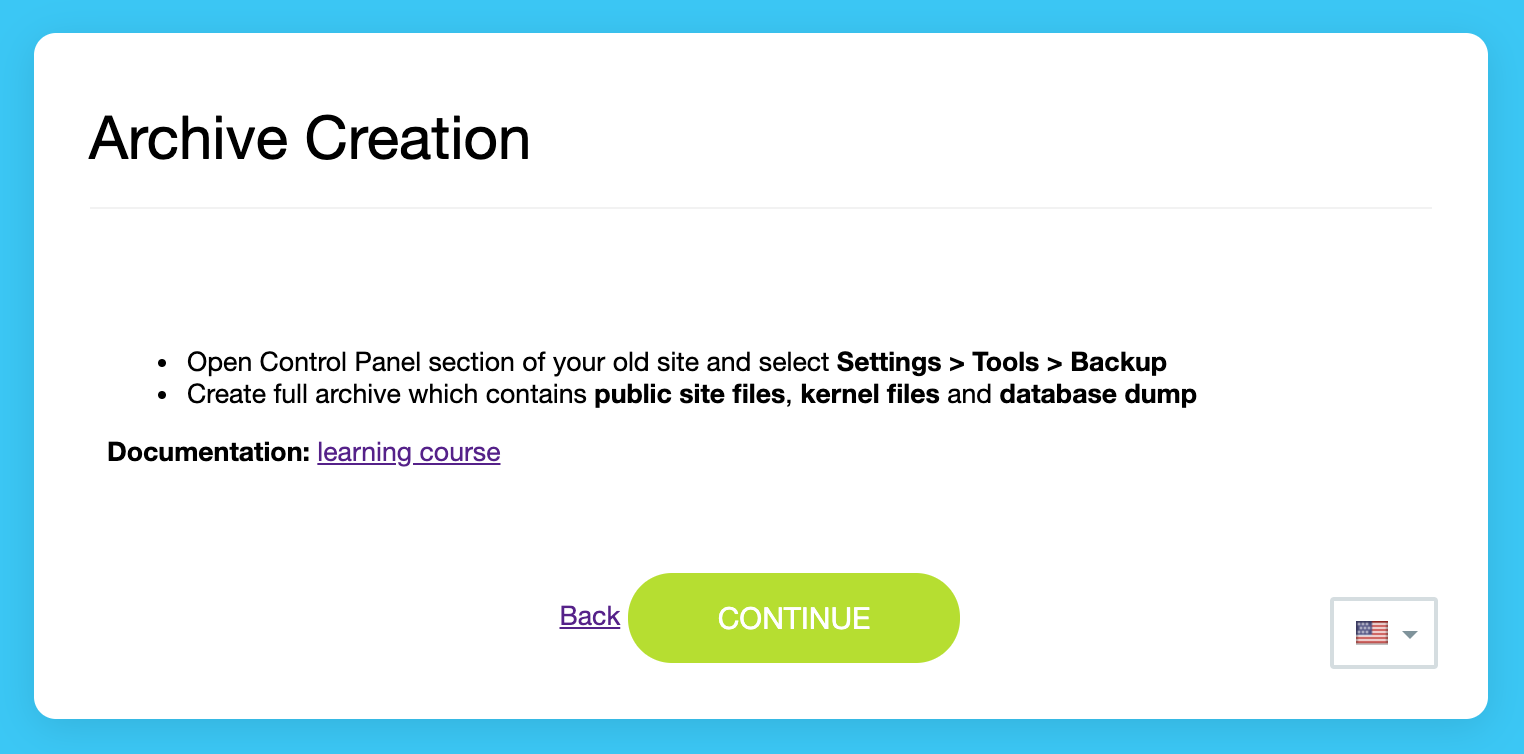
Now that you are done with the checks, you can create an archive file with the contents of your site. Open the System Backup page (Settings > Tools > System Backup) and follow the instructions.
Site transfer
Once the archive file is ready, you can start actually migrating the site:
Upload the archive file to the root directory on the remote server (or local machine if you're moving the site back for some purpose). If the source location is available remotely, download the file over the Internet to have all the parts of archive fetched automatically (see below). Otherwise, put all the files beside the restore.php file (also see below).
Important! if the site archive contains a full copy of the site including the kernel and the public area, you don't have to bother and install the system manually on the server.
Download the restore.php, script from the lower part of Backups page (Settings > Tools > System Backups > Backups), you will find the link at the page bottom. Upload the script to the root directory on the remote server.
Note: This link will download the script as per your current system version. The latest version of the script is always available at Bitrix24 website.
3. Open http://your_site/restore.php in your browser to bring up the
initial page
of the migration wizard. Click Continue.
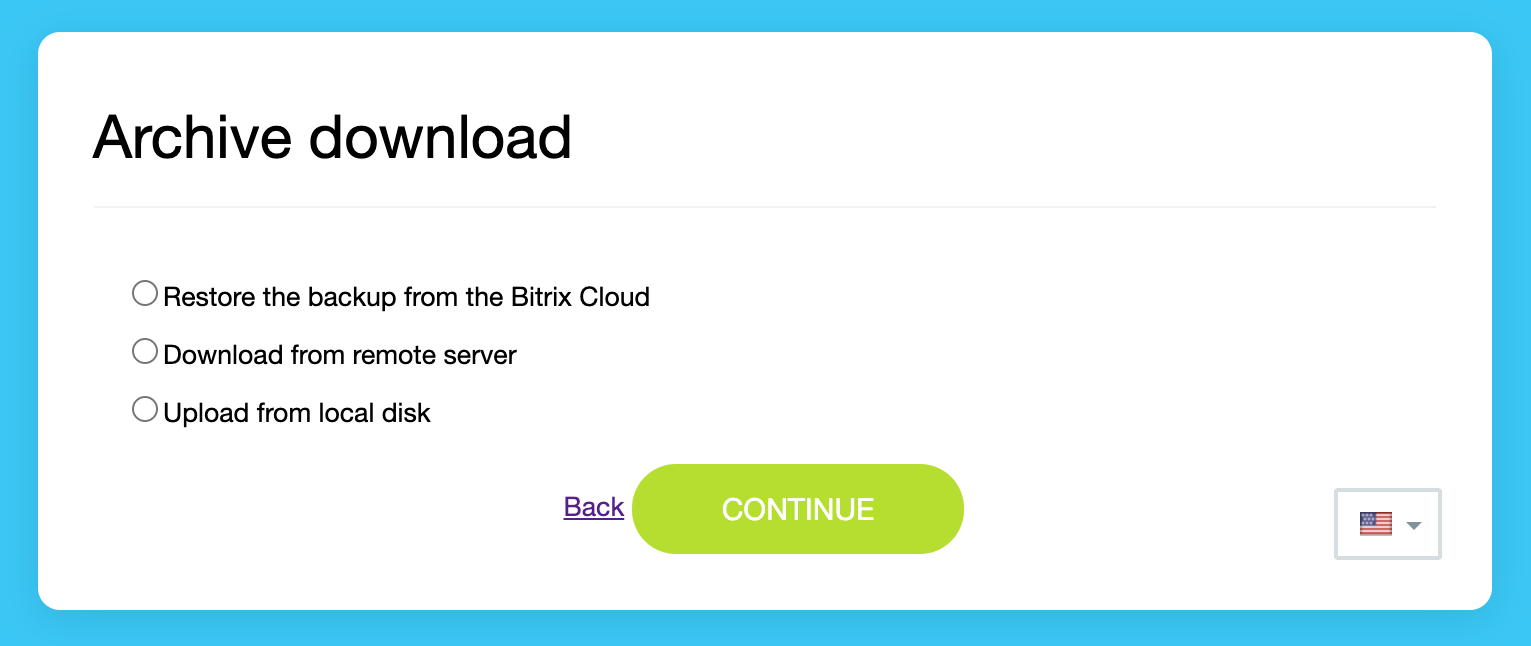
4. Select how you would like the script to access the archive file and click Continue.
Note: Item Archive is stored in document root folder will appear when the archive is copied to the site root folder.
When downloading archive in cloud
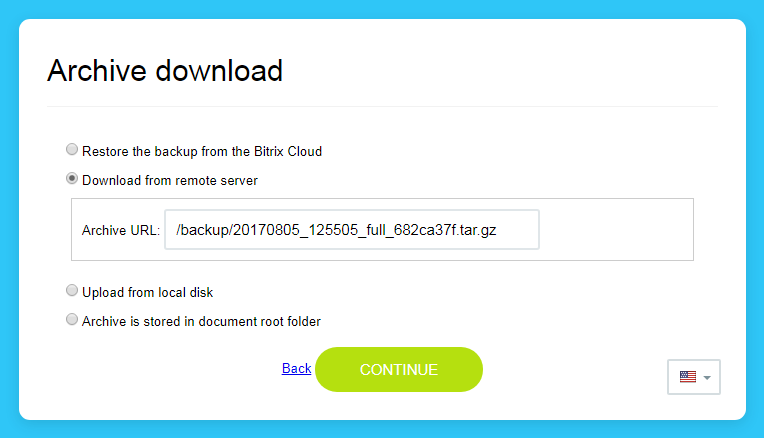
When site archive was located on client's site (in cloud), indicate the option Download from remote server and set the path to archive:
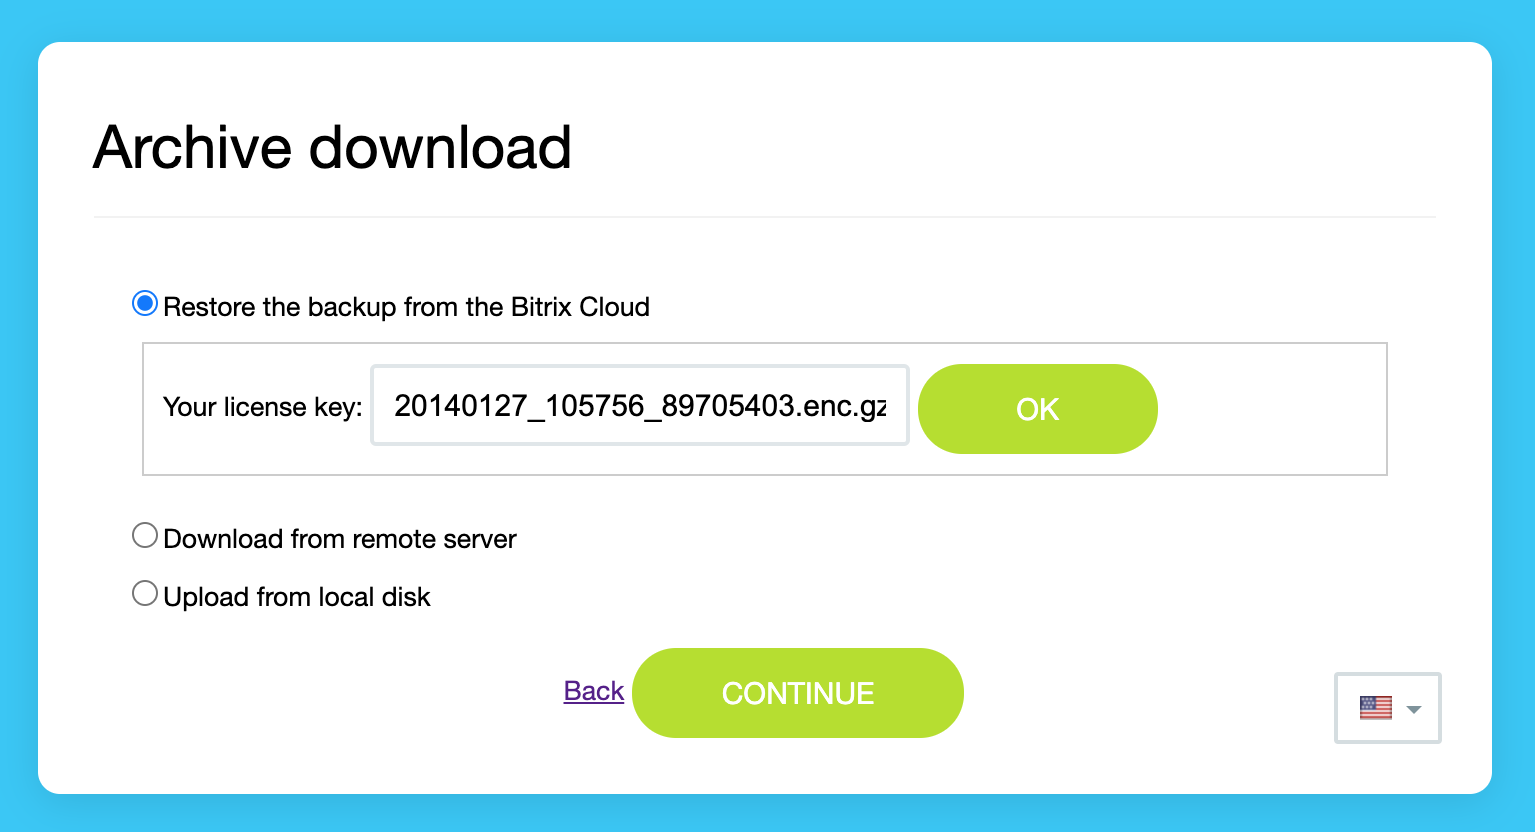
When site archive was located in Bitrix24 Cloud, set the option Restore the backup from Bitrix Cloud and specify the active licence key:
After archive is downloaded, indicate the password (when archive was encrypted at the backup creating stage) to pack the archive.
Once the archive has been unpacked, the next Wizard window will ask you to provide database connection parameters – if you included database dump in the archive file.
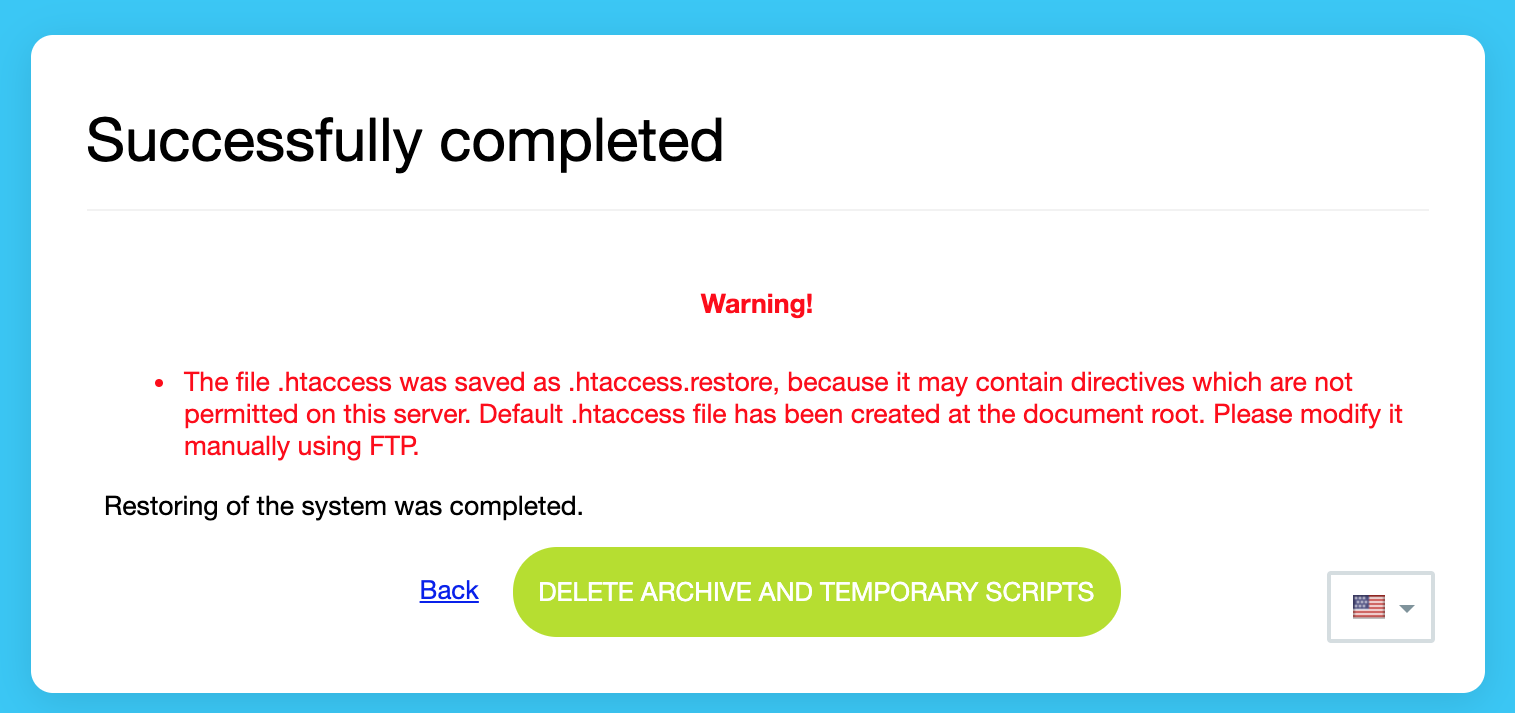
Indicate the required parameters, click Restore and wait until the procedure is complete.
In the final window, click Delete archive and temporary scripts in the opened window:
The following files will be deleted for security reasons:
/restore.php
/archive_copy_file(the one with the .tar.gz or .enc extension)
/bitrix/backup/database_dump (.sql)
The recovery operation has been completed.
Important things to note:
If you're using IIS, remember that the web.config file is also added to the archive. You have to delete the extracted file manually. Your server will create a new web.config as required.
SEF URL feature may appear broken. Rename .htaccess.restore to .htaccess to fix the issue.
If the archive was created on a demo version of the system, the trial period will reset.