Last Modified: 11.03.2021
|
|
|
Views: 6105
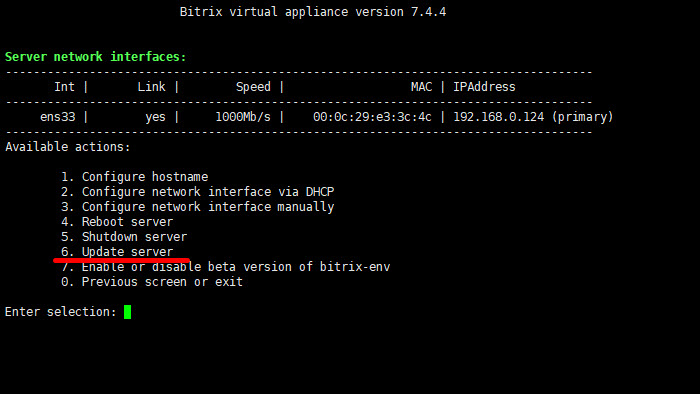
Last Modified: 11.03.2021 In the Fall 2021, legacy versions of queue servers Nginx-PushStreamModule 0.3.4/0.4.0 and Bitrix Push server 1.0 will no longer be supported. We recommend upgrading from queue server Bitrix Push server 1.0 to Bitrix Push server 2.0 now. 1. VMBitrix updateUpdate Bitrix Virtual Appliance to the latest stable version: 2. Configure localhost settings > 6. Update server.
Important! You must backup your VMBitrix before the update. Find more details on Bitrix Virtual Appliance update here.
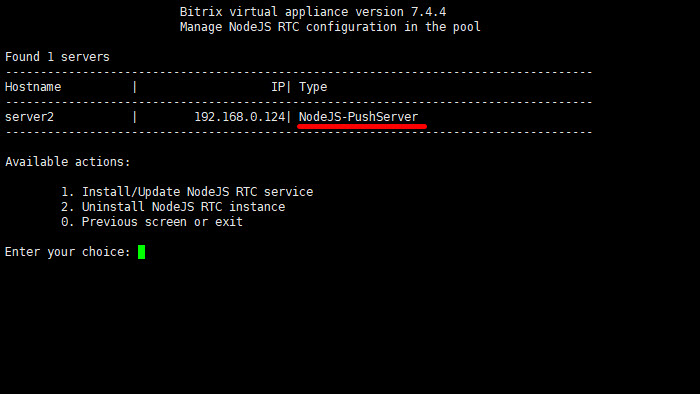
2. Checking for NodeJS-PushServer in VMBitrixEnsure that NodeJS-PushServer is used as the queue server in Bitrix Virtual Appliance: 9. Configure Push/RTC service for the pool:
When Bitrix Virtual Appliance has queue server set as Nginx-PushStreamModule, you have a deprecated queue server. Find more details on upgrading from Nginx-PushStreamModule to Bitrix Push server 2.0 here.
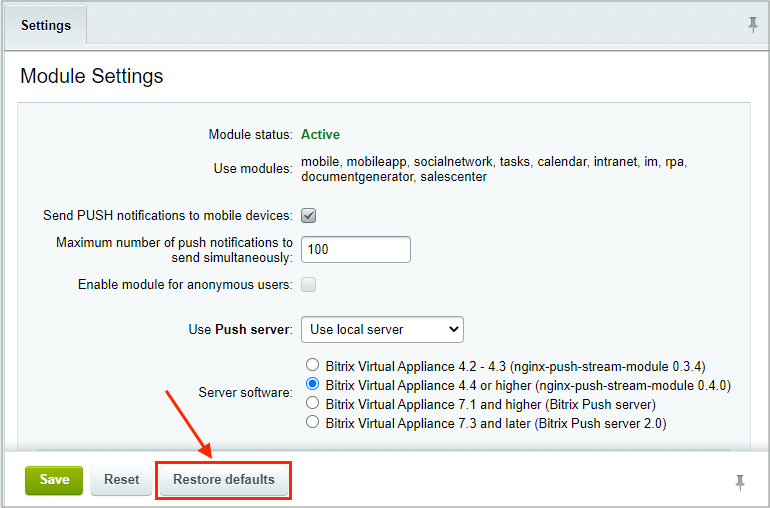
3. Bitrix Push server 2.0You need to preliminarily reset queue server settings in the Control Panel: Settings > System Settings > Module Settings > Push and Pull. Click on the Reset defaults:
Important! You don't have to additionally click on the Save button!
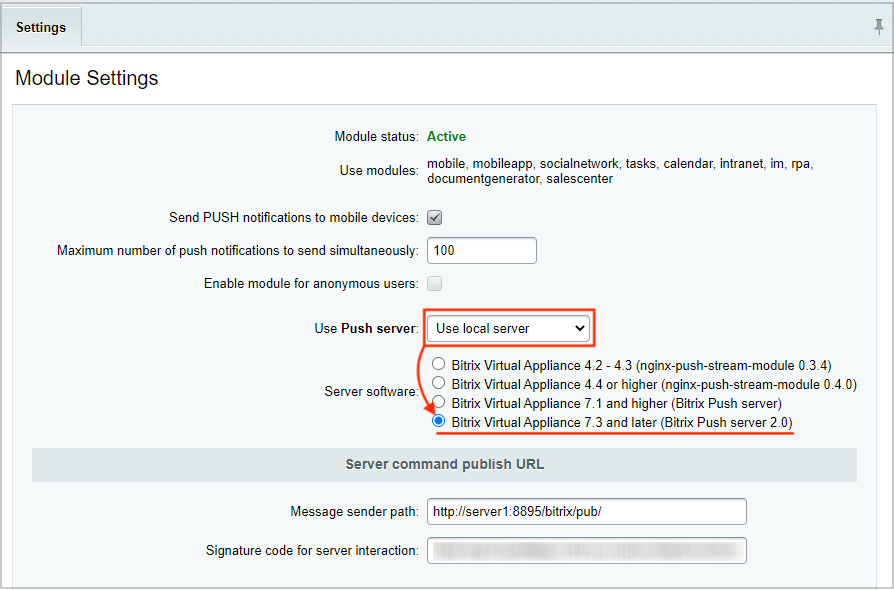
To enable new queue server Bitrix Push server 2.0, select Virtual Appliance 7.3 and later (Bitrix Push server 2.0) select in the option Use "Push server": User local server and click save: All is complete. Usually, no more settings are required. Possible errors
When Bitrix Push server 2.0 is installed and started for the first time, a secret key is generated inside the queue server settings file /etc/push-server/push-server*.json in the section
"security": {
	"key": "<your secret key>"
},
When Bitrix Push server 2.0 is started at the BitrixVM Virtual Appliance for the first time, this code is automatically written into the system kernel file /bitrix/.setting.php and in the database, as well as it is visible in the control panel inside the field Signature code for server interaction:
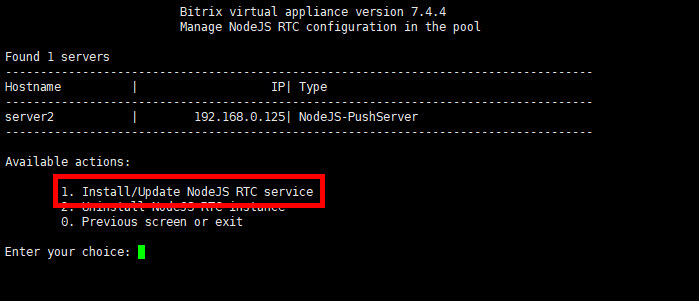
There are situations, when due to some reasons the secret key in the kernel settings file /bitrix/.setting.php and in the database differs from the key that is written in the queue server settings. Because of this, queue server operates incorrectly and messages are not delivered. To solve this issue, re-create the NodeJS-PushServer role in the BitrixVM Virtual Appliance: 9. Configure Push/RTC service for the pool > 1. Install/Update NodeJS RTC service
When you have your own custom virtual environment, it can be done manually:
After this procedure, the server operation will be restored. Extra materials
Courses developed by Bitrix24
|
