Views: 12146
Last Modified: 24.09.2024
Attention!
-
For operations, described in this chapter, knowledge of *nix-systems administration is required. Prior to start of these operations, it is recommended to perform full backup of Bitrix Virtual Appliance.
- Provided settings are listed outside the scope of the Virtual Appliance menu. This means that the details below are provided for informational purposes only and should be used with clear understanding of your actions and under your own liability. Bitrix24 technical support reviews the questions related to Virtual Appliance menu items only.
Attention! Logic Volume Manager LVM2 is installed by default in CentOS 9 during the automatic partitioning of the disk during the system installation phase (in case if BitrixEnv is installed via bitrix_env.sh script on the CentOS 9). In such case, the size change for LVM-partition will differ from previous methods.
Scenario: the size of system disk was increased from 20GB to 100GB, as was done previously in VMWare Player.
Then, the actions to change LVM-partition size will be the following:
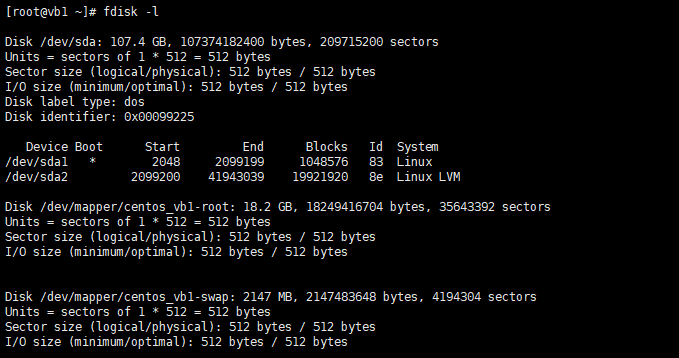
- Check, what devices/partitions are available at the moment via the command:
fdisk -l
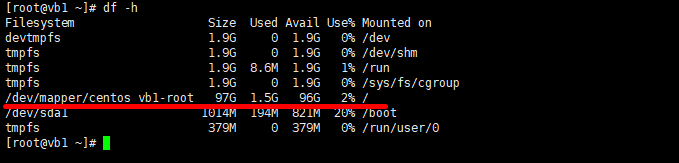
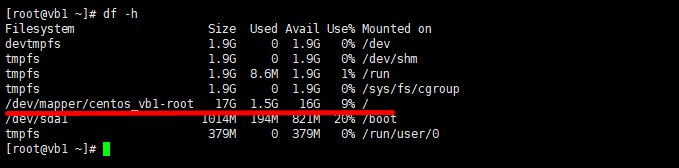
- Verify, that the space did not increase automatically via the command:
df -h
Volume group name and the name volume are also visible (we will have different ones):
- cl - volume group name;
- root - volume name.
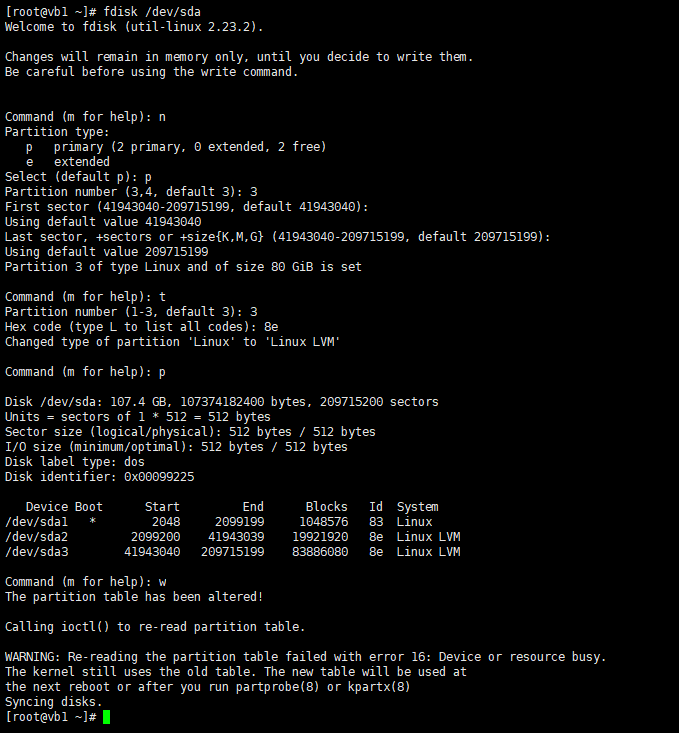
- Create a new sda3 partition - partition type: Linux LVM (code type 8e) on the unpartitioned space. To do that, start working with the sda device via the command:
fdisk /dev/sda
- Next, create a new partition via the n command:
- primary (primary partition) - p and
Partition number (1-3, default 3): 3 command (because we had 2 logical partitions sda1 and sda2 - p.1);
- in this case, first and last sectors are selected by default - this way, partition will be created by using all available free space on disk;
- indicate partition type - t and
Partition number (1-3, default 3): 3 command;
- enter partition code type, corresponding Linux LVM -
8e;
- see the partition table - enter p command and make sure, that all is correct;
- Partition sda3 is created. To save the updated partition table and to exit from fdisk - w command.
- For the system to load the new partition table, reload the Virtual Appliance:
reboot
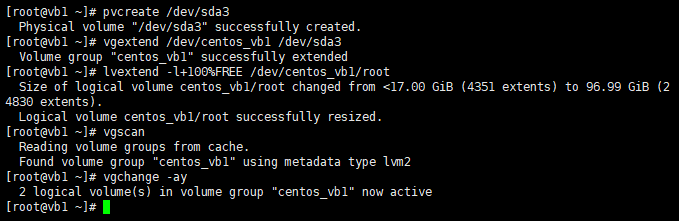
- After the reset, it is necessary to create a sda3 physical volume:
pvcreate /dev/sda3
- Next, expand the volume group to a new space, using the cl volume group name (which we have memorized previously in p.2):
vgextend /dev/cl /dev/sda3
- Now, expand the logical volume, by using the root volume name (hich we have memorized previously in p.2):
lvextend -l+100%FREE /dev/cl/root
- Scan disks for the for the availability of volume groups and activate all volume groups that are found:
vgscan
vgchange -ay
- Find the type of file system:
file -s /dev/sda1

See, that file system is XFS.
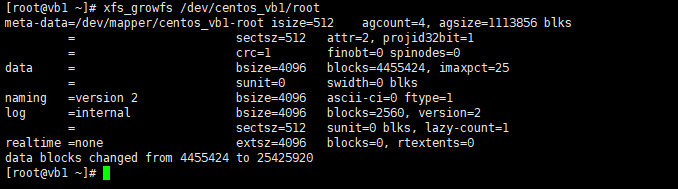
- And finally, expand XFS file system (may require time):
xfs_growfs /dev/cl/root
Note: If the file system is not
XFS, but, for example, id
ext4 or
reiserfs, then the commands will be the following (with account of cl - to group name and root - volume name from p.2):
resize2fs /dev/cl/root - for ext4; resize_reiserfs /dev/cl/root - for reiserfs;
- Check the final result:
df -h