Views: 8149
Last Modified: 04.09.2024
Attention!
-
For operations, described in this chapter, knowledge of *nix-systems administration is required. Prior to start of these operations, it is recommended to perform full backup of Bitrix Virtual Appliance.
- Provided settings are listed outside the scope of the Virtual Appliance menu. This means that the details below are provided for informational purposes only and should be used with clear understanding of your actions and under your own liability. Bitrix24 technical support reviews the questions related to Virtual Appliance menu items only.
You should place specific partitions at the separate disks due to the majority of disk space being occupied by site content and reserve copies, located in /home/bitrix, as well as by the database, located in /var/lib/mysql.
Let's overview this case with an example, when a folder /home is transferred with site contents and backup copies to a separate disk.
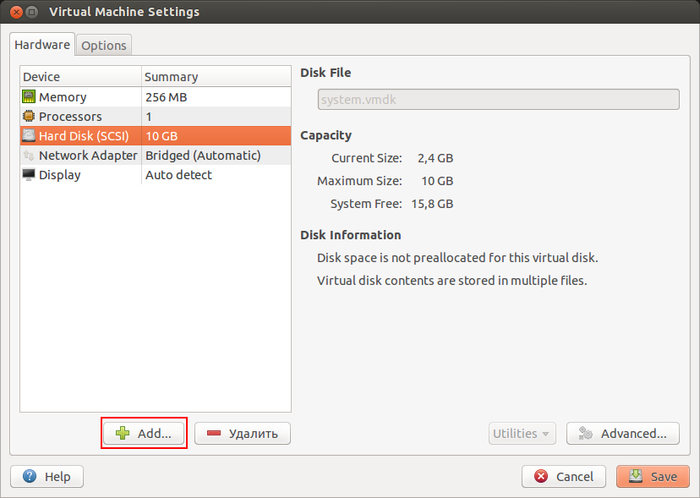
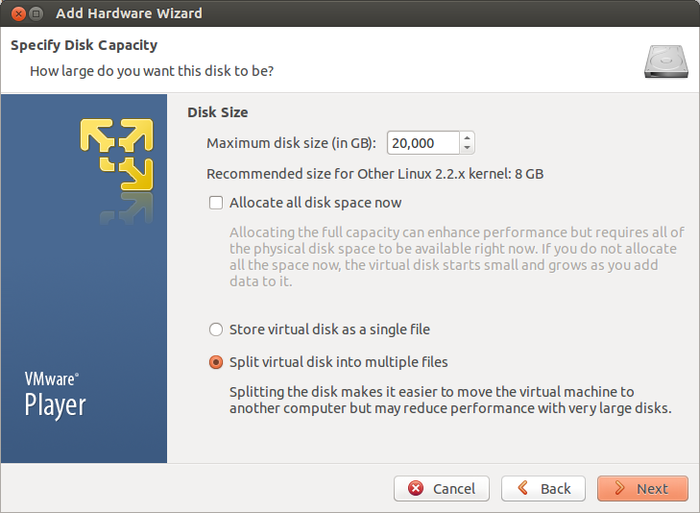
- Add a new disk of needed size inside the Virtual Appliance settings hardware list. Perform all the actions, listed below, under the root user administrator account:
- After the disk was added, a server re-load may be required to initialize it. You can see the new disk and its assigned letter designation via this command:
fdisk -l
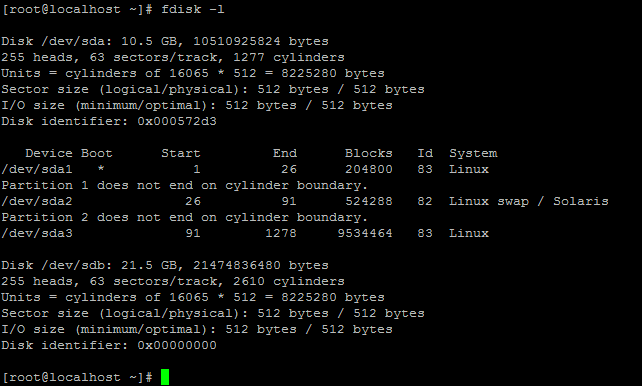
- Launch the fdisk utility for work with the
/dev/sdb disk:
fdisk /dev/sdb
Create a new partition via the n command:
- new (primary partition) - p command and
Partition number (1-4): 1;
- first and the last sectors should be selected by default - this way, a partition will be created, using all the free space on the disk:
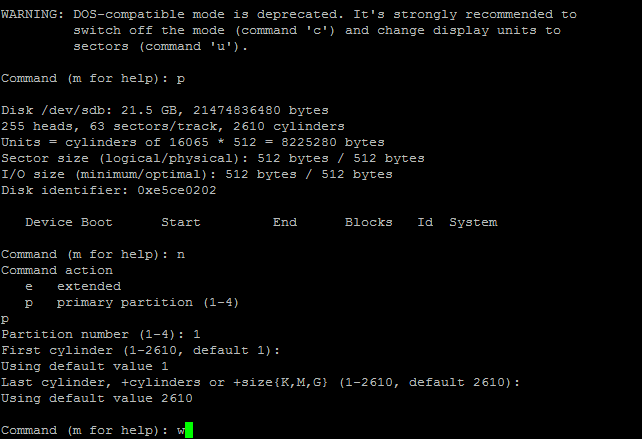
To save changes on the disk and to exit from the fdisk, enter the w command.
After partition table are saved, format new partition and transfer information from /home to it:
mkfs.ext4 /dev/sdb1
mount /dev/sdb1 /mnt
systemctl stop httpd.service
systemctl stop nginx.service
mv -f /home/* /mnt
umount /mnt
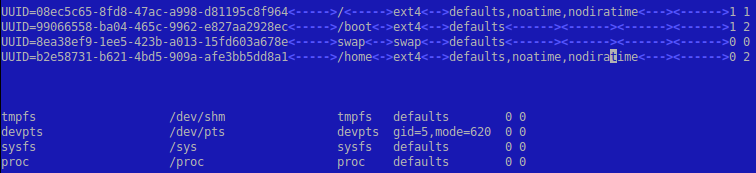
- Text step, define UUID for new disk:
blkid
/dev/sda1: UUID="99066558-ba04-465c-9962-e827aa2928ec" TYPE="ext4"
/dev/sda2: UUID="8ea38ef9-1ee5-423b-a013-15fd603a678e" TYPE="swap"
/dev/sda3: UUID="08ec5c65-8fd8-47ac-a998-d81195c8f964" TYPE="ext4"
/dev/sdb1: UUID="b2e58731-b621-4bd5-909a-afe3bb5dd8a1" TYPE="ext4"
and add the record (in this example: UUID=b2e58731-b621-4bd5-909a-afe3bb5dd8a1) about it in /etc/fstab (instead of UUID, device name /dev/sdb also can be used):
The only thing that is left, is to import a new disk and to launch previously stopped services:
mount /home
systemctl start httpd.service
systemctl start nginx.service
Adding disks in other virtualization environment or directly on a physical server is performed in a similar manner.