Views: 20377
Last Modified: 26.09.2017
Attention! For Bitrix24 On-Premise and Bitrix Site Manager - AD/LDAP integration module version 11.5.0 and higher is required to support NTLM-authorization tool.
After enabling and configuration, new NTLM-authorization mechanism starts to work as follows:
- Unauthorized visitor joins the project, to be redirected by event processor to an open Apache port (8890 for HTTP or 8891 for HTTPS);
- Apache completes NTLM-authorization and the user is redirected back to port 80 or port 443 (for HTTP and HTTPS, accordingly);
- The user performs the next hits normally.
The following is an example of Bitrix24 On-Premise settings.
Configuring NTLM-user authorization in Bitrix24 On-Premise
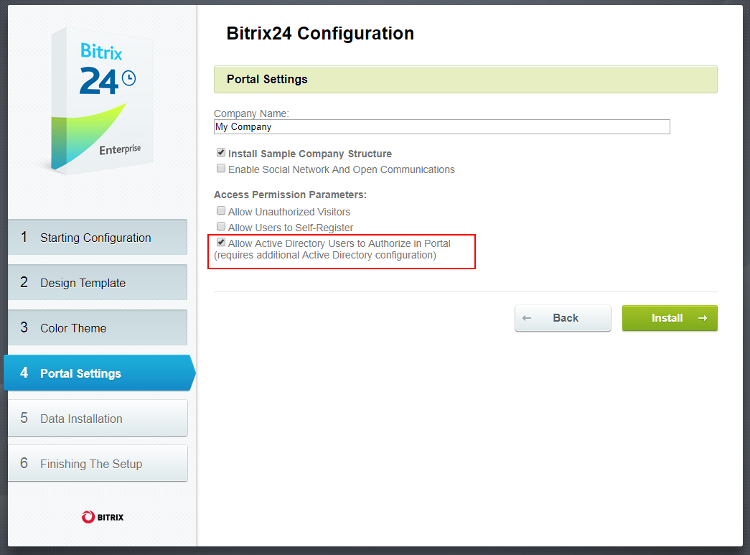
- During the installation, select Allow Active Directory Users to Authorize in portal in the Installation Wizard:
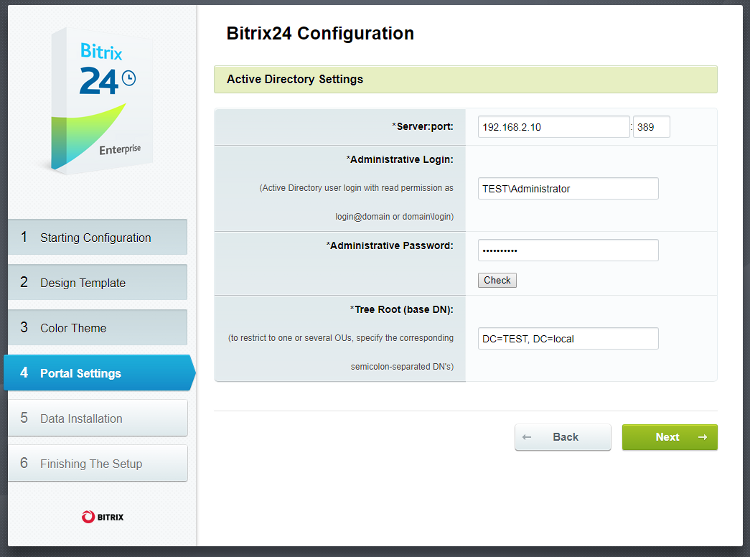
- Next, input domain AD connection settings, check the connection:
- Specify the relations of groups in AD to the corporate portal groups.
-
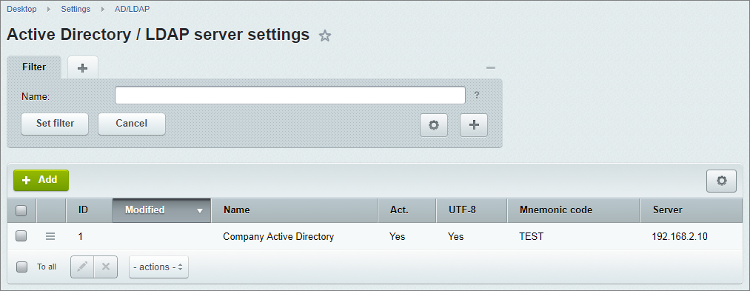
After installation is complete, open the Active Directory/LDAP servers page in the portal administrative section (AD/LDAP Settings):
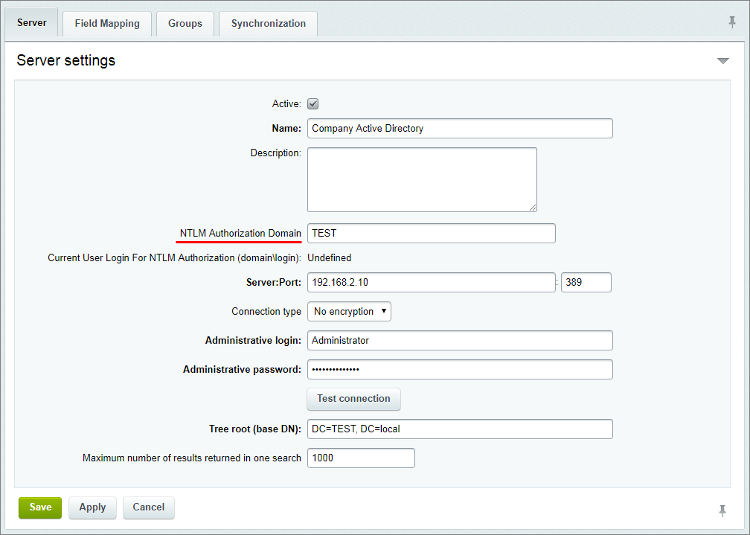
- edit Active Directory server parameters, by indicating NTLM Authorization Domain:
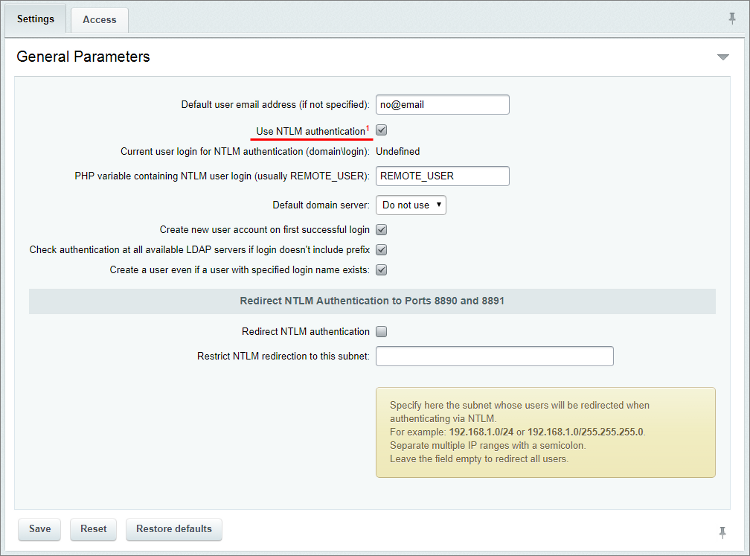
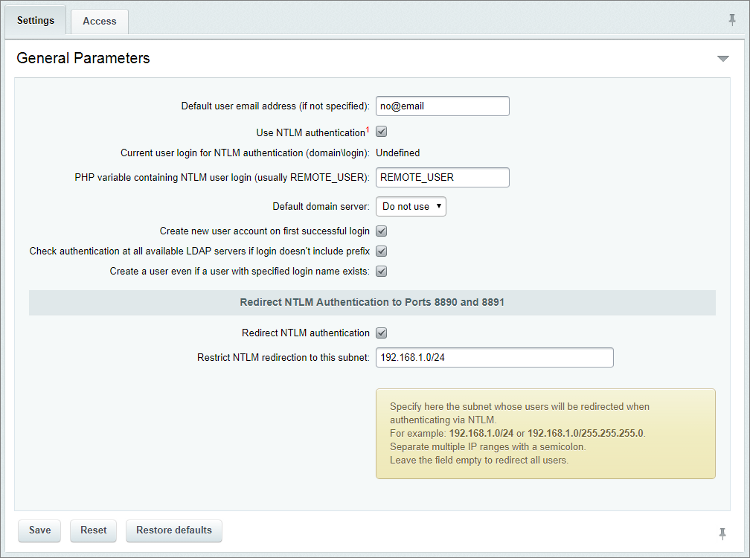
- Next, enter AD/LDAP module settings and select Use NTLM authentication:
Bitrix24 product is ready to use of NTLM-authorization. Next and final step: configure Virtual Appliance.
Note! If the company's local network requires a configured NTLM-authorization and employees need to work with the portal via standard authorization, then it is necessary to indicate the IP-addresses range for which the NTLM-authorization is required in the AD/LDAP module settings -
Restrict NTLM redirection to this subnet (for example, 192.168.0.1/24):
Configuration of NTLM-user authorization in Bitrix24 Virtual Appliance
To configure Virtual Appliance, connect to it under root user, select menu item 6. Manage sites in the pool > 7. Configure NTLM auth for all sites and input the required data:
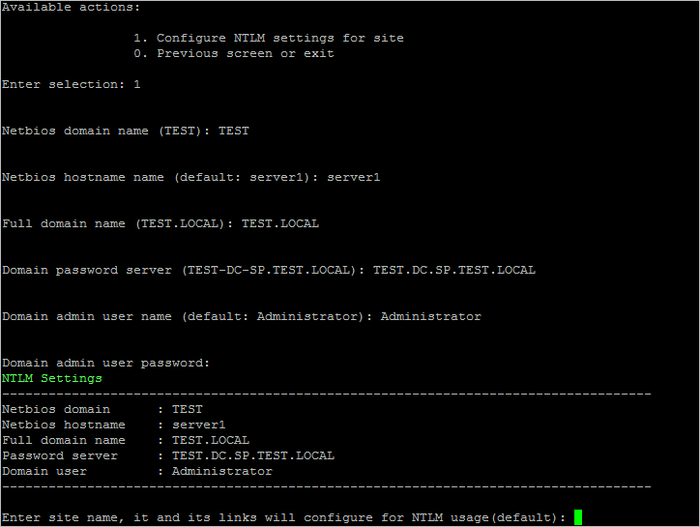
After the correctness of inputted data is confirmed, the wizard will configure and launch all the necessary services, as well as connect the Virtual Appliance into the domain.
Note: The following command can check if the computer has successfully joined the domain:
net ads testjoin
The setup is complete. Next, check the browser settings to ensure successful NTLM-authorization.
Configuration of NTLM-authrization in browsers
- Internet Explorer
Make sure NTLM authorization is successful, the web server must be located in the Local Intranet zone (if necessary, it must be added there).
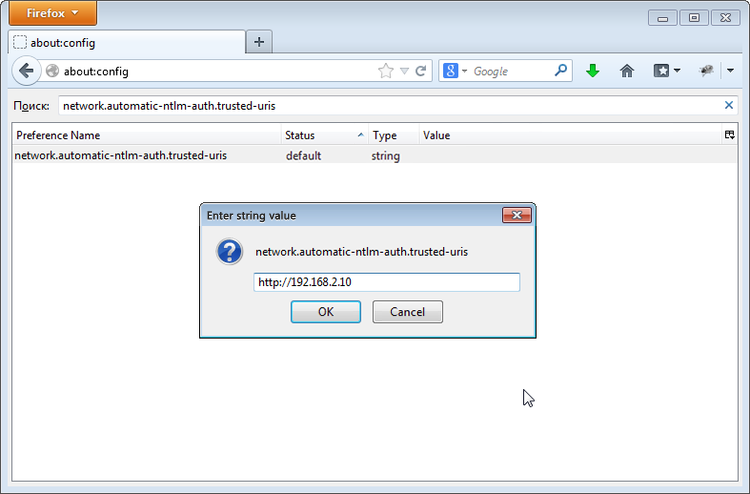
- Mozilla Firefox:
Add web-server to the list of authorised URI for automatic NTLM-authorization (via the network.automatic-ntlm-auth.trusted-uris parameter on the Firefox page: about:config)
Note: Actions to enable NTLM-authorization on pre-installed Bitrix24 On-Premise are similar to the above listed, except that the Active Directory server is added manually in the administrative section.