Views: 26552
Last Modified: 05.04.2022
Bitrix Environment for Linux is useful for:
- Users and developers who previously used Bitrix Virtual Appliance product for site preparation and experienced problems with the migration of configuration to host or non-virtual hardware without prejudice to performance.
- For hosting-partners specialists planning creation of different VPS templates for Bitrix products.
- For system administrators requiring fast preparation of high-performance framework for the installation or migration of sites based on Bitrix.
- For programmers and system administrators requiring the fast deployment of a cluster based on Bitrix.
Bitrix Environment for Linux provides the fast deployment of an optimal environment for Bitrix products and solutions built on Linux Fedora 14-16 (i386, x86_64), CentOS 5/6 (i386, x86_64) and Red Hat Enterprise Linux 5/6 (i386, x86_64) with minimal costs:
- mysql-server 5.*
- web-server (Apache 2.2.*)
- php 5.6.*
- nginx 1.6.2
- memcached
- stunnel
- catdoc
- xpdf
- munin
- nagios
- sphinx
Let’s consider the installation of Bitrix Environment for Linux on hardware with a CentOS 5/6 (i386, x86_64) installation.
- Authorize on the server as the administrator.
- Download the script Bitrix Enviroment for Linux and input the following commands for execution:
wget http://repo.bitrix.info/yum/bitrix-env.sh
chmod +x bitrix-env.sh
./bitrix-env.sh
Note. If the download utility for the wget file is missing on the server install it with yum install wget command.
- During the installation, you are prompted to indicate the Environment to install (please select Version 5).
- After the installation, you have to open the ports required for the normal operation of Bitrix product in Bitrix Environmen:
iptables -I INPUT -p tcp --dport 25 -j ACCEPT
iptables -I INPUT -p tcp --dport 80 -j ACCEPT
iptables -I INPUT -p tcp --dport 443 -j ACCEPT
iptables -I INPUT -p tcp --dport 5222 -j ACCEPT
iptables -I INPUT -p tcp --dport 5223 -j ACCEPT
iptables -I INPUT -p tcp --dport 8890 -j ACCEPT
iptables -I INPUT -p tcp --dport 8891 -j ACCEPT
iptables -I INPUT -p tcp --dport 8893 -j ACCEPT
iptables -I INPUT -p tcp --dport 8894 -j ACCEPT
where the ports are designated and used for the following services:
- 25 - smtp server;
- 80 - http ;
- 443 - https;
- 5222 - bitrix xmpp server;
- 5223 - bitrix xmpp serever on ssl;
- 8890 - ntlm authorization;
- 8891 - ntlm authorization on ssl;
- 8893 - http server of instant messages;
- 8894 - https server of instant messages.
- Now the ports are indicated and you have to save the table with the following command:
service iptables save
- The installation is finished.

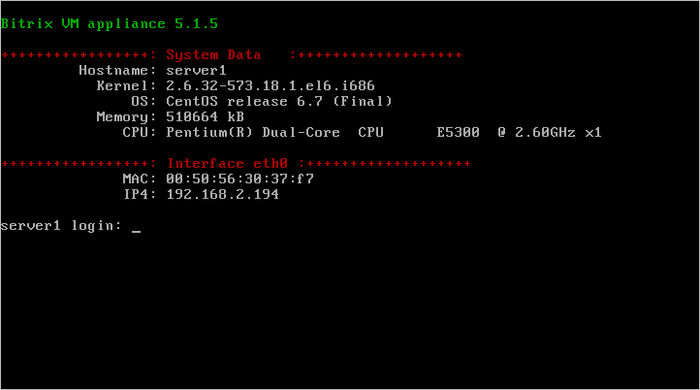
- Reboot the server to check if the installation is correct – you will see that the machine is running and its current version on the screen.
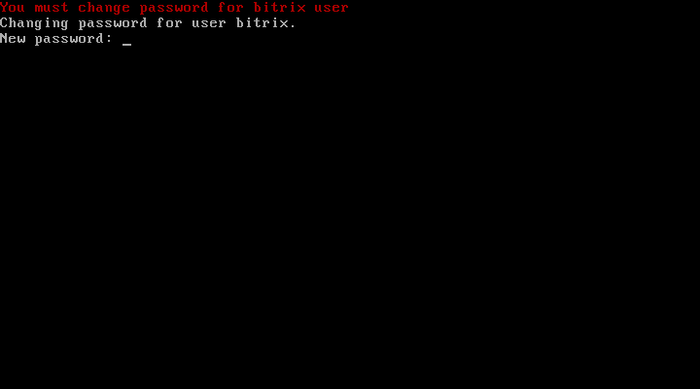
- Upon the first server logon with root user name you are prompted to change the password of the bitrix user that you will further use to operate the machine.
Now you are ready to work.