For operations, described in this chapter, knowledge of *nix-systems administration is required. Prior to start of these operations, it is recommended to perform full backup of Bitrix Virtual Appliance.
Provided settings are listed outside the scope of the Virtual Appliance menu. This means that the details below are provided for informational purposes only and should be used with clear understanding of your actions and under your own liability. Bitrix24 technical support reviews the questions related to Virtual Appliance menu items only.
Manual activation
In addition to
enabling specific PHP-extensions from the BitrixEnv menu
Section 8. Manage web nodes in the pool > 1. Manage PHP extensions allows enabling additional PHP modules that may be required.
Learn more
the required extensions can be connected manually.
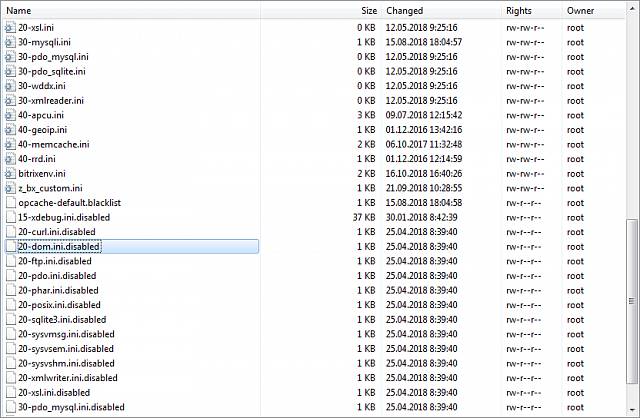
Configuration ini-files for the available php-extensions are located in the directory /etc/php.d/:
To manually enable a required extension, the file {name_extension}.ini.disabled must be renamed to {name_extension}.ini and the Apache service must be re-launched – httpd.
Example
For example, extension xmlreader must be enabled.
Go to server directory /etc/php.d/:
cd /etc/php.d/
Print list of files in the directory:
ls
Find the file 30-xmlreader.ini.disabled in the list, rename it for 30-xmlreader.ini, save and replace the current file:
mv 30-xmlreader.ini.disabled 30-xmlreader.ini
Attention! If the content of 30-xmlreader.ini.disabled is copied into 30-xmlreader.ini and those two files are kept in the directory /etc/php.d/, then the extension will deactivated when the PHP or Virtual Appliance are updated. To avoid this, only one file 30-xmlreader.ini must be kept with the active extension.
Re-launch the Apache service – httpd:
systemctl restart httpd.service
The procedure is completed, extension is xmlreader operational:
Setting a php-extension, unavailable in BitrixVA
You can also set any php-extension manually.
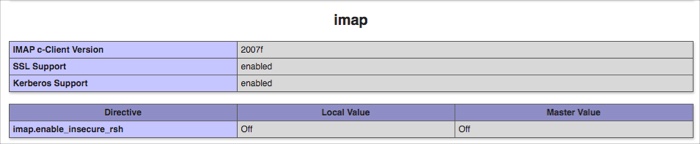
For example, set the extension php-imap.
First, find name for ph-extension using the command:
yum list php-imap*
Next, set using the command:
yum install php-imap
Creates the file /etc/php.d/20-imap.ini upon installation.
Then, re-launch the httpd service.
All is ready, php-extension imap is operational:
Note: some php-extensions can automatically be enabled after installation. When ini-file weren't created during setting of the extension, you need to create it manually.
)