Views: 20699
Last Modified: 15.08.2018
Own SSL certificate, issued by any certification authority, can be also connected to a site in BitrixVM.
Important! Before issuing a certificate, make sure that you have
created a site at the host (also available from the Internet), to which the certificate is issued, as well as that DNS settings for DNS hoster and registrator for this domain are correct. Otherwise the certificate won't be issued. Plus, there is a limit – 5 errors for certificate issue per hour and per account for this domain.
You must have the following certificate files: private key, certificate chain and the certificate.
Requirements for imported certificates:
- Certificate, private key and certificate chain must have PEM-encoding.
- Private key must not be encoded.
- Files of the certificate and private key are required, file with the chain may not be specified.
- If you use your own paths for uploading the certificates, specify full paths during import. When using relative pathnames, the certificate files must be uploaded into the /etc/nginx/certs directory.
The following must be done to connect own SSL certificate:
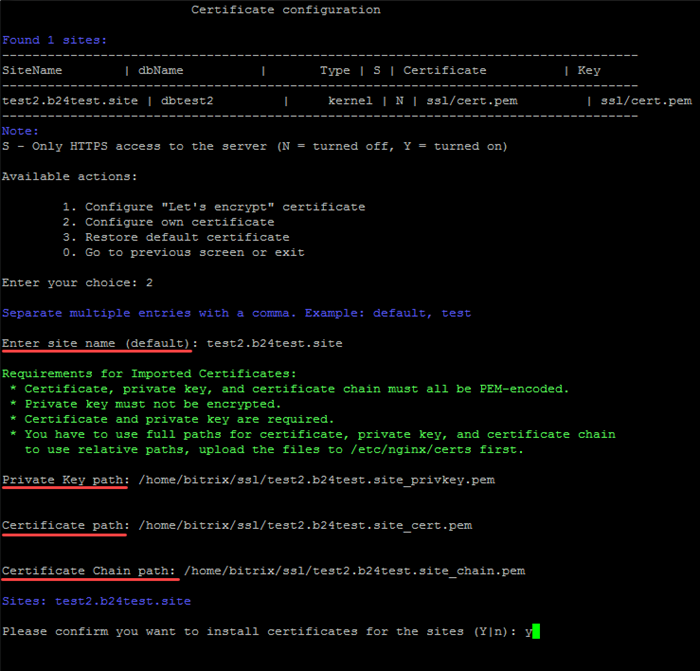
- Copy the certificate files into any server directory via any SFTP client. In our example, we have create the /home/bitrix/ssl/ directory and have copied certificate files into it.
The resulting paths are as follows:
- private key –
/home/bitrix/ssl/test2.b24test.site_privkey.pem
- certificate –
/home/bitrix/ssl/test2.b24test.site_cert.pem
- certificate chain –
/home/bitrix/ssl/test2.b24test.site_chain.pem
- After that, go to the menu 8. Manage web nodes in the pool > 3. Configure certificates:
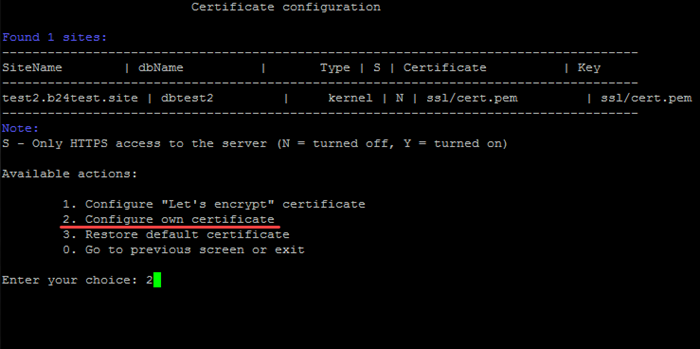
- Select menu item 2. Configure own certificate and enter site name (or several site names), for which the certificate (-s) must be imported (in this example: test2.b24test.site), Private Key path, Certificate path, Certificate Chain path and confirm certificate installation for this domain:
- The installation wizard will install the certificate. Paths of SSL certificates will be specified in the same section:
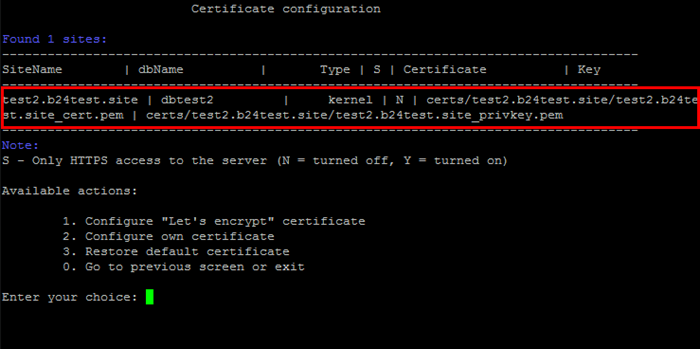
-
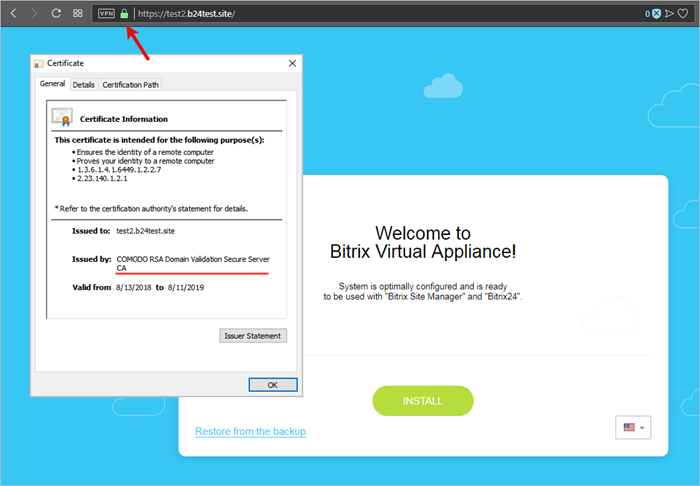
Connected certificate can be easily checked - go to your site via https protocol, and the valid certificate will have a green lock icon:
Support of several sites is available, separated by comma. You will have to track validity period of your certificate on your own. Certificate re-issuing is also performed by the site owner as well. After the new certificate is issued, it can be imported again.
Note: If you have used your own server directory to copy initial certificate files, then after import is completed it is recommended to delete these files for security purposes (in the example - /home/bitrix/ssl/). If you have copied files into /etc/nginx/certs, then there is no need to delete them.